Ultimate Guide to Sagging Roof
Last updated: Feb 28, 2026
Introduction to Sagging Roof
A sagging roof is a warning sign, not just an aesthetic concern. It points to structural stress in the framing, fasteners, or roof deck that could worsen over time. If you notice a dip along the ridge, sagging along a fascia line, or ceilings and walls showing signs of movement, it's worth taking seriously. Addressing sag early can prevent more extensive (and costly) damage later.
How sagging shows up
- Visible dip or bowing along the roofline, ridge, or over a specific area
- Interior signs: ceiling or wall cracks, doors that don't latch properly, or jammed drawers
- Floors that feel uneven near load-bearing walls
- Exterior clues: warped fascia, loose gutters, curling or cupped shingles
- Moisture or stains showing up after rain
Is it urgent or common?
- Common, especially in older homes or after severe weather, or when moisture has weakened the roof structure.
- It becomes urgent when you see:
- A pronounced dip or sudden change in shape
- New cracking in walls or brickwork
- Active leaks or soft, soggy spots in the attic
- Doors or windows that won't behave normally
- If any of these urgent signs are present, treat it as a priority and seek professional assessment promptly. If the sag is localized and there are no leaks or obvious water intrusion, you have some time to plan, but don't delay a structural evaluation.
High-level next steps
1. Keep people and pets away from the affected area and avoid walking on roof sections that look compromised.
2. Do a quick attic check:
- Look for daylight, sagging roof sheathing, or damp wood
- Note any musty odors or visible mold
3. Document the issue:
- Take clear photos from multiple angles (exterior and interior)
- Jot down when you first noticed changes and any weather events that preceded it
4. Get a professional assessment:
- Schedule a licensed structural roofer or structural engineer to inspect the framing, decking, and load paths
- Ask about the extent of the sag, the underlying cause, and whether repairs or full replacement are recommended
5. Plan for next steps:
- Request a written estimate with scope, timelines, and warranties
- Discuss temporary stabilization options if advised by the pro (and only if safe to implement)
Common causes (high-level)
- Rot or moisture damage to roof deck or framing
- Compromised trusses or rafters from age, improper installation, or overload
- Excessive snow/ice load or heavy rainfall over time
- Poor attic ventilation allowing condensation and wood rot
- Previous repairs or shoddy workmanship that didn't address root causes
What to expect from a professional assessment
- Safety evaluation of the area to prevent further damage
- Measurements of the sag to determine severity and load path
- Inspection of rafters, joists, sheathing, and connections
- Moisture testing and signs of rot or insect damage
- Clear recommendations on repair versus replacement, cost ranges, and timelines
Quick tips for homeowners (during the wait)
- Keep rain out of the attic with tarps only if you can do so safely and without climbing on the roof
- Inspect interior ceilings and walls for new or growing cracks after storms
- Avoid DIY “solutions” that involve lifting or shoring heavily—these require professional design and permits
Understanding the outcome
- A professional assessment will tell you whether the sag is a repairable issue or a sign you need a more extensive rebuild
- Early intervention can save you money and reduce the risk of sudden failure in severe weather
Is a Sagging Roof an Emergency?
A sagging roof isn't always catastrophic, but certain signs mean you should treat it as an emergency or near-emergency situation. If you notice movement, leaks, or new openings, act quickly.
- Visible bowing or deflection in the roof deck, rafters, or trusses you can spot from the attic or outside.
- Buckling, cracking, or peeling of shingles, metal panels, or underlayment that seems to be getting worse.
- Interior water intrusion, wet insulation, moldy ceilings, or new damp spots on walls near the attic or upper level.
- Sagging ceiling or soft spots in the ceiling that indicate the deck may be failing.
- Unusual creaks, pops, or cracking sounds in wind or when you step near the affected area.
- Forecasts calling for heavy rain, snow, or ice that could worsen the sag and lead to leaks.
If you see any of these, treat the situation as high-risk and limit activity beneath the affected area.
Your first job is to keep people and pets out of danger, and to reduce potential further damage.
- 1) Keep everyone away from the area directly under the sagging spot. Don't walk on or near suspect sections of the roof.
- 2) If you can do so safely, shut off power to outlets and lighting near the affected area to avoid electrical hazards if water intrusion is possible.
- 3) Protect valuables: move furniture, electronics, and important items away from drafts, dripping water, or ceiling stains.
- 4) Use buckets or tarps to catch drips inside, but avoid climbing onto the roof to place coverings unless you are trained and equipped.
- 5) Photograph and document damage from a safe distance for your records and insurance.
- Call a roofer immediately if:
- The sagging appears to be worsening quickly or the roof deck feels soft or gives under light pressure.
- Water is actively dripping into living spaces or there are new, expanding stains on ceilings or walls.
- Structural components (chimneys, skylights, or ridge lines) show movement or gaps widen after rain or wind.
Triage: when you can wait vs. when to escalate
Understanding when you can wait a little versus when you need instant help helps you plan without unnecessary risk.
- Monitor if:
- The sagging is minor, there are no interior leaks, and the weather is calm.
- You can observe changes safely from ground level or the attic without moving on or under the compromised area.
- You have a clear plan to get a professional assessment within a few days and no further storms are forecast.
- Can wait if:
- The roof shows no new movement, interior damage remains absent, and occupants feel secure for the short term.
- A dry spell is forecast and you can schedule temporary stabilization or a full repair within a reasonable timeframe.
- You've consulted a roofing pro and agree on a plan to address the issue promptly, with the understanding that conditions could change.
- Gather details: address, photos, observed movement, leaks, and any recent storms.
- Note safety gaps:identify who should avoid the area and how to secure belongings.
- Schedule timing: prioritize a diagnosis first, then decide on temporary supports or permanent repairs based on the roofer's assessment.
Common Causes of Sagging Roofs
Water damage, leaks, and wood rot
Water intrusion weakens the structural wood, rots decking, and erodes the load path that keeps a roof up. Over time, wet framing loses stiffness, causing visible sag.
- Signs to look for:
- Dark stains on ceilings and walls
- Soft, spongy spots in the attic decking or floor
- Musty odor, mold growth, or peeling paint
- Small cracks or visible bowing in rafters from the attic
- Why it matters:
- Wet wood is heavier and weaker; repeated moisture cycles shrink and swell wood, allowing the roof to sag.
1) Stop or slow further water entry by repairing leaks in shingles, flashing, or gutters, and keep the attic dry.
2) Call a licensed roofer or structural pro to inspect for rot in rafters, joists, and plywood; replace any rotten members.
3) Replace damaged decking or sheathing, reseal seams, and ensure proper ventilation to limit moisture buildup.
Structural overload from snow, ice, and debris
Excess weight presses down on the roof structure. Snow banks, ice dams, or heavy debris across the roof can push weak framing into a sag.
- Signs to look for:
- Visible mid-span bowing or a soft dip along the roof plane
- Cracks in ceiling drywall or doors/windows that don't shut smoothly
- Heavy, sagging gutters or fascia from the weight
- Why it happens:
- Prolonged snow/ice loads, ice damming, or heavy leaves/debris add stress that exceeds the designed roof load.
1) Safely remove loose snow with a roof rake from the ground; avoid climbing onto a slippery roof.
2) For ice dams, have a professional remove ice and address insulation/ventilation to prevent recurrence; avoid chiseling or hammering ice.
3) After reducing the load, have a pro verify if the framing is still adequate and whether reinforcement or upgrades are needed.
Compromised framing and supports
Rafters, joists, and beams can degrade from age, pest damage, or improper initial construction, reducing their ability to carry loads.
- Signs to look for:
- Doors or windows that stick or misalign, sloping floors, or ceiling cracks
- Visible cracks or splits in attic framing members
- Why it matters:
- Damaged or undersized framing creates a weak load path, allowing the roof to sink under its own weight or weather loads.
1) Avoid using areas under the sag; don't crowd or walk on suspect sections.
2) Get a structural engineer or seasoned carpenter to assess; repairs may include sistering, reinforcing, or replacing members.
3) Restore a solid load path before re-roofing to prevent new sagging problems.
Damaged roof deck and sheathing
Warped, delaminated, or nailed-loose decking can't adequately support the roof finish, leading to visible sagging.
- Signs to look for:
- Warped, cupped, or bulging plywood/OSB
- Nails pulling away or nails driven unevenly
- Soft spots in the attic floor or underlayment
- Why it matters:
- A compromised deck transmits loads unevenly and can fail under wind, rain, or snow.
1) Replace damaged sheets with proper spacing and nailing patterns.
2) Investigate and fix moisture sources; replace insulation or roof felt if wet.
3) Re-secure and reseal the roof deck to restore a solid, straight plane.
Age, wear, and pest damage
As roofs age, materials fatigue; pests like termites or carpenter ants hollow out structural members, reducing strength.
- Signs to look for:
- Hollow-sounding or crumbly wood
- Visible termite tubes, frass, or other pest activity
- Widespread sag in older structures without a single obvious leak
- Why it matters:
- Cumulative wear and pest damage erode the roof's ability to support loads over time.
1) Have a pest and structural inspection to identify active infestations and damaged wood.
2) Treat pest issues; replace severely compromised framing.
3) Consider a full roof replacement when the structure is beyond economical repair to restore a safe load path.
How Roof Materials Affect Sagging Roof
How sagging stress interacts with roof materials
Sagging shifts load from the framing to the roofing itself. Heavier materials magnify the stress on rafters, connections, and the deck, increasing the chance of fastener pull-out, seam separation, and tile or shingle failure. Flexible materials can sag with the deck but may show more noticeable curvature or edge lifting. Brittle materials can crack or break when the underlying structure sags even slightly. Understanding these interactions helps you spot trouble early and plan a proper repair.
Common roofing materials and how sagging affects them
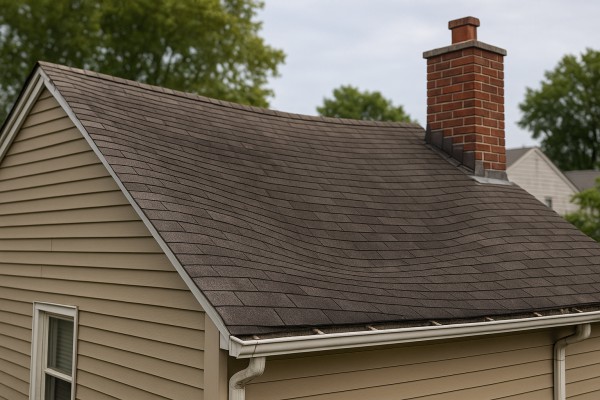
- Asphalt shingles

- Sagging can cause buckling, edge curling, and nail pops where the deck dips. Water may find seams that widen as the roof deflects, accelerating underlayment wear and potential leaks.
- Metal roofing (standing-seam or panel systems)

- Panels may bow or misalign seams as the deck sags, leading to seam leaks and accelerated wear on edge fasteners. Fasteners can loosen or tear through with repeated flexing.
- Clay or concrete tiles

- These are very heavy. Sagging concentrates load on supports, increasing the risk of tile cracking, broken rows, and failed mortar or underlayment. The weight can worsen deflection at hips, valleys, and ridges.
- Wood shingles and shakes
- Wood handles movement but is susceptible to moisture damage. Sagging creates gaps, cupping, or warping, which can loosen nails and allow air and water infiltration.
- Cedar shingles/shakes (a specific wood variety)
- Similar to generic wood shingles, but cedar's natural oils and grain can mask early signs. Expect increased warping, splitting, and nail pull-outs as the deck sags.
- Slate

- Extremely heavy and brittle. Sagging often shows as cracks or outright loss of continuity in the slate rows. The underlying deck and support must be solid, or you'll see cascading failures.
- Synthetic shake / composite shingles
- Lighter than real shakes but still subject to deformation with deflection. Expect seam gaps, visible settling of layers, and potential accelerated wear on adhesive seams.
- Flat roofing materials (EPDM, TPO, built-up roofs) on low-slope sections
- Sagging indicates substrate or deck deflection under ballast or insulation. Membranes can wrinkle, puddling can form, and laps or seams may open, inviting leaks.
Quick inspection steps by material
1. Look for visible deflection lines, waviness, or sag at ridges and along eaves.
2. Check along ridges, valleys, and flashing for gaps, lifted edges, or cracked sealant.
3. Inspect fasteners: any looseness, pull-out, or rust can signal deck movement under the material.
4. Examine tiles or shingles for cracks, splits, or curling, especially near supports.
Maintenance tips by material
- Asphalt shingles
- Re-nail loose sections carefully, replace severely cupped shingles, and ensure proper underlayment beneath deformed areas.
- Metal roofing
- Tighten loose fasteners, reseal flashing seams, and verify panel alignment. Watch for rust around penetrations.
- Clay/concrete tiles
- Replace cracked tiles promptly, verify underlayment integrity, and confirm roof deck support is adequate to handle the weight.
- Wood shingles/shakes and cedar
- Replace damaged shingles, treat or seal to slow moisture intrusion, and monitor for rot near eaves where deflection concentrates.
- Slate
- Replace broken pieces, check batten or roving supports, and ensure hangers and nails remain secure under deflection.
- Synthetic shake
- Inspect for seam gaps and adhesive degradation; reseal or replace affected panels as needed.
- Flat roof membranes (EPDM/TPO)

- Look for wrinkling or standing water, reseal laps, and verify edge termination to prevent membrane creep as the deck sags.
Signals that you may need a structural check
1. Widespread deflection across multiple sections or between seasons.
2. Visible compression or bending of the supporting structure in addition to surface sag.
3. Unexplained ice dams or water backing up in gutters during freeze-thaw cycles.
When to bring in a pro
- If you notice significant sag along a large span, or if multiple material types show distortion, the roof structure may need framing repair or reinforcement, not just surface fixes. A licensed contractor can assess framing, deck condition, and the feasibility of replacing select areas versus a full roof replacement.
The Risks of Ignoring a Sagging Roof
- A sagging roof is a serious warning sign that a portion of the structure is overloaded or failing. The strongest danger is a partial or full collapse, which can trap occupants or cause severe injuries from falling debris.
- As the roof sags, fasteners, joists, and rafters are stressed. Even light loads—wind, rain, or snow—can push the system past its limit.
- Loose shingles, bent flashing, or exposed framing can give way unexpectedly, creating slipping hazards for anyone on or below the affected area.
Structural Damage Spreads
- Roof sagging doesn't stay confined to one spot. The added stress can crack or warp joists, rafters, and the ceiling below.
- Stress points may transfer to walls, doors, and windows, causing misalignment, sticky doors, or cracked drywall and plaster.
- A sagging roof can also impact chimney support and exterior fascia, leading to further, more costly problems.
Water Intrusion and Mold Growth
- Sagging areas are prone to leaks. Small drips can turn into significant water damage behind walls and under ceilings.
- Persistent moisture invites mold and mildew growth, which can compromise indoor air quality and require specialty remediation.
- Water damage weakens insulation and can freeze in winter, expanding cracks and worsening the sag.
Higher Repair and Replacement Costs
- The longer a sag is left unaddressed, the more the damage compounds. Small, affordable fixes can escalate into major structural repairs.
- Delays often mean replacing larger sections of roofing structure, which is far more expensive than timely maintenance or early intervention.
- Coping with wind, snow, or heavy rain while the roof is compromised can increase material costs and labor time.
Insurance and Warranty Implications
- Some insurers require timely reporting and professional assessment of structural issues. Delays or neglect can complicate or reduce coverage for subsequent damage.
- Roof warranties often require that sagging be addressed promptly. If ignored, warranties may be voided or claims denied for related failures.
- Documentation of professional evaluation and repair plans strengthens any insurance or warranty discussions.
Pest and Wildlife Access
- A sagging roof creates openings or softened attic spaces that pests can exploit.
- Rodents, birds, and insects may move into damaged decking or insulation, causing additional damage and health concerns.
Reduced Comfort, Value, and Curb Appeal
- Cracks, drafts, and uneven indoor temperatures become more common as the structure settles.
- Visible sagging can lower curb appeal and home value, especially if left unaddressed during a sale or appraisal.
What to Watch For (warning signs)
- Visible bowing in the ceiling or interior walls
- Stains or moisture spots on ceilings and walls
- Soft, spongy feeling under the roof deck when you press on attic areas
- Cracks around doors, windows, and crown moldings
- Strange creaks or pops during wind or movement
What to Do Right Now
1. Prioritize safety: keep people and pets away from the sagging area and avoid walking on or under it if you hear cracking or creaking.
2. Schedule a professional roof inspection promptly. Look for a licensed contractor or a certified structural roofer to assess load, framing, and deck integrity.
3. Document damage: take clear photos from multiple angles, including interior ceilings and attic views, for your records and any insurance discussions.
4. Do not attempt to shore up or repair the sag yourself. Structural fixes require professional assessment, proper bracing, and code-compliant methods.
5. Gather information for your contractor and insurer: recent weather events, dates of observed sag, and any related leaks or interior damage. Obtain written estimates and timelines before committing to work.
How a Sagging Roof Is Diagnosed
Quick exterior indicators
- Noticeable bow or dip along the roofline when viewed from the ground
- Uneven gutters or shingles that appear to run uphill or downhill
- Chimney leaning or flashing gaps that wasn't there before
- Fascia or soffit boards with gaps, cracks, or peeling paint near the edges
In-depth exterior assessment
- Stand back at several angles and compare the roofline from different sides of the house
- Look for shadow lines that indicate a soft, uneven deck underneath the shingles
- Check for shingles that are cupping, curling, or lifting in the center of the roof run
- Inspect flashing around vents, skylights, and chimney for movement or gaps
1) Establish reference points: mark a straight reference line along the eaves using a chalk line or painter's tape, then compare to the ridge height at several points along the run.
2) Measure sag distances: use a measuring tape to record vertical differences between the reference line and the roof edge; note any differences larger than a small fraction of the span.
3) Inspect joints and penetrations: look for gaps around chimneys, vents, and where the roof meets walls; movement here can signal framing shifts.
Attic and interior indicators
- Ceiling cracks that radiate from corners or run along joists
- Doors and windows that stick or don't fit their frames comfortably
- Rafter or joist bowing visible from the attic; sag can transfer to interior ceilings
- Unusual creaks or sounds in calm weather, suggesting shifting framing
- Laser level or a long straightedge (6–8 ft)
- Measuring tape and a notepad for quick, repeatable checks
- Plumb line or string with a weight to test vertical alignment from the ridge down
- Moisture meter (optional) to check for hidden rot in framing or decking
- Infrared camera or thermal tool (optional) to identify damp or cooler spots on the roof deck
Safety and practical checks
- Do not walk on sections you suspect are sagging; load can worsen the problem
- Use binoculars or a camera with a zoom to document the roof from the ground
- Have a helper with you when inspecting from a ladder or upper areas
- If you notice active leaks, mold, or large deflections, pause the inspection and call a professional
When to bring in a professional
- Interior signs of movement beyond small deflections (cracks widening, doors sticking more)
- Sag greater than 1–2 inches over a 10-foot span or ongoing progression
- Visible damage around flashings, vents, or chimneys, or any soft spots on the roof deck
Documentation tips for the pro
- Photos of the roofline from multiple angles and at different times of day
- Clear notes on measurements, dates, and observed interior symptoms
- A list of any prior repairs, leaks, or known incidents that could affect the roof
- A simple map of problem areas to share during a visit or handoff
Repair Options for a Sagging Roof
Temporary fixes
- Cover the area with a heavy-duty tarp, securely anchored to solid framing. Overlap edges to encourage water run-off and prevent wind from tearing it loose.
- Place sturdy boards or plywood over the suspected sagging line from the outside to help distribute load until a professional can reassess.
- Limit access to the area and avoid walking on the affected section. Loose decking can fail suddenly.
- Clear gutters and downspouts so water can shed away from the sagging area. Clogged drains add weight and pressure.
- If you have interior access, install temporary bracing between nearby rafters or between ceiling joists to slow movement. This is a stopgap, not a fix.
- Photograph and document the problem from at least a couple of angles. Detailed notes help the contractor understand the scope when they arrive.
Minor repairs
- Identify the root cause: moisture intrusion, loose fasteners, or warped decking. Fix the underlying issue to prevent repeat sagging.
- Re-nail or fasten loose shingles, starter courses, and exposed sheathing with corrosion-resistant fasteners. Use proper spacing and avoid over-tightening.
- Add stiffening where possible:
- Install blocking between rafters on the sagging bay to reduce flex.
- Consider sistering affected rafters with a solid board to restore rigidity, if the structural member is only mildly compromised.
- Replace small, damaged decking patches:
- Cut out rotten or warped decking in the affected area.
- Install matching plywood, securing with ring-shail nails or screws.
- Seam and tape new underlayment smoothly to preserve a water seal.
- Restore and seal:
- Reinstall underlayment across the repaired section.
- Refasten flashing around chimneys, vents, and valleys to prevent leaks.
- Re-shingle or re-metal the patch with proper overlap to match surrounding material.
- Ventilation and moisture control:
- Ensure attic vents are clear and functioning to prevent moisture buildup that can worsen sagging.
- Consider a temporary dehumidification plan if high humidity contributed to the problem.
- Safety check:
- If the area remains weak, stop and wait for a pro. Do not pursue aggressive fixes without confirmation of structural integrity.
Partial replacement
- When sagging is localized but the decking and framing are compromised in a specific bay, partial replacement is a practical path.
- Steps:
1) Protect the area and remove roofing materials above the damaged bay to expose decking and affected framing.
2) Inspect framing: replace or sister weakened rafters or joists to restore vertical support.
3) Remove damaged decking: cut out the compromised plywood or oriented strand board (OSB) and dry-fit new sheets.
4) Install new support and blocking as needed to reestablish straight, true planes.
5) Lay underlayment over the new decking, then reinstall flashing and shingles/metal roof in the patched area.
6) Reconnect nearby sections to maintain a continuous, water-tight system.
- Considerations:
- Match decking thickness and fastener type to the existing system.
- Color and texture matching may be less critical in a repaired bay, but aim for a seamless transition.
- This option usually requires building code checks and, in many areas, permits.
Full roof replacement
- When sagging is widespread, persistent, or tied to structural failure in multiple bays, a full roof replacement is often the most durable solution.
- Steps:
1) Comprehensive assessment by a licensed roofer (and often a structural engineer) to confirm the extent of damage and necessary reinforcements.
2) Permit and plan: select materials (asphalt shingles, metal, or another system), ventilation strategy, and flashing details. Prepare the site for debris removal.
3) Tear-off: remove the entire roof assembly, inspecting rafters and decking for unseen damage. Replace severely compromised framing as needed.
4) Structural reinforcements: add or replace rafters, collar ties, rafter ties, or a new ridge beam if the structure requires it.
5) Install new roof system: new underlayment, drip edge, flashing, ventilation (soffit, ridge), and the final roofing material with proper nailing patterns.
6) Finish and inspection: complete flashing around chimneys and vents, seal valleys, and ensure watertight detailing at edges and penetrations. Schedule a quality check after installation.
- Why it's chosen:
- Restores structural integrity across the home, not just the visible surface.
- Provides the longest-term fix, improved energy efficiency, and updated weather protection.
- Minimizes ongoing repair cycles when sagging stems from aging or widespread damage.
Typical Cost to Fix a Sagging Roof
Minor repair
- Description: Localized sag in a small area, often limited to a few rafters or joists. Fixes may include sistering a couple of rafters, adding blocking, re-nailing, and light shoring. Minimal decking work is usually needed.
- Estimated cost: $500–$2,000.
- What to expect: Quick, targeted work on a single spot; the rest of the roof remains untouched.
- Time frame: Typically 1–2 days.
Moderate repair
- Description: Sag spreading across a larger section or involving several rafters/joists, with partial framing work required. Fixes may involve full-length sistering, replacing 1–2 damaged members, adding a temporary or permanent ridge support, and minor decking repairs.
- Estimated cost: $2,000–$8,000.
- What to expect: More extensive structural reinforcement; possible need to re-nail or reseal flashing around the affected area.
- Time frame: Usually several days, depending on access and weather.
Major repair
- Description: Widespread structural concern, with substantial sag across a broad area. Fixes can include replacing multiple rafters or trusses, rebuilding sections of the roof framing, installing new ridge beams or support structures, and potentially re-decking and re-roofing the affected area.
- Estimated cost: $8,000–$25,000 (or more for large, complex, or high-end roofs).
- What to expect: Significant framing work may be required, potential temporary shoring, and a broader roof replacement plan in severe cases.
- Time frame: Weeks for planning, permitting, and execution on larger projects.
What factors affect cost
- Roof size: Larger roofs demand more materials, labor, and time, driving up cost substantially.
- Access: Limited or difficult access (tight crawl spaces, steep slopes, or restricted work zones) increases labor time and equipment needs.
- Material type: Lumber quality, trusses vs. rafters, and the cost of decking and fasteners influence overall price.
- Extent of damage: Isolated issues cost less than widespread framing failure or multiple failed joints.
- Local labor rates: Rates vary by region and by the contractor's availability, affecting total cost.
Planning and estimating (steps)
1. Get a licensed roofer to assess: Determine whether the sag is structural (framing) or surface-related (decking/roofing).
2. Compare written estimates: Look for scope of work, assumed materials, permits, and warranties.
3. Decide on a repair path: Partial reinforcement vs. full replacement, factoring long-term durability and future resale value.
How Long Can You Wait Before Addressing a Sagging Roof?
Sagging is a warning sign that the structure supporting your roof is under stress. The longer you wait, the more stress travels through the framing, which can lead to leaks, interior damage, and, in worst cases, partial or full roof failure. Here's a practical, homeowners-friendly guide to how urgent it is to act and what to expect as time passes.
Quick safety first
- Do not step on or near the sagging area. Even a small shift can worsen the problem.
- Keep kids and pets away from the affected space.
- If rain is forecast, move valuables away from the area and place containers to catch leaks.
- From ground level, take clear photos or videos to document the sag for insurance or contractor discussions.
- If you can see daylight in the attic or hear creaking, treat this as urgent and seek a professional assessment immediately.
0-24 hours
What happens:
- The load on the compromised framing is highest right after you notice it. Small shifts can quickly become larger.
- You may start to see interior signs like new ceiling bulges or damp spots visible from below.
What to do:
- Prioritize safety: avoid accessing the attic, attic hatch, or the roof itself.
- Cover the affected area from inside if possible, and shield any leaks with containers to limit water damage.
- Schedule a roofing contractor or structural engineer visit as soon as you can; a rapid assessment helps prevent a bigger problem.
- Document with photos and note the exact location and any changes you observe.
2-3 days
What happens:
- The sagging area is under ongoing stress, and temporary supports may start to fail if they were improvised.
- Water intrusion can spread, potentially affecting insulation, ceiling drywall, and electrical components.
What to do:
- If weather allows, keep tarps in place and re-secure them to prevent wind from shifting them.
- Avoid loading the area with furniture or stored items—vibrations can transmit through the framing.
- Obtain at least two firm estimates from licensed roofers or structural specialists. Ask about temporary stabilization options and long-term repair plans.
1-2 weeks
What happens:
- Structural members (rafters, joists) under the sag can sag more, increasing risk of further deck or ceiling damage.
- Interior ceilings may show more pronounced cracks, and water damage can reach insulation or adjacent rooms.
- The cost and scope of repair usually grow as more components are affected.
What to do:
- Engage a licensed contractor for a formal assessment and a written repair plan.
- If temporary stabilization is advised, have it performed by pros to avoid dangerous improvisation.
- Start documenting all communication, assessments, and costs for insurance and warranty purposes.
1-3 months
What happens:
- Prolonged load and moisture exposure can lead to widespread damage: mold growth, accelerated wood rot, and more extensive structural compromise.
- A sagging roof can limit attic ventilation and create ongoing energy and humidity problems.
- Repair or replacement decisions become bigger and pricier, often involving subcontractors and major structural work.
What to do:
- Work with a contractor to determine whether the roof can be repaired or if full replacement is more cost-effective.
- Plan for permits, code compliance, and any necessary structural reinforcements.
- Maintain ongoing monitoring: set a regular check schedule for any new movement, water intrusion, or interior changes.
What happens if you wait to address the problem in several timeframes
- Immediate delay (0-24 hours): Small problems can accelerate quickly. Risk of sudden, larger movement or a hidden leak increases. The fastest path to containment is a prompt professional assessment and temporary stabilization.
- Short-term delay (2-3 days): Additional water intrusion and further framing stress are likely. Costs begin climbing as damage spreads to insulation, drywall, and electrical components.
- Medium-term delay (1-2 weeks): Structural components may require more extensive repair or replacement. The interior repair scope grows, and insurance claims become more complex.
- Longer-term delay (1-3 months): High likelihood of significant mold risk and major structural work. Replacement of portions of roof framing or even whole roof replacement becomes the practical option, with substantial budgeting and planning needed.
Short paragraphs, clear signs to watch for, and timely professional input make a big difference in staying ahead of a sagging roof.
How the Sagging Roof Problem Varies by Location and Climate
How This Problem Varies by Region & Climate within the United States
- Northeast: heavy snow and ice, plus repeated freeze-thaw cycles. Sagging often stems from moisture-related rot in attic framing and decking. Look for soft spots, sagging along rafters, staining near the eaves after melting snow.
- Southeast: high humidity and frequent rain, with termites and other wood-destroying insects posing a bigger threat. Sagging can come from rotten decking and insect damage, especially where ventilation is poor. Watch for damp patches, musty attic air, and sudden creaks after storms.
- Midwest: wide temperature swings, snow, and wind-driven rain. Structural settling, moisture intrusion, and corroded fasteners can amplify sag over time. Signs include ceiling dips that appear after warm days follow cold snaps.
- Southwest: intense sun, heat, and sporadic heavy rains. Rapid aging of decking and underlayment, plus warped plywood from heat, can cause sag. Look for warped sections, cracked shingles, and leaks after monsoon events.
- West Coast: seismic activity and coastal exposure in many areas. Earthquakes can shift framing and create uneven loads; salt air can corrode metal components in coastal regions. Signs include door/frame misalignment, gaps around eaves, and sudden roof deck movement after quakes.
Climate-Driven Factors That Accelerate Sag
- Temperature swings: wood expands and contracts, loosening nails and joints over time.
- Moisture load: ongoing moisture weakens wood, glue lines, and fasteners.
- Snow and ice: added weight compounds stress on rafters and joists.
- Humidity: attic condensation can rot sheathing and foster mold.
- Wind and rain: wind-driven rain can lift shingles and expose gaps that let moisture in.
Regional Construction Practices & Materials
- Sheathing choices: plywood vs. OSB; some regions use heavier decks or different spacing, impacting load paths.
- Treatments and fasteners: regional codes influence how framing handles loads and moisture; older homes may lack modern connections that resist sag.
- Roofing materials: asphalt shingles common in many regions; metal and tile are more prevalent in hot, arid, or coastal areas—these choices affect heat gain, expansion, and fatigue.
Quick Regional Maintenance Guidelines
- After major weather events: schedule an inspection to verify deck and framing integrity.
- Annual attic check: inspect for damp spots, soft spots, or dark staining.
- Ventilation: keep soffit and ridge vents clear to minimize condensation and rot.
- Material aging cues: look for softened decking, rusted metal components, or weakened fasteners.
Practical Steps for Homeowners (Numbered)
1) Do a visual scan from inside and outside for ceiling dips, wall cracks, or doors and windows that don't close properly.
2) In the attic, gently probe decking for soft or spongy areas and check for trapped moisture or mold.
3) After rain or snowmelt, note any new leaks or staining that align with sagging sections of the roof.