Ultimate Guide to Roof Seam Separation
Last updated: Feb 28, 2026
Introduction to Roof Seam Separation
What is roof seam separation?
Seam separation is when the joint between two roofing sections (or the flashing that seals a seam) starts to pull apart. That gap can let in water, wind-driven rain, and debris, and it often shows up as lifted edges, rust, or gaps along the seam. You may notice it along the roof ridge, where metal panels meet, or where flashing runs around vents and chimneys. Common causes include age and wear, weather cycles that push and pull on seals, improper initial installation, and damage from hail or heavy winds.
- What to look for: water stains on ceilings or walls, damp insulation in the attic, dark streaks along seams, rust on metal surfaces, loose or wobbly panels, or raised/flattened sealant.
- Why it matters: once a seam opens, the risk of leaks and interior water damage increases, and the problem can worsen quickly in severe weather.
Is it urgent or common?
- It's a fairly common issue as roofs age or endure repeated weather stress.
- Not every seam separation is an immediate emergency, but a separating seam can progress to active leaks or structural damage if left unaddressed.
- If you have an active leak, significant water intrusion, or visible structural movement, treat it as urgent and minimize interior exposure until a pro can assess.
Signs, risks, and quick checks
- Visible gaps or gaps that widen with wind
- Lifting or buckling of flashing
- Loose fasteners or corroded metal around the seam
- Missing or degraded sealant along the seam
- Water stains, damp attic insulation, or musty odors inside the home
- Increased interior condensation or energy loss in the affected area
High-level next steps
1) Do a safe exterior check from ground level: look for obvious gaps, lifted edges, or loose panels along seams. Avoid climbing the roof if you're not equipped for it.
2) Document the situation: take clear photos from multiple angles, including close-ups of any sealant or flashing, and note dates of observed changes.
3) Inspect interior indicators: check ceilings, upper walls, and attic for signs of moisture, staining, or damp insulation.
4) Implement temporary protection if needed: cover exposed areas with a sturdy tarp or board to limit water entry, but do not overwrite proper ventilation or safety practices.
5) Schedule a professional assessment: seek a licensed roofer who specializes in seam repairs or metal roofing systems, and request a scope of work and warranty discussion.
What a pro will review (high level)
- The integrity of the seam, flashing, and sealant materials
- Fastener condition and panel alignment
- Causes: thermal movement, improper installation, or underlying deck/sheathing issues
- Repair options: reseal, reseat panels, replace flashing, or in some cases, panel replacement
- Drainage and ventilation considerations to prevent future problems
Short-term mitigation and prevention tips
- Keep gutters clear to prevent meltwater buildup near seams
- Address hail or storm damage promptly to minimize further cracking
- Schedule regular roof inspections, especially after severe weather seasons
- Consider metal seam coatings or sealant upgrades during a repair to extend life
- Maintain attic ventilation to reduce condensation and temperature swings that stress seams
Quick reference checklist
- Active leak present? If yes, prioritize assessment and temporary protection.
- Seams visibly separated or flashing pulled away? Note for the pro's evaluation.
- Any recent storms or hail? Might have contributed to the issue.
- Do you have easy access to safe inspection? Use a ladder with a spotter, proper PPE, and avoid steep slopes.
Is Roof Seam Separation an Emergency? Recognizing Urgency and When to Seek Help
Quick triage
Seam separation is not always an emergency, but some signs demand immediate attention. Use this quick guide to decide whether to call a pro now, monitor the situation, or schedule a regular inspection.
- Call a roofer immediately if:
- Water is actively dripping inside or you see standing water on the ceiling near the seam.
- Daylight or a gap is visible from the attic or through a clearly opened seam from the exterior.
- The seam shows noticeable movement, sagging, or buckling, especially during wind or rain.
- There are exposed wires, electrical components, or signs of arcing near the seam.
- Severe weather is ongoing or forecast to arrive soon that could worsen the damage.
- Monitor if:
- There is no active leak yet, but you hear wind-driven noises or see tiny changes in the seam.
- Damp spots appear after a rain but dry out between events; the pattern is inconsistent.
- The seam is partially open but appears stable; you can schedule a professional inspection soon.
- Can wait if:
- The seam remains visually intact with no leaks or daylight, and the attic shows no moisture after several dry days.
- The forecast calls for calm, dry weather for at least 24–48 hours.
- Interior conditions are comfortable and there are no signs of water damage yet.
What to watch for (signs of urgency)
- Active leaks inside the home, including water staining on ceilings or walls near the seam.
- Visible daylight, gaps, or obvious separation in the seam from an elevated view.
- Sagging roof areas, bulging shingles, or any movement when you apply light pressure near the seam from a safe spot.
- Electrical hazards or heat/hum near the seam.
Can wait if: conditions for a temporary delay are met
- The seam is intact with no leaks, no daylight, and no signs of sustained moisture inside the attic.
- Weather is dry and stable for an extended period; no storm in the forecast for at least 1–2 days.
- You can arrange a professional inspection within a few days without risking interior damage.
1. Do not walk on a wet or windy roof; wait for a professional unless you're assessing from the attic and it's safe to do so.
2. In the attic, look for fresh drips, puddles, or new damp spots near the seam; document with photos for the roofer.
3. Inside the home, place a bucket or container under any active drip; use towels to limit water damage on floors and furniture.
4. Move valuables away from affected areas and cover them with plastic if possible.
5. Notify a licensed roofer as soon as you can, sharing photos and a timeline of observations to help gauge urgency.
Steps a homeowner can take while waiting
- Keep the area around the seam clear of debris and avoid heavy traffic on the roof.
- Check the attic after rain events for new moisture and note changes over time.
- Maintain a simple log of weather conditions and observed damage to share with the contractor.
When to escalate
- If the interior damage accelerates (new wet spots inside after rain, rapidly spreading stains, or mold in the attic), escalate the request for emergency service with your roofer or insurer.
Understanding the Common Causes of Roof Seam Separation
Aging and wear
Roof seams are designed to flex with temperature changes and weather exposure, but age takes a toll. Over time, sealants dry out, metals fatigue, and fasteners loosen. When these elements weaken, seams lose their watertight grip and small gaps can form.
- Degraded sealants and caulk that lose elasticity
- Loose, backed-out, or missing fasteners
- Nails that are over- or under-driven, rounding the seal or creating micro-movements
- Corrosion or oxidation on metal seams
Weather and climate stresses
The elements constantly push and pull on a roof. Thermal cycling from hot days and cold nights, plus wind, rain, and ice, can widen seams and push water into vulnerable areas.
- UV breakdown of sealants and coatings
- Freeze-thaw cycles that crack or widen joints
- Wind uplift that pries seams apart at edges or ridges
- Heavy rainfall or hail stressing vulnerable seams
- Ice dam formation that exerts upward and outward pressure on seams
Installation defects and flashing problems
Seams rely on proper flashing, sealing, and fastening. If any part of the installation is off, seams become weak points that fail earlier than expected.
- Inadequate flashing at valleys, chimneys, vent pipes, and edges
- Inconsistent or insufficient sealant application
- Incorrect fastener spacing or penetration depth
- Poor overlap, misaligned seams, or improper seam width
Material quality and compatibility
Not all materials withstand the same stresses in the same way. Mismatches and subpar products can create stress points that promote seam separation.
- Low-quality sealants or improper curing agents
- Incompatible metal types or coatings that corrode near seams
- Factory defects in manufactured seams or panels
- Inadequate underlayment or substrate compatibility
Structural movement and ventilation factors
The roof deck and attic environment influence how seams behave under load. Movement and moisture buildup can force seams apart over time.
- Sagging or weakened roof deck or framing
- Poor attic ventilation leading to excess humidity and corrosion
- Excess weight from snow or ice on weak structures
- Local ground settling or surrounding structural shifts (less common, but possible)
Maintenance gaps
Skipping routine checks lets small issues grow into noticeable seam separation.
- Lack of biannual inspections for sealant cracks or edge lifting
- Delayed repair of damaged flashing or peeling sealant
- Neglecting debris removal around roof penetrations that trap moisture
- Not addressing minor leaks early, allowing them to widen seams gradually
Quick-reference signs to watch for
- Hairline cracks or gaps along the seam
- Popping, lifting, or shifting of metal edges
- Visible rust, corrosion, or sealant discoloration
- Water staining or dampness near seams after rain
Practical steps homeowners can take
1) Schedule a seasonal visual check, focusing on edges, flashings, and penetrations.
2) Note any changes in sealant color, texture, or elasticity.
3) Keep gutters clear and trim nearby branches to reduce moisture retention and debris.
4) If you see lifted edges or pooling water near seams, mark the area and plan a professional inspection.
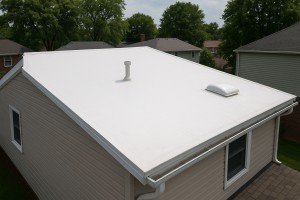
How Roof Material Affects Roof Seam Separation
How material type influences seam dynamics
Seams are the lifelines where two pieces meet, and every roofing material joins in its own way. Temperature swings cause expansion and contraction, wind uplift tests fasteners and coatings, and the roof deck beneath can shift with aging. Some materials rely on tight mechanical interlocks, others on sealants or adhesive bonds. When those joining methods weaken, seam separation begins and water finds its way under the surface.
Common roofing materials and how seams affect them
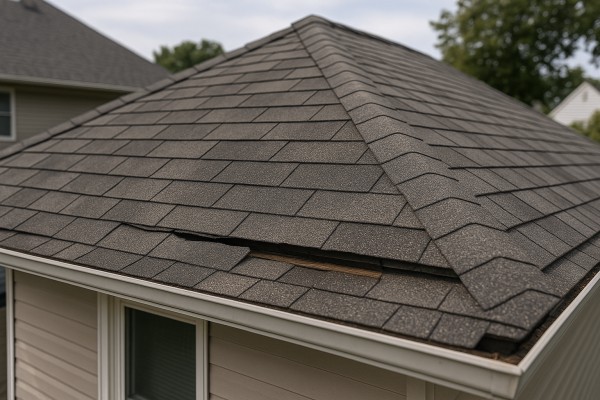
Seams here are typically the lap edges and the points where tabs meet. Wind uplift or aging asphalt binder can cause tabs to lift or edge laps to separate. Signs include visibly raised edges, loose granules in gutters, and local leaks near the roof-to-wall transitions. Prompt reseating or replacing damaged shingles helps prevent deeper leaks.
- Metal standing-seam and corrugated metal
Metal seams are designed to lock tightly, but fasteners, clips, or sealant around the seams can loosen or fail. Separation shows up as a continuous moisture line along a seam or a noticeable gap between panels. Causes include thermal cycling, hail damage, corrosion, or improper installation. Leaks typically track along the seam line.
Wood seams depend on tight install and proper nailing. Gaps can open as shakes warp, shrink, or age. Signs include daylight showing through seams, cupping, or splines pulling apart, along with rot or insect damage at exposed joints. Wet wood expands and contracts, accelerating seam separation in damp climates.
These tiles often interlock or butt at narrow seams. If tiles or their fasteners loosen or fail, seams can separate and allow water to reach underlayment. Expect leaks near seam lines, cracked or displaced tiles after wind events, and increased moss or algae growth where water pools along joints.
- Synthetic and composite shingles
These rely on interlocking edges or adhesive seams. Adhesive failure, UV degradation, or poor bonding can cause seams to separate. Look for gaps between panels, loose edges, or membranes showing through at seams. Leaks tend to follow the seam lines rather than random spots.
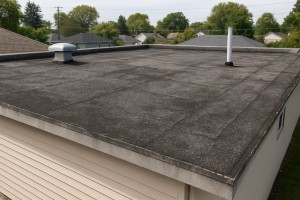
Seams are formed with adhesive tapes or liquid adhesives. Over time, seam tape can peel and the seam bond can separate, creating continuous leakage paths. Look for dark lines where seams have pulled apart, pooling water near edges, or bubbling in the rubber surface.
TPO seams are welded or taped. If the weld is weak or improperly done, seams may begin to separate, especially in heat or after a hail event. Signs include waviness along a seam, exposed undersides, or visible gaps where water can intrude.
BUR uses multiple plies bonded with asphalt and a cap sheet. Seams between plies or across the cap sheet can separate with age or thermal movement. Expect blistering, seam cracks, or adhesive dings along the field seam lines, which can lead to localized leaks.
Quick maintenance checks by material
1) Do a seasonal visual walkaround from the ground and attic access, noting any lifted edges, gaps, or unusual glare along seams.
2) Clear debris and ensure gutters and downspouts drain properly so water isn't ponding near seams.
3) Inspect fasteners, clips, and sealants for corrosion, loosening, or missing components; tighten or replace as needed (using material-specified fasteners).
4) If you see adhesive seams peeling, disbonded panels, or exposed underlayment, avoid walking on the roof and call a pro to reseal or replace affected sections.
5) For flat or low-slope roofs (EPDM, TPO, BUR), schedule a pro inspection after major weather events; a professional can re-weld or reseal seams to restore the waterproof barrier.
Signs to watch for by material
- In shingles: lifted tabs, granular wear at seams, sudden spikes in algae or mold along lap lines.
- In metal: shiny slits or gaps at seams, rust around fasteners, or streaks following seam lines.
- In tile: shifted or cracked tiles along rows, moss accumulating where water pools.
- In rubber or membranes: seam tape peeling, visible seams separating, or standing water near joints.
The Risks of Ignoring Roof Seam Separation
A seam split can allow rain to flow into the attic and along roof deck if left unchecked. Even small leaks can travel and cause hidden damage that isn't obvious from the outside.
- Water stains on ceilings and walls
- Damp insulation reducing effectiveness
- Mold and mildew growth in the attic or insulation
- Electrical hazards if moisture reaches wiring or fixtures
Structural damage and long-term costs
Moisture lingering at a seam can degrade the roof structure over time. This isn't just about the surface; you're dealing with the foundation of the roof.
- Soft, deteriorating roof decking or rafters
- Fastener corrosion and flashing failure that worsens leaks
- Warping or sagging in attic framing
- Reduced lifespan of surrounding roofing components and potential premature replacement
Ice dams, wind uplift, and weather events
In colder climates, a seam gap can worsen under freezing and thawing cycles, and wind can lift loose flashing or sealants.
- Ice dam buildup that forces water under shingles or panels
- Wind-driven rain infiltrating under flashing and penetrating deeper
- Hail impacts that widen gaps or loosen flashing over time
Energy efficiency and comfort
Gaps around seams act like leaks in your envelope, letting conditioned air escape or outside air infiltrate.
- Higher heating and cooling costs due to air leakage
- Uneven indoor temperatures and drafts near the affected area
- Increased strain on HVAC systems to maintain comfort
Wildlife, pests, and contamination
Open seams are inviting to critters and insects, which can make their way into the attic or roofline.
- Birds, rodents, and insects nesting in the roof cavity
- Debris and dirt buildup accelerating moisture problems
- Contaminants that compromise indoor air quality
Insurance considerations and financial impact
Maintenance gaps can influence insurance coverage and claim outcomes.
- Potential questions about neglect if damage is left untreated
- Higher claims risk if a small issue becomes major damage
- Unanticipated repair bills when damage spreads beyond the seam
Diagnostic indicators to watch for
Early signs help you catch problems before they escalate.
- Visible gaps or separation at flashing seams
- Loose, cracked, or missing sealant around joints
- Rust or corrosion on metal flashing near seams
- Staining or damp patches in the attic or along the ceiling
- Shingle or panel edges that appear misaligned or lifted
What to do if you suspect a seam separation
Follow a practical, safety-first approach to protect your home and budget.
1) Do a quick safety check: avoid walking on damaged areas; keep kids and pets away from the roof edge.
2) Direct water away: temporarily cover seams with a tarp or heavy-duty plastic to reduce interior leakage.
3) Photograph and document: take clear pictures of the seam, flashing, and any interior signs of water intrusion.
4) Schedule a professional inspection: a licensed roofer should assess the extent, flashing integrity, and underlying wood.
5) Ask targeted questions: warranty coverage, recommended repair scope, materials, and whether fascia or deck replacement is needed.
6) Plan the repair carefully: ensure proper flashing installation, weatherproof sealants, and ventilation as part of a complete fix.
Diagnosing Roof Seam Separation
What seam separation looks like from the ground
- Daylight visible along the seam when you look up from the yard or with binoculars.
- Shingle edges along the seam that are lifted, curled, or buckling.
- Flashing at the seam appears loose, torn, or corroded.
- Gaps or noticeably wider seams where shingles no longer sit flat.
- Water stains or damp spots on exterior walls, soffits, or near the seam after rain.
Attic and interior indicators
- Stains, damp patches, or mold on the underside of the roof deck or around rafter tails along the seam.
- Wet or damp insulation near the seam; insulation that looks clumped or degraded.
- Musty odors in the attic after rain or humid days.
- Frost buildup along the seam in winter, indicating air leakage.
- Sagging or soft spots in the roof decking near the seam (avoid pressing hard; this is a sign to seek professional help).
Exterior inspection cues
- Daylight anomalies along the seam visible from the ground or rooftop edge.
- Flashing at the seam that is loose, warped, or missing sealant.
- Cracked, cracked-open, or cracking sealant around seam flashing.
- Shingles near the seam feel soft or spongy to the touch (handle with care; don't press hard).
- Visible rust or corrosion on metal flashing around the seam.
Step-by-step diagnosis plan
1. Prepare and prioritize safety: avoid wet or icy roofs; use a sturdy ladder with a helper; wear a harness if possible.
2. Gather tools: binoculars, flashlight, camera or smartphone, notebook, comfortable gloves, and a moisture meter if you have one.
3. Do a ground-level seam check: scan the roof line with binoculars for any daylight, lifted edges, or flashing issues; note approximate locations.
4. If safe, inspect the roof from a ladder: closely examine along the seam for flaws in flashing, sealant, or caulk; gently probe for soft spots but don't push on damaged shingles.
5. Inspect the attic with a flashlight: look for dampness along the seams, ceiling stains, mold, or a musty smell; try to trace stains to exterior seams.
6. Check flashing around vents, chimneys, and skylights: look for loose nails, rust, gaps, or damaged sealant that could allow leakage to reach the seam.
7. Document with photos: annotate each issue and location so you can reference it later or share with a pro.
Safety and rapid triage
- If you see active leaks during rain, avoid climbing the roof until weather clears; use buckets and towels inside to manage drips.
- Do not walk on soft or severely weathered shingles; uneven footing can cause more damage or injury.
- Wear non-slip shoes and use fall protection if you choose to work on a ladder or roof.
When to escalate to a professional diagnostic
- Large or multiple gaps, bulging seams, or ongoing leaks despite inspection.
- You're uncomfortable with heights or the roof shows signs of widespread moisture.
- Structural concerns appear (sagging decking, significant flashing failure, or extensive interior moisture).
Repair Options for Roof-Seam Separation
Temporary fixes
- Cover the area with a heavy-duty tarp, weighted down along all edges to prevent wind uplift. Secure with roofing nails or capped screws every 18–24 inches, ensuring the tarp extends beyond the seam to reduce water intrusion.
- Seal exposed gaps with weatherproof, elastomeric roof cement or a self-adhesive flashing tape designed for asphalt or metal roofs. Apply along the seam edges and over small gaps to slow leaks until a proper repair can be made.
- Clear debris from the affected seam and nearby shingles to keep water from pooling. Remove twigs, leaves, and dirt that can trap moisture.
- If water is entering your attic, place a bucket or waterproof tray under the drip area and use a temporary fan or dehumidifier to manage moisture and reduce condensation.
- Avoid walking on the fragile area. If you must inspect, use lightweight plywood sheets as a temporary path to minimize further damage.
Minor repairs
- Inspect the seam to identify the underlying cause: loose nails, lifted shingles, or damaged flashing. Make a plan before touching the roof.
- Re-nail loose shingles along the seam with corrosion-resistant nails (galvanized or aluminum). Space nails per the shingle manufacturer's pattern and avoid overdriving.
- Re-seat lifted shingles with a roofing hammer or a small pry bar, pressing them firmly back down and sealing the edge with a compatible asphalt cement or sealant.
- Apply adhesive sealant along the seam and under the edges of shingles to close small gaps. Use a fabric or mesh patch if the seam has wider cracks to provide extra strength.
- Inspect and repair flashing around any vents, chimneys, or wall transitions that intersect the seam. Re-seat, reseal, or replace flashing as needed to restore a continuous waterproof barrier.
- Allow time for sealants to cure per product instructions, and re-check after a heavy rain to confirm the fix is holding.
Partial replacement
- When the seam damage extends beyond a few shingles or a single flashing run, plan a partial replacement of the affected roof area.
- Remove damaged shingles carefully on both sides of the seam and take note of the underlayment condition. Replace any torn or deteriorated underlayment to maintain a solid base.
- Install new shingles using the same exposure and nailing pattern as the existing roof. Use matching fasteners and roofing cement for a clean seam.
- Replace or repair flashing along the seam and any adjacent valleys or transitions. Ensure seals are continuous and watertight.
- Re-seal the new installation with compatible sealant at the edges and around penetrations. Confirm proper drainage and verify there are no gaps that could allow water ingress.
- Perform a water test by gently spraying the area from a hose or calling in a professional to verify the repair before returning the area to normal use.
Full roof replacement
- Consider a full roof replacement if seam separation is widespread, multiple seams are affected, or the deck shows signs of damage such as soft spots, mold, or extensive rot.
- Begin with a professional evaluation to determine the roof system, decking condition, and ventilation needs. Choose a compatible roof type (asphalt shingles, metal, tile, etc.) and color that suits your home.
- Remove all shingles, underlayment, and flashing down to the decking. Inspect the roof deck for rot or structural issues and replace damaged sections.
- Install a new underlayment suitable for your climate and roof type, followed by high-quality flashing, drip edge, and vent components.
- Install the new roofing system with proper ventilation and attic insulation to prevent future issues. Use staggered seams and appropriate nail patterns to maximize waterproofing and wind resistance.
- Perform a thorough inspection after installation, including tight flashing joints, sealed penetrations, and a complete water test to ensure there are no leaks.
- Schedule a follow-up inspection after a few months to confirm the roof remains watertight and to address any settling or minor defects early.
Typical Cost to Fix Roof Seam Separation
Minor repair
Description: Small seam separations along straight roof lines, usually from aging sealant or a lightly loose edge of flashing. No noticeable decking damage. Typically addressed with a reseal, a quick re-fastening, and minor flashing touch-ups.
- Typical cost: about $150–$450
- What it covers:
- Cleaning and re-sealing the seam
- Re-fastening or adjusting loose flashing
- A small bead of sealant to seal the edge
1) Inspect the seam and dry the area to locate the source of seepage.
2) Remove loose or cracked sealant and clean the surface.
3) Apply new sealant and re-seat or fasten flashing; trim excess as needed.
4) Allow cure time and perform a light water test to confirm sealing.
Moderate repair
Description: Seams and flashing that are separating in a broader area, or where flashing has begun to lift at corners or joints. May involve replacing short sections of flashing and resealing larger portions. Could include minor underlayment adjustment but no extensive decking damage.
- Typical cost: about $450–$1,200
- What it covers:
- Replacing or extending flashing at multiple seams
- Resealing a larger seam area
- Access-port or small section adjustments to underlayment
1) Secure interior area and protect nearby roofing.
2) Remove damaged flashing and clean the mating surfaces.
3) Install new flashing sections and seal with high-quality sealant; re-nail as needed.
4) Re-seal the seam and inspect for leaks; perform a test after drying.
Major repair
Description: Significant seam separation with multiple seams affected, damaged flashing running along a long stretch, or compromised decking/underlayment. Often requires replacing a larger roof section, installing a new flashing system, or repairing damaged plywood before resealing.
- Typical cost: about $1,200–$4,000+ (depending on roof size and complexity)
- What it covers:
- Replacing extensive flashing and underlayment
- Decking repairs or replacement in affected area
- Partial reroofing or a more robust flashing system
- Color-matched shingles or proper integration with existing roofing
1) Comprehensive assessment of all affected seams, underlayment, and decking.
2) Remove damaged materials in the affected zone and replace decking if softened or rotted.
3) Install a new flashing system and full underlayment, then seal seams.
4) Reinstall or replace shingles in the affected area and perform a thorough leak test.
What factors affect cost
- Roof size
- Access
- Material type
- Extent of damage
- Local labor rates
How Long Can You Wait to Address a Roof Seam Separation?
Quick reality check
A roof seam separation is a warning sign, not a small annoyance. Water can follow that seam into attic spaces, insulation, and ceilings. The longer you wait, the more damage can accumulate, and the more difficult and costly a repair becomes. Your best bet is to treat it as urgent, but manageable, with a plan.
Timeframe breakdown
- Within 24 hours
- What happens: Moisture may start to drip into the attic or interior; fast-moving weather can push water along the seam.
- Risks: Mold growth, wood rot, staining on ceilings, potential electrical hazards if wiring is nearby.
- Action: Cover the area from the outside with a temporary waterproof tarp or heavy-duty plastic, secure edges, and arrange a roof inspection as soon as possible.
- 24–72 hours
- What happens: Water intrusion becomes more noticeable; staining and damp insulation may appear.
- Risks: Structural lumber can begin to weaken; attic ventilation can be compromised.
- Action: Schedule an inspection and temporary repair. Check for actively leaking spots after rain or heavy wind.
- 3–7 days
- What happens: The leak can widen with wind-driven rain; prior tarps may loosen or fail.
- Risks: Increased interior damage, higher repair bill, more extensive sealant and flashing work.
- Action: Get a professional assessment. If you can't access a roofer immediately, reinforce temporary protection and keep interior areas dry.
- 1–3 weeks
- What happens: Prolonged moisture exposure can lead to insulation degradation, faster wood rot, and possible ceiling bulging.
- Risks: Higher mold risk and potential need for interior drywall repair or repainting.
- Action: Plan for a formal roof seam repair or flashing replacement. Ensure ventilation and dehumidification in the attic to slow moisture buildup.
- 1–2 months
- What happens: If left unfixed, you may see ongoing leaks during rain, larger interior damage, and more extensive flashing or seam repairs required.
- Risks: Significant restoration costs, potential structural concerns, and disruption to living spaces.
- Action: This is a red flag. Pursue a full repair or replacement evaluation and consider temporary interior mitigation (dehumidification, water diversion) while scheduling work.
- Longer than 2 months
- What happens: Repeated exposure compounds damage; mold, rot, and potential attic condensation problems become persistent.
- Risks: High repair costs, possible escalation to full roof replacement in some cases.
- Action: Treat as an emergency: prioritize a professional assessment, address interior moisture, and schedule permanent fixes immediately.
What happens if you wait to address the problem in several timeframes
- Waiting 1 day vs 1 week
- Day: Minor staining, attic dryness preserved, easier short-term patch.
- Week: Water intrusion more evident; higher risk of wood damage and insulation saturation.
- Waiting 1 week vs 1 month
- Week: Temporary fixes might hold, but long-term seal integrity is stressed.
- Month: More extensive flashing work, possible drywall or ceiling repairs, higher labor costs.
- Waiting during a seasonal storm window
- Storms intensify leaks and accelerate damage, making a quick fix insufficient and requiring more robust repairs.
- Waiting through multiple storms
- Repeated exposure compounds moisture, increases mold risk, and can necessitate more invasive interior remediation.
Practical indicators you should not ignore
- Visible rust or corrosion on metal flashing near the seam
- Dark staining or damp insulation in the attic
- Sizzling noises or sudden drops in interior humidity control during rain
- Ceiling bulging, paint cracking, or new spots appearing after rain events
How to prioritize next steps
- Step 1: Protect. Move valuables, place tarps, and limit access to the affected attic space.
- Step 2: Document. Take clear photos from interior and exterior, note dates and rainfall.
- Step 3: Schedule. Book a roof inspection with a licensed roofer for an assessment of flashing, seam integrity, and deck condition.
- Step 4: Decide. Based on the inspection, determine whether a temporary seal, flashing replacement, or full seam repair is needed, and set a repair timeline.
How Roof Seam Separation Varies by Location and Climate
How This Problem Varies by Region & Climate within the United States
- Regional climate shapes how seams age, fail, and require attention. Heat, cold, moisture, wind, and precipitation each push different weaknesses in flashing, sealant, and fasteners.
- Materials behave differently depending on where you live. A flashing that lasts 20 years in a dry desert may fail sooner in a humid coastal environment.
- The best prevention and repair approach isn't one-size-fits-all. Understanding your region helps you spot likely failure points and plan inspections accordingly.
Northeast & Upper Midwest
- Why it matters: Repeated freeze-thaw cycles plus snow buildup put constant stress on seams and flashing. Ice dams can force water under flashing and into the roof deck.
- What to look for: Cracked or missing sealant at seam joints; gaps along metal flashing; rust on exposed metal; moss or algae in shaded areas; interior ceiling stains after melt periods.
- Practical checks: Inspect after thaw periods and after heavy snows; pay attention to valley and ridge seams; ensure gutters are clear to reduce ice dam risk.
Southeast & Gulf Coast
- Why it matters: High heat, humidity, and coastal salt air accelerate sealant aging and corrosion. Strong winds from thunderstorms and hurricanes can lift or peel seams.
- What to look for: Deteriorated caulk around flashing; corrosion on metal seams; loose fasteners or lifted edges; signs of wind-driven water intrusion near the deck edge.
- Practical checks: Do seasonal inspections, especially after storms or hurricanes; inspect near coastal areas for salt-related corrosion; replace aging sealants before peak heat.
Midwest & Great Plains
- Why it matters: Wide temperature swings and hail impact seam integrity. Snow and rain cycles push water through any tiny flaw.
- What to look for: Cracked or softened sealant; loose or bent flashing; dented or pitted metal seams; granule loss around shingle seams; damp attic signs after storms.
- Practical checks: After severe weather, run a quick exterior check along all flashing; verify fasteners aren't backed out; ensure proper drainage to reduce water backing up at seams.
Southwest
- Why it matters: Extreme sun exposure and heat cause faster aging of sealants and roofing fabrics. Thermal expansion can stress metal seams and flashing.
- What to look for: Edges of shingles curling near seams; sealant drying and cracking; metal seams showing signs of wear or oxidation; fasteners loosening in high wind areas.
- Practical checks: Schedule inspections during or after heat waves and monsoon storms; watch for heat-induced warping in metal profiles; keep attic ventilated to reduce deck heat buildup.
Pacific Northwest
- Why it matters: Persistent rain and humidity promote moisture intrusion and moss/lichen growth that can hide or accelerate seam failures. UV exposure is less intense but sealing materials still degrade over time.
- What to look for: Soft or peeling sealant at flashing; moss or algae around flashing lines; wood rot near penetrations; rust on metal seams in coastal zones.
- Practical checks: Do year-round inspections, with extra focus after heavy rainfall; ensure proper roof drainage to prevent ponding near seams; keep flashing clear of plant growth.
Alaska
- Why it matters: Severe cold and heavy snow subject seams to strong thermal cycling and ice damming. Freeze-thaw cycles can crack sealants and loosen flashing.
- What to look for: Cracked or brittle sealant; ice dam-related water intrusion at edges; corroded metal where salt is present; shingle and tile edge damage from wind-driven snow.
- Practical checks: Post-winter inspection is essential; verify insulation and ventilation to minimize ice dam risk; check drip edges and flashing after melt seasons.
Hawaii
- Why it matters: Tropical moisture, high humidity, and coastal salt air accelerate corrosion and sealant breakdown. UV exposure also wears materials over time.
- What to look for: Rust on metal flashing; UV-degraded sealant around seams; moss or mold in shaded areas; wind-driven rain signs at exposed edges.
- Practical checks: Regular coastal inspections; especially after storms or hurricane season; monitor metal seams for early corrosion and reseal as needed.