Ultimate Guide to Vibrating Metal Roof Panels
Last updated: Feb 28, 2026
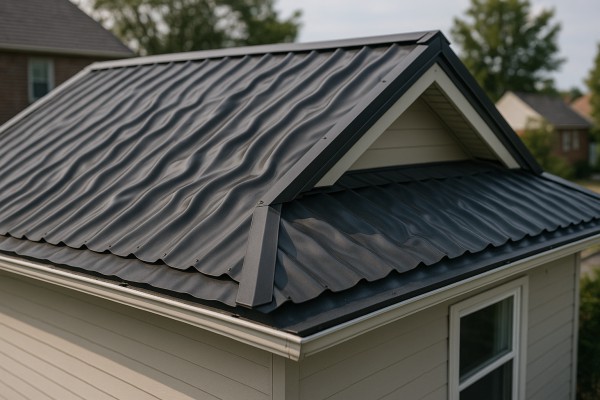
Introduction to Vibrating Metal Roof Panels
Vibrating metal roof panels can be surprising and a bit unsettling. If you hear banging, fluttering, or a steady humming coming from your roof, you're not imagining it—there's often a real mechanical reason behind it. For homeowners, the key question is whether this is something urgent or a common nuisance that's worth keeping an eye on.
In most homes, vibrating panels are not an immediate danger, but they do point to components that may be wearing out or moving where they shouldn't. Understanding the cause helps you decide what to do next, and it keeps your roof singing with the wind instead of rattling at you.
What causes vibrating panels?
- Wind uplift and gusts pressing on exposed edges and seams
- Thermal expansion and contraction between adjoining panels
- Loose or missing fasteners, clips, or lap spacers
- Improper alignment or loose ridge caps and seals
- Debris or hardware resting against a panel
- Worn or damaged gaskets and weather seals
- Vents, skylights, or other penetrations contacting metal
Is it urgent or common?
- It's fairly common on standing-seam and other exposed-metal roofs, especially in windy areas or during seasonal temperature shifts.
- For most homes, vibrations are a nuisance rather than an immediate threat. However, ongoing movement can loosen fasteners or damage seals over time.
- If you notice sudden loud banging during a storm, panels lifting visibly, or water intrusion, treat it as more urgent and seek professional help soon.
How to assess safely
- From the ground, look for obvious loose panels, gaps at seams, or missing fasteners along the field of the roof.
- If you can do so safely, use a ladder with a helper to inspect a few panels at a time for loose screws, clips, or misaligned seams.
- Listen for the loudest spots to narrow down the area that's vibrating.
- Check for signs of damage: bent or creased panels, corrosion at fasteners, or contact between panels and fasteners.
High-level next steps
- Step 1: Document symptoms with photos or notes (where the vibration is strongest, when it occurs, and under what wind/temperature conditions).
- Step 2: Determine whether you can safely reach the roof to visually inspect for loose fasteners, gaps, or damaged seals.
- Step 3: If you find loose components or obvious damage, avoid DIY fixes that require full-roof access unless you're comfortable and safe. Consider a professional inspection for a precise diagnosis.
- Step 4: Prioritize fixes that restore proper panel seating and secure fasteners using manufacturer-approved parts.
- Step 5: After repairs, schedule periodic inspections, especially after major storms or rapid temperature changes, to catch issues early.
Quick homeowner checklist
- [ ] Note exact locations of vibration and any changes after wind storms
- [ ] Check for loose screws, clips, and seals along exposed seams
- [ ] Look for panel misalignment or visible gaps at lap joints
- [ ] Observe for leaks or corrosion near fasteners or seams
- [ ] Plan a professional inspection if vibrations persist or damage is suspected
Are Vibrating Metal Roof Panels an Emergency?
When this becomes an emergency
- Call a roofer immediately if you notice any of these signs:
- Panels visibly lifting, buckling, or separating from the roof deck.
- Large gaps that expose underlayment or the attic space to rain or wind.
- Continuous, loud vibration or banging that lasts minutes after the wind has died down.
- Debris on or around the roof that indicates fasteners or panels have come loose.
- Water intrusion into living spaces, visible leaks, or damp insulation from roof area.
- Visible rust, corrosion, or missing fasteners along the edge or in critical seams.
- Call a roofer immediately if you hear odd grinding, scraping, or metallic clatter coming from the roof, especially during wind gusts.
- Call a roofer immediately if you work or notice damage near electrical components (e.g., vent caps, satellite dishes) that could create a shock risk or short circuit.
Quick safety steps
1. Step back and keep people and pets away from the affected area. Do not stand on the ground directly beneath the panels if debris could fall.
2. Do not attempt to climb onto the roof or tighten screws from the ladder or ground. Loose panels can shift suddenly and cause injury.
3. If it's safe to observe from ground level, take clear photos or videos from a secure distance to share with the roofer.
4. If you have a detached or damaged flashing, ridge cap, or vent boot, note its location for the repair crew so they can prioritize proper resealing.
5. If you're in a storm or high-wind event, stay indoors and wait for professional assessment before re-entering the attic or roof space.
What to monitor
- Monitor if the vibration occurs only during strong winds or thunderstorms and subsides when wind dies down.
- Monitor if there is no obvious water intrusion, no new leaks, and the interior ceiling remains dry despite the vibration.
- Monitor if the panels remain in place but show signs of looseness at fasteners, which could indicate a mounting issue rather than a full failure.
- Monitor if there are any unusual sounds far from the edge of the roof, which might suggest components like flashing, screws, or support purlins loosening.
Can wait if
- Can wait if the vibration is mild, intermittent, and stops after a storm passes, with no signs of leaks or panel movement.
- Can wait if there is no visible damage to fascia, gutters, or soffit, and attic insulation remains dry.
- Can wait if you have a planned repair window and the system is still providing weather protection without current leakage or imminent panel movement.
What a pro will check and fix (quick overview)
- Fastener integrity: loose, missing, or corroded screws and nails; re-secure or replace as needed.
- Panel alignment: ensure panels sit flat and properly anchored to prevent further movement.
- Flashing and sealants: reseal edges, vents, and penetrations to restore wind1- and water-tightness.
- Structural checks: inspect underlayment and rafters for damage from repeated movement or impact.
- Debris removal: clear any loose debris that could cause future vibration or puncture.
Bottom line
Vibrating metal roof panels can range from a minor nuisance to a serious safety and weatherproofing concern. Use this guide to gauge severity, act quickly when needed, and involve a qualified roofer to prevent further damage and protect your home.
Common Causes of Vibrating Metal Roof Panels
Wind Uplift and Airflow
- Strong gusts can lift and shift panels if seams aren't fully closed or fasteners aren't holding tight.
- Gaps at edges, ridges, and along panel seams let air rush underneath, creating a fluttering or rattling sound.
- Common trouble spots: loose ridge cap, unsealed penetrations, or loosely seated trims.
- What to check:
- Inspect along the length of the panels for visible gaps or loose fasteners.
- Pay attention to the ridge, eaves, and transitional areas where panels meet flashing.
Loose or Missing Fasteners and Clips
- Over time, screws can back out or clips can fail, especially on older roofs or those subjected to heavy wind.
- Loose hardware lets panels move independently, producing tremors or creaks during wind events.
- What to look for:
- Exposed screws with visible looseness or backing out from the panel.
- Clips that have shifted, cracked, or detached from the deck.
- Quick steps:
1) Use a sturdy ladder and wear eye protection.
2) Tighten screws to the manufacturer's torque spec or replace stripped fasteners.
3) Reinstall or replace damaged clips with the correct type for your panel system.
Improper Fastening Pattern or Panel Alignment
- If panels were not installed with the correct clip spacing, or if panels are out of alignment, wind can create repeating vibration along seams.
- Misrouted or interchanged components can also cause loose fit.
- Indicators:
- Uneven gaps between panels or misaligned seam lines.
- Clips or fasteners sitting at odd angles or not binding the panel to the deck.
- Fix approach:
- Confirm the installation pattern matches the manufacturer's spec.
- Re-seat panels and replace any misfit clips to restore a uniform, tight hold.
Faulty Seals, Flashing, and Roof Penetrations
- Vibration often travels from the wind under the panels where flashing or seals have degraded.
- Penetrations (vents, skylights, chimneys) are common leak points where air can swirl and rattle panels.
- Inspection notes:
- Check the sealant around penetrations for cracks or gaps.
- Inspect flashing for loose legs, creases, or lifted edges.
- Remedies:
- Re-seal or replace compromised gaskets and sealant.
- Re-secure or replace flashing so it captures the panel edge firmly.
Structural Movement and Building Flex
- The roof deck and underlying structure can shift with age, settling, or seasonal movement.
- When the deck flexes, metal panels may momentarily rub or rotate against fasteners, producing vibration.
- What to assess:
- Visible warping or sagging of the roof deck in areas under heavy loads.
- Studs or rafters showing unusual movement at fastener points.
- Potential fix:
- Address underlying framing issues and ensure the deck is solid and plumb before re-securing panels.
Thermal Expansion and Contraction
- Metal expands in heat and contracts when it cools, especially on sunny days.
- This cycle can create slight pops or ticks and, in windy conditions, can feel like ongoing vibration if panels aren't free to move slightly.
- How to reduce symptoms:
- Ensure there's adequate clearance at joints and around trim pieces.
- Use the correct fastener length and spacing to allow controlled movement without loosening.
Debris Accumulation and Rattling Objects
- Leaves, needles, or small debris can collect in the panel ribs or under edge trims and vibrate with wind.
- Lightweight objects (twigs, plastic bags) can flutter and amplify sound during gusts.
- Quick checks:
- Inspect rib valleys and under edge trims for debris.
- Remove any lodged material with a soft brush or compressed air.
- HVAC units, attic fans, or ceiling-mounted ducts can vibrate against the metal surface.
- If equipment is secured nearby, vibration can transfer through fasteners into the panels.
- What to inspect:
- Any equipment mounting that sits on or near the roof inventory.
- Ducts or clamps that rub against panel trays or ribs.
- Solutions:
- Add soft, vibration-damping gaskets or shims.
- Relocate or re-secure equipment to minimize contact with the roof.
- Minor hail or impact dents can destabilize a panel edge or loosen fasteners, leading to new vibrations after impact.
- Look for dents along the panel faces and at the seams.
- Recovery path:
- Replace severely dented panels or re-fastening hardware as needed to restore a tight, uniform surface.
How Roof Materials Affect Vibrating Metal Roof Panels
How vibrations interact with roof assemblies
Vibrating metal roof panels transmit energy into the roof system, and what happens next depends on the material sitting underneath or adjacent to the panels. Some substrates are forgiving, some are rigid, and some rely on fasteners or sealants to stay put. The key idea: a vibration that's tolerable on one roof type can cause loose fasteners, cracked seams, or degraded underlayment on another. Read this section to learn how your specific roof material responds and what to watch for.
- Asphalt shingles

- Effects: Nails or staples can loosen over time; shingles near edges may lift; granule loss can accelerate as fasteners shift.
- Implications: Look for exposed nails, lifted corners, and increased attic noise. Consider tighter nailing patterns, high-quality sealants, and a well-seated underlayment to dampen movement.
- Wood shingles and shakes
- Effects: Nails may work loose; grain orientation can make panels feel “loose” against the wood; vibration can accelerate warp or cupping in softwoods.
- Implications: Watch for nail pops, splitting, or new gaps. Use corrosion-resistant or coated fasteners and ensure staggered, secure installation with solid substrate.
- Clay and concrete tiles

- Effects: Rigid tiles can crack or shift if metal panels vibrate heavily; grouted joints and battens may loosen and tiles can rattle.
- Implications: Expect potential tile movement and inspect for hairline cracking after windy events. Anti-vibration clips or a decoupled battens system can help isolate movement.
- Slate

- Effects: Slate is brittle; repeated vibration can cause microcracks or loosening at fasteners near edges.
- Implications: Look for new cracks or loosened slates after storms. Extra support underlayment and careful fastener placement are important.
- Metal roofing (existing standing seam or corrugated)

- Effects: Iron or steel panels themselves can transmit more noise and movement into fasteners and seams; clips and screws may loosen if the system isn't properly decoupled.
- Implications: Regular checks of seam fasteners and clip points are essential. A well-designed vibration-damping layer beneath the metal helps reduce noise and wear.
- Synthetic/composite shingles

- Effects: Vibration can cause edge lifting in some thinner composites if attachment isn't solid; expansion gaps may close and re-open with movement.
- Implications: Ensure proper adhesive or nail/hook attachment and allow for material expansion without over-constraining.
- Modified bitumen and built-up roofs
- Effects: Adhesives and cap sheets can shear if vibration is frequent; underlayment may loosen at laps.
- Implications: Inspect lap seals and adhesive bonds after strong winds; consider decoupling options at critical seams.
- Rubber/EPDM or other membranes on flat roofs
- Effects: Seams and flashings can shift, edge trim may rattle, and fasteners can work slightly loose at perimeter regions.
- Implications: Regularly inspect seams, replace degraded adhesives, and use edge detailing that tolerates minor movement.
Practical steps for homeowners
1) Identify your roof material and note any signs of vibration-related wear (loose fasteners, rattling, edge lifting).
2) Check fasteners and seams in the most vibration-prone areas (rakes, eaves, around penetrations).
3) Use appropriate damping measures (underlayment, vibration-absorbing clips, or decoupling layers) where recommended for your material.
4) Schedule a professional assessment if you notice repeated movement, cracking, or leaks after high-wind events.
Maintenance and inspection tips
- Do a semiannual visual check of all fasteners and seals.
- Listen for unusual attic noise during windstorms; investigate promptly.
- Maintain adequate attic insulation and ventilation to minimize temperature-driven movement.
- Keep drainage paths clear to prevent water from infiltrating through loosened joints.
The Risks of Ignoring Vibrating Metal Roof Panels
What vibrating panels can signal
If you feel or hear a rhythmic shake, it's a warning sign rather than a quirk. Vibrations can point to issues that worsen over time if left unchecked. Common signals include:
- Loose or missing fasteners, clips, or panel seams
- Panel deformation or misalignment that lets edges rub or flex
- Wind-driven movement around edges and ridges
- Corrosion around screws or fasteners that compromises holding power
- Hidden damage to underlayment or insulation beneath the metal
Structural and fastener fatigue
Metal roofs endure a lot of movement, and vibration accelerates wear. Ignoring the signs can lead to:
- Progressive loosening of fasteners, washers, and clips
- Cracks or tears in the panel skin at stress points
- Worn or stretched fastener threads that lose their grip
- Deformation of the metal panels and panel-to-panel seams
- Faster deterioration of the substructure as edges flex and grind against framing
Water intrusion and insulation risk
Vibration can widen existing gaps and create new ones. That invites trouble like:
- Leaks at seams, flashing, and fastener penetrations
- Gaps that allow wind-driven rain to reach insulation and attic spaces
- Condensation buildup in poorly sealed areas, promoting mold and mildew
- Dents and punctures that compromise underlayment and vapor barriers
Increased interior noise and nuisance
Rattling and booming sounds aren't just annoying; they're a telltale sign of ongoing stress. Potential effects include:
- Disturbance inside living spaces, especially with wind-driven exposure
- Transfer of vibration to ceiling joists and drywall, leading to small cracks or nail pops
- Potential loosening of interior fixtures that contact the roof framing
Compounding costs and safety concerns
Ignoring vibration now can lead to bigger bills later. Consider these realities:
- Progressive fastener and panel damage requiring more extensive replacement
- Water damage that demands attic restoration, insulation, and drywall work
- Higher likelihood of sudden panel loosening or detachment in storms
- Insurance and code-compliance implications if damage worsens and isn't documented or repaired
Quick, safe checks if you notice vibration
1. Do a safe ground-level inspection with binoculars or a ladder kept away from the edge of the roof. Look for loose or missing fasteners, raised edges, and obvious panel movement.
2. Note when the vibration occurs—during high winds, temperature changes, or rain—and whether it changes with roof temperature or shading.
3. Avoid climbing onto the roof yourself if you're not trained or equipped. Focus on visible flashing, seams, and edge conditions from the ground.
4. Schedule a professional inspection to assess fasteners, panel alignment, flashing, and underlayment; obtain a written repair plan and cost estimate.
How Vibrating Metal Roof Panels Are Diagnosed
Symptoms to confirm a vibration problem
- You hear rattling, buzzing, or a hollow thump when wind gusts sweep across the roof.
- Panels feel loose or move slightly when you touch them at edges or seams.
- Seams, edge caps, or ridge pieces look misaligned or gap open.
- You notice attic noises or daylight peeking between panels, especially during windy days.
- A consistent pattern of vibration along a particular row or section of panels is visible.
Safety first
- Use a sturdy ladder, good footing, and fall protection if needed. Wear gloves and eye protection.
- Avoid climbing on a wet, icy, or steep roof. If you're unsure about safety, don't attempt a hands-on inspection from the roof.
- Work with a partner who can hold the ladder and help in an emergency.
Step-by-step diagnostic process
1) Reproduce and observe
- Have a calm wind day or wait for a gust to occur while you stand at ground level or in the attic.
- Note exactly where the vibration starts and whether it travels across rows or remains isolated to one panel.
2) Inspect the attic for clues
- Look for loose or corroded fasteners through access panels.
- Listen with a stethoscope or a long screwdriver pressed gently to the underside of a panel (from the attic) to pinpoint the source.
- Check for signs of water intrusion, sagging decking, or dark stains that could indicate past leaks.
3) Exterior visual check from ground level and near the edge
- Using a ladder, scan for loose screws, missing plugs, bent edges, or raised panel corners.
- Inspect fastener washers for rust or deformation; unevenness can amplify vibration.
- Look at ridge caps and flashing where wind can push on adjoining panels.
4) Inspect fasteners and clips
- Confirm screws are snug but not over-tightened; over-tightening can warp rubber washers and create leaks or stresses.
- Check that all clips or interlocks along the panel seams are present and seated properly.
- Replace corroded or stripped screws with the same length and type recommended by the panel manufacturer.
5) Examine seams, edges, and ridge components
- Seams along standing-seam roofs should lie flat without gaps.
- Check ridge caps and valley flashings for secure seating and any gaps that could allow wind gusts to grip panels.
6) Assess wind uplift zones and edge zones
- Areas near eaves, hips, and ridges are more prone to vibration from wind uplift.
- If you find missing or loose clips in these zones, note them as high-priority fixes.
7) Check decking condition and underlayment
- In the attic, press lightly on the roof deck beneath the panels to feel for soft spots indicating rot or deterioration.
- If decking moves with pressure or shows fungal stains, a larger repair may be needed before re-securing panels.
Common causes you can spot and quick fixes
- Loose or missing screws: tighten or replace with appropriate hardware and seal with new washers.
- Worn or corroded clips: replace damaged clips to restore panel alignment and reduce movement.
- Damaged seams or gaps: reseal with manufacturer-approved sealant and ensure proper clamping force at joints.
- Bent or misaligned panels: re-seat or straighten with care, then re-check fastener alignment.
- Weathered edge caps or flashings: reseat and reseal, replacing damaged components as needed.
- Expansion gaps not accommodated: confirm installation guidelines were followed; some panels require spacing to tolerate thermal movement.
When to call a professional
- The roof is steep, or you're uncomfortable with heights or attic access.
- You find structural sag, widespread corrosion, or widespread water intrusion.
- Multiple fasteners and clips are loose across large sections, or you notice garage-like lifting in windy conditions.
- The vibration persists after basic fixes or you're unsure about proper fastener type and spacing.
Repair Options for Vibrating Metal Roof Panels
Temporary fixes
Safety first. Vibrating panels are a sign of wind or spacing issues that can worsen quickly, so treat these as short-term stabilizers while planning a proper fix.
- Identify the driver of vibration:
- Wind gusts, loose fasteners, misaligned panels, or missing sealant.
- Quick fastener check:
- Locate loose screws along the vibrating run and snug them with a screwdriver. Do not over-tighten; seating the washer helps hold the panel without crushing it.
- Re-seat and align:
- Gently press misaligned panels back into their rib profiles and reseat any edge panels. If you can access the fastener pattern, ensure panels sit flat against the fastener strips.
- Add temporary bracing:
- Install lightweight metal straps or wind braces across the backs of the affected panels from ridge to eave, anchored into solid framing. Use corrosion-resistant hardware and avoid over-tightening.
- Seal gaps to reduce wind catching:
- Apply exterior-grade sealant along small seams and panel joints that show gaps. This won't cure a structural issue, but it can dampen air-driven flutter in the short term.
- Minimize exposure during storms:
- If a storm is approaching, secure loose materials around the roof and avoid drilling or new penetrations until you can perform a careful permanent fix.
Minor repairs
These fixes address localized problems without replacing large sections of the roof. They're ideal when vibration is confined to a small area.
- Inspect and prioritize:
- Check the entire vibrating run for loose fasteners, damaged washers, and bent panels.
- Fastener replacement:
- Remove failing screws and install new corrosion-resistant screws with washers, driving them straight into the framing. Use the same thread pattern as the existing fasteners.
- Re-seal and flash:
- Clean old sealant from joints and reapply a high-quality exterior sealant along panel seams and edging. Reflash penetrations (pipes, vents) if their flashing looks worn.
- Panel conditioning:
- If a panel is lightly bent but not damaged, you may carefully bend back to shape with hand pressure or a rubber mallet. If the bend is severe, replace the panel to prevent future flutter.
- Check edge closures:
- Ensure first and last rows have proper closures and are locked into the eave and ridge closures. Re-tighten or replace edge fasteners as needed.
Partial replacement
Use this when vibration is localized to a defined run or section of panels rather than the entire roof.
- Plan the section:
- Mark the exact row or area showing the most movement and determine if you'll replace one or several panels in that run.
- Remove and prep:
- Carefully remove sealant along the joints, lift the damaged panels, and detach them from the supporting structure without disturbing adjacent panels.
- Install new panels:
- Install matching panels with the same profile, fastener spacing, and underlayment. Secure into the same purlins and ensure proper alignment with adjoining panels.
- Seal and flash:
- Re-seal the joints with exterior sealant and reflash ends and penetrations as needed. Check for wind-rated compatibility with the neighboring sections.
- Finish and inspect:
- Clean the area, re-tighten all fasteners in the replaced run, and perform a gentle wind test (if safe) to confirm vibration is reduced.
Full roof replacement
Reserve this option for widespread vibration, signs of structural compromise, or when the existing panels and underlayment have reached the end of their service life.
- Assess scope:
- Confirm that vibration is not caused by an underlying structural issue (rot, sagging sheathing). If structure is compromised, address that first.
- Plan the project:
- Choose the panel profile, color, and wind resistance rating appropriate for your climate. Prepare for tear-off, disposal, and disposal cost.
- Remove and inspect:
- Remove all existing panels, carefully inspect sheathing, purlins, and rafters. Replace or repair damaged structural components.
- Install with best practices:
- Install new underlayment, proper ventilation, and wind-resistant fasteners. Space fasteners per manufacturer specs and ensure panels are aligned squarely with strong flashing and valley protection.
- Commission and protect:
- Seal all panel joints, flash all penetrations, and verify the roof is tight against wind-driven rain. Schedule a final inspection to confirm no vibrations and proper drainage.
Understanding the Typical Cost to Fix Vibrating Metal Roof Panels
Minor repair: description and cost
A few loose fasteners or clips causing light vibration, with a small edge misalignment or a tiny gap around flashing. Often no panel replacement is needed. Actions: tighten existing screws/clips, reseat panels, and apply a fresh bead of sealant or caulk where warranted.
- Cost: typically $100–$350
- What's included: labor to tighten, reseat, and seal; minor adjustments; basic inspection of nearby areas.
This quick fix is usually completed in a few hours and is the most budget-friendly option. It's the first line of defense against persistent rattling in calm conditions turning into noticeable movement on windy days.
Moderate repair: description and cost
Several panels are loose or vibrating, and the movement is more pronounced with wind. There may be minor edge wear or signs of movement at seams, and a few clips or fasteners may need replacement. In some cases, one or two panels may need to be repositioned and resealed, with a check of flashing and sealant integrity.
- Cost: typically $400–$1,800
- What's included: replacement/adjustment of multiple clips, reseating and sealing several panels, plus inspection of underlayment and flashing in the affected area.
Moderate repairs often take half a day to a full day depending on access and the number of panels involved. If a small section shows corrosion or edge wear, that area may require more attention to prevent future vibration.
Major repair: description and cost
Widespread vibration due to damaged panels, bent metal, or compromised structural components such as purlins or battens. This may involve replacing multiple panels, re-fastening the roof's support structure, and potentially addressing underlying underlayment or deck issues. In some cases, a larger section of the roof requires removal and reinstallation, or partial roof replacement with matching material.
- Cost: typically $2,000–$6,000 (for a small-to-mid-size home), higher for larger homes or premium metals
- What's included: panel replacement or substantial panelwork, possible replacement of clips/fasteners, resealing seams, and basic inspection of supported structure and underlayment.
Major repairs can escalate quickly if corrosion, water intrusion, or damaged framing is found. They often involve coordination of multiple trades and may require permits or scheduling around weather.
What factors affect cost
- Roof size: larger roofs require more materials and more labor, driving up both material and labor costs.
- Access: difficult access (tight crawl spaces, steep pitches, or limited working room) adds time and equipment needs.
- Material type: heavier or premium metals, color-matched coatings, or specialty finishes cost more per panel and may demand specific fasteners.
- Extent of damage: isolated issues are cheaper to fix than widespread panel damage or compromised structure.
- Local labor rates: geographic variance in wages and contractor demand affects overall pricing.
How Long Can You Wait Before Addressing Vibrating Metal Roof Panels?
Immediate action (today–24 hours)
Vibrating panels often point to loose fasteners, misaligned panels, or wind-related movement. Acting quickly can prevent leaks, panel damage, or the loss of panels in a gust.
Steps to take now:
1) Safety first: If panels are visibly flapping or you hear loud popping in wind, stay off the roof. Keep kids and pets away.
2) Ground check: From the ground, note which section vibrates and whether fasteners along the edge look loose, missing, or corroded.
3) Safe tightening: If you can reach a loose fastener safely, gently snug it with the proper screwdriver. Do not overtighten, and stop if you're unsure or if the panel bowing is evident.
4) Inspect for obvious damage: Look for bent panels, missing clips, or obvious sealant failure around seams.
5) When in doubt, call a pro: If anything looks questionable or you're unsure about safety, schedule a professional inspection.
Short-term: within 1 week
If the vibration persists after initial checks, treat it as a sign the issue could worsen quickly, especially with rain or wind.
What to do next:
- Re-check and secure: Tighten any visibly loose fasteners and replace missing or damaged clips from accessible locations. Re-seal seams if you see gaps or old sealant degrading.
- Inspect associated components: Check flashing, gutters, and ridge caps; loose flashing can amplify vibration and lead to leaks.
- Document the condition: Take clear photos of the panels, fasteners, and seams to share with a roofer.
- Watch for leaks: If you notice moisture staining inside or on ceilings after rain, escalate to a professional visit sooner rather than later.
Medium-term: within 1–2 months
At this stage, a simple fix may no longer suffice. The root cause might be misalignment, worn clips, or even sun or wind warping affecting panel integrity.
Actions to consider:
- Schedule a professional assessment: A roofer can confirm whether clips, screws, or spacers need replacement and whether the underlayment has been compromised.
- Check for corrosion or fatigue: Rust, bent edges, or fatigued panels can signal deeper problems that could worsen with time.
- Prepare for potential repairs: If leaks appear or are suspected, plan for resealing, re-fastening, or panel replacement as recommended by the pro.
Long-term: within 3–6 months
Prolonged vibration without correction raises the odds of more serious damage and higher repair costs.
What happens if you wait:
- Increased wear: Seams and fasteners lose sealing integrity; corrosion can spread.
- Water intrusion risk rises: Even small ongoing leaks can damage insulation and structural wood.
- Possible panel deformation: Continuous movement can cause buckling or cracking.
Recommended steps:
- Obtain a written assessment and cost estimate from a licensed roofer.
- Consider staged repairs: Re-fastening and resealing now, with a replacement plan for distressed panels if needed.
- Review attic ventilation and roof support: Poor attic airflow or structural movement can worsen vibration; address underlying causes as part of the plan.
Extended: 6+ months
Waiting beyond six months significantly raises risk.
Likely outcomes:
- Panel detachment risk in storms: A loose or fatigued panel can rip away in high winds.
- Major repair or replacement: Expect higher costs for extensive fixes, potential full panel replacement, or roof system overhaul.
- Comprehensive inspection advised: A full roof inspection to map out remaining life and prioritize safety.
What to do next:
- Plan a formal roof assessment with quotes from multiple qualified roofers.
- Prioritize safety and warranty considerations: ensure any work complies with panel manufacturer guidelines and local codes.
How Vibrating Metal Roof Panels Vary by Location and Climate
How This Problem Varies by Region & Climate within the United States
The way vibrating metal roof panels act and what causes the movement change by geography. Local weather patterns, wind behavior, temperature swings, and precipitation all shape both the vibration itself and the fixes that work best. Think of it as a puzzle where the pieces depend on where you live.
- Wind exposure and gusts: Coastal and open prairie areas see more wind-driven panel movement, especially on low-slope roofs or buildings with limited eave protection.
- Temperature swings: Regions with hot summers and cold winters create bigger expansion/contraction cycles in metal panels, which can loosen fasteners over time.
- Snow, ice, and rain: Heavy snowfall and ice dam conditions can load and lubricate edges, causing panels to shift or rattle under wind or thaw cycles.
- Humidity and corrosion: humid, salty, or rainy climates accelerate corrosion of fasteners and clips unless corrosion-resistant hardware is chosen.
- Seismic and settling: Areas with seismic activity or ongoing foundation movement add dynamic forces that can amplify vibration if attachment systems aren't rated for movement.
Two quick truths to keep in mind:
- The same panel type can behave very differently in Florida than it does in Minnesota.
- The fixes that stop rattling in a windy desert roof won't be identical to those that stop it on a foggy coast.
Wind, Snow, and Temperature: How It Plays Out by Climate
- Coastal & exposed inland areas: Expect wind-driven vibration to be frequent. Heavier clip systems or closer fastener spacing may be needed.
- Snow-prone regions: Freeze-thaw cycles, drifting snow, and ice buildup can tug on edges and seams. Extra attention to sealants and clearance around penetrations helps.
- Arid, hot regions: Wide daily temperature swings cause more expansion and contraction. Use clips designed for thermal movement and check fastener torque regularly.
- Northern continental zones: Severe cold combined with wind can stiffen panels, then sudden gusts at thaw can produce sharp rattles. Regular inspection after thaw periods is smart.
- Mountain and rainforest zones: Mixed factors—wind, rain, and snow—mean a layered approach: corrosion-resistant hardware, robust sealing, and checks for moss or debris that can amplify vibration.
Regional Variations: Quick Reference by Region
1) Northeast and Great Lakes
- Frequent freezes, snow, and strong storms mean higher potential for edge movement. Prioritize secure attachment, moisture barriers, and corrosion-resistant fasteners.
2) Southeast and Gulf Coast
- High wind and salt air (in coastal pockets) demand corrosion-resistant hardware and protective coatings; batten/clip systems should be rated for uplift.
3) Southwest and Desert Southwest
- Large temperature swings. Use clips that accommodate thermal movement; inspect seals for UV cracking; watch for fastener loosening in sun-exposed areas.
4) Northwest and Pacific Coast
- Persistent moisture and coastal salt can corrode hardware faster. Prioritize sealed joints, drainage, and hardware with superior rust resistance.
5) Mountain West
- Wind-heavy and snow-prone with rapid weather shifts. Combine robust fasteners, climate-appropriate sealants, and annual post-season checks.
Local Codes, Fasteners, and Materials
- Wind uplift requirements: Regions with higher wind loads often mandate specific clip systems and fastener patterns. Use hardware rated for your local uplift rating.
- Material choice: Aluminum vs steel vs copper each has pros and cons in different climates. Aluminum tolerates salt better; steel with proper coatings handles heavy snow exposure.
- Coatings and seals: Zinc, galvanization, or polymer coatings extend life in humid or coastal climates. Use gaskets or sealants compatible with metal roofing to reduce thermal movement noise.
Maintenance & Inspection by Climate
1) Inspect after major storms and seasonal transitions for loose screws, clips, or fasteners.
2) Check for corrosion, edging, and sealant integrity in coastal and humid regions.
3) Monitor for hot-season expansion gaps in desert or sun-exposed roofs; re-tighten fasteners as needed.
4) Clear debris and verify proper drainage around edges and penetrations to minimize water-driven vibration.
5) Schedule a regional check-in with a roofer who understands your climate within the last 12 months.