Ultimate Guide to Historic Roof Restoration
Last updated: Feb 28, 2026
Introduction to Historic Roof Restoration
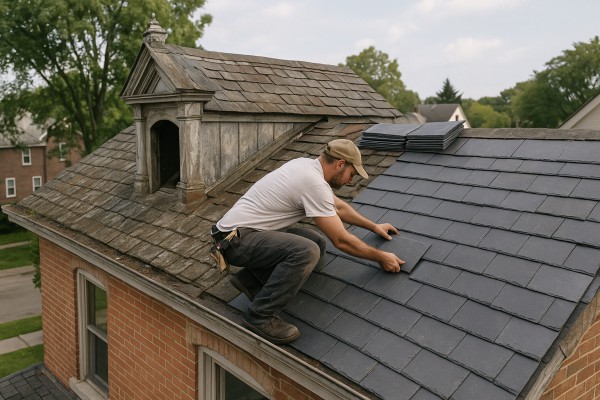
Historic roof restoration blends reverence for the past with practical, modern performance. It aims to extend a roof's life while preserving its character, materials, and architectural details. In this guide, you'll find actionable steps, common decisions, and tips for working with heritage considerations in most communities. You'll also get clear, homeowner-friendly guidance on what to expect during a restoration project and how to plan for long-term performance.
Understanding Historic Roofs
Historic roofs come in a variety of materials—slate, clay tile, wood shingles, metal, and sometimes ornamental shingles or decorative trims. Each material has its own care needs and replacement options, and many are protected by local or national preservation rules. Key realities to keep in mind:
- Material compatibility matters: repairs should respect the original weight, texture, and fastening methods.
- Hidden components can drive decisions: underlayment, flashing, and decking often influence whether you repair, reproduce, or replace.
- Documentation helps: keeping an inventory of materials, colors, and patterns protects the building's character and guides future upkeep.
When Restoration Makes Sense
Restoration is often the best path when you want to preserve the building's historic look and function, and when structural integrity is sound. Consider restoration if:
- The roof structure is sound but surface layers are worn or damaged.
- Original materials can be repaired or replicated without major alteration to the silhouette.
- Local guidelines or landmark rules require keeping historic design elements intact.
- The project budget supports careful conservation rather than full replacement.
- Pros and cons at a glance:
- Pros: preserves character, can be cost-effective for small repairs, maintains historical value.
- Cons: may require specialty materials and skilled labor, sometimes longer timelines.
Core Steps in a Historic Roof Restoration
A thoughtful restoration proceeds in stages, balancing conservation with modern performance. Here's a practical workflow:
1. Assess and document: capture photos, measure, and note material types, patterns, and any defects.
2. Prioritize conservation: decide what to repair, what to reproduce, and what to replace with compatible equivalents.
3. Structural check: inspect decking, rafters, and supports for rot or weakness; plan stabilization if needed.
4. Decide on repair vs replacement: favor repair with compatible materials whenever feasible; plan careful replication for missing pieces.
5. Update weatherproofing: replace flashing and underlayment with materials that honor historical design while meeting current codes.
6. Preserve decorative elements: clean, repair, or recreate ridges, cresting, vents, and trim without compromising authenticity.
7. Improve ventilation and insulation: ensure the attic and roof assemblies breathe properly to extend life.
8. Finishing touches: apply compatible sealants, coatings, or treatments that protect without altering appearance.
Choosing Materials and Preservation Techniques
Material choices should honor the original while ensuring reliability. Practical tips:
- Match original materials when available and feasible; this preserves texture, color, and mass.
- When exact matches are unavailable, use tested substitutes with compatible weight and performance.
- Verify fire resistance, wind uplift ratings, and local code requirements.
- Favor discreet, reversible interventions that don't damage historic fabric.
- Plan for long-term maintenance with appropriate protective coatings or sealants.
Finding a Skilled Historic Roofer
Historic restoration is a specialized niche. Look for:
- Licensed, insured contractors with documented historic projects.
- A portfolio that includes photos and references from similar buildings.
- Knowledge of local preservation guidelines and permitting processes.
- Clear communication about approach, timelines, and material sources.
- Willingness to collaborate with conservation officers or building historians when needed.
Maintenance Tips for Historic Roofs
Ongoing care reduces surprise failures and protects character:
- Schedule inspections twice a year and after major storms.
- Keep gutters clear to prevent water backing up under eaves.
- Avoid high-pressure washing on fragile surfaces; use soft methods for cleaning.
- Watch for moss, rot, and loose or missing decorative elements.
- Document changes over time to help future homeowners maintain authenticity.
Historic Roof Restoration: Techniques for Preserving Heritage Roofs
Comprehensive definition
Historic roof restoration is the careful process of conserving and repairing an existing roof to preserve its original materials, design, and character while restoring weather-tight performance. It focuses on stabilizing and renewing aged components—shingles, tiles, metalwork, decking, flashing—without unnecessarily removing authentic fabric. The goal is to extend the roof's life, maintain architectural integrity, and align with preservation standards and local guidelines. Restoration is distinct from full replacement: it prioritizes conservation of significant material and, when possible, reversible, minimally invasive techniques.
A successful restoration balances authenticity with modern reliability—meeting safety and weatherproofing needs while honoring craftsmanship, patterns, and profiles that define the building's history.
When it's typically needed
- The property has historic designation or notable architectural features worth preserving.
- Original materials show significant wear, deterioration, or loss, but substantial fabric remains.
- Replacement would erase historic character or alter key design details.
- You're pursuing preservation incentives, grants, or tax credits that require conservation of original fabric.
- After severe weather, ineffective prior repairs, or persistent moisture problems that can be addressed without full reroofing.
Core principles of historic roof restoration
- Preserve original fabric as much as possible; replace only what is deteriorated beyond repair.
- Use compatible materials and techniques that match weight, appearance, and aging behavior.
- Favor reversible repairs and documented interventions.
- Maintain proper ventilation, drainage, and structural supports.
- Document every step for future owners and for compliance with standards.
- Respect historic workmanship and detailing (profiles, nails, ridges, flashing).
Common materials and techniques
- Wood shingles and shakes: repair fractured or cupped sections; hand-cut replacement shingles when needed; use compatible nails; treat and reseal to slow weathering; avoid over-cleaning that damages grain.
- Slate: replace broken pieces with matching slate; use copper or corrosion-resistant nails; maintain the underlying deck and proper bedding; blend new pieces to minimize visual contrast.
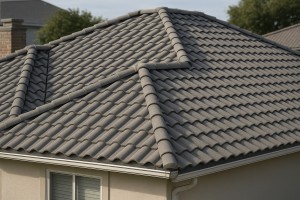
- Clay and concrete tiles: replace only broken pieces with matching profiles and color; reuse salvaged tiles when possible; ensure underlayment and proper ridge and hip tiles for water shedding.
- Metal roofs: preserve patina where appropriate; repair seams with compatible sealants and fasteners; avoid aggressive coatings that hide historic character; re-seal flashing with compatible metals.
- Flashing, gutters, and ornamentation: reproduce historic forms in copper, zinc, or painted metal as appropriate; match detailing on hips, valleys, and cross-gables; ensure proper drainage and slope.
- Underlayment and deck: replace rotted decking with matched thickness; use ventilation-appropriate underlayment; prioritize breathability where feasible to protect historic wood.
- Cleaning and preservation methods: use soft brushes and low-pressure techniques; avoid high-pressure washing or harsh chemicals that can erode historic finishes.
Step-by-step plan for a restoration project
1. Document the roof's condition and historical features; photograph before any work.
2. Research period-appropriate materials and profiles and obtain necessary approvals (if applicable).
3. Develop a detailed plan: scope, materials, budget, and sequencing.
4. Stabilize and remove non-original or severely damaged elements without disturbing intact fabric.
5. Repair or replace damaged original materials with matching, reversible methods; install compatible underlayment and flashing.
6. Reassemble decorative and functional elements, verify drainage, and schedule a maintenance plan.
Maintenance after restoration
- Schedule biannual inspections and post-storm checks.
- Clean gutters and downspouts; trim overhanging branches.
- Remove moss or lichens with gentle methods; avoid aggressive pressure washing.
- Re-tighten or replace aging fasteners with compatible materials.
- Re-seal or maintain protective coatings as recommended for the specific materials.
- Keep a written maintenance log for future owners.
Choosing the right professional
- Experience with historic roofs and knowledge of preservation standards (for example, local guidelines and, if applicable, the Secretary of the Interior's Standards).
- A portfolio showing restoration projects with visible material matching and detailing.
- References from other homeowners or preservation bodies; clear written scope and timeline.
- Ability to source matching materials (salvage options or precise replicas) and to work within budget while preserving authenticity.
When You Need Historic Roof Restoration
Signs this service is needed
Historic roofs demand special care when deterioration starts to show. Look for a cluster of issues rather than a single flaw.
- Age indicators: the roof has surpassed the typical lifespan for its material (historic slate or clay tile often lasts longer, but seasons of neglect can shorten life dramatically).
- Leaks and interior staining: recurring water spots on ceilings or in upper walls, especially after rain or snowmelt.
- Damaged flashing or joins: rusted, cracked, or displaced flashing around chimneys, vents, hips, or dormers.
- Shingle or tile problems: curling, cupping, cracking, missing pieces, or heavy granule loss in gutters or downspouts.
- Sagging or soft decking: soft spots, flexing underfoot, or visible warping in attic floors point to structural concerns.
- Moss, algae, or lichens: persistent growth that traps moisture against the roof surface.
- Decorative elements showing wear: eroded cresting, metal details, finials, or ornamental shingles losing profile or integrity.
- Interior signs tied to exterior age: moldy attic air, warped rafters, or insulation dampness suggesting hidden roof leaks.
- Historic fabric concerns: local preservation guidelines or recommended restoration practices that emphasize authenticity and material compatibility.
Short note: every historic roof carries a unique combination of material, craft, and age. When multiple signs appear, restoration becomes more appropriate than simple patchwork.
Ways you can confirm yourself as a homeowner
You don't have to guess. Use a practical checklist to confirm what you're seeing.
- Confirm roof age and material: check home records, previous inspection reports, or permits. Note the material type (slate, clay tile, wood shingles, metal) and its typical lifespan.
- Survey from ground level: lean on a pair of binoculars to spot curling, missing pieces, or flashing gaps along hips and ridges.
- Inspect the attic: with a flashlight, look for daylight through rafters, dark water stains, damp insulation, or musty odors. Tap the decking gently to feel for soft spots.
- Check gutters and downspouts: look for a heavy load of fallen granules or ceramic dust that indicates wear, and inspect for rust or corrosion on metal pieces.
- Look for historic details: verify if decorative roof features show cracks or detachments that affect authenticity and weather tightness.
- Review documentation: gather old repair invoices, warranty papers, and any preservation guidelines from local authorities or a historic district office.
- Take a photo log: document problem areas over time to track progression and to share with a professional.
Tip: if you live in a historically designated district, some materials and methods are restricted. A quick call to the local historic preservation office can confirm what's allowed before teasing out the restoration plan.
When to get a professional assessment
Certain conditions almost always require a licensed roofer with historic restoration experience. A pro can assess authenticity, structural risk, and material compatibility for a careful restoration plan.
- You notice repeated leaks, wood rot, or structural distress in the roof system.
- The roof is part of a designated historic property, or you plan to comply with preservation guidelines.
- Visible damage spans multiple areas: hips, ridges, chimneys, dormers, or ornate features.
- The material is unique (slate, historic clay tile, custom metal, or terracotta) and requires specialty repair or sourcing.
- You're unsure about the roof's condition or its true age, and you want a documented scope of work and cost estimate.
- You plan to restore rather than merely patch, ensuring ongoing durability while preserving historic character.
Steps to proceed with a pro, so you're ready for a thorough assessment:
1) Gather evidence: photos, measurements, and any prior inspection notes. 2) List preservation goals and any restrictions from local historic authorities. 3) Schedule a site visit with a roofer who specializes in historic restoration. 4) Get a written assessment that outlines recommended materials, methods, and a restoration timeline. 5) Review permitting, compliance, and warranty options before work begins.
What's Included with Historic Roof Restoration
What's typically included
- Thorough site assessment and historical compatibility plan
- A detailed condition report, material IDs, and a preservation-focused approach to match era and style.
- Site protection and safety
- Scaffolding, harnessing, tarps, fall protection, and debris containment to keep people and landscaping safe.
- Stabilization and temporary fixes
- Quick, code-compliant measures to stop leaks and prevent further damage while planning longer repairs.
- Roof decking and structural repairs
- Repair or replacement of rotten or damaged decking, rafters, and framing as needed to support a proper restoration.
- Period-appropriate roofing materials
- Installation of materials that match the historic character (slate, clay tile, wooden shingles, or metal) in profile, color, and finish.
- Underlayment and ventilation
- Weather-resistant underlayment and era-appropriate ventilation strategies to protect the roof assembly and attic space.
- Flashings, valleys, and detailing
- Copper, lead-coated steel, or compatible flashings; replacement or replication of ridge caps, drip edges, and valley treatments.
- Gutters, downspouts, and drainage
- Repair or replacement of historically styled gutters and leaders to ensure proper water flow and historic look.
- Chimney and roof penetrations
- Flashing, crown repair, and masonry work around chimneys and vents to maintain water integrity.
- Decorative and architectural details
- Restoration or replication of dormer trim, bargeboards, cresting, mantles, or other period-correct ornamentation.
- Paints, finishes, and protective coatings
- Historically appropriate sealants and coatings on wood or metal surfaces to protect materials and preserve color and patina.
- Water management basics
- Parapet coping, scuppers, and other drainage features aligned with the era and local requirements.
- Documentation and records
- Updated photos, material identifications, and notes for future maintenance and historic records.
- Cleanup and site restoration
- Debris removal, final cleaning, and protection of landscaping and nearby structures.
- Permitting and coordination
- Help navigating local permits, preservation guidelines, and inspections; coordination with preservation officers if needed.
- Warranties and maintenance guidance
- Clear expectations for workmanship, and a maintenance plan to extend the life of the restoration.
The workflow you can expect (brief, practical steps)
1) Initial survey and documentation
2) Preservation plan development and material sourcing
3) Site protection and temporary stabilization
4) Decking and structural repairs as identified
5) Installation of period-appropriate roof coverings
6) Flashings, gutters, and chimney/penetration work
7) Finishes, detailing, and protective coatings
8) Final inspection, cleanup, and handoff with maintenance guidance
What's not typically included
- Interior restoration or cosmetic work unrelated to the roof
- Attic or ceiling renovations, wall finishes, or interior remodeling are generally out of scope.
- Non-historic modern upgrades unless requested and approved
- Add-ons like modern skylights, satellite dishes, or non-period solar adaptations are not standard unless specifically agreed to.
- Major interior or structural changes beyond roof scope
- Widening rooflines, adding new dormers, or reshaping the building envelope typically require separate planning.
- Exterior renovations beyond the roof envelope
- Siding replacement, exterior painting, or remodeling beyond the roofline are not part of a standard historic roof restoration.
- Hazardous material remediation handled separately
- Asbestos or lead paint abatement, if present, is usually contracted out to licensed specialists and may be billed separately.
- Comprehensive re-engineering of non-roof systems
- Electrical upgrades, plumbing, HVAC work, or insulation improvements beyond what the roof structure necessitates are not included unless explicitly tied to the restoration plan.
- Emergency response outside scheduled scope
- If urgent repairs are needed outside the agreed timeline, those emergency services would be a separate cost and schedule.
Roofing Materials Commonly Used in Historic Roof Restoration

- What it is and why it matters: Natural slate is a hallmark of many historic homes. It's long-lasting, weather resistant, and offers an authentic appearance. Our restoration approach focuses on preserving or replacing like-for-like slate to keep the roof historically accurate.
- How we work with slate:
- 1. Structural check: slate is heavy. We verify the roof framing and decking can support the weight and adjust if needed.
- 2. Matching and sourcing: we seek pieces that match color, thickness, and gauge from reclaimed or carefully selected stock.
- 3. Installation specifics: we use corrosion-resistant nails (often copper or stainless steel) and proper headlap patterns to prevent leaks and preserve the slate look.
- What to expect on the job: damaged slates are carefully removed and replaced one-by-one to maintain the original pattern. We avoid shortcuts that compromise historical accuracy or water sealing.
Cedar Shingle or Shake
- Character and considerations: Wood shingles/shakes give a warm, period-accurate appearance but require more maintenance and regular treatment to resist weather and insects.
- How we apply cedar in restoration:
- 1. Surface prep: we inspect for rot in the roof decking and repair as needed before re-shingling.
- 2. Sourcing: we select cedar shingles or shakes that match the grain size and profile of the original roof.
- 3. Fastening and finish: we use appropriate fasteners and, when allowed by code, fire-retardant treatments to balance safety with historical look.
- Maintenance note: expect periodic cleaning, staining, or sealing to extend life and preserve color.

- Why clay tile is common: clay tiles offer a durable, period-appropriate look and excellent weather resistance when properly installed.
- Restoration specifics:
- 1. Structural fit: clay tiles are heavy and require a solid substrate; we verify support and underlayment compatibility.
- 2. Matching style: we aim for the same tile profile, color, and surface texture as the original, with careful replacement of broken or missing tiles.
- 3. Lippage and sealing: we ensure correct tile orientation and proper flashing around chimneys and valleys to prevent leaks.
- Special considerations: clay tile can crack from hail or impacts; we use matched replacements and a careful coloring approach to maintain a uniform appearance.
- Modern alternative with historical flexibility: concrete tiles can mimic clay or slate while offering different durability and weight characteristics.
- Restoration approach:
- 1. Assess weight load: although lighter than some clay options, concrete tiles still require solid support and proper underlayment.
- 2. Color and texture matching: we choose finishes that resemble historic tones and surface textures.
- 3. Fastening and joints: we pay attention to expansion gaps and flashing to avoid water intrusion.
- Longevity and care: concrete tiles resist weathering well, but color may fade over time; we plan for touch-ups that blend with the aged look.

- Why metal suits historic homes: metals provide longevity and a historically accurate sheen or patina, especially for ridge caps, valleys, and flashings.
- Material specifics:
- Copper: timeless look; patina develops over years. We often use copper flashings and trims to match the roof's original hardware and aesthetic.
- Zinc: naturally self-sealing and develops a protective patina. Great for detailing and gutters when a muted gray tone is desired.
- Steel/Galvanized: durable, cost-effective option that can mimic older appearances when finished to suit the style.
- Restoration steps:
- 1. Inspect for compatibility with existing framing and adjoining materials.
- 2. Use appropriate fasteners to prevent galvanic corrosion and ensure a clean, period-appropriate seam.
- 3. Address roof penetrations (vents, chimneys) with matched flashings to maintain weather sealing.
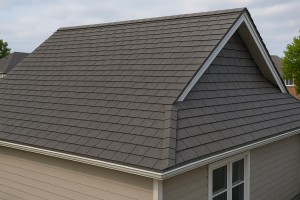
Synthetic Slate and Composite Shingles
- Modern options that honor history: these products imitate natural slate or wood shakes but come with easier handling and sometimes longer warranties.
- How they fit restoration projects:
- 1. Evaluate historical accuracy vs. practicality: if the look is the priority, we can match profiles closely.
- 2. Installation approach: these are lighter and can be faster to install, but must be chosen to withstand local weather and meet code.
- 3. Long-term care: colorfast options reduce maintenance, but we still plan for regular inspections to catch any edge wear or movement.
- A compromise between authentic appearance and modern performance: fiber cement can reproduce wood or slate aesthetics with greater fire resistance and lower maintenance.
- How we handle them:
- 1. Profile and pattern matching to preserve historic rhythm.
- 2. Proper nailing patterns and sealants to prevent leaks.
- 3. Re-coating as needed to maintain the aged look without sacrificing protection.

- When used: in some homes that originally featured later-era roofing, or when matching a mid-20th-century update is necessary for authenticity.
- Restoration approach:
- 1. Select architectural or three-tab shingles that resemble the historical profile.
- 2. Ensure color and granule texture match the surrounding sections for a cohesive appearance.
- 3. Integrate with legacy flashing and decking to maintain proper water control.
Understanding the Cost of Historic Roof Restoration
Typical average costs for Historic Roof Restoration
- On average, restoration work for historic roofs falls in the ballpark of $12–$22 per square foot (psf) for common materials and careful preservation. This accounts for repairs, weatherproofing, flashing, and matching finishes that respect the historic character.
- For premium materials and more intricate detailing (slate, copper, terracotta, or complex patterns), costs commonly run $25–$60+ psf. The exact amount depends on material availability, pattern complexity, and fastener systems.
- If you measure by roof area, a typical 2,000–3,000 sq ft roof could trend from roughly $24,000–$66,000 at mid-range, and higher if you're using high-end materials or extensive structural work. Small repairs on older homes without major material changes will sit toward the lower end of the range.
What drives cost (and how to plan)
- Material choice: Historic-look alternatives (composites or traditional blends) can alter price substantially from standard modern options.
- Condition of substrate: Rot, water damage, or compromised framing adds carpentry time and may require reinforcing Before and after photos: it's expensive but essential to preserve the structure.
- Extent of restoration: Minor repairs and weatherproofing vs. full strip-down, lead or pipe flashing replacement, and re-nailing or re-fastening patterns.
- Accessibility and height: Difficult rooftops, multi-story setups, or limited staging increase labor and safety costs.
- Preservation requirements: If the project must meet local historic preservation guidelines, expect higher design and craftsmanship standards, documentation, and possible specialist subcontractors.
- Permits and inspections: Local permit fees and required inspections add to the overall price, and some areas require specific preservation approvals.
Cost components you'll typically see
- Assessment and planning: initial survey, material sourcing, and plan development.
- Materials and fasteners: period-appropriate shingles, slate, copper, lead flashing, and flashing guards.
- Labor: skilled craftsmen for historic finishes, alignment, and detailing.
- Substrate and structural work: decking, sheathing, rot repair, and framing as needed.
- Scaffolding and safety: setup, maintenance, and teardown.
- Permits, inspections, and documentation: required by local authorities and preservation boards.
Ways to lower costs without sacrificing integrity
- Targeted repairs first: have a careful assessment to fix only what's necessary before larger replacement work.
- Reuse and match where feasible: salvageable decorative trim, flashing, and non-structural elements can cut material costs.
- Choose compatible, cost-effective materials: select historically appropriate options that balance look and price.
- Consolidate tasks: align roof work with adjacent exterior projects to reduce mobilization and scaffolding time.
- Get multiple bids from qualified specialists: prioritize contractors who have historic restoration experience and references.
- Schedule smartly: plan around dry seasons to reduce weather delays and keep crews productive.
Actions that may increase costs
- Hidden damage: rot behind fascia, framing weaknesses, or mold that requires remediation raises price quickly.
- Complex materials: slate, copper, or handcrafted clay tiles demand specialized trades and longer lead times.
- Code and preservation hurdles: additional testing, approvals, or non-standard fasteners can push costs up.
- Access issues: steep pitches, limited driveway access, or urban settings requiring extra safety measures.
- Weather delays: rain, snow, or extreme heat can extend the project timeline and inflate labor costs.
Quick steps to estimate your project
1) Determine roof area and identify the primary material you want to preserve or replace.
2) List expected scope: repairs, re-flashing, replacement, or full restoration.
3) Assess substrate condition and note any rot, water intrusion, or structural concerns.
4) Check local preservation guidelines and permit requirements for your area.
5) Gather at least 3 bids from contractors with historic restoration experience and compare line-item details.
How the Historic Roof Restoration Process Works
1. Initial Assessment
- On-site inspection of the roof, attic, and exterior structure to gauge condition and potential challenges.
- Identify age, original materials, and signs of water damage, rot, rust, or insect activity.
- Note historic features worth preserving: decorative cornices, metal flashing, patterned shingles, dormers, and cresting.
- Gather measurements, take baseline photos, and flag safety concerns or access limitations.
- Discuss homeowner goals and any known history of leaks or prior repairs.
2. Documentation and Historic Preservation Plan
- Step 1: Photograph and sketch all visible features; label areas that must be preserved.
- Step 2: Create a condition map detailing rotten boards, loose flashing, failed sealants, and moisture intrusion.
- Step 3: Draft a preservation-focused plan that prioritizes original materials and historic aesthetics while ensuring long-term reliability.
3. Permits and Compliance
- Verify local permits, especially in historic districts or with preservation commissions.
- Align the plan with guidelines for color, materials, and attachment methods.
- Build a realistic schedule and budget; identify potential constraints early to avoid surprises.
4. Cleaning and Preparation
- Remove debris, vegetation, and any hazardous materials carefully to avoid damaging fragile features.
- Gently clean surfaces to reveal true condition without abrading historic finishes.
- Treat for mold, mildew, or insect activity if present; decontaminate gutters and flashings.
- Protect surrounding landscaping and siding during the restoration work.
5. Repair vs. Restoration Decision
- Evaluate whether individual components can be repaired rather than replaced.
- Use compatible, historically appropriate materials for repairs and patchwork.
- When replacement is necessary, match appearance, profile, and performance as closely as possible to the original.
6. Materials and Sourcing
- Source period-appropriate shingles, metal flashings, and fasteners where feasible.
- Ensure underlayment, ventilation, and fasteners are compatible with historic assemblies.
- Check warranty implications and long-term performance; document material provenance and supplier standards.
7. Weatherproofing and System Restoration
- Replace or upgrade underlayment to create a continuous moisture barrier.
- Re-seat or recreate flashing at hips, valleys, chimneys, and roof-to-wall transitions.
- Restore ridge caps, cresting, and vent details; address ice-dam protection and drainage considerations where relevant.
8. Surface Treatment and Aesthetics
- Apply coatings or finishes that are breathable and compatible with historic materials.
- Restore color and patina to match the original appearance while keeping the surface protected.
- Use sealants and coatings judiciously to avoid trapping moisture or altering material behavior.
9. Final Inspection and Maintenance Plan
- Conduct a thorough walkthrough with the homeowner to verify satisfaction and note any minor touch-ups.
- Document final conditions with photos and notes; compare before/after results.
- Provide a maintenance plan: seasonal inspections, cleaning guidance, and recommended service intervals to extend the life of the restoration.
Residential Versus Commercial Considerations in Historic Roof Restoration
Residential considerations
- Occupancy and disruption: Home life matters. Plan around family routines, kids, and pets; limit daytime noise near sleeping areas; set clear communication about daily schedules.
- Historic status and approvals: If the house sits in a historic district or on a local landmark list, confirm required permits, design reviews, and any color or material restrictions before starting.
- Materials and aesthetics: Aim to preserve the original character. Choose profiles, textures, and colors that align with the era, or use approved substitutes that maintain visual harmony.
- Accessibility and safety: Ensure safe access for crews with ladders, scaffolding, and fall protection; protect landscaping, walkways, and outdoor furniture from debris.
- Weather windows and moisture risk: Schedule in milder weather; use tarps and temporary containment to guard interiors from dust and moisture.
- Maintenance expectations: Historic roofs may require ongoing care (re-sealing, gutter upkeep, moss removal) to keep the restoration looking authentic and performing well.
- Residential vs Commercial Considerations of Historic Roof Restoration: This phrase highlights the narrower footprint, tighter schedules, and family-friendly disruption profile of home projects versus larger-scale work.
Commercial considerations
- Scale and site management: Larger crews and equipment demand organized staging, clear access routes, and tighter safety controls; expect longer coordination timelines.
- Tenant coordination and access: For multi-tenant buildings, plan around business hours, elevator use, signage, and nuisance controls to minimize impact on occupants.
- Preservation standards and reviews: Expect interactions with preservation commissions or state historic preservation offices; document decisions and maintain a preservation-minded approach throughout.
- Code compliance and safety: Fire ratings, wind uplift design, and updated underlayment requirements are common; ensure fall protection, PPE, and OSHA-compliant practices for all workers.
- Material choices and compatibility: Select materials that balance authenticity with modern performance; confirm weight limits, drainage compatibility, and warranty terms for commercial applications.
- Financing and budgeting: Larger projects bring bigger budgets and longer procurement cycles; build contingencies for lead times, inspections, and potential change orders.
- Scheduling and phasing: Break projects into manageable phases to minimize disruption to tenants or operations; consider temporary roofing solutions or off-hours work windows.
- Quick reference: Residential vs Commercial Considerations of Historic Roof Restoration
- Residential projects prioritize family comfort, intimate site control, and era-appropriate aesthetics; permits are typically simpler, timelines shorter, and disruption manageable within a home's routine.
- Commercial projects focus on scale, tenant coordination, regulatory reviews, and long-term performance; expect more complex logistics, longer lead times, and tighter integration with building systems.
How Historic Roof Restoration Varies by Location
Regional climate and weather patterns
Your roof must withstand the local climate. The same historic roof that performs well in a dry, sunny climate can struggle in freeze–thaw cycles, high humidity, or hurricane winds. Expect material choices and maintenance plans to shift with the weather patterns you face year after year.
- Freeze-thaw areas (Northeast, Midwest): expect more frequent mortar or limework maintenance, periodic repointing, and detailing that resists cracking from cold snaps.
- Coastal humid zones (Atlantic, Gulf): salt spray and damp conditions accelerate corrosion, rot, and moss growth on wood or metal surfaces; ventilation and drainage become priorities.
- Arid, hot regions (Southwest): sun exposure and heat demand durable finishes, heat-reflective coatings, and careful ventilation to reduce heat transfer into attic spaces.
- Pacific Northwest: abundant rain and moss-friendly environments call for moisture control, rot-resistant detailing, and anti-moss strategies.
Material availability and regional styles
Historic roofs reflect local materials and historic styles. Availability and compatibility drive your restoration kit as much as aesthetics.
- Northeast/Appalachia: slate, standing-seam metal, and wood shingles are common historic options; sourcing may favor reclaimed or matched slates.
- Southwest/California: clay or terracotta tiles and clay barrel tiles are prevalent in Spanish and Mission-inspired designs.
- Pacific Northwest: cedar shakes and shingles are traditional, with frequent need for rot inhibitors and proper drainage.
- Midwest: mixed options including asphalt historic overlays and metal accents, with emphasis on durable underlayment for seasonal moisture swings.
Local codes, permits, and preservation guidelines
Local standards shape what you can and cannot do with a historic roof. Preservation goals, zoning rules, and permit timelines vary by city and county.
- Check with the local historic commission or planning department early.
- Some districts require material approvals or mock-ups before full installation.
- Expect different permit fees, inspection schedules, and possible Section 106 reviews for federally funded projects.
Structural considerations by region
Roof structure must handle region-specific loads and hazards. This affects framing, fasteners, and installation details.
- Snow-heavy regions (Northeast, Midwest): thicker rafters, higher snow-load design, and better insulation/ventilation to reduce ice dams.
- High-wind and hurricane zones (Southeast, Gulf): reinforced fasteners, impact-resistant underlayment, and wind-rated assemblies.
- Seismic zones (West Coast, parts of Alaska): flexible connections, retrofit of supports, and adherence to strict nailing patterns to prevent failure during quakes.
- Wildfire-prone areas (California, parts of the West): ember-resistant ventilation and fire-rated underlayment where applicable.
Insurance and warranty expectations by region
Regional risk profiles influence coverage and warranty choices.
- Wind, hail, and wildfire-prone areas may require higher wind resistance ratings and durable coatings.
- Coastal regions may demand corrosion-resistant metals and longer-term warranties for salt exposure.
- Dry interior regions benefit from UV-resistant finishes and moisture-control warranties.
Practical process steps by location
Follow a region-aware workflow to minimize surprises.
1) Gather local guidelines: historic approvals, HOA rules, and permit timelines.
2) Assess climate-driven needs: moisture control, ventilation, insulation, and seasonal access.
3) Select region-appropriate materials: compatible with the historic look and local availability.
4) Plan for local constraints: weather windows, lead times for specialty materials, and seismic or wind considerations.
5) Align with local contractors: choose crews with proven experience in your area and access to regional suppliers.
How this service varies in different regions in the United States
- Northeast: emphasis on slate and metal with robust weatherproof detailing; higher likelihood of lead or zinc flashing compatibility; long lead times for authentic slates.
- Southeast: clay tile and terracotta commonly chosen for historic fidelity; reinforced eave details to resist hurricane winds; moisture management is critical.
- Midwest: durable wood shakes or metal as common historic options; focus on moisture control, ice dam prevention, and snow-load compliance.
- Southwest: clay tile and stucco-adjacent regions; solar considerations and heat management, with bright, durable finishes to combat sun exposure.
- West Coast: cedar shakes in the Pacific Northwest, clay tiles in warmer inland areas; earthquake-retrofitting considerations and ember-resistant details in wildfire zones.