Ultimate Guide to Hail Damage Roof Repair
Last updated: Feb 28, 2026

Introduction to Hail Damage Roof Repair
Hail storms can hide damage you can't see from the ground, yet it's usually the small, persistent issues that become big problems. This page explains how hail can affect different roof types, what to look for after a storm, and practical steps to get your roof back to solid protection—without overwhelming you with jargon.
What hail damage is and how it happens
Hail can strike with force and leave a range of issues, from cosmetic dents to deeper compromises in the roof deck. The impact can loosen granules, crack shingles, bend flashing, and push water into vulnerable spots. Even if you don't see a conspicuous hole, hidden damage can lead to leaks and accelerated aging if left untreated.
Signs of hail damage
- Dented or cracked shingles or metal panels
- Granule loss on shingles (you may notice grit in gutters or downspouts)
- Bruised spots that feel soft or compressible
- Damaged or displaced flashing around chimneys, vents, or roof edges
- Bent gutters or dented downspouts
- Attic leaks or damp insulation after a rain
1. Prioritize safety: avoid walking on a damaged roof if you're unsure about its stability. Have a professional assess dangerous areas.
2. Do a ground-level check: look for obvious damage from the curb or with binoculars, focusing on the high and exposed areas.
3. Photograph from multiple angles: close-ups of shingles, flashing, gutters, and the attic access area if you can safely reach it.
4. Create a simple damage log: note when the storm occurred, where you saw issues, and any signs of leaks since the event.
Professional assessment and repair options
- A licensed roofer conducts a comprehensive inspection for missing, cracked, or curled shingles, compromised underlayment, and flashing integrity.
- Asphalt shingles: damaged shingles are typically replaced; underlayment and matching material are assessed for repair feasibility.
- Metal roofs: dents may be repaired in place on some systems, or sections may need replacement to restore full protection.
- Tile and slate: cracked or broken pieces are replaced; securing surrounding tiles is important to prevent future leaks.
- Vent and flashing work: seals around chimneys, vents, and roof penetrations often need resealing or flashing replacement to keep water out.
Insurance basics
- Document promptly: keep photos, notes, and a copy of your storm report.
- Understand coverage: hail damage is commonly covered if it leads to leaks or structural issues; check your deductible and any depreciation considerations.
- File promptly and follow up: insurers may require a written estimate, photos, and a roofers' assessment.
- Mitigation matters: temporary protections (tarps or boards) may be requested to prevent further damage.
Choosing a contractor
- Local licensing and insurance: verify current credentials and workers' comp coverage.
- Clear, written estimates: compare scope, materials, warranties, and timeline.
- References and past projects: ask about hail-related repairs and long-term performance.
- Warranty coverage: ask what is covered, for how long, and what could void the warranty.
- Communication: choose someone who explains findings plainly and keeps you updated.
Maintenance and prevention after hail repair
- Schedule a post-repair inspection to confirm everything is sealed and secure.
- Clean gutters and downspouts to prevent debris buildup that hides damage.
- Trim nearby branches to reduce future impact risk and debris.
- Consider impact-resistant upgrades for high-wuild areas or severe hail seasons.
Hail-Damaged Roof Repair: Assessing Damage and Restoring Your Roof
Comprehensive definition
Hail-damaged roof repair is the targeted process of identifying, evaluating, and restoring roof components that have been harmed by hail stones. It covers damaged shingles or metal panels, compromised underlayment, bent flashing and vent boots, dented gutters, and potential water intrusion into the attic or ceilings. The goal is to stop leaks, preserve the roof's protective layer, and restore curb appeal and long-term performance. Repairs range from small shingle replacements and flashing fixes to full replacement when damage is widespread. Insurance considerations and proper documentation are often part of the process.
When it's typically needed
- After a hailstorm or series of storms with large hail (often 1 inch or larger, but smaller hail can cause issues on older roofs).
- When you notice leaks, interior staining, or sudden increases in attic moisture following a storm.
- If the roof is older or has already shown signs of wear, making it more susceptible to hail damage.
- In neighborhoods where hail traveled with wind, causing focused impact patterns on ridges, valleys, and edges.
- When you see visible damage on exterior components: shingles with bruising, cracks, or granule loss; dented metal panels; bent vent caps or skylights.
Signs to look for from the ground
- Shingle bruising, cracking, or curling in a pattern that matches hail impact.
- Bald spots or accelerated granule loss, especially along edges and valleys.
- Dented gutters, downspouts, fascia, or air vents.
- Cracked or dented flashing around chimneys, skylights, and vent pipes.
- Interior signs: water stains, damp insulation, or musty odors in the attic.
Quick homeowner assessment steps
1. Prioritize safety; avoid walking on a damaged roof during or after rain.
2. Do a ground-level visual check with binoculars to spot obvious dents, cracks, or granule loss.
3. Inspect the attic for evidence of leaks, sunken insulation, or dark streaks.
4. Photograph all visible damage from multiple angles for your records.
5. Schedule a professional inspection promptly to prevent further water damage.
How a pro evaluates the damage
- A roof inspector will go up for a hands-on assessment of shingles, underlayment, flashing, and penetrations.
- They check for hidden damage: soft spots, damper underlayment, and moisture behind flashing.
- They'll determine repair versus replacement based on damage extent, roof age, and local codes.
- Expect a detailed report with photos, an estimate, and a scope of work for insurance purposes.
Repair options and typical timelines
- Asphalt shingles: replace damaged shingles, reseal or replace flashing, and address any granule loss.
- Metal roofs: dent repair on panels or panel replacement if structural integrity is compromised.
- Underlayment and flashing: may require partial replacement to restore a watertight seal.
- Temporary measures: tarping to slow leaks if rain is imminent, until permanent repairs are completed.
- Timeline varies by extent: minor patchwork can be finished in a day or two; full replacement may take several days and coordinate with weather.
Insurance and documentation
- Many policies cover hail damage, but coverage depends on the terms and roof age.
- A professional inspection report, photos, and a repair scope help support a claim.
- Keep a file of all estimates, communications, and any roofing materials used.
Repair versus replacement considerations
- Replacing a damaged section is common when the remaining shingles or panels are near the end of their life or damage is widespread.
- If most of the roof is aging or has sustained structural damage to underlayment, decking, or attic components, replacement may be the prudent long-term choice.
- Local climate, roof pitch, and accessibility can influence cost and feasibility.
Post-repair maintenance and prevention
- Schedule regular inspections after major storms and at least annually.
- Keep gutters clear to prevent water backup and fascia wear.
- Trim overhanging branches that could cause additional impact during storms.
- Consider impact-resistant materials for new installations if you're due for a replacement.
When Hail-Damage Roof Repair Is Needed
Signs this service is needed
Hail damage can be subtle or obvious, but timely repair protects your home. Look for:
- Dented, cracked, or missing shingles in hail-affected areas
- Shingles that are bruised, soft, or cupping/curling
- Visible granule loss in gutters, downspouts, or on the driveway
- Soft spots or patches on the roof deck (you may notice this as damp insulation in the attic)
- Interior leaks: water stains or damp spots on ceilings or attic spaces after a storm
- Damaged flashing around chimneys, vents, skylights, or other roof penetrations
- Dents or dents on metal parts like vent collars, gutters, and metal fascia
- Streaks or dark patches on the roof that look water-absorbed rather than dry
- Recent hail event with sudden changes in roof appearance
Ways you can confirm yourself as a homeowner
A careful, safe check from ground level and inside your home can reveal a lot. Do these steps:
- Ground-level view (from a safe distance):
- Use binoculars to scan the roof for dents, bruises, or curled shingles.
- Check for obvious granule loss in areas hit by hail.
- Inspect flashing around vents, chimneys, and skylights for dents or cracks.
- Attic and ceiling check:
- Look for new water stains, staining along rafters, or damp insulation after rain.
- Note any musty smells that could signal hidden leaks.
- Gutter and downspout review:
- See if gutters rubble with extra granules, and look for dents in metal sections.
- See if downspouts show concentrated granules or staining.
- Safety-first notes:
- Do not climb on a wet or steep roof.
- If you're unsure about your own safety, skip climbing and proceed with safer checks or call a pro.
- Documentation:
- Take clear photos of any damage from multiple angles.
- Record the date and the hail size if you know it (storm reports help).
- Keep a simple damage log to share with a contractor or insurer.
When to get a professional assessment
Professional eyes catch issues you might miss and help with insurance. Consider a pro when any of these apply:
1) You notice any signs of damage or leaks after a hail event.
2) Your roof is older (roughly 15–20 years or more) or has known prior damage—hail can worsen existing vulnerabilities.
3) You're unsure about safety or how to inspect properly; a quick, safe professional check is worth it.
4) The storm was large enough to cause widespread damage in your neighborhood, even if your roof looks fine from the ground.
5) You're pursuing an insurance claim—the most credible claim files come with a professional damage assessment and written scope.
6) You want peace of mind about flashing, vents, and attic components that may be compromised even if shingles look okay.
What to expect from the assessment:
- A thorough roof inspection (surface, flashing, vents, chimney, skylights, and edges)
- An attic check for leaks, insulation damage, and ventilation issues
- Photo documentation of all damaged areas and a written damage report
- A clear repair or replacement recommendation with scope and rough costs
- Guidance on coordinating with your insurer and filing a claim
How to prepare for the professional visit:
- Have your storm date and any prior roof work documented
- Note visible leaks or attic moisture beforehand
- Provide access to the roof and attic as needed, and ensure safety considerations are discussed
- Prepare a list of questions about repair options, warranty, and long-term roof health
What's Included with Hail-Damage Roof Repair
What is typically included
When hail damage is confirmed, a repair package typically covers the following elements. The exact scope depends on damage extent and insurance coverage, but these are the common components you can expect.
- Thorough hail-damage inspection and documentation
A written assessment with photos highlighting impacted shingles, flashing, underlayment, and decking so you can file or discuss with your insurer.
Assistance coordinating with your adjuster, including a clear scope of repairs, repair estimates, and a record of observed damage to support your claim.
- Temporary protection against leaks
Tarping or other weatherproofing measures to minimize water intrusion while work is planned or weather is unsettled.
- Shingle repair and replacement
Replacing or re-sealing damaged shingles, re-nailing loose tabs, and restoring the roof surface where feasible. In cases of severe damage, individual shingles may be replaced to restore surface integrity.
- Underlayment inspection and repair
Inspecting and replacing damaged layers beneath the shingles to maintain a watertight barrier.
- Flashing repair or replacement
Sealant, re-fastening, or replacing flashing around chimneys, vents, valleys, and skylights to prevent leaks at seams and joints.
Assessing and repairing soft or water-damaged decking as needed to maintain structural support and roof integrity.
- Vents, boot and attic components
Repair or replacement of vent boots, pipe flashings, soffit and attic access components affected by hail.
- Gutters and downspouts (where needed)
Inspection and minor repairs to drainage paths to ensure water flows away from the roof edge and into proper drainage.
- Debris removal and cleanup
Complete site cleanup, disposal of damaged materials, and restoration of a tidy work area.
- Final inspection and warranty information
A closing check to confirm repairs are complete and a written warranty or workmanship guarantee for the repair components.
- Maintenance guidance and documentation
Practical tips for upkeep after repairs and a clear record of work performed for future reference or claims.
- Permit coordination (as needed)
Help with obtaining any required permits and ensuring work complies with local codes and HOA rules; note that permit fees and code upgrade costs are typically billed separately if applicable.
What is not typically included
If damage is widespread or structural elements are compromised beyond repair, a full replacement may be required, which would be outside standard repair scope.
- Structural repairs beyond the roofing system
Framing or structural repairs to trusses/decks are not included unless they're directly caused by hail damage and specified in the repair plan.
- Interior damage and mold remediation
Water intrusion leading to ceilings, drywall, insulation, or mold issues usually requires separate assessment and remediation services.
- Extensive cosmetic work unrelated to functional damage
Replacing shingles for color matching, texture differences, or cosmetic upgrades that don't affect performance is typically not included.
- Exterior siding, siding repair, or window/door work
Exterior finishes beyond the roof line are generally outside the roof repair scope.
- Landscaping and exterior debris beyond roof area
Tree removal, yard restoration, or large-scale landscape cleanup is not part of the roof repair package.
- New roof coatings or aftermarket upgrades
Treatments or coatings intended to extend life beyond the repair scope are generally separate services.
- Permit fees and potential code upgrade costs
While permit coordination is often provided, the actual permit fees and any required code upgrades are normally billed separately.
Roofing Materials Commonly Used in Hail-Damage Roof Repair

- Hail damage signs: bruising on the shingle surface, granule loss, and sometimes exposed fiberglass mat. Depending on hail size and frequency, you may see dark spots or missing granules in gutters.
- How the service relates: Most hail repairs with asphalt shingles involve replacing damaged shingles and resealing flashing if needed. If damage is widespread, a full or partial reroof may be advised to restore weatherproofing and warranty coverage.
- Material specifics: 3-tab shingles are cheaper and often show damage more visibly; architectural (laminate) shingles tend to hide minor bruising better but still need careful inspection. Matching profile, color, and warranty is important for a seamless look and performance.
- Key considerations: Ensure the underlying underlayment and decking aren't compromised; hail can loosen nails or lift tabs, inviting leaks. Flashing and ridge lines deserve close scrutiny.
- Steps you'll see:
1) Exterior and attic inspection for hidden water intrusion.
2) Remove and replace damaged shingles with matching ones.
3) Re-seal tabs, reseat flashing, and tidy the roof line.
4) Final inspection and debris cleanup.

- Hail damage signs: dents, creases, and occasionally punctures at fastener points or seams. Dents can mar appearance and, in severe cases, affect sealant performance.
- How the service relates: If dents compromise waterproofing or panel integrity, the repair may mean panel replacement or section replacement rather than patching. Seals and fasteners get re-sealed.
- Material specifics: Common metals include steel, aluminum, and copper. Coatings can be scratched or dented; some coatings impact color matching after repair. Panel and seam replacement is often preferred to preserve warranty.
- Key considerations: Look for damaged valley intersections, damaged sealant around vents, and compromised flashing. Color-matched fasteners and sealants help restore both function and curb appeal.
- Steps you'll see:
1) Inspect for dented panels and potential leaks.
2) Replace damaged panels or sections as needed.
3) Re-fastened and reseal seams, closures, and flashings.
4) Leak test and final clean-up.

- Hail damage signs: cracked or broken tiles are common; impact can also loosen surrounding tiles or damage the underlayment.
- How the service relates: Damaged tiles get replaced with matching pieces; the underlayment and deck integrity are checked and repaired if needed. In some cases, re-bedding and resealing are required to maintain proper drainage.
- Material specifics: Clay tiles are lighter and more brittle than concrete tiles; weight and wind resistance matter for roof structure. Matching color and texture is important for a uniform look.
- Key considerations: Structural support matters—heavy tiles require adequate attic clearance and framing. Improper reseating can lead to leaks along the roof plane.
- Steps you'll see:
1) Identify cracked/broken tiles and assess underlayment.
2) Replace with matching tiles using proper bedding and fasteners.
3) Re-seal and inspect surrounding tiles and flashing.
4) Confirm water shedding and finish with a clean-up.

- Hail damage signs: chips, cracks, or fractures in slate panels; damage can be subtle but serious if it affects seals.
- How the service relates: Slate repair typically leans toward precise replacement with matching slate. It's a specialized job to preserve the roof's look and longevity.
- Material specifics: Slate is durable but brittle; color and thickness must be matched for a seamless repair. Skilled craftsmen with slate experience are often required.
- Key considerations: Repairing vs. replacing may depend on the extent of cracking and the availability of matching slate.
- Steps you'll see:
1) Locate cracked or chipped slate.
2) Remove damaged pieces and install matching replacement slate.
3) Re-secure and seal joints; inspect adjacent slates.
4) Final check for leaks and edge detailing.

- Hail damage signs: bruising or cracking similar to asphalt, but with different fracture patterns thanks to the synthetic core.
- How the service relates: Often easier to replace in sections with mates designed for quick color and texture match. Repairs can be less invasive and restore a uniform appearance.
- Material specifics: Engineered to resemble traditional shingles while offering improved impact resistance and color stability; warranties vary by product.
- Key considerations: Verify compatibility with existing roofing system and flashing details.
- Steps you'll see:
1) Identify damaged sections.
2) Replace with matching synthetic shingles.
3) Re-seat and seal joints and flashings.
4) Inspect overall roof performance.
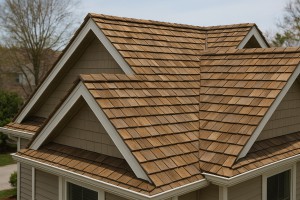
- Hail damage signs: splits, cracks, and splits in individual shakes; surface irregularities may lead to leaks if not addressed.
- How the service relates: Damaged shakes are typically replaced in sections; pruning or resealing can be part of the fix to maintain moisture resistance.
- Material specifics: Cedar requires regular sealing and can weather unevenly; shakes are prone to rot if water infiltration occurs.
- Key considerations: Wind and hail patterns influence damage, so a thorough inspection of surrounding shakes is essential.
- Steps you'll see:
1) Locate damaged shakes and inspect for rot.
2) Replace with matching shakes and reseal.
3) Treat exposed wood as needed and reseal for longevity.
4) Final health check of the entire shake-dominated area.
EPDM/TPO (Flat Roof Membranes)
- Hail damage signs: punctures, tears, or seam separations on flat sections.
- How the service relates: Repairs focus on patching punctures or replacing damaged membrane sections; integrity of seams and flashing is crucial.
- Material specifics: Rubber membranes are tough but repairable with patches or full membrane sections; adhesives and seam tapes vary by product.
- Key considerations: Punctures can lead to slow leaks; ensure proper patch sizing and edge sealing.
- Steps you'll see:
1) Find punctures and compromised seams.
2) Apply patches or replace the damaged membrane segment.
3) Re-seal edges and flashings.
4) Test for leaks and clean up.
Underlayment & Flashing (Protective Layers)
- Hail damage signs: damaged underlayment shows up as water intrusion behind shingles or tiles; flashing around chimneys and vents can be torn or displaced.
- How the service relates: Repair often requires replacing underlayment and re-flashing to restore a watertight barrier.
- Material specifics: Ice and water shield at critical points; synthetic underlayment options; metal or lead-free flashing with corrosion resistance.
- Key considerations: Underlayment damage can be subtle; addressing flashing ensures long-term protection at penetrations.
- Steps you'll see:
1) Remove damaged underlayment where necessary.
2) Install new underlayment and re-flash penetrations.
3) Verify sealants and joints are intact.
4) Final inspection for moisture intrusion.
Estimating the Cost of Hail-Damage Roof Repair
Typical average costs for Hail Damage Roof Repair
- Minor repairs (small patch jobs, a few damaged shingles): about $200–$600
- Moderate repairs (several shingles, flashing or vent work): about $600–$2,000
- Major repairs (extensive shingle replacement, multiple penetrations, noticeable water intrusion): about $2,000–$5,000
- Full roof replacement due to hail damage: asphalt shingle roofs typically $8,000–$15,000; higher for premium materials (wood, metal, tile) or very large roofs
Note: These are national averages. Local material costs, labor rates, roof size, and the extent of damage can shift the price significantly. Insurance involvement can also change what you ultimately pay out of pocket.
What drives costs up or down
- Roof size and pitch: steeper roofs and larger homes require more labor and safety measures.
- Material type: premium shingles, metal, or specialty materials cost more to replace.
- Extent of damage: localized damage may be repaired; widespread hail damage can require partial or full replacement.
- Underlayment and decking: hidden moisture, rot, or warping adds labor and material costs.
- Ventilation, flashing, and penetrations: damaged vents or flashing increases repair scope.
- Access and safety: tight jobs, difficult access, or need for temporary tarping raises costs.
- Timeline and demand: post-storm surge pricing and contractor availability can push prices up.
- Insurance coordination: if you file a claim, the claim process and potential contractor coordination can influence the final bill.
Ways to potentially reduce the cost
- Get a professional damage assessment early to distinguish minor fixes from larger issues.
- Use the same material type as your current roof when possible to keep costs down.
- Consider patching rather than full replacement if damage is isolated and the rest of the roof is healthy.
- Obtain multiple written estimates (at least 3) to compare scope and pricing.
- Schedule work in off-peak times when crews are more available and rates may be steadier.
- Work with a contractor who is experienced with insurance claims to minimize unnecessary scope changes.
- Address water intrusion promptly with temporary tarps to prevent additional damage and costs.
Ways the price can rise
- Hidden damage: rot in decking or structural components discovered after removal begins.
- Very steep or complex roof geometry requiring extra safety measures and time.
- Necessity of temporary housing or debris containment due to ongoing storms or high winds.
- Upgrading materials mid-project (different shingles, underlayment, or ventilation) after discovery of issues.
- Permits, inspections, and code-related upgrades triggered during repair.
Steps in an estimate (what to expect)
1. Initial on-site inspection to identify visible and hidden hail damage.
2. Detailed assessment of shingles, flashing, underlayment, and decking condition.
3. Determination of repair scope vs. replacement, with an itemized quote.
4. Material selections and waste disposal considerations documented.
5. Coordination with an insurance claim, if pursued, and a transparent scope of work.
6. Final review of timeline, warranties, and payment terms.
How the Hail Damage Roof Repair Process Works
Step 1: Schedule a Free Inspection
- A calm, no-pressure start. Call or message us to set up a time that fits your schedule. We aim to be punctual and professional from the first contact.
- What to have ready: your address, photos of hail-damaged areas (roof, gutters, siding), and any recent insurance claim numbers if you've already started a claim.
- What happens during the visit: an on-site, non-destructive review from ground level and, when safe, a careful roof walk to spot visible damage. We'll answer questions and explain what we'll look for.
- Duration: about 30–60 minutes depending on your home and accessibility.
Step 2: On-Site Roof Inspection and Documentation
- Our roofer conducts a thorough inspection from multiple angles to avoid guessing. We look for: hail impact marks, bruised or cracked shingles, lifted or missing granules, and any compromised flashing.
- Exterior components: we check vent boots, valleys, chimneys, skylights, gutters, and downspouts for dents or damage that can affect drainage and water flow.
- Interior indicators: attic inspections for signs of moisture, staining, or condensation that might signal hidden damage.
- Documentation: every finding is photographed and cataloged for your records and for the insurance claim if applicable.
Step 3: Damage Assessment & Report
- We compile a detailed damage assessment based on the inspection. You'll receive a clear report with how severe the damage is and what repairs are required.
- Components covered in the assessment: roof surface, flashing, penetrations (vents, pipes), underlayment, decking if needed, and any drainage-related issues.
- Estimates: a transparent cost range for the recommended repairs, plus optional upgrades or replacements if you want them.
- Timeline impact: estimated duration of the repair project and any steps that could affect your daily routines.
Step 4: Insurance Coordination
- If you're filing or continuing a claim, we'll guide you through the process. We provide the documentation your adjuster will want, including photos, measurements, and a clear scope of work.
- What to expect from your adjuster: verification of hail scope, assessment of roof components, and potential depreciation considerations.
- Our role: we can attend the adjuster meeting with you if you'd like, and we help ensure the scope matches the actual repair needs to avoid under- or over-claiming.
- Turnaround: once the claim is filed and an adjuster has reviewed, we align the approved scope with the repair plan and move forward.
Step 5: Repair Plan & Materials
- We present a clear, itemized repair plan. You'll see what's required, why it's needed, and how long it will take.
- Key components: shingle replacement with color-matched options, any necessary deck repairs, flashing overhaul, vent boot replacement, and secure re-sealing.
- Protective layers: ice and water shield in vulnerable valleys and eaves, new underlayment if needed, and proper ventilation improvements where applicable.
- Materials: high-quality shingles and flashing that match your home and local code requirements; options available for durability and budget.
- Approval: once you approve, we lock in material orders, color selections, and a start date.
Step 6: Scheduling, Safety, and Permits
- We schedule the project with your calendar in mind and plan around weather windows to minimize disruption.
- Permits: we handle necessary permits and inspections, keeping you informed of requirements and timelines.
- Safety: job-site safety is non-negotiable. We set up tarps, containment, and secure ladders. Our crew uses fall protection and tools designed for roof work.
- Site cleanliness: daily disposal of debris and a thorough finish-clean to leave your property neat.
Step 7: Final Walk-Through & Warranty
- Upon completion, we walk you through all repaired areas to confirm everything looks and functions as intended.
- Punch list: we address any minor touch-ups or adjustments you note during the final review.
- Warranties: you'll receive warranty details that cover both manufacturer materials and workmanship. We'll explain how to file a future claim or service request.
- Follow-up: we stay available for maintenance tips and any future roof concerns, so you're never left guessing after the project wraps.
Residential vs. Commercial Considerations for Hail-Damage Roof Repair
Quick overview
Hail damage looks different on a home than on a multi-tenant commercial building. Scale, materials, access, and occupancy patterns shape how we inspect, file insurance, and execute repairs. The goal in both cases is a durable, leak-free roof that stands up to future storms—and that means tailored plans for residential and commercial properties.
- Residential vs Commercial Considerations of Hail Damage Roof Repair: differences in scale, materials, access, warranties, and timelines drive every decision.
Residential Considerations
- Roof types and impact patterns
- Asphalt shingles are the most common residential target; hail can bruise shingles and loosen granules, leading to accelerated aging.
- Tile, metal, or wood roofs respond differently; detection often requires close-up inspection and sometimes replacement of affected sections rather than the whole roof.
- Insurance and claims
- Homeowners typically file under dwelling coverage; expect an adjuster visit, scope review, and deductible considerations.
- When damage is localized, patching may suffice; widespread damage usually warrants a full roof replacement.
- Access, safety, and scheduling
- Roofers work around limited access points, attics, and eaves. Work tends to be daytime-only and weather-dependent.
- Coordinate around family schedules and local HOA rules if applicable.
- Aesthetics and warranties
- Shingle color, texture, and roofline matter for curb appeal. Residential warranties vary by shingle brand and contractor; ensure proper installation to maintain coverage.
- Life-cycle decisions
- If the structure is older, assess remaining life expectancy and whether a partial repair or complete replacement offers the best long-term value.
Commercial Considerations
- Roof geometry and systems
- Commercial properties often use flat or low-slope roofs with built-up, modified bitumen, or single-ply membranes (EPDM, TPO, PVC). Hail can damage membranes, flashings, and penetrations more subtly but severely.
- Drainage, skylights, HVAC curbs, lactations, and roof penetrations require meticulous attention.
- Scale, cost, and downtime
- Large surface areas mean longer repair windows and more coordination with tenants or property management.
- Projects may need staging, phased work, or off-hours scheduling to minimize business disruption.
- Safety, codes, and warranties
- Commercial jobs demand rigorous safety plans, fall protection for crews, and adherence to commercial roofing codes and warranty terms.
- Warranties are typically tied to membrane systems and flashing details; documentation and supplier specs are essential for claims.
- Inspection and documentation
- Use aerial imagery or drone surveys to map hail impact across wide roof zones; document edge metal, penetrations, and parapets.
- Create a detailed repair plan with phased milestones, especially for multi-tenant properties.
- Insurance and business considerations
- Commercial claims may involve property insurers, tenant alterations, and potential business interruption coverage.
- Larger deductibles and different depreciation rules may apply; expect longer loss-adjuster coordination.
Inspection and Documentation (shared approach)
- Step 1: Schedule a thorough roof assessment with a licensed contractor.
- Step 2: Capture comprehensive photos from ground, ladder-safe angles, and drone if permitted.
- Step 3: Prepare a neutral, itemized estimate covering damaged roofing, flashing, penetrations, and any insulation or decking concerns.
- Step 4: Compile a file for the insurer and for property records, with labeled sections for each roof zone or unit.
Repair Approaches (contextual)
- Residential: prioritize patching or shingle replacement where feasible; ensure flashing and vents are resealed to prevent leaks; address any attic moisture or insulation gaps.
- Commercial: plan for membrane repair or replacement, seam sealing, and flashing upgrades; coordinate with penetrations and equipment curbs; verify drainage paths remain effective after work.
Timeline and Coordination
- Build a weather-window plan with contingency days.
- For commercial properties, schedule around tenant access and business needs; communicate milestones to property management.
- Obtain any required permits and ensure disposal logistics for debris.
Costs, Proof, and Prevention
- Costs correlate with area, material type, and accessibility; larger jobs may see bulk-material savings but higher labor coordination costs.
- Insurance documentation should include a clearly defined scope, photos, and a written repair plan to reduce back-and-forth.
- Post-repair, implement protective measures (gravel stops, improved flashing, and maintenance checks) to reduce future hail risk.
How Hail-Damage Roof Repair Varies by Location
Regional climate and hail patterns
- In the Great Plains and upper Midwest, hail storms are frequent and can produce large stones, which means more widespread damage and a higher likelihood of needing roof replacement rather than quick cosmetic fixes.
- The Southeast and parts of the Gulf Coast see intense, often high-frequency thunderstorms, but hail tends to be less extreme than in the Plains. You may see more mixed weather damage (wind-driven water intrusion) alongside hail.
- The Northeast experiences freeze–thaw cycles that can worsen small flaws after hail strikes, making timely repairs critical to prevent leaks.
- Western states vary widely, from hot, dry deserts to snowy mountain corridors. Hail size and frequency can be seasonal and influenced by mountain weather patterns, so inspection timing matters.
Material and construction differences by region
- Asphalt shingles are common nationwide, but regional materials change repair tactics: metal roofs, clay or concrete tiles, and wood shakes each respond differently to hail and require specialty repair or replacement.
- In areas with tile or slate roofs, hail can crack or dislodge pieces more readily, leading to localized tile replacement and careful flashing work to avoid leaks.
- Steeply pitched roofs common in many regions slow water intrusion after hail damage, but also make inspections and repairs more hazardous. Low-slope or flat roofs (common in parts of the West and South) risk rapid water intrusion and may need more extensive membrane work.
- Roof age matters regionally. In drought-prone areas with long-lasting materials, a small hail bruise on an older roof could trigger replacement sooner than on a newer installation.
Insurance, permits, and local practices
- Insurance practices vary by state and even by insurer. Some regions see quicker approvals for roof replacements after hail storms, while others rely on more thorough engineering reports or independent adjusters.
- Permit requirements and building-code rules differ by jurisdiction. In fire-prone or hurricane-prone areas, stricter flashing, venting, and wind-resistance standards can influence repair scope.
- HOA and community rules matter in some regions. Some neighborhoods require pre-approval for any roof work or color/material restrictions for replacements.
Seasonal timing and scheduling realities
- Northern regions often face winter weather windows, which can delay roofing work, push projects into spring, and require indoor drying and temporary protection measures.
- Southern and coastal regions may have year-round access but contend with heat, humidity, or hurricane season that can rearrange scheduling and response times.
- Temperature affects materials: extreme heat can soften asphalt shingles and adhesive at seams, while extreme cold can hinder sealant performance. Plan repairs for moderate weather when possible.
Repair vs. replacement tendencies by region
- High-damage zones with large, frequent hail generally favor full roof replacement over patch repairs to ensure long-term performance.
- Regions with lower hail frequency or smaller average hail size may see more patch repairs and targeted fixes (replacing only the most damaged shingles, flashing, and vent seals).
- Consider roof age and warranty. In older roofs, even moderate hail can accelerate deterioration, tipping the decision toward replacement.
Practical regional checklists
- Have a local, licensed roofer inspect for hidden damage under shingles, around flashing, and at penetrations (vents, chimneys).
- Confirm whether your region's insurance practices require specific documentation (photos, engineer's report) before approving replacement.
- Check for material-specific needs in your area (tile durability, metal panel sealing, or shingle granule loss) and choose contractors experienced with regional products.
- Schedule inspections promptly after a storm, but avoid jumping to conclusions—regional patterns affect whether damage is cosmetic or structural.