Ultimate Guide to Improper Nail Placement
Last updated: Feb 28, 2026
An Introduction to Improper Nail Placement
Improper nail placement is a common roofing flaw that can quietly undermine a roof's resilience. When nails aren't driven in the right spot, at the right depth, or with the right spacing, fasteners fail to hold shingles securely. That can lead to leaks, wind uplift, and accelerated wear around the nailing zone. For homeowners, recognizing this issue early is the first step toward a longer-lasting roof.
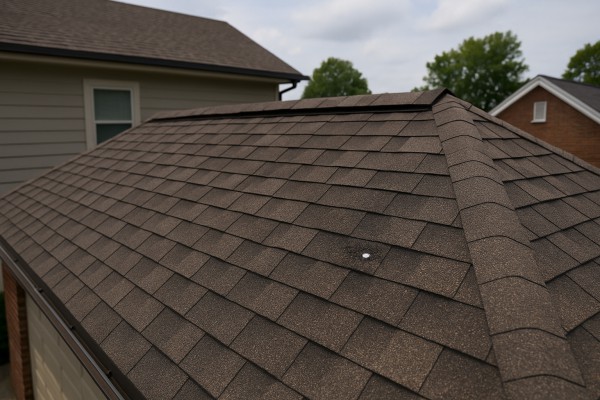
What improper nail placement looks like
- Nails sitting too high or too low on shingles, or not penetrating through the nailing strip and into the deck.
- Nails driven at odd angles or driven in crookedly, leaving heads proud or recessed.
- Multiple nails in a single fastener line or missing nails in sections that should be nailed.
- Starter and edge nails that don't align with the manufacturer's pattern.
- Signs of loose or curling shingles, lifted edges, or water staining near the nail line.
- Rust around nail heads or degraded sealant around fasteners.
Why it happens
- DIY mistakes or inexperience with specific shingle products.
- Repairs using mismatched fasteners or incorrect nail length.
- Re-roofing with improper patterns after shingle replacement.
- Degraded decking that changes the effective nail hold.
- Rush jobs during busy seasons, when attention to detail slips.
What it can lead to
- Water infiltration around the nail line and beneath shingles.
- Wind uplift during storms, accelerating edge lift and shingle damage.
- Accelerated wear of the roofing system, including sealants and flashing.
- Potential deck damage if nails miss the deck and rely on insufficient hold.
- Higher maintenance cost over time as repairs pile up.
Is it urgent or common?
- It's a surprisingly common issue, especially on aging roofs or after quick, contractor-driven repairs.
- Not every case is an immediate emergency, but some scenarios demand prompt attention:
- Active leaks or noticeable dripping after rain.
- Exposed decking or visible water staining inside attic spaces.
- Shingles that repeatedly curl, buckle, or lift at the nail line.
- If you observe active leakage or large areas of lifted shingles, treat it as urgent and get an assessment soon.
High-level next steps
1) Check for signs and document them
- Take clear photos of suspected nail lines, edge fasteners, and any lifted shingles.
- Note any staining, drafty attic spaces, or moisture around ceilings.
2) Schedule a professional inspection
- A roofing pro can verify nail patterns, confirm shingle type, and assess deck condition.
- Expect an evaluation of nail length, depth, spacing, and that nails penetrate into the roof deck.
3) Identify the scope of work
- Determine whether the issue is isolated to a small section or part of a broader pattern.
- Decide if re-nailing, resealing, or partial replacement is appropriate, based on damage.
4) Plan repairs with proper materials
- Use manufacturer-recommended nails (correct length, corrosion-resistant metal, and appropriate thickness) for the specific shingles.
- Ensure nails are placed exactly as designed for the product and confirmed by the installer.
5) Monitor after repair
- After fixes, inspect the roof after heavy rain or wind events.
- Look for new signs of edge lift, nail head exposure, or moisture intrusion in the attic.
Is Improper Nail Placement an Emergency? Understanding Urgency, Risks, and Immediate Steps
What counts as an emergency?
- Active water intrusion into living spaces or ceilings. If you see dripping, pooled water, or new stains that expand during rain, you're dealing with an urgent leak.
- Visible interior signs of structural distress. Cracking or sagging ceilings, walls pulling away from framing, or doors that won't close properly can indicate serious roof issues.
- Large areas of shingles missing or exposed underlayment after a storm. If the roof surface is compromised across a wide zone, rain can reach the interior quickly.
- Nails protruding into living space or attic with obvious movement or popping. Exposed fasteners that have moved or backed out can be a red flag for improper nail placement affecting the roof deck and waterproofing.
- Wind-driven damage or hail impact combined with suspect nail patterns. Severe weather can exacerbate weak nail placement and accelerate leaks.
- Protect yourself first. If you're not comfortable on a ladder or roof, stay off the roof and call for help. Do not risk a fall.
- Contain the water. Place a bucket or container under any active drip. Damp towels around the leak can slow spread on porous ceilings while you arrange professional help.
- Document before you act. Take clear photos of any visible nails, shingles, or interior damage. This helps a roofer assess the urgency and scope quickly.
- Check for electrical hazards. If water is near outlets, switches, or electrical panels, keep people and pets away and turn off power to the affected circuits if it's safe to do so.
- Ventilation matters. If you have moldy or musty smells, avoid breathing the air in the attic; localize exposure and contact a professional promptly.
- There is active leaking into living spaces or through the ceiling.
- You can see daylight from the attic or there are large gaps in the roof deck.
- The roof shows sagging, deflection, or any creaking sounds that indicate potential structural trouble.
- Multiple shingles are missing or severely damaged in a broad area after a storm.
- There are exposed nails or fasteners that appear driven through underlayment or into the attic with movement or backing out.
Monitor if
- The leak is small and localized, with no interior water staining yet, and weather is not worsening.
- You notice a slow drip only during heavy rain, and the attic remains dry otherwise.
- There is no visible daylight intrusion, but some suspect nail placement could have allowed minor leakage—still keep an eye on it over the next 24–48 hours.
- The interior environment is stable (no swelling, no mold odor) and the area seems otherwise structurally sound.
Can wait if
- There is no interior water intrusion and weather is clear, but you've observed suspicious nail patterns or minor roof gaps that don't show active leakage.
- The roof damage appears localized to a small patch and the attic remains dry, with no movement, cracking, or noticeable sag.
- You've secured a temporary assessment and a fall-proof plan, and you will arrange a professional inspection within a few days.
Quick checklist for a sanity check
- Do you have active leaks? If yes, treat as urgent.
- Are there signs of daylight, sagging, or large shingle loss? Treat as urgent.
- Is the interior dry at the moment? If yes, you may monitor briefly, but plan a professional inspection soon.
- Have you documented damage with photos? Do it now.
- Is it safe to access the roof or attic? If not, call a pro and avoid risky DIY steps.
Common Causes of Improper Nail Placement
Misreading the nailing zone and alignment
Shingles are stamped with a designated nailing zone. When that zone is misread or ignored, nails end up in the wrong spot, which weakens wind resistance and can lead to leaks. Common mistakes include placing nails outside the marked area, hitting the overlap instead of the actual shingle, or nailing across multiple courses instead of per piece.
- Relying on guesswork instead of manufacturer marks.
- Nailing too high or too low relative to the shingle's nailing line.
- Skipping the intended alignment from one row to the next, causing inconsistent hold.
Edge proximity and hold
Nailing too close to the edge can split the shingle, while driving too far toward the center reduces the nail's grip. Both mistakes undermine wind uplift resistance and can create voids around the fastener.
- Keep nails within the manufacturer's recommended distance from the edge.
- Avoid nailing close to cutouts, hips, or corners where edge integrity is already stressed.
- In hot or dry conditions, edge proximity mistakes are more likely as shingles expand and contract.
Wrong nail size, type, or length
Using the wrong fastener compromises hold and corrosion resistance. A nail that's too short or inappropriate for the deck and climate may pull out, while the wrong type can fail in freeze-thaw cycles or coastal salt air.
- Choose corrosion-resistant nails suited to the roof surface and climate (e.g., asphalt shingles on wood decking in most climates).
- Ensure the length penetrates the deck adequately without protruding beyond the underside.
- In high-wind zones, consider fasteners recommended by the shingle manufacturer or local code.
Angle and driving technique
Nails driven at the wrong angle or hammered too hard can deform the shingle surface, pull the nail head below the surface, or create stress cracks.
- Drive nails straight and perpendicular to the roofing plane.
- Avoid skewing the nail or overdriving it, which leaves the head depressed or the shingle dented.
- Maintain consistent pressure with a nail gun or proper hammer technique to ensure a flush, secure set.
Substrate issues and deck prep
If the roof deck is rotten, warped, or overloaded with underlayment, nails won't seat properly or hold long-term. A poor base leads to nail head settlement, leaks, and fastener failure over time.
- Inspect and repair the deck before nailing; replace rotten boards and flatten buckles.
- Remove old nails or fasteners that could be hit again, causing dimples or concealed voids.
- Ensure a clean, dry surface so nails seat fully and evenly.
Wind zone and code considerations
High-wind areas demand stricter adherence to nailing patterns and, sometimes, additional fasteners. Improperly accounting for wind loads can result in faster uplift and more maintenance problems.
- Follow local building codes for wind resistance and required nail counts per shingle.
- Use manufacturer-approved fasteners for the specific shingle line and climate.
- Factor in roof slope, exposure, and exposure per shingle when planning nail distribution.
Rushing or inconsistent technique invites mistakes that compromise nail placement. A rushed job often results in skipped nails, misalignment, or overdriven heads.
- Calibrate nail guns to avoid over- or under-driving.
- Maintain a steady pace and consistent distance from the edge to the nailing line.
- Double-check each nail as you go instead of relying on memory from earlier rows.
Quick checks to prevent improper nail placement
1) Verify each shingle's marked nailing zone before nailing and keep nails within that zone.
2) Use the correct fastener type and length for the deck and climate, testing on a scrap piece if unsure.
3) Do a dry-run section to confirm alignment and driving technique before completing the full roof.
How Roof Materials Affect Improper Nail Placement

Improper nail placement on asphalt shingles disrupts the seal and wind resistance that keeps the roof watertight.
- Nailing zone: position nails in the manufacturer's designated nailing zone, usually the top third of the shingle, not near the edge or the sealing strip.
- Nail depth and angle: drive nails straight and flush. Overdriven nails can pinch or crack the shingle; underdriven nails can pull loose in strong winds.
- Fastener type: use corrosion-resistant nails of the recommended length. Inadequate fasteners can rust or fail, creating leaks around the holes.
- Coverage: avoid nailing through already sealed areas or across the seal tab, which can prevent proper adhesion during weather changes.

Metal panels rely on precise fastener placement to seal joints and prevent leaks around penetrations.
- Fastener location: place nails or screws in the manufacturer-designated spots (often along ribs or specific batten lines) with proper washers. Misplaced fasteners can warp panels and create leaks.
- Over- or under-tightening: overtightening can deform the panel and washer; under-tightening can allow water to seep around the fastener.
- Washers and sealant: improper nail placement can force washers out of alignment, leading to water intrusion and rust over time.
- Panel alignment: placing fasteners too close to panel edges or joints can compromise the panel's wind uplift resistance.
Wood Shingles and Shakes
Wood is especially sensitive to nail location because wrong placement can split wood or fail to hold under wind.
- Edge and butt proximity: nails must avoid split-prone edges and the butt joints; misplacement invites cracking and water entry.
- Through-battens vs. face-nailing: for many applications, nails go through battens in a controlled pattern rather than randomly through the face, reducing surface splits and lift.
- Depth consistency: consistently drive nails to the same depth to prevent raised fasteners that trap moisture.
- Spacing and wind: improper spacing can allow shingles to lift in high winds, increasing the risk of gaps and leaks.

Tile roofs require careful nail or fastener placement because tiles are brittle and easily damaged.
- Nailing through tiles: never nail through the face of a tile; fasten at battens or designated nail slots to avoid cracking.
- Edge and support: nails placed too close to edges or misaligned with supporting battens can crack or crack adjacent tiles.
- Fastener type and spacing: use tile-specific fasteners and follow the pattern to maintain proper alignment and wind resistance.
- Underlayment interplay: improper nail placement can jeopardize the underlayment's protection if fasteners miss the intended support.

Slate is strong but brittle; improper nail placement commonly leads to cracks or loosened courses.
- Nail position: nails should be placed to avoid high-stress zones that crack the slate; many roofs use copper nails or corrosion-resistant options with washers.
- Nail depth: over- or under-driven nails can loosen slates or create hairline openings for water.
- Edge care: avoid placing nails too close to edges where slates are thin and prone to breakage.
- Alternating patterns: slate roofs often use a standardized pattern; deviating from it can compromise weatherproofing and wind resistance.
Composite and Synthetic Shingles
Composite materials mimic real shingles but respond differently to fastener placement.
- Similar rules to asphalt: keep nails in the correct nailing zone and drive straight and flush.
- Expansion and contraction: improper depth or angle can cause gaps as the material expands and contracts with temperature changes.
- Warranty considerations: deviating from the manufacturer's specified nail pattern can affect warranty coverage and performance.
- Surface compatibility: use fasteners recommended for the specific composite product to avoid staining or panel damage.
Common roofing materials and effects of improper nail placement
- Asphalt shingles: leaks, curling, wind uplift, and compromised seal tabs.
- Metal roofing: dimples or punctures, washer misalignment, leaks at penetrations, and panel movement.
- Wood shingles/shakes: splits, cracks, lifted edges, and gaps that invite moisture.
- Clay/concrete tiles: cracked or shattered tiles, misalignment, and compromised support.
- Slate: cracked slates, misfit patterns, and leakage risks around fasteners.
- Composite/synthetic shingles: gaps, curling, and reduced warranty protection.
The Risks of Ignoring Improper Nail Placement
Water intrusion and leaks
- Misplaced nails can miss the intended nail line or strike through the sealing lap, creating an open channel for rain to follow the fastener. This often leads to small sneaky leaks that worsen after heavy storms or rapid temperature changes.
- Overdriven nails crack the surrounding shingle material around the hole, forming micro-leaks that may not be obvious right away but can cause rot and interior staining over time.
- Underdriven or loose nails don't grip the shingle firmly, allowing movement during wind or thermal expansion. The result is gaps that widen with each season and let moisture in.
- Nails that miss the proper fastener zone can damage the protective sealant layer, compromising the roof's first line of defense and increasing the chance of water wicking under nearby shingles.
Wind uplift and roof failure
- Nails placed too high on the tab or with insufficient length lose holding power when gusts slam the roof, making shingles more prone to lifting.
- Inadequate spacing along edges, hips, ridges, and valleys invites curling, lifting, or panel separation, especially in high-wind areas.
- The wrong fastener type or corroded nails reduce wind resistance, allowing fasteners to fail prematurely and shingles to peel away in storms.
- Improper nail alignment can compromise flashing and valley joints, creating weak points where wind-driven rain can pry shingles loose.
Structural damage beneath the surface
- Repeated moisture intrusion accelerates rot in the roof deck (plywood or OSB) and can produce soft spots or sagging over time.
- Hidden rot behind shingles weakens the substrate that supports underlayment and finish materials, increasing the risk of sudden failures during heavy weather.
- Poorly nailed valleys, rake edges, and seam junctions can loosen framing connections and compromise the roof's structural integrity as loads shift with wind and snow.
- When the deck starts to deteriorate, the entire roof system loses stiffness and distributes loads unevenly, making future repairs harder and more expensive.
Ice damming and moisture buildup
- Gaps around improperly placed nails allow warm attic air to travel to the roof deck, causing uneven snowmelt and refreezing at the eaves—an ice dam scenario.
- Ice dams force water to back up under shingles, which can lift edges, saturate the decking, and lead to widespread interior staining and moisture damage.
- Repeated cycles of melting and refreezing stress shingles and underlayment, reducing their effectiveness and shortening service life.
Safety hazards and long-term costs
- Loose or protruding shingles are projectiles in strong winds, creating hazards for people, pets, and property nearby.
- Hidden damage from poor nail placement often costs more to fix later than addressing the issue correctly upfront, with repairs sometimes requiring deck replacement.
- Patch jobs that don't address the root cause tend to fail again, leading to repeated disassembly, re-nailing, and ongoing maintenance instead of a durable solution.
- Ignoring improper placement can void manufacturer warranties that require proper fastening patterns, leaving you uncovered if a claim is needed after a storm.
Quick checks to spot trouble
- Visual cues: shingles sitting unevenly, cupping, feathering around fasteners, or nails that sit noticeably above the surface.
- Fasteners: look for bent, rusted, or missing nails along edges, valleys, and around penetrations.
- Interior signs: damp rafters, staining, or soft spots in the attic near suspect areas, which suggest moisture intrusion beyond the surface.
What to do if you suspect improper nail placement
1. Document signs of trouble with clear photos and notes of when storms occurred.
2. Compare the installed nail pattern to the manufacturer's recommendations for your shingle type and roof pitch.
3. Have a qualified roofer perform a professional inspection to verify nail placement, determine the extent of any damage, and recommend corrective steps.
4. Plan timely repairs to prevent escalating damage to decking, underlayment, and interior spaces, and to restore the roof's intended performance.
Diagnosing Improper Nail Placement
Visual clues on the roof
- Shingles near the nail line appear buckled, cupped, or curled upward.
- Shingle tabs along the top edge are loose or sitting up, especially in windy corners.
- Nail heads are visible on the surface due to overdriving or failure of the shingle around the fastener.
- Cracked or split shingles located where nails were driven.
- Rust or dark stains around fastener areas.
- Rows of shingles look misaligned in one area, suggesting nails were driven in the wrong spots.
Hidden clues from inside the attic
- Stains or damp spots on ceilings or insulation that line up with a particular roof section.
- Darkened wood or water marks directly above areas where shingles seem poorly secured.
- Increased humidity or musty odor in the attic after rain or melting snow.
Nail placement defects to look for
- Nails placed too close to the edge of a shingle, increasing the risk of tearing and water intrusion.
- Nails driven too high or too low relative to the intended nailing line.
- Missing nails in a row, leaving shingles unsupported.
- Nails not aligned with the manufacturer's nailing pattern or placed in improper zones (such as into valleys or over flashing).
- Bent, corroded, or protruding nails that aren't flush with the shingle surface.
- Clumped or double-nailing in one spot, which can crack the shingle.
A practical, step-by-step diagnostic plan
1) Do an exterior scan from the ground with binoculars to catch obvious signs: lifted edges, curling tabs, or shingles that look out of place.
2) If it's safe, walk a small, stable section of the roof and check several shingles in each zone for proper nail lines: the nail should be centered on the nailing area and not exposed or countersunk excessively.
3) Inspect for consistent nail patterns across rows. A mismatched pattern in one area often points to improper placement or corner-cutting during installation.
4) Check the attic after rain or snowmelt: look for leaks, damp insulation, or stained rafters that line up with particular roof sections.
5) Compare what you see to the shingle manufacturer's recommended nailing pattern. If nails appear in the wrong zone or if you see evidence of double-nailing, that's a red flag.
6) Photograph any suspect areas from multiple angles and note dates and weather conditions. This makes it easier to discuss with a contractor if you need a professional assessment.
When to bring in a professional
- You find widespread lift, curling, or leakage that can't be explained by a single storm.
- You're not comfortable inspecting the roof safely from a ladder or you're dealing with steep pitches, high winds, or damaged roofing.
- There are signs of interior water intrusion beyond a single attic bay, suggesting systemic nail-line issues.
Repair Options for Improper Nail Placement
Temporary fixes
- Leaks or loose nails can be stabilized quickly to buy time until a proper repair.
- Patch with roofing cement and fabric: apply a generous bead of roofing cement around the nail head on the shingle surface, press a small patch of roofing fabric or a self-adhesive repair sheet over it, then seal with another thin layer of cement.
- Use a temporary weatherproof coverage: if multiple nails are suspect or a larger area is compromised, cover with a heavy-duty tarp or temporary underlayment secured with roofing nails or staples, avoiding sharp edges that could tear.
- Safety notes: avoid walking on wet shingles; work from ladders with proper fall protection; never drive nails through shingles from above to hide problems.
- Monitor: temporary fixes are not a substitute for professional assessment; plan to repair within a short timeframe to prevent interior leaks.
Minor repairs
- When a few nails are mislocated or a couple of shingles are damaged, a minor repair can stop the immediate problem.
- Step-by-step:
1) Inspect the area from the attic and the roof to confirm which nails are wrong and which shingles are compromised.
2) Remove the affected shingle(s) carefully with a flat pry bar, lift the surrounding tabs, and take out the mis-nail and any damaged nails.
3) Re-nail or reattach with proper nails, ensuring they are seated flush but not overdriven. Place nails on the original nailing line and through the shingle plane, avoiding thin spots at the edges.
4) Seal each nail head with a dab of roofing cement to prevent water intrusion.
5) Reinstall shingles, ensuring close but not tight fit with neighboring shingles. If the shingle is warped or cracked, replace it with a new one matched to the color and style.
- Notes:
- Use corrosion-resistant nails appropriate for your roof type and climate.
- Check the seal around flashing, valleys, and penetrations; reseal if needed to prevent leaks.
Partial replacement
- When several consecutive shingles or a small section show nail-related damage, a partial replacement saves time and cost.
- Process:
1) Mark the affected area and carefully lift and remove the shingles in that section, without disturbing adjacent areas.
2) Inspect and replace any damaged underlayment or decking beneath.
3) Install new starter or shingle courses, aligning with existing patterns and ensuring proper interlock with neighboring shingles.
4) Fasten according to manufacturer instructions, then seal all nail heads.
5) Inspect surrounding shingles for lift or flutter; add clips or additional fasteners where required.
- Tip: match the new shingles to the existing roof as closely as possible for a seamless appearance.
Full roof replacement
- When improper nail placement is widespread or has caused significant deck damage, a full roof replacement may be the most durable solution.
- Plan:
1) Have a professional inspect the entire roof to assess deck condition, flashing, and ventilation.
2) Create a tear-off plan: remove all shingles, inspect the decking for rot or damage, and prune any compromised areas.
3) Replace damaged underlayment and any rotted decking before re-covering.
4) Install a new underlayment, ventilation, and flashing system per manufacturer guidelines.
5) Install new shingles, aligning with hips, ridges, and valleys; secure with the correct fasteners as recommended by the manufacturer.
6) Final inspection to ensure proper seal, flashing integrity, and wind resistance.
- Considerations:
- Full replacements are most reliable when numerous nails are mislocated, many shingles are damaged, or signs of moisture have spread across the roof.
- Ensure you choose a roof system and warranty that matches your climate, pitch, and attic ventilation needs.
Typical Costs to Fix Improper Nail Placement
Minor repair
A minor repair covers a small area where nails were misdriven, loose shingles, or minor nail corrosion. A pro will re-nail the affected shingles with proper corrosion-resistant nails, reseat the shingles, and apply sealant along the nail lines to prevent leaks.
- Typical scope: Re-nail 1–2 shingles, reseat, apply sealant along nail lines
- Cost range: $150–$350
- Time estimate: 2–4 hours
- What's included: Inspection, re-nailing, reseating, sealant
- What's not included: Any deck replacement or extensive flashing work
Moderate repair
Moderate repair involves a larger patch where several nails were misdriven or shallow gaps observed around penetrations. This may require re-nailing a larger area, securing underlayment, reseating or adjusting flashing in the affected zone, and possibly replacing a short section of felt.
- Typical scope: Re-nailing a larger patch (about 6–12 shingles), check/adjust underlayment, minor flashing work
- Cost range: $400–$1,000
- Time estimate: 1–2 days, depending on weather and access
- Included: Labor, nails, sealant, underlayment adjustments, flashing tweaks
- Excluded: Major deck or full-area replacement
Major repair
Major repair addresses widespread misplacement that threatens the roof's integrity: damaged sheathing, multiple sections requiring re-nailing, damaged flashing, and potential replacement of a larger portion of shingles.
- Typical scope: Remove damaged shingles, inspect/repair sheathing, re-nail across the affected zone, replace flashing as needed
- Cost range: $1,200–$5,000+ depending on area and materials
- Time estimate: 2–5 days, or longer for larger roofs
- Included: Materials (nails, underlayment, new shingles, flashing), labor, cleanup
- Excluded: Full reroof or structural repairs beyond roof deck replacement
What factors affect cost
- Roof size: Larger roof means more material and more labor
- Access: Hard-to-reach areas, steep pitches, or tight attic spaces add time and safety requirements
- Material type: Asphalt, metal, tile, or slate affect fasteners and installation complexity
- Extent of damage: How many nails are misdriven and how much underlayment or decking is affected
- Local labor rates: Regional wage levels and demand drive price variations
How Long Can You Wait Before Addressing Improper Nail Placement?
- Water can seep through gaps created by under- or over-driven nails, missing nails, or nails placed in the wrong location.
- Shingle edges may lift or buckle, increasing wind uplift and the chance of panels blowing off in a storm.
- The roof deck and insulation behind the nails are exposed to moisture, which can lead to rot, mold, and higher energy costs.
Timeframes and what happens if you wait
- 0–48 hours (right after discovery or a heavy storm)
- Active leaks may begin or worsen during rain events.
- Damp attic insulation can become mold-prone quickly if moisture reaches the decking.
- You might notice small ceiling stains or a musty odor in the attic.
- 3–7 days
- Water intrusion becomes more consistent; attic and living spaces may show visible signs like dark spots or damp drywall.
- Shingles near the problem area may start to curl or lift, catching wind and spreading the issue.
- 2–4 weeks
- Persistent moisture can cause wood behind the nails to swell, warp, or decay.
- Nail corrosion may accelerate; rust can weaken fasteners and reduce holding power.
- The roof's overall seal weakens, increasing the risk of widespread leaks during rain.
- 1–3 months
- Structural components (sheathing, rafters) can begin to suffer from ongoing moisture exposure.
- Mold growth becomes more likely in attic spaces, posing health and remediation challenges.
- You'll likely see larger, more noticeable stains on ceilings and walls; insurance claims and repair plans become more involved.
- 6+ months
- Prolonged water damage can necessitate substantial repairs or a partial/full roof replacement.
- Persistent leaks may compromise insulation and indoor air quality; energy efficiency drops.
- Delayed repairs often lead to higher costs and more extensive disruption.
How the damage progresses if left unfixed
- Wind-driven exposure amplifies with time; mismatched nails no longer anchor shingles reliably.
- Moisture travels along the roof deck and into framing, amplifying rot risk.
- The warranty on shingles and flashing can be affected if improper nail placement is deemed a contributing factor.
Quick indicators to watch for
- Shingles that look loose, buckled, or cracked around the nail area.
- Shingle cupping or curling near the missing or mislocated nails.
- Water stains on ceilings or in the attic after rain.
- Soft spots or musty odors in the attic or along the interior ceiling.
Practical steps you can take now
1. Do not delay a professional inspection; a licensed roofer can assess nail placement and overall installation quality.
2. If you see active leaks, minimize interior damage with safe measures and follow professional guidance for temporary containment.
3. Document the issue with photos and notes—this helps with estimates, warranties, and insurance discussions.
4. Prioritize a repair plan: correct nail placement, reseal flashing, and replace any damaged shingles or decking as needed.
How a pro approaches the timeline
- They'll verify nail count, location, and driving depth, then determine if you need spot repairs or partial replacement.
- They'll check surrounding fasteners for corrosion or failure and inspect flashing around chimneys, vents, and skylights.
- They'll advise on weather windows for repair to prevent further moisture intrusion and align with warranty requirements.
How Improper Nail Placement Varies by Location and Climate
How This Problem Varies by Region & Climate within the United States
- Pacific Northwest and coastal humid climates (Seattle, Portland, coastal Oregon/Wa). Moisture is a constant challenge. When nails are misplaced, shingles tend to cup or lift sooner, and fastener corrosion can worsen edge leaks. Improper nails that don't hit the center of the nailing zone or that miss the decking can allow moisture to creep under the shingles. In these areas, corrosion-resistant fasteners are essential, and failure to drive nails straight can compound problem areas under persistent rain.
- Southwest and desert regions (Arizona, southern Nevada, parts of California). Intense sun and heat cause shingles to expand and contract more than in milder climates. If nails are too short, mislocated, or overdriven, the expanding shingles can crack or curl, creating gaps where water sits. The problem isn't just uplift in wind; it's improper nail depth that can pinch the shingle's underside during temperature swings. Use nails long enough to penetrate into the deck and install per the manufacturer's pattern.
- Northeast and Midwest (New England, Great Lakes, Upper Midwest). Freeze-thaw cycles push and pull decking and shingles. Nails that aren't set flush or that miss the intended nailing zone can loosen as boards flex with freezing temperatures, leading to lifted edges after a cold snap. In windy days, poorly placed nails offer less resistance to uplift, which is common in mid-latitude storms. Wood knots and varying framing can also affect where nails hold best, so following the exact pattern is more critical here.
- Southeast and Gulf Coast (Florida, the Carolinas, coastal Texas). High humidity plus hurricane or tropical-storm wind patterns demand robust fastening. Improper nail placement—nails driven high, too few nails per shingle, or nails missing the center of the nailing zone—can fail under strong gusts. Corrosion risk is elevated in salty air, so nails should be corrosion-resistant. In wet seasons, even small misplacements can become leaks where rain drives in along the nails' heads.
- Mountain regions and snow-prone areas (Rocky Mountains, Appalachians). Heavy snow loads combine with temperature swings to stress roof systems. If nails aren't aligned with the recommended pattern, or if nails drift toward edges or tab joints, shingles are more likely to lift under snow pressure or melt-water flow. Proper nail length and penetrating into solid decking help resist uplift when wind-driven snow shifts weight across the roof.
Practical Guidelines by Climate (quick reference)
1) Identify your climate zone and the local wind and precipitation patterns that affect your roof.
2) Match nails to the manufacturer's recommended nailing pattern for your shingle type, and use corrosion-resistant nails in humid or coastal areas.
3) In high-wind or high-snow regions, expect to use more nails per shingle and ensure each nail is centered in the zone; avoid placing nails near edges or through capped areas where they can split or loosen.
4) Inspect after severe weather for lifted shingles or nail heads that look loose, and correct misplacements promptly to prevent slow leaks or peel-back.