Ultimate Guide to Curling or Buckling Shingles
Last updated: Feb 28, 2026
Curling or Buckling Shingles: An Introduction
Curling or buckling shingles are more than an eyesore—they're a sign something isn't right with your roof. You might notice edges that turn upward, entire rows that look wavy, or tabs that lift away from the deck. These patterns can develop gradually, making them easy to overlook until a rainstorm or strong wind exposes a leak or loose shingles. This page walks you through what to look for, how serious the issue is, and the high-level steps you can take to respond.
What curling or buckling shingles look like
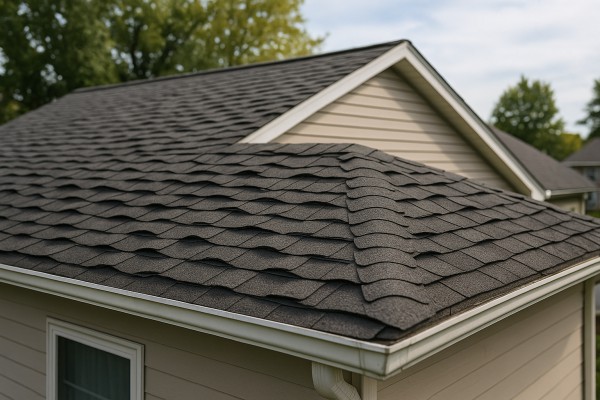
- Raised, cupped, or warped edges along individual shingles
- Visual waves or ripples across a row of shingles
- One or more shingles that lift or buckle away from the roof plane
- Gaps at the shingle seams or flashing areas
- Shingles that look distorted when viewed from the ground or attic light
Why shingles curl or buckle
- Excess heat and sun exposure over time, softening asphalt and causing tabs to warp
- Poor attic ventilation, trapping heat and moisture near the deck
- Nailing too high or too low, causing improper sealing and lift
- Old, worn, or low-quality shingles that have reached the end of their life
- Decking or underlayment damage, leaking, or structural changes that distort the roof plane
Is this urgent or common?
- Common in hot climates or with aging roofs. Curling can start small and remain manageable, but it often progresses if left unattended.
- Not every curl means immediate collapse, but buckling in wide areas or near penetrations can lead to leaks or wind damage during storms.
- If you see widespread buckling, active leaks, or moisture in the attic, treat it as more urgent and plan a professional assessment.
High-level next steps
- Identify the scope: note where curling or buckling occurs and whether it's localized or spreading.
- Prioritize safety: avoid walking on a roof that's visibly damaged or slick; use binoculars or a camera from ground level to assess first.
- Prepare for repair decisions: determine whether you're dealing with a few damaged shingles or a broader roof issue.
How to assess safely
1. Ensure safe access: use a sturdy ladder, have a helper, and avoid wet or windy conditions.
2. Look from ground level: inspect for lifted edges, gaps, or waves in the visible areas.
3. Inspect the attic: check for signs of moisture, staining, or daylight leaking through the decking.
4. Document: take clear photos of affected areas and note the extent (row numbers, distance across the roof).
5. Seek a professional view: if the damage covers a large area or you're unsure about the underlying decking or ventilation, plan a professional evaluation.
High-level repair and maintenance considerations
- Spot repairs: a few curled shingles may be replaced individually if the surrounding deck is solid and the underlayment is intact.
- Replacement: widespread curling or buckling often signals aging beyond repair for the current roof and may require partial or full replacement.
- Ventilation and insulation: poor attic ventilation can fuel future curling; improving airflow can help slow recurrence.
- Deck and underlayment: damaged decking or felt can contribute to buckling; careful inspection is key.
- Pro diagnosis: structural issues, improper installation, or nail sealing problems require a roof professional's assessment to identify root causes and prevent recurrence.
Note: curling is often more visible from ground level; use a steady, staged approach for observation and plan a professional assessment if you see extensive buckling or signs of leaks.
Are Curling or Buckling Shingles an Emergency? How to Tell and What to Do
Quick signs this might be an emergency
- Active water leaks or dripping from ceilings or walls
- Large sections of shingles buckled, cupped, or lifting noticeably along the eaves or ridges
- Exposed roof deck or missing shingles showing bare underlayment
- Visible sagging or bowing in the roofline or attic framing
- Strong winds or recent storm damage coinciding with immediate shingle movement
When you see these indicators, your roof could be at risk of further interior damage or sudden failure in a weather event. In contrast, milder curling that's isolated to a few shingles or cosmetic cupping without leaks often isn't an immediate emergency, but it still warrants attention soon.
- Stay safe: avoid walking on the roof. If you must check from the ground, use binoculars and never stand on slick or steep surfaces.
- Protect interiors: grab buckets or towels under any active leaks, and move valuables away from the affected area.
- Document damage: take clear photos from ground level and inside the attic if you can do so safely. This helps with insurance and contractor assessments.
- Consider temporary protection: if a leak is present and weather is coming, a temporary tarp can reduce water entry, but do so only if you can do it safely from ground level or with a professional help.
- Call a roofer immediately if you notice active leaks with water dripping into living spaces, or if interior staining worsens after rain.
- Call a roofer immediately if you see shingles buckling severely or lifting in multiple areas, especially near valleys, hips, or eaves where water intrusion is most likely.
- Call a roofer immediately if roof decking is exposed or there are large gaps in the roofing material.
- Call a roofer immediately if there is any visible structural sag or creaking in the attic under load, indicating possible frame compromise.
- Call a roofer immediately if damage followed a major storm and you see widespread curling or buckling across a broad swath of the roof.
Monitor if
- Monitor if curling or buckling is limited to a few shingles in a non-critical area (far from vents, chimneys, or skylights) and there are no leaks.
- Monitor if the interior remains dry, there is no attic moisture, and the roof pitch is difficult to access safely from the ground.
- Monitor if the weather is calm and you can schedule an inspection soon without rain in the forecast. Small, localized curling can be a precursor to larger issues, but doesn't always mean immediate failure.
Can wait if
- Can wait if curling is mild, cosmetic, and not progressing toward lifting or buckling of larger sections.
- Can wait if there are no leaks, no visible water intrusion, and the affected area is isolated and distant from critical living spaces.
- Can wait if you can schedule a professional inspection within a few weeks and weather permits safe access to the roof.
What to do right now (step-by-step)
1) Prioritize safety: don't go on the roof yourself if it's wet, steep, or visibly compromised.
2) Minimize further water entry: place containers under leaks and move belongings away from the area.
3) Record and report: take photos and note dates of observed curling or buckling, plus any storm events that preceded it.
4) Schedule a professional assessment: contact a licensed roofer to evaluate the severity, determine if a temporary protective measure is appropriate, and plan a repair or replacement timeline.
5) Consider temporary protection only if you can do so safely: tarps can help limit water intrusion, but improper installation can create more hazards or damage.
What Causes Curling or Buckling Shingles?
Age and wear
Asphalt shingles aren't forever. Over time, the protective oils break down, the granules wear off, and the shingle mat loses elasticity. When the shingle backing becomes stiff, edges begin to lift, curl, or cup. Weathering and recurrent sun exposure accelerate this process, especially on south-facing slopes.
- Common signs: edges curling under, cupping along the center, or shingles that lie flat in some spots and curl in others.
Heat, sun, and temperature swings
Excess heat softens the asphalt, and repeated heating and cooling cycles cause expansion and contraction. If shingles are exposed to intense sun or sudden temperature changes, their edges can warp and buckle.
- Contributing factors: long hot summers, reflective roof surfaces, and little shade.
- Look for: uniform curling on the same orientation across many shingles, often near the eaves or south-facing slopes.
Insufficient attic ventilation and insulation
Hot attics bake the roof assembly from above. When the underside of the shingles gets too warm or moisture condenses inside the roof cavity, the shingle layer can deform and curl at the edges.
- Symptoms: warm attic, damp insulation, visible curling along multiple courses.
- Quick check: place your hand on the underside of the sheathing in the attic on a sunny day; if it feels very warm, ventilation may be inadequate.
Improper installation or fasteners
Shingles must be nailed in the correct spots with the right number of fasteners and proper spacing. If nails are driven too high or too low, overdriven, or placed in the wrong location, the shingle can fail to lay flat and eventually curl.
- Common mistakes:
- Nailing through the wrong line on the shingle
- Not enough nails per shingle in high-wind areas
- Nails that protrude beyond the nailing area and split the shingle
- Outcome: uneven seal, gaps, and curling along the edges.
Moisture intrusion and flashing problems
Water under the shingle lifts the edge and allows curling to begin. Leaks around vents, chimneys, or at roof-to-wall transitions push moisture under the shingles, especially after a freeze-thaw cycle.
- Areas to inspect: around flashing, around penetrations, and at transitions to siding.
- Result: buckling where deck wood swells or warps beneath the shingle layer.
Roof deck issues and substrate movement
A warped, undersupported, or inadequately fastened roof deck can create an uneven surface for shingles. If the deck moves or settles, shingles above can curl to accommodate the irregularities.
- Symptoms: soft spots on the deck, visible sagging, or inconsistent shingle alignment across a course.
Ice damming and water damage
In colder climates, ice dams force water up under the shingles as meltwater refreezes. Recurrent moisture intrusion can cause shingles to warp and buckle near the eaves or along valleys.
- Pattern: buckling along lower edges after winter thaws and freezes.
Manufacturing defects or batch variation
In rare cases, a batch of shingles may have manufacturing defects that reduce flexibility or adhesion, leading to premature curling.
- What to watch for: multiple shingles curling in the same area or across a roof section that otherwise looks sound.
Quick identification steps
1) Examine curling patterns: edges curling vs centers curling can hint at heat versus moisture causes.
2) Check the attic: feel for heat buildup or dampness indicating ventilation or insulation issues.
3) Inspect fasteners: look for nails that are too high, too low, or overdriven.
4) Inspect flashing and penetrations: leaks here often precede edge lifting.
5) Assess the deck: press on the decking in the attic or from a crawlspace to detect soft spots or movement.
How Roof Materials Affect Curling or Buckling Shingles
Common materials and how curling or buckling shows up
- Asphalt shingles (fiberglass or organic): Curling often starts at the edges or corners and can progress to cupping across the width. Buckling can occur when heat, aging, or improper ventilation traps moisture behind the shingles or when the roof deck isn't solid. Poor nailing or overdriven nails can also cause edges to lift and curl.
- Wood shingles/shakes (cedar, redwood, etc.): Wood is especially sensitive to moisture cycles. Shingles may cup, curl along the grain, or lift at the edges after repeated wet-dry seasons. Excess moisture or rot in the roof deck can exaggerate movement, leading to buckling texture across the roof plane.

- Metal roofing (steel, aluminum): Metal itself tends not to curl, but panels can warp or “oil can” if fasteners are misapplied, seams aren't properly flashed, or the underlayment isn't compatible. Extreme temperature swings and trapped moisture can also contribute to subtle buckling or panel distortion.
- Clay or concrete tile: While individual tiles don't curl like asphalt shingles, the system can show buckling if the deck or underlayment shifts, or if tiles are installed over a warped surface. Missing or damaged fasteners and inadequate deck support can cause edge lift and misalignment that resembles buckling.
- Slate: Slate is heavy and precision-installed. Curling or edge lift can occur if slates aren't secured well or if the deck settles, warps, or is poorly vented. Improper underlayment or installation can magnify movement and edge curling.
- Composite or engineered shingles: These mimic asphalt but are denser and sometimes heavier. They curl at the edges with age, heat exposure, or moisture intrusion, and may buckle if the roof deck isn't stable or ventilation is lacking.
- Rubber or EPDM shingle-style roofing: On roofs with rubber or rubber-like shingles, UV exposure and aging can cause edge curling or edge delamination. Buckling is more common where the membrane has shifted or where adhesive seams fail, especially on low-slope or flat sections.
Why material choices matter
- Material density and expansion: Heavier or denser materials react differently to sun, heat, and moisture, changing how the edges curl or how seams buckle over time.
- Installation compatibility: Some materials require specific nailing patterns, fastener types, or underlayment. Mismatches here often become the first clues you see as curling or buckling.
- Moisture management: Roofs that trap water under the surface (condensation in the attic, poor ventilation, or deck rot) tend to exhibit more curling and buckling, especially with moisture-sensitive materials like wood and organic shingles.
- Deck condition: A solid, true deck supports any roofing material. If the deck is warped, bowed, or rotted, movement shows up as buckling across multiple material types.
Diagnostic cues by material (quick reference)
- Asphalt: Look for edge curl, cupping, or gaps along valleys and eaves; granule loss can accompany aging.
- Wood: Inspect for cupping on individual shingles, soft or rotten spots in the deck, and repeat moisture cycles.
- Metal: Check for subtle panel distortion, loose or missing fasteners, and improper flashing at edges or penetrations.
- Tile: Note any loose or cracked tiles, misaligned rows, or gaps between tiles and flashing.
- Slate: Watch for loose or cracked slates, uneven rows, or signs the deck is moving beneath the slate.
- Composite: Search for edge curling and faster wear along heat-exposed sections.
- Rubber/EPDM: Inspect seals and seams for edge curl, lifted flashing, or adhesive failure, particularly on sun-exposed edges.
Quick, material-focused steps to assess curling or buckling
1. Inspect edges and seams from ground level or a safe ladder stance; note any curling, cupping, or edge lifting.
2. Check attic ventilation and roof deck condition (moisture stains, mold, or rot).
3. Look for granule loss (asphalt) or wood grain swelling (wood shingles).
4. Verify fastener patterns and flashing compatibility for the installed material.
5. If you suspect deck or substrate movement, avoid walking on damaged areas and call a pro for a closer look.
The Risks of Ignoring Curling or Buckling Shingles
Water intrusion and leaks
Curling or buckling creates gaps where rain can seep behind the surface. Even small gaps can allow moisture to reach the underlayment and roof deck, especially during heavy rain, thaw cycles, or wind-driven moisture. Over time, that hidden moisture can cause staining, stains on ceilings, and damp smells in the attic.
- Moisture behind shingles can lead to stained drywall or plaster in living spaces.
- Continuous dampness accelerates rot in the roof deck and sheathing.
- Hidden leaks can worsen before you notice visible signs on the ceiling.
Accelerated deterioration of underlayment and deck
Shingles that aren't lying flat can trap moisture against the roof surface. That moisture won't dry out as quickly, speeding up wear on the underlayment and the plywood or OSB decking beneath.
- Warped or softened decking increases the risk of localized sagging.
- Moisture intrusion reduces the effectiveness of the underlayment as a moisture barrier.
- Repeated freeze-thaw cycles can intensify damage over multiple seasons.
Mold, mildew, and indoor air quality
Moisture behind curled shingles can create a favorable environment for mold and mildew growth in the attic and along the roof line. That mold can migrate to living spaces via ventilation paths, affecting indoor air quality.
- Visible mold growth on sheathing or in attic corners is a warning sign.
- Musty odors in the attic or upper floor can indicate hidden moisture.
- Health symptoms can include allergy-like reactions for sensitive occupants.
Curling shingles expose gaps where heat and warm attic air can melt snow near the eaves. The refreezing of that meltwater at the eaves forms ice dams, which push water back under shingles and into the roof system.
- Ice dams can cause water to back up under shingles and into walls.
- Repeated icing damages shingles, flashing, and gutters.
- Hidden leaks from ice dams often show up as ceiling stains well after a thaw.
Wind uplift and accelerated failure
Raised or buckled shingles are more susceptible to wind uplift. A strong gust can peel them away, expose more underlayment, and create a cycle of increasing damage with each storm.
- Elevated edges catch wind, increasing the risk of further curling.
- Exposed underlayment loses its protective role more quickly.
- Loose shingles can become projectiles in severe storms, risking property damage.
Energy efficiency and comfort
When shingles aren't lying flush, attic ventilation and insulation performance suffer. Warmer areas of the roof deck may lose energy efficiency, leading to higher heating or cooling costs and uneven indoor temperatures.
- Heat transfer through the roof increases in hot months.
- Poor attic air sealing can worsen drafts and hot spots in living spaces.
Structural integrity and resale value
Curling or buckling is often a sign of underlying moisture or improper installation. If left unaddressed, it can lead to more extensive repairs, potential framing issues, and a lower home value.
- Prolonged moisture exposure can compromise roof framing.
- Pending repairs can complicate future resale or insurance underwriting.
- Visible curling degrades curb appeal and confidence in the roof's condition.
Insurance and warranties
Some policies and roof warranties require timely maintenance and proper installation. Ignoring curled shingles can affect coverage or void warranties if the condition is deemed neglect or improper maintenance.
- Claims may be questioned if ongoing issues are left unaddressed.
- Warranty terms often require ongoing inspection and prompt repair of damage.
- Documented maintenance helps preserve coverage and resale confidence.
What to watch for
- Edges of shingles cupping upward or lifting away from the deck.
- Noticeable gaps between shingles, especially near the edges or on soft slopes.
- Exposed underlayment or granule loss in valleys or gutters.
- Musty attic odors or visible staining on sheathing.
- Look for irregular waviness along the ridges and eaves.
- Check for shingles that sit higher than neighboring tabs.
- Inspect for exposed flashing or damaged vent areas.
Quick steps if you notice curling or buckling
1) Avoid walking on the roof; curled shingles can be sharp and unstable.
2) Take clear photos of affected areas for records.
3) Schedule a professional roof inspection to assess moisture, decking, and flashing.
4) Prepare for a repair plan that may include replacement of damaged shingles and possible deck repair.
5) Consider addressing ventilation and insulation to reduce future moisture buildup.
How Curling or Buckling Shingles Are Diagnosed
Visual cues homeowners notice
- Raised, cupped, or rolled edges on individual shingles, often most evident on sun-exposed sides of the roof.
- Buckling shingles that form a diagonal or straight-line wave, not just a single curled corner.
- Shingles that lie flat in the middle but lift at the edges, creating a ripple or fan-like pattern.
- Clusters of shingles showing similar curling or buckling, suggesting a common cause rather than isolated damage.
- Portions of the roof where many shingles are missing granules or appear unusually glossy or sun-worn.
- Dimples or wave patterns along rows that run parallel to the roof's edges.
Factors that commonly contribute to misdiagnosis
- Age of the roof: older shingles are more prone to curling from heat exposure and aging.
- Installation details: nails too close to the shingle edge, overdriven nails, or improper nailing patterns can cause buckling.
- Ventilation and moisture: poor attic ventilation or roof deck moisture can lead to buckling or premature aging.
- Climate fluctuations: rapid freeze-thaw cycles or extreme heat can exaggerate curling or buckling patterns.
- Localized vs. widespread: localized curling often points to installation or deck moisture issues, while widespread curling tends to reflect aging or heat exposure.
Step-by-step diagnostic approach
1) Do a ground-level visual check
- Stand safely on solid ground with binoculars to identify areas with curling or buckling.
- Map the roof sections where it's most obvious (e.g., south-facing slopes, areas above valleys, or near roof penetrations).
2) Inspect from the roof if you're comfortable and safe
- Use a sturdy ladder, have a spotter, and wear proper footwear.
- Look for consistency: is curling confined to a few shingles or spread across entire sections or planes?
3) Check attic and decking conditions
- Look for moisture stains, mold, or a musty smell near the attic hatch.
- Check for visible daylight or sagging areas in the roof deck from the attic side, which can indicate moisture or poor decking support.
4) Compare neighboring sections and other rooftop features
- See if curling/buckling follows a particular row, rafter line, or seam.
- Note whether adjacent homes on the block show similar roof issues, which might point to climate or age rather than a single installation fault.
5) Consider timing and causes
- If curling appears primarily in high-heat months, heat exposure and aging are likely factors.
- If buckling runs along fastened edges or near vents, improper nailing or deck moisture may be the culprit.
6) Assess the urgency based on condition
- Is there active water intrusion or daylight visible through shingles? This elevates urgency.
- Is the roof still under warranty or within a repairable window, given its age and condition?
What the diagnosis means for action
- Curling from heat/age: often an indication that replacement is near, though selective repairs may be possible if damage is limited.
- Buckling from moisture or installation: may require decking inspection, ventilation improvements, or re-nailing/re-sealing, depending on severity.
- Localized versus widespread patterns: localized issues might be addressed with targeted repairs; widespread patterns often signal a full roof replacement timeline.
When to call a professional
- If you're uncomfortable climbing or inspecting the roof, or if you notice active leaks, daylight through the deck, or widespread buckling.
- If you're unsure whether curling or buckling is due to aging, installation, or deck moisture, a licensed roofer can confirm with a proper inspection.
Documentation you can gather
- Photos from multiple angles and distances (ground and attic side, if accessible).
- A rough map of affected areas by roof slope and exposure.
- Notes on timing (months or seasons when curling/buckling is most apparent) and any related events (storms, extreme heat).
- A list of questions for a pro, such as potential replacement options, ventilation upgrades, and warranty considerations.
Quick at-a-glance checklist
- Visual signs of curling or buckling: yes/no
- Extent: localized vs. widespread
- Nearby moisture or attic issues: yes/no
- Roof age and exposure history: yes/no
- Safe inspection capability: yes/no or call pro
Repair Options for Curling or Buckling Shingles
Temporary fixes
- Cover exposed areas with a weatherproof tarp or heavy-duty roofing plastic if you see fresh leaks or mats of moisture. Secure edges with rope or nails, but don't over-tighten.
- Re-nail loose shingles to slow further damage. Use corrosion-resistant roofing nails (one inch longer than the existing nails) and place them slightly above the row above to avoid creating new nail pops. Drive nails straight and flush, then seal with asphalt roofing cement.
- Seal small lifted edges or edges curling at the corners with a thin line of asphalt roofing cement. Lightly press the shingle back into place and allow a bit of cure time before driving more nails if needed.
- Use self-adhesive patches for tiny, localized buckles. Apply the patch over clean, dry shingle surface and press firmly so the patch adheres well. This is a short-term measure and not a replacement for longer-term repair.
- Avoid walking on a roof with curling shingles unless absolutely necessary. If you must, use a roof-approved roof ladder, safe footwear, and two-person assistance to minimize damage.
Minor repairs
- Re-secure borderline shingles that are cupping but still firmly attached. Lift the edge slightly, add a bead of roofing cement under the lip, then re-nail along the same line or just above it.
- Replace a few damaged or severely cupped shingles in a small area. Remove nails carefully, slide out the old shingle, and slide in a new one. Nail into the same pattern as the surrounding shingles, then seal with cement around the edges.
- Check nearby shingles for brittle tabs or hairline cracks. If you see cracks, seal them with a flexible asphalt sealant and cover with a small patch of roofing tape or patch ahead of the crack to prevent further splitting.
- Address attic ventilation and moisture sources. Curling is often a symptom of excess heat or trapped moisture. Ensure attic vents are clear, soffits are not blocked, and insulation is not soaking up moisture.
Partial replacement
- When curling or buckling affects a continuous stretch or a localized section, consider partial replacement rather than a full roof. This keeps cost down while restoring protection.
- Steps:
1) Identify the damaged section and measure the area to determine the number of shingles to replace.
2) Pry up the damaged shingles along the edges of the section and carefully remove nails without tearing the surrounding shingles.
3) Cut and fit new shingles to replace the removed layer. Align the tabs with neighboring shingles so they lay flat and watertight.
4) Nail into the same shingles pattern as the existing roof, about 1 inch above the old nails. Seal nail heads with roofing cement.
5) Seal seams and edges with a bead of roofing cement, and place a patch of waterproof sealant along the edge of the replacement area if needed.
6) Inspect and reseal adjacent shingles if they show signs of lifting or curling; re-nail as needed.
- Color and granule match are important for curb appeal. If you're unsure about color compatibility or shingle type, consider replacing a larger area to achieve a uniform look.
Full roof replacement
- When curling or buckling covers a large portion of the roof or is linked to age, moisture intrusion, or persistent ventilation problems, a full roof replacement may be the most cost-effective long-term fix.
- Process overview:
1) Comprehensive assessment of roof structure, deck, underlayment, flashing, and ventilation to determine overall needs.
2) Remove old shingles down to the deck, inspect for damage, and repair any deck or structural issues.
3) Install a new underlayment, with proper ventilation details, then apply the new shingles in standard laps with correct nailing patterns.
4) Reinstall flashing, ridge caps, and vents, ensuring waterproof transitions at chimneys, skylights, and valleys.
5) Final inspection and clean-up. Verify there are no loose edges or nails protruding and ensure proper attic ventilation is restored.
- When choosing materials, consider shingle type, warranty, and local climate. A full replacement is a major project, and working with a licensed roofer helps ensure proper installation, warranty coverage, and long-term performance.
What Is the Typical Cost to Fix Curling or Buckling Shingles?
Minor repair: Description and cost
A minor repair handles a small, isolated patch where a few shingles are curling or buckling. This is usually cosmetic and won't require touching the roof deck or flashing. The goal is to stop further edge lifting and protect against water intrusion.
- What it involves
- Inspecting the small area and identifying loose or damaged nails
- Replacing 1–3 curled or cupped shingles
- Re-nailing securely and sealing edges with roofing cement or a compatible sealant
- Touching up flashing if needed and cleaning the area
- Typical cost
- Roughly $150–$350 for a small patch, depending on accessibility and material type
- If underlayment or flashing needs minor attention, add $50–$150
- Steps you can expect in a minor repair
1. Locate the curled shingles and check for loose nails
2. Remove the affected shingles carefully without disturbing neighboring tabs
3. Install new shingles with proper nailing pattern
4. Seal edges and reseal surrounding flashing if present
- When it's still considered minor
- Curling is isolated, not widespread
- No signs of water intrusion beyond the patch
- The underlying deck and attic ventilation look healthy upon inspection
Moderate repair: Description and cost
Moderate repairs cover a larger area, usually a small section of the roof (roughly 100–300 square feet) with several curled or buckled shingles and possibly damaged underlayment or flashing. This can be triggered by wind uplift, previous improper nailing, or aging shingles.
- What it involves
- Removing a larger run of curled shingles
- Checking and possibly replacing degraded underlayment in the affected zone
- Re-flashing vulnerable areas (valleys, vents, skylights) if needed
- Installing new shingles with correct alignment and fasteners
- Cleaning debris and performing a quick upstream inspection to ensure no other zones are compromised
- Typical cost
- Roughly $500–$1,200, depending on roof size, material, and access
- Additional costs for underlayment replacement or minor deck checks: $100–$300
- Steps you can expect in a moderate repair
1. Assess the extent and map out the affected zone
2. Remove and replace a broader run of curled or buckled shingles
3. Inspect underlayment and flashing; replace if compromised
4. Reinstall shingles with proper nailing and alignment
5. Seal edges and perform a post-repair inspection
- When it's considered moderate
- Multiple adjacent shingles are curling, with some minor buckling
- Evidence of wind-related damage or aging materials in the localized area
- Underlayment or flashing shows signs of wear in the affected zone
Major repair: Description and cost
A major repair is needed when curling or buckling covers a large portion of the roof, or when damage extends to the underlayment and possibly the decking. This can involve substantial patchwork, flashing refresh, and sometimes partial deck replacement. In extreme cases, a reroof may be warranted.
- What it involves
- Extensive removal of damaged shingles across a large area
- Replacement of underlayment and, if necessary, damaged decking
- Re-flashing around penetrations and along valleys
- Full re-shingle of the affected roof plane and a thorough inspection to prevent recurrence
- Possible scaffolding or higher labor intensity for steep pitches
- Typical cost
- Roughly $1,800–$4,500 for a large-area repair on a standard home
- More complex scenarios (deck work, steep pitches, or very large roofs) can run $5,000–$12,000 or more
- If a full reroof is recommended, costs will be higher and vary with material choice
- Steps you can expect in a major repair
1. Comprehensive roof assessment to determine scope
2. Remove damaged shingles over a wide area and inspect decking
3. Replace underlayment and repair or replace decking as needed
4. Re-flash and seal all penetrations; install new shingles
5. Perform a final inspection and address any residual issues
What factors affect cost
- Roof size
- Larger roof areas require more materials and labor; cost scales with square footage
- Access
- Steep pitches, tall structures, or difficult-to-reach eaves increase time, safety measures, and equipment needs
- Material type
- Asphalt shingles are generally cheaper to repair than premium shingles (architectural, cedar, or metal) due to material price and install complexity
- Extent of damage
- Isolated curling vs. widespread buckling, underlayment degradation, and decking damage drive cost differences
- Local labor rates
- Regional wage differences, permit requirements, and scheduling (seasonality) influence labor costs
How Long Can You Wait Before Your Shingles Curl or Buckle?
0–7 days
- Early curling or buckling around the edges or near vents is a warning sign, not a full replacement yet. The main risk is wind uplift and water finding its way under loose edges.
- What to do: avoid walking on the roof. If you notice active leaks in the attic, place a tarp over the affected area from the inside and call a roofer for a quick inspection.
- Practical outcome: minor delays may be tolerable for a few days, but the problem can worsen quickly as wind, rain, and heat stress continue.
1–4 weeks
- The curled/buckled sections can spread to adjacent shingles as heat cycles and age take their toll. The roof deck may start to show moisture signs in the attic or along the ceiling.
- What to do: schedule a professional assessment this week. In the meantime, keep the area dry, ventilate the attic if you can, and protect interior finishes with temporary barriers if leaks become visible.
- Practical outcome: delaying beyond a few weeks increases the chance of larger sections needing replacement rather than isolated repairs, and minor leaks can become more pronounced.
1–3 months
- Widespread curling or buckling increases wind uplift risk and accelerates deterioration of the underlayment and roof deck. Moisture intrusion becomes more likely, especially in storms.
- What to do: obtain written estimates from licensed roofers and start planning for repair or partial replacement. If the roof has multiple weak areas, you may be looking at a larger repair bill rather than a patch.
- Practical outcome: repairs become more invasive and expensive; the chance of interior damage, such as insulation moisture or mold, rises if leaks are present.
6–12 months
- Prolonged neglect can lead to significant structural impact: exposed roof deck, sagging spots, and widespread leaking. You may need a full roof replacement rather than piecemeal fixes.
- What to do: act now to avoid escalating costs. A comprehensive plan with a roof replacement timeline and budget is often more cost-effective than repeated patch jobs.
- Practical outcome: major damage is likely, and deferred action now translates to higher material, labor, and potential interior repair costs.
1) Do a quick roof-side inspection from ground level or use binoculars to identify obvious curling, buckling, or patches that are lifting.
2) Avoid stepping on the roof. If you must access the attic, wear a flashlight and look for stained or damp insulation indicating leaks.
3) If leaks are present, place a tarp inside the attic or along the ceiling to slow water intrusion until the roofer arrives.
4) Schedule a professional roof inspection as soon as possible, and request a written assessment detailing the extent of curling/buckling and recommended fixes.
5) Get multiple quotes and ask about options: partial repair, re-seaming adjacent shingles, or full replacement if necessary.
Quick-checks to help you decide when to act
- Is more than a handful of shingles curling or buckling, or is it localized to a single area?
- Are you seeing or smelling moisture in the attic after rain?
- Has heat exposure or age contributed to the issue over multiple seasons?
- Are there wind-driven rain events forecasted that could exacerbate loose shingles?
What to tell your roofer
- Location and size of affected areas
- Whether you've noticed leaks inside the attic or ceilings
- Any prior repairs or shingle types used on the same roof
- Your preferred timeline and budget, so they can tailor a plan that minimizes disruption
Practical takeaway
Curling or buckling shingles don't fix themselves. Waiting longer increases exposure to wind, rain, and heat, often turning a small issue into a larger, more costly project. Addressing the problem promptly with a professional assessment keeps options open and helps protect your home.
How Curling or Buckling Shingles Vary by Location and Climate
How This Problem Varies by Region & Climate within the United States
Regional weather drives when, why, and how shingles curl or buckle. Temperature swings, humidity, wind, snow, salt spray, and UV exposure all interact with roofing materials, underlayments, and attic ventilation. Knowing your region helps you spot the early signs and tailor prevention.
Northeast & Midwest
- What drives it: Cold winters with freeze–thaw cycles, heavy seasonal snows, and wet springs. Rapid warming days followed by cool nights can stress shingles and the deck beneath.
- Signs to watch for: Rippled, wavy shingles; edges or tabs lifting near eaves or around roof penetrations; nail pops or fasteners pulling slightly out of the deck.
- Regional prevention steps:
- Step 1: Verify and improve attic ventilation (balanced intake and exhaust) to move moisture out and reduce deck swelling.
- Step 2: Add or upgrade insulation to minimize temperature-driven movement of the roof deck.
- Step 3: Keep gutters and downspouts clear to reduce water backing up onto the roof and ice dam risk.
- Step 4: Have a professional inspect after heavy snowmelt or ice dam events and address any deck leaks promptly.
Southeast & Gulf Coast
- What drives it: High humidity, frequent rain, and intense sun. Wind from tropical storms or hurricanes can lift edges if shingles aren't well adhered.
- Signs to watch for: Edges curling or lifting in sun-warmed afternoons; adhesive failure in hot weather; granules washing away more quickly after rain.
- Regional prevention steps:
- Step 1: Use shingles with strong sealing properties and wind-rated installation.
- Step 2: Ensure proper nailing pattern and sealant at joints and around penetrations.
- Step 3: Improve attic ventilation and moisture control to prevent deck dampness.
- Step 4: Inspect after storms for wind damage and reseal any loose edges quickly.
West & Desert
- What drives it: Intense, long-duration sun exposure and high daytime temperatures in deserts; heavy rain and moisture in coastal parts.
- Signs to watch for: Shingle drying and becoming brittle in desert zones, leading to cracking or upward curling; in wetter coastal areas, swelling and buckling from moisture intrusion.
- Regional prevention steps:
- Step 1: Choose UV-resistant, heat-stable shingles and reflective or lighter-colored options where possible.
- Step 2: Ensure ventilation is not blocked by insulation or soffits; keep roof deck closer to exterior temperatures.
- Step 3: In coastal zones, watch for salt spray intrusion and inspect seals around flashings and edges.
- Step 4: Schedule more frequent inspections in transition seasons when heat and moisture swings are common.
Mountain & Pacific Northwest
- What drives it: Snow accumulation and ice dam formation in winter; heavy rainfall and accelerated aging from constant moisture in the wet coast ranges.
- Signs to watch for: Buckling near eaves where ice dams form; cupping or edge curling after wet seasons; granule loss following storms.
- Regional prevention steps:
- Step 1: Install ice and water shield along eaves and low-slope areas to manage meltwater.
- Step 2: Improve attic insulation and ventilation to reduce condensation on the roof deck.
- Step 3: Use roof coverings rated for high moisture and ensure proper underlayment installation.
- Step 4: Inspect after major rain events or heavy snow thaw cycles and reseal any affected areas promptly.
Regional overview tips (apply across all regions)
- Regular inspections: Schedule at least two professional roof checks per year, plus after major storms.
- Documentation: Photograph any curling patterns, edge gaps, or missing granules to track progression.
- Ventilation and deck health: Keep attic ventilation balanced and the deck dry to prevent hidden moisture that causes buckling.
- Quick response: If buckling is localized and minor, address underlying moisture or heat issues; if widespread or severe, call a roofer for a safe assessment and repair plan.