Last updated: Apr 19, 2026
Twin Falls sits above the Snake River Canyon in south-central Idaho, creating an exposed setting where wind can accelerate weathering on roof edges, ridges, and flashing. The high-desert exposure means gusts can peel back shingle tabs, lift poorly sealed flashing, and push granular wear down faster than you'd expect. If your roof skirts the canyon rim or faces open horizons, those wind-driven forces are not theoretical worries-they're daily realities. Inspecting for lifted tabs, torn underlayment, and loose or corroded flashing should be part of your routine after strong storms or seasonal wind events. Upgrade flashing with corrosion-resistant metals, and consider edge protection that resists wind uplift for long-term resilience.
The city's pattern of hot, dry summers followed by cold, snowy winters makes freeze-thaw cycling a primary driver of shingle cracking, flashing movement, and leak development. Water that seeps into tiny seams or vent gaps can freeze and expand, prying apart joints and creating micro-cracks that host moisture year after year. Over time, these small failures compound, accelerating accelerated aging even on roofs that still look sound from the ground. For homeowners, this means you should treat your roof as a dynamic system: regular attic ventilation to minimize warm, moist air lifting through the deck, and a keen eye for edge damage or curling shingles that signal deeper concerns. If you've noticed more granule loss after a winter or more dampness in the attic after storms, that's a sign to prioritize a professional assessment before minor issues become costly repairs.
Spring hail and wind events are a recurring local concern, so roofs are often evaluated not just for age but for cumulative storm wear before replacement timing is decided. Hail can bruise shingles, compromise the granule surface, and create microcracks that allow moisture entry. Wind can shift flashing, loosen seals around vent pipes, and drive water under the roof line where it meets the wall. In practice, this means you should schedule a post-storm inspection after every significant hail event or windstorm. Look for dented metal flashing, bubbled or cracked shingles, and unusual moisture staining on interior ceilings adjacent to corners and penetrations. Addressing these issues early preserves insulation, slows insulation degradation, and lowers the risk of sudden leaks.
With the climate's extremes, proper ventilation is not optional-it's a lifesaver for longevity. A roof acting as a heat trap in summer followed by rapid cooling in winter fosters more rapid shingle aging and deck delamination. Ensure soffit and ridge vents are clean, unobstructed, and appropriately sized for your attic's cubic footage. Equally important is edge protection: a roof's edge and drip edge should be robust, well-fastened, and continuous to resist wind uplift and meltwater intrusion. If you have vent pipes or protrusions, sealant integrity around flashing must be maintained, and backing details should exclude backward migration of water into the deck. Practical checks: perform a visual from the ground and a careful crawl or ladder-assisted inspection twice a year, focusing on the perimeters, ridges, and flashing seams.
In this climate, material selection matters. Steep-slope systems that combine strong edge detailing, resilient flashing, and solid underlayment perform best under freeze-thaw, wind, and hail exposure. When evaluating options, prioritize synthetic and metal options with proven wind uplift resistance and durable flashing systems, then pair them with a ventilation strategy that keeps the attic dry and temperature-stable. Shingle colors and textures that hide minor scuffs from hail or wind can also reduce perceived wear while you monitor for deeper issues.
Set a seasonal inspection rhythm tied to spring storms and post-winter conditions. After each major wind or hail event, inspect from the ground for lifted edges, then perform a higher-risk inspection after you've cleared snow and ice. When you notice curling, gaps around flashing, or ceiling stains near penetrations, treat it as a priority repair window. Delays compound risk, especially where freeze-thaw cycles press on vulnerable sealants and deck materials. Your roof is constantly negotiating a harsh balance of sun, wind, and cold-keep a vigilant eye and address problems before they become failures.
Twin Falls area homeowners face weather-driven claim activity tied especially to hail and wind, which directly affects whether repair or full replacement is financially realistic. The canyon setting amplifies wind gusts and hail exposure, and the freeze-thaw cycle can push aging roofs over the edge faster than you might expect. In practice, that means your roof should be evaluated not only for obvious spots but for hidden damage around hips, valleys, and flashing where wind-driven hail can start micro-cracks that worsen with repeating cycles of freezing and thawing. If a storm rattles your area, expect a window where insurers look closely at how much life your current roof has left versus the cost of a full replacement after a hail event.
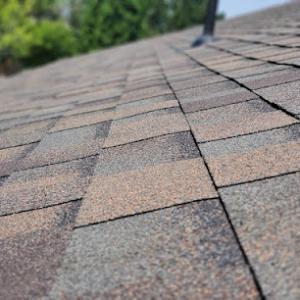
Damage on asphalt shingles can be subtle: bruising under granules, hairline cracks, or granule loss that accelerates aging. Metal roofs may show more cosmetic evidence on the surface, but scratches or dented panels can hide faster deterioration under repeated hits. Start with a careful, photo-docused assessment. Document any hail-driven irregularities, pattern damage along eaves and ridge lines, and any loose or torn flashing. Date-stamped photos help establish a storm window, which is useful when discussing claim timelines with the carrier. If a technician notices underlying moisture intrusion or compromised underlayment, the issue moves from cosmetic to structural concern, which can influence whether a patch will suffice or a full roof replacement is the sounder choice.
Insurance carriers in this market may ask for detailed photo sets, date-stamped documentation, and sometimes an independent adjuster review. Prepare a concise damage map that shows both immediate impacts and potential delayed failures-like exposed underlayment where shingles have been displaced. Present manufacturer guidance for any replacement or repair you propose, and be ready to discuss wind uplift ratings and hail resistance features that your roof employs. If your roof includes impact-resistant options such as metal roofing or Class 4-rated shingles, be aware those features can matter more in this market, since insurers may recognize them for discount consideration where available. When you receive an initial offer, review whether it reflects both the visible, storm-driven damage and any latent issues uncovered by the adjuster. It is common for multiple conversations to occur as the claim moves from initial assessment to final determination.
Given the combination of freeze-thaw cycles and recurring wind and hail exposure, the decision between repair and replacement hinges on the roof's current condition and the expected remaining life. If the structure shows widespread granule loss, curling, or consistent moisture intrusion after a hail event, a full replacement often becomes the more reliable option. For milder signs, targeted repairs on a well-ventilated, steep-slope system can extend service life without overextending resources. In either case, focusing on an approach that improves ventilation, reduces ice dam risk, and enhances impact resistance can yield long-term resilience against Twin Falls' weather regime.

Heck Roofing
(208) 749-9146 www.heckroofing.com
219 Maxwell Ave, Twin Falls, Idaho
4.9 from 237 reviews
Heck Roofing is passionate about and takes a lot of pride in serving the Magic Valley and surrounding areas with the highest quality and complete satisfaction. We specialize in roof replacements, repairs, tear offs, overlays, metal roofing, single ply membranes of all sorts, roof inspections, and more. Call us for your free estimate today!
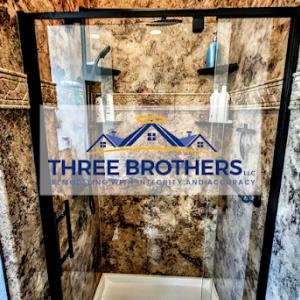
Three Brothers
(208) 417-1634 threebrothersllc.com
117 6th Ave W, Twin Falls, Idaho
4.9 from 210 reviews
With Three Brothers, you are guaranteed to have a lasting home renovation project, installed by experts. Our team goes above and beyond to provide expert, friendly service. As a family-owned company, we make customer satisfaction our number one priority. We offer roofing, gutter, windows, and siding services. Give us a call today to learn more about our premier company, or fill out our online form now to request a free estimate!
Roof Rescue
(208) 732-2122 roofrescueusa.com
223 Addison Ave, Twin Falls, Idaho
5.0 from 26 reviews
With offices located in Idaho Falls, Twin Falls and Logan, we offer services to all of Southeastern Idaho, Cache Valley Utah, Western Wyoming, and Southwestern Montana. Free Estimates | Senior and Military Discounts | Licensed and Insured
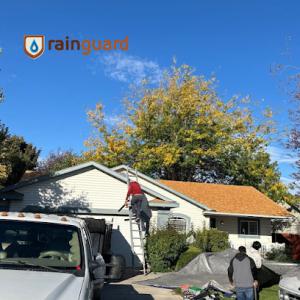
Rainguard Roofing
(208) 490-9060 rainguardroofing.net
1646 Eldridge Ave, Twin Falls, Idaho
4.7 from 115 reviews
Since 2012, Rainguard Roofing has been the trusted name for comprehensive roofing and gutter solutions in Twin Falls and Pocatello. As certified experts in both residential and commercial projects, our dedicated team handles everything from new installations and replacements to essential repairs. Our commitment to outstanding customer service ensures every project is a seamless experience, prioritizing your complete satisfaction with clear communication and reliable support from start to finish.
M & M Construction - Roofing
(208) 329-2425 topusabrowse.top
213 5th Ave W, Twin Falls, Idaho
5.0 from 12 reviews
At M & M Construction - Roofing, our family-owned business has been providing exceptional roofing solutions to residential and commercial clients in Southern Idaho for the past 17 years. With a team of highly skilled professionals and a commitment to quality workmanship, we offer a wide range of services, including residential and commercial roof repairs, tear offs and replacements, installations, and maintenance. Whether you're looking for a new roof or repairs to an existing one, our experienced contractors will work closely with you to ensure a seamless and stress-free project.
Legion Roofing
624 4th Ave W, Twin Falls, Idaho
4.7 from 15 reviews
Looking for a reliable residential or commercial roofing company? Whether your roof is leaking or you want to replace your old roof, Legion Roofing can help. No job is too big or too small for our experienced crew. We offer a limited lifetime manufacturer warranty on our services.
KW Roofing
287 Noble St, Twin Falls, Idaho
5.0 from 8 reviews
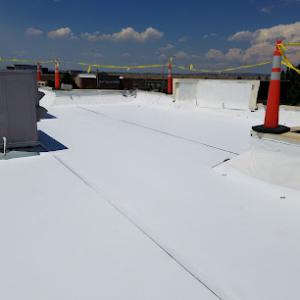
Looking for a roofing expert you can trust in the Magic Valley and surrounding areas? KW Roofing, LLC specializes in flat roof solutions, providing top-notch craftsmanship and reliable service. We're dedicated to protecting your property with durable, high-quality roofing that stands the test of time. From new installations to repairs and maintenance, our team utilizes first-rate materials such as TPO and PVC membranes to ensure superior protection and energy efficiency. Choose KW Roofing, LLC for expertise and peace of mind.
Asphalt shingles remain common in Twin Falls because they fit mainstream residential budgets, but they are especially vulnerable here to hail bruising, granule loss, and thermal aging from intense summer sun. If your home uses asphalt, pay attention to impact-resistant options or thicker courses with good granule seal. In a setting where sun exposure is relentless and hail storms visit more often than you'd expect, consider upgrading to a high-quality wind-limited asphalt system that includes a reinforced underlayment and a well-sealed ridge and hip line. Regular inspections after storms help catch bruising and edge color loss before it accelerates aging.
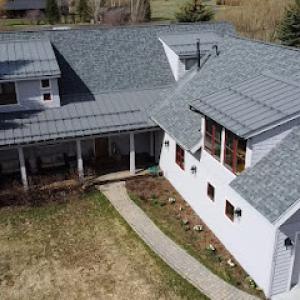
Metal roofing is a strong regional fit in Twin Falls because it handles snow shedding, freeze-thaw exposure, and impact resistance better than many alternatives, though detailing at edges and penetrations is critical in windy conditions. If you choose metal, look for panels with proven cold-weather performance and robust fasteners that resist loosening in freezes. Pay special attention to flashing around chimneys, vent stacks, and skylights, since wind-driven debris can pry at seams. Adequate attic ventilation remains essential to prevent condensation and ice damming under metal, especially on steep slopes where sun exposure is uneven.
Clay and concrete tile appear in some higher-end homes, but their weight and brittleness make structural review and storm-damage assessment more important in a city that sees both winter loading and spring hail. If your structure is already engineered for tile, evaluate rafter spacing and anchorage to withstand snow loads and the potential for cracking in freeze-thaw cycles. When hail hits, tiles can crack and spall, exposing underlayment to moisture. In that case, a quick-diagnosis plan and a trusted roofer who can identify micro-fractures without removing large sections are valuable. Weigh the long-term maintenance against the aesthetic and insulation benefits of tile.
Regardless of material choice, a cohesive strategy matters. Start with a thorough inspection after winter thaws and spring storms to identify loose shingles, lifted edges, or exposed underlayment. In summer, watch for granule loss on asphalt shingles and signs of heat stress on darker surfaces. Ventilation is a common bottleneck: ensure soffit and ridge vents are clear and balanced to prevent heat buildup and ice dam problems. For metal roofs, keep edges and penetrations sealed and inspect fasteners annually, especially after strong winds. For tile systems, check for cracked or displaced tiles, and verify that the roof's load path remains intact through the frost cycles. A well-ventilated, properly sealed system remains your best defense against the combined effects of freeze-thaw and storm-driven aging.
In Twin Falls, late spring through early fall is generally the practical reroofing window because winter snow and freeze conditions complicate tear-off, sealing, and inspection closeout. The longer you wait into late fall, the more chance there is for cold snaps to interrupt ventilation work and slow the installation process. If a roof shows widespread aging or recurring leaks, aim for a plan that can start as soon as conditions reliably allow, so long-term underlayment and flashing can be brought up to a robust standard before the next winter. The goal is to have a solid, sealed roof deck with properly vented ears and ridge lines before the first freeze.
Spring storm season can interrupt schedules with hail and wind, so homeowners often face a tradeoff between early booking and waiting until post-storm damage is fully documented. Hail can compress or chip shingles and expose decking, but wind-driven crews working through a spring lull can also leave gaps or rushed sealants if weather shifts suddenly. The prudent approach is to schedule with a trusted local roofer who can provide a realistic contingency plan, including dedicated weather windows and a clear sequence for tear-off, inspection, and material staging. Waiting for every last storm to pass can push you into late spring or summer, but leaping into the first available slot after a hail event should come with an agreed follow-up inspection to confirm flashing and ventilation are performing as intended.
Autumn replacement decisions in Twin Falls are often driven by the need to enter winter with sound flashing, ventilation, and underlayment before snow and freeze-thaw expose weak spots. If you delay too long, snow buildup and freeze-thaw cycles can complicate sealing around penetrations and edge details. A fall schedule should prioritize securing all critical waterproofing components, ensuring ridge and soffit vents are clear, and confirming the drip edge and valley membranes are firmly set. If winter weather is imminent, selecting a crew that can complete a careful, thorough closeout with robust ice and water shield is not just prudent-it's a preventive step against repeated cold-season leaks.
Typical Twin Falls pricing ranges are about $350 to $550 per square for asphalt shingles. In your area, this remains the most budget-friendly path, and it often handles the freeze-thaw cycle reasonably well when the roof is well-ventilated and protected with proper underlayment. If your home has a steeper pitch or higher exposure to wind and hail, expect occasional upward pressure on labor time, not necessarily material cost. Keep in mind that severe weather events can temporarily push prices higher as local crews ramp up to handle insurance-driven replacement volumes.
Metal roofing runs about $700 to $1200 per square in this market. Metal handles heat and hail very well, and its lighter weight can help with existing structures that aren't designed for heavy tiles. In a canyon climate with strong winds and rapid temperature swings, metal often delivers longer life and higher resistance to the freeze-thaw stress. Costs can spike after hail events when demand spikes and contractors juggle project loads, but the long-term energy savings and durability can offset the upfront premium if you plan for a roof that lasts decades.
Clay tile typically falls in the $800 to $1500 per square range. Tile systems are robust against sun and wind but add weight and require precise installation. Freeze-thaw conditions in this region can stress tiles differently than asphalt, so a careful structural check is prudent before reroofing. After hail or heavy wind storms, prices for tile can move higher as supply chains and crews adjust to the demand. If your home's structure can support it, tile offers excellent longevity and curb appeal.
Concrete tile costs come in at about $650 to $1100 per square. Concrete provides strong impact resistance and decent energy performance, with installation demands that are more specialized than asphalt but typically less expensive than clay. In Twin Falls, the labor complexity and roof framing needs may rise modestly for heavier concrete tile, especially on roofs with complex geometry or older framing.
Wood shingles or shakes run roughly $600 to $900 per square. They deliver a distinctive look and good insulation, but weather exposure can drive maintenance in this climate, especially if hail damage occurs. When wind events happen, check for loose or damaged shards that could compromise insulation and ventilation. Heavy hail or high winds can boost installation time and costs as crews address damage quickly to prevent further freeze-thaw stress.
Synthetic or composite shingles are typically $500 to $800 per square. They blend affordable pricing with good impact resistance and a manageable weight profile. In this market, composites can be a practical middle ground when hail risk and wind exposure are high but you want quicker installation and easier long-term upkeep. As with other heavy systems, substantial weather events can push contractor availability and pricing up for a short window.
In Twin Falls, a full reroof typically requires a permit through the city building department rather than being treated as a purely informal maintenance project. The process is designed to ensure that each reroof adds sound, code-compliant protection against the region's heat, winter freeze-thaw cycles, and wind-driven events. When you or your contractor submit the plan, expect the review to look for alignment with local wind and snow loads, proper nailing patterns for the chosen roof system, and adequate deck condition. Keeping a clear line of communication with the building department helps prevent delays if a detail needs revision.
Local review concentrates on roofing details that matter in this climate, especially flashing, ventilation, and whether the roof structure is appropriate for the proposed system. Flashing around dormers, chimneys, skylights, and roof-to-wall transitions must be continuous and corrosion-resistant to resist seasonal thermal movement. Ventilation is checked to support long-term roof life; inadequate soffit intake or ridge exhaust can lead to premature aging from heat and moisture. The review also considers whether the existing roof structure can support the intended system, given Twin Falls' heat exposure, freeze-thaw patterns, and typical attic insulation levels.
A final inspection is required to close the permit in Twin Falls, so homeowners should confirm that the contractor schedules and passes final sign-off rather than leaving the permit open. Expect the inspector to verify proper installation of underlayment, drip edges, and the chosen roof system, as well as sequencing of installation to prevent weather-related damage during the reroof. Once the final sign-off is recorded, the project can move from permit status to completed, with a lasting installation that holds up through the area's seasonal cycles.
In Twin Falls, the freeze-thaw cycle in dry, high-desert air shows up first at flashing transitions, roof penetrations, and other joints where repeated expansion and contraction can open leak paths. The result is slow, creeping leaks that expand behind the scenes, often before a homeowner notices standing water or stained ceilings.
Wind exposure in the area can damage ridge components, loosen edge materials, and drive debris abrasion, especially on roofs already weakened by age or hail. Ridge caps, vent boot seams, and the uppermost edge materials bear the brunt, and once those areas loosen, storm-driven wind can accelerate broader deterioration across the roof face.
On older asphalt roofs, the region often shows a combination of sun-driven brittleness and storm impact wear rather than a single clean failure event. That means you may see curling shingles, granule loss, and small weep holes appearing in multiple spots, all from repeated cycles rather than one dramatic blow.
What this means for you is a need for proactive inspection and targeted maintenance. Focus on vulnerable spots: flashings at chimneys, vents, skylights; seams around skylights; ridge and edge materials; and the first signs of loosening or granule loss.
When you see curling shingles, exposed underlayment, or granular washout after a storm, address them quickly before water follows the same path. Regular seasonal checks should map out high-risk areas: roof-to-wall transitions, valley bottoms, and any slope where ice tends to linger around eaves.
Seasonal storm prep includes cleaning debris from gutters, trimming overhanging branches, and ensuring a balanced venting plan with intake and exhaust vents, so warm, moist air can escape without lifting shingles and flashing. If you notice repeated small leaks after storms, seek a local roofer who tracks local patterns for freeze-thaw cycles.
Ageing asphalt roofs in this climate often show sun-driven brittleness with storm wear. That means checks should happen more often as shingles curl or granules shed. Choose materials with proven tolerance for freeze-thaw, edge-fastening, and robust flashing, pair them with a maintenance plan addressing sun and spring storms.