Last updated: Apr 19, 2026
In a climate with long, blistering days and strong sun, a roof ages faster than in milder regions. Asphalt shingles, metal, clay or concrete tiles, and even synthetic options all succumb to heat exposure, but the rate and style of aging differ. The sun can bake underlayment and reveal fabric wear sooner, while metal roofs may expand and contract with daily highs, affecting fasteners and sealants. The practical takeaway is that longevity for heat-sensitive materials hinges on choosing the right product for Laredo's extreme sun and managing the installation window to minimize heat-induced stress. When planning a replacement, consider how the material you pick will perform as temperatures routinely hover in the triple digits during peak season.
Local installers often target cooler months because work conditions and material performance are more manageable than during peak summer heat. You want workable temperatures for shingles, underlayment, sealants, and coatings so that adhesive bonds cure properly and the system seals without premature drying or softening. Scheduling for a stretch of calmer weather helps crews maintain quality without rushing. If a project must occur in the late spring, build in extra time for heat-related pauses and hydration planning, so materials don't sit in direct sun longer than necessary. A well-timed window reduces the chance of warranty-voiding heat stress or uneven shingle seating caused by scorching midday sun.
Spring often brings sudden hail and wind events that can trigger claims and urgent roof work. In Laredo, those weather interruptions are a real factor. The practical approach is to align the replacement timeline with a forecasted dry spell while still avoiding the hottest part of the year. If a storm bursts through, crews will pause for safety and material protection, which can extend the project timeline. When you plan, communicate a flexible schedule with your contractor: a window that protects against both heat exposure and rain delays. A staged approach, common for longer jobs, can help manage heat exposure while keeping the work on track as weather permits.
The city's process for full replacements often includes staged underlayment and final inspections. Coordinating these stages around heat-sensitive conditions is essential. For example, some steps may be performed on milder days to prevent underlayment from prematurely drying or buckling in extreme heat. The final inspection becomes a checkpoint after the system is fully installed and temperature-sensitive components have had time to settle. Plan with the contractor to schedule the underlayment stage during cooler hours and reserve the final inspection for a dry, moderate-weather day. This sequencing helps ensure that everything seals correctly and that heat in the attic or interior spaces doesn't push moisture issues into later, more costly fixes.
Before the project begins, confirm a preferred replacement window that avoids the peak heat while accommodating potential spring storms. Review the proposed staging sequence with the contractor and mark a clear plan for underlayment and final inspection dates. Ensure you have access to shaded coverage for materials waiting on-site and a reliable daily schedule for weather-related pauses. With these steps, the roof replacement can endure Laredo's long hot season while preserving the integrity of heat-sensitive materials and delivering a durable, weather-ready result.
Spring storms in this heat-soaked stretch bring hail and high winds that can strike roofs before a project starts or while a replacement is underway. Those blows aren't just a weather nuisance-they can create hidden damage that complicates the repair timeline and invites further deterioration if not addressed quickly. You may wake up to dented shingles, lifted edges, or granule loss that isn't obvious from the ground. This is a window where proactive inspection matters more than ever. Have a trusted roofer evaluate the roof as soon as you suspect impact, not after you notice leaks. Early, careful documentation of storm damage helps prevent disputes once a crew is ready to replace the roof.
Texas insurers commonly scrutinize roof claims after hail and wind events, making detailed photo documentation and prompt adjuster coordination especially important in Laredo. After a storm, take high-resolution photos of every side of the roof, close-ups of damaged shingles, vents, chimneys, and gutters. Capture the attic from inside to show any water stains or daylight gaps around penetrations. Keep a dated log of observed damage and weather conditions, and share it with the insurer and the contractor immediately. When the adjuster arrives, accompany them to the roof and mark all areas of potential damage so nothing is missed. If an area looks questionable, document it anyway-claim reviews often hinge on presenting a complete, transparent picture of the condition before work begins.
Because underwriting has tightened in parts of Texas, Laredo homeowners may face more pre-approval steps and more detailed estimate requirements when storm damage is involved. Expect requests for line-by-line scope details, material specifications, and exact remediation methods. Have the contractor prepare a stamped, itemized estimate that aligns with the insurer's preferred terminology and the project's staged underlayment or inspection schedule. Be ready to provide contractor and adjuster contact information, a chronology of the storm event, and the roof's observed condition before and after the event. Timely follow-up with the insurer can prevent delays that cascade into extended exposure to the South Texas sun and heat, which accelerates aging of even new components.
A staged replacement, common in this market, requires careful coordination. Before work begins, align the crew's schedule with the insurer's approval and the permit process, so that coverage remains intact and there are no gaps in protection. During the process, document daily progress with photos, noting weather constraints and any temporary protections installed to shield the home from rain or debris. If hail or wind damage is discovered mid-work, notify the adjuster immediately and secure any newly exposed areas. Quick, precise communication helps preserve the claim's integrity and reduces the risk of denied coverage due to shifting conditions or incomplete documentation.
Find local contractors experienced in assessing and restoring roofs after hail, wind, and severe weather events.
Sunset Roofers
(956) 307-6123 sunsetroofers.com
1701 Jacaman Rd Suite RB2B, Laredo, Texas
5.0 from 34 reviews
J M Flores Roofing & Construction
(956) 723-4334 www.jmfloresroofingandconstructioninc.com
5805 US-59, Laredo, Texas
4.7 from 37 reviews
Sunset Roofers
(956) 307-6123 sunsetroofers.com
1701 Jacaman Rd Suite RB2B, Laredo, Texas
5.0 from 34 reviews
We are a local professional roofing company offering re-roofs, repairs and maintenance. Workmanship 100% guaranteed. BBB accredited, insured and Owens Corning Preferred Contactor.
HBC Roofing
2319 San Dario Ave, Laredo, Texas
4.8 from 138 reviews
HBC ROOFING IS RATED The Best ROOFING COMPANY IN LAREDO 2024 By : Quality Business Awards Roof Repairs, Roof Replacement,Storm Damage, Hail Damage, Natural Disasters, Residential Roofs, , Certified Roofers, Roof Inspection, Insurance Claims Welcome, Warranty on all Work, Licensed & Insured, Debris Clean-up, GAF Certified, Owens Corning, ABC Supply Inc., SRS Distribution. Painting Contractor, Commercial, Residential, Exterior/Interior, Custom Painting, Cabinet Painting, Deck Painting, Specializing in Storm damage, Hail & Wind Damage. Workmanship Warranty on all new RoofsCall us today for your FREE ROOF INSPECTION!!
J M Flores Roofing & Construction
(956) 723-4334 www.jmfloresroofingandconstructioninc.com
5805 US-59, Laredo, Texas
4.7 from 37 reviews
Serving Webb County since 1963. Our mission is to serve the community both commercially and residentially with the most qualified, uncompromising workmanship and service. We work with dedication, integrity, and strive for a position of leadership in the roofing and construction industry.
Rios Roofing Laredo
(956) 999-4236 www.riosroofinglaredo.com
214 N Zapata Hwy, Laredo, Texas
4.9 from 13 reviews
Rios Roofing has been serving as a leading Roofing Contractor since 2010. As a fully-certified professional, I’m ready to tackle anything from the most complex and large scale construction projects to the smallest of repair jobs. I’m fueled by my commitment to excellence and go the extra mile to make sure my clients are completely satisfied with my work. Call to schedule an initial consultation today.

A&H Roofing
9614 Center Rd, Laredo, Texas
5.0 from 11 reviews
We offer FREE INSPECTIONS! We work with all insurance companies. Affordable care for your roofing needs! Call today for a free inspection, find out if your roof can be done with no money out of your pocket.
McAllen Valley Roofing
(956) 242-0431 www.laredo-roofing.com
107 C. del Norte #5c, Laredo, Texas
4.6 from 13 reviews
When it comes to commercial & residential roofing companies in Laredo that offer both quality service and affordable pricing, McAllen Valley Roofing is your best choice. With 30 years of combined experience, we have built a trusted reputation by taking pride in our work. Our superior craftsmanship and design truly set us apart from any other roofing company in town. We can repair and install all types of roofing systems and materials, including asphalt shingles, tile roofs, metal roofs, low-slope/flat roofs, and more. Whether your old roof can reasonably be repaired, or if it’s time to re-roof, you can always expect an honest evaluation. For a free roofing estimate, call 956-242-0431 or visit our website for more information.
V.L. Garza Roofing & Remodeling
1105 Market St, Laredo, Texas
4.7 from 12 reviews
Roofing & Remodeling
Laredo Roofing Solutions
(956) 774-7663 www.laredoroofingsolutions.com
1407 C. del Norte Ste 102, Laredo, Texas
4.2 from 26 reviews
Laredo Roofing Solutions has the best warranties in Texas backed by the Manufactures. Call us to compare warranties before you sign with anyone else. We have up to 50 years for labor and workmanship and 50 years on materials.
JJ Flores Roofing & Sheet Metal
(956) 722-7688 jjfloresroofing.co
1810 Aguila Azteca Dr, Laredo, Texas
4.2 from 19 reviews
JJ Flores Roofing is Laredo's premier commercial & industrial roofing contractor specializing in Thermoplastic Single-Ply, SBS/APP, BUR, Standing Seam Metal, Sheet Metal Fabrication.
Perez roofing
602 Jara Dr, Laredo, Texas
5.0 from 1 review
Armando perez, roofing contractor for more rhan 30 years. Here to help with all roofing inquiries. Free estimates
V&V Roofing Contractors
(956) 401-4138 www.facebook.com
2413 Jacaman Rd ste 3, Laredo, Texas
3.0 from 2 reviews
Roofing Company
AF Roofing
4214 Marcella Ave, Laredo, Texas
At AF Roofing, we look to provide our clients with the very best roof installations and repairs in Laredo, TX and the surrounding areas. We work on both commercial and residential properties and specialize in metal roofing, TPO roofing and more. Call us today.
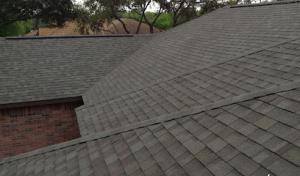
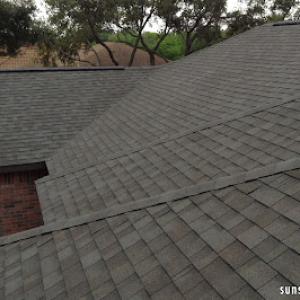
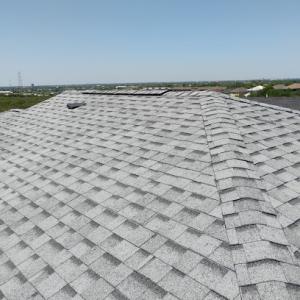
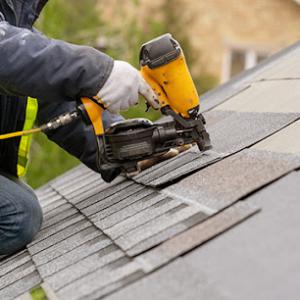
Asphalt shingles are common in Laredo and are especially exposed to heat-related aging under the city's prolonged sun and high temperatures. The mix of brutal sun, high daytime heat, and repeated expansion-contraction cycles tends to shorten the life of lower-end shingles and can lead to accelerated granule loss. When you're evaluating asphalt options, prioritize architectural or laminate shingles with better solar reflectivity and thicker overlay. A reflective mineral grit or lighter color can help bounce some heat away, slowing wear on the backside of the roof deck. Regular inspections after the hottest months are wise, looking for curling, missing granules, or signs of accelerated aging near vents and penetrations. Good attic ventilation remains essential with asphalt to vent hot air that otherwise translates into faster shingle aging and higher indoor temperatures.
Metal roofing is a meaningful local option for heat performance and long-term durability. A metal roof can reflect a substantial portion of radiant heat, especially when installed with a light surface color and a vented, well-sealed underlayment system. For Laredo's climate, color matters: lighter hues stay cooler than dark finishes, and panel profiles with adequate air gaps help minimize heat transfer into the attic space. Pay attention to fastener placement and flashing to withstand heat-induced expansion and contraction, as well as potential wind-driven issues during spring storms. If you already have a metal roof, ensure there's a solid deck under it and that sealant tracks remain flexible to cope with rapid temperature swings. A properly installed metal roof can dramatically reduce cooling loads while resisting hail better than some other options.
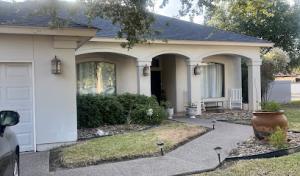
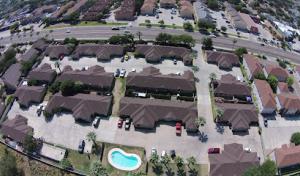
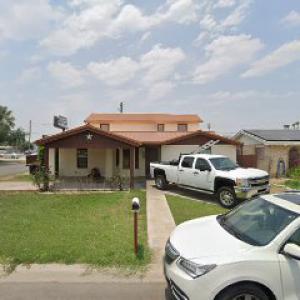
Clay and concrete tile fit South Texas architectural patterns seen in Laredo, but their weight and replacement complexity can materially affect project planning. These tiles excel at shedding heat when installed with appropriate underlayment and an open rafter or battens configuration that promotes airflow beneath the tiles. However, weight demands structural verification, especially on older homes or those with limited roof deck support. Tile surfaces stay cooler in direct sun when compared with dark asphalt, but sun exposure can still lead to brittle edges and microcracking over time if installation details aren't meticulous. Weather resistance is good, yet heavy tiles require careful wind mitigation and precise flashing to avoid leaks after storm events. If a clay or concrete tile roof is on the table, evaluate structural compatibility, tile weight allowances, and the long-term plan for tile replacement or repair.
In a long hot season, prioritizing color and reflective surface, adequate attic ventilation, and clean, well-sealed penetrations will pay off across any material. For storm-prone springs, consider how each option handles hail impacts, wind uplift, and ease of access for maintenance. If a roof choice aligns with the home's existing frame, deck, and architectural style, it's often the one that will age most gracefully under Laredo's sun while delivering dependable performance when storms arrive.
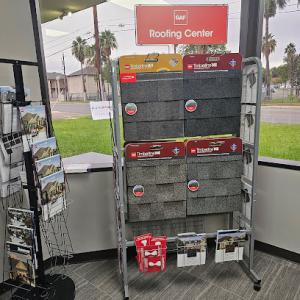
When planning a roof replacement, compare each option against the local pricing ranges per square. Asphalt shingles typically run from 350 to 650 USD per square, metal roofs from 700 to 1200 USD per square, clay tile from 1100 to 1800 USD per square, concrete tile from 900 to 1600 USD per square, wood shingles or shakes from 500 to 900 USD per square, and synthetic or composite shingles from 500 to 900 USD per square. These figures reflect heat exposure, long hot seasons, and the kind of storm activity common after spring hail.
In this market, costs can spike when storm demand surges after spring hail and wind events. Crews, scheduling, and material availability tighten at the same time, pushing prices higher and shortening contractor calendars. If a hail event hits your neighborhood, expect a quick uptick not just in quotes but in the time it takes to secure a trustworthy crew. Planning ahead and locking in dates during off-peak windows can save money and reduce stress when the next storm season rolls around.
Tile-heavy homes naturally push the project into longer timelines and tighter scheduling windows, because tiles require specialized crews and longer installation hours. Heat-driven scheduling around cooler months can affect labor planning more here than in milder markets. If your roof features clay or concrete tile, you may see higher per-square costs and a longer push to complete, especially after a hail event when demand is high. Budget for a flexible start date and potential staging if weather windows are limited.
Start with a cost per square for your preferred material and add a contingency for storm-driven scheduling. If you're replacing a roof after a hail season, request a few schedule options: a fastest-possible window, a mid-season window, and a late-season window. Ask for a transparent breakdown that includes underlayment, fasteners, and any specialty work needed for your roof type. Compare bids not only on price but on projected lead times, crew experience with your material, and the contractor's ability to coordinate staged underlayment and inspections if required by your project scope.
Get a clear picture of your project costs upfront - no commitment required.
McAllen Valley Roofing
(956) 242-0431 www.laredo-roofing.com
107 C. del Norte #5c, Laredo, Texas
4.6 from 13 reviews
During the long, sun-soaked season, a full roof replacement is a major project that triggers the city's building department process. A permit ensures the work meets local safety standards, material setbacks, and proper surfacing for the heat and wind that are common here. If the project proceeds without a permit, a homeowner may face fines, compelled work stoppages, or a future need to rectify noncompliant components when another inspection is demanded by the department. A permit helps protect your home from quick fixes that fail under the stretch of heat and spring storms.
Inspection scheduling is tied to the department's workflow, not a fixed calendar. Laredo uses staged inspections for roofing, including a rough or underlayment inspection and a final inspection to verify code compliance. The underlayment check is where the city confirms that the deck, underlayment type, and overlaps are correctly installed to withstand heat expansion and potential hail impact. The final inspection confirms alignment with local wind-resistance requirements, flashing details, and attic ventilation in light of the area's hot climate. Expect inspectors to request documentation for ventilation, drainage, and any nailing patterns that affect the roof's durability during the city's high-temperature season.
Permits may be issued to either the contractor or the property owner, which means you should discuss this upfront to align responsibilities and avoid delays. If the contractor takes on the permit, ensure you receive copies of permit numbers, inspection dates, and a clear timeline that accommodates weather windows and the city's workload. If you pursue the permit as the owner, prepare for more direct communication with the Building Department and readiness to provide contractor information and project plans. In practice, inspection timing can drift when department workload is heavy or weather windows compress; building in a few flexible days around heat-driven scheduling helps prevent missed inspections and the need for rework.
Coordinate with the contractor to lock in a tentative inspection sequence, then confirm dates as the work progresses. Keep access clear for inspectors and have all required documentation ready, including permit numbers and project scope. Anticipate that final inspections may spotlight flashing and corner details where heat and wind demand extra attention. By knowing the staged process and staying responsive to the department's schedule, a roofing project can stay on track without creating additional setbacks during the hottest part of the year.
In the Texas roof-claim environment, hail and wind losses are common and insurers often expect fast, well-documented submissions. Your neighbors have seen adjusters on the roof within days after a hail event, with quick walk-throughs and requests for photos, measurements, and a clear repair plan. If records aren't precise or if the scope isn't well illustrated, a claim can slow or be questioned. Stay ready with a dated storm diary, photos of exterior damage, and a concise description of observed leaks, damp spots, or loose shingles.
Detailed damage documentation helps a claim ride out the fast-moving reviews that regional activity can trigger. Take high-resolution images of impact marks, cracked or missing shingles, granule loss, and any flashing or vent issues. Note wind-driven damage on eaves and overhead branches that may have contributed to the impact. When possible, include a simple sketch showing affected bays and adjoining structures. Insurers value clarity, not vague impressions, so organize your evidence in a chronological, easy-to-follow package.
Statewide underwriting tightening can influence whether a homeowner repairs, replaces, or upgrades materials after a claim. Carriers may reevaluate the long-term performance of your roof type in the face of repeated heat exposure and storm events. If a claim triggers a full replacement, expect questions about durability, wind resistance, and compatibility with the home's existing structure. Being prepared to discuss alternative materials or upgraded underlayment choices can help shape a favorable outcome, while keeping resilience in mind.
After a storm, speed matters, but accuracy matters more. You'll be asked to confirm the roof's age, previous repairs, and any interior signs of water intrusion. A clear, consistent narrative across photos, notes, and receipts reduces back-and-forth. If a change in material type is proposed, understand how it affects performance in prolonged heat and seasonal storms, and weigh that against your home's architectural style and future maintenance needs.
Connect with contractors who help homeowners navigate the claims process from damage assessment to final approval.
Sunset Roofers
(956) 307-6123 sunsetroofers.com
1701 Jacaman Rd Suite RB2B, Laredo, Texas
5.0 from 34 reviews
J M Flores Roofing & Construction
(956) 723-4334 www.jmfloresroofingandconstructioninc.com
5805 US-59, Laredo, Texas
4.7 from 37 reviews
In a market like Laredo where heat and storm exposure both matter, warranty terms should be reviewed alongside material choice rather than treated as a generic add-on. Look for two core components: material warranties that back the roofing product itself, and workmanship warranties that cover the contractor's installation work. Material warranties often live with the shingle or panel type, while workmanship warranties depend on the installer's credentials and practices. Both parts are essential on a re-roof, where the installation happens over existing assemblies that have already endured the long hot season.
Because many local projects are re-roofs rather than new construction, attention should be paid to how workmanship and manufacturer coverage interact on replacement jobs. Some manufacturers void coverage if the roof is not installed by a certified pro or if the prior roof condition was mismanaged. When evaluating quotes, verify that the installer's workmanship warranty remains valid after a full tear-off and staged underlayment, and confirm whether coverage transfers if you sell the home. A robust agreement will specify duration, what is covered, and how claims are processed.
The local contractor mix includes firms promoting warranty-backed work, making warranty comparison a meaningful part of contractor evaluation. In practice, this means asking for a clear claim path after hail or high-wind events, and ensuring the warranty explicitly covers wind-driven lift, nail pull-out, and underlayment degradation. Confirm whether the warranty requires periodic inspections or maintenance steps to stay in force, and document any storm-related repairs with photos and notes.
Begin with a written checklist that includes material brand, model, and clearly stated warranty terms for both material and workmanship. Require a detailed scope of work covering tear-off, underlayment, flashing, and vent work. Finally, keep copies of all product serials, installation dates, and contractor correspondence; these records streamline future warranty claims and help preserve coverage through resale.