Ultimate Guide to Storm Damage Roof Repair
Last updated: Feb 28, 2026
Introduction to Storm Damage Roof Repair
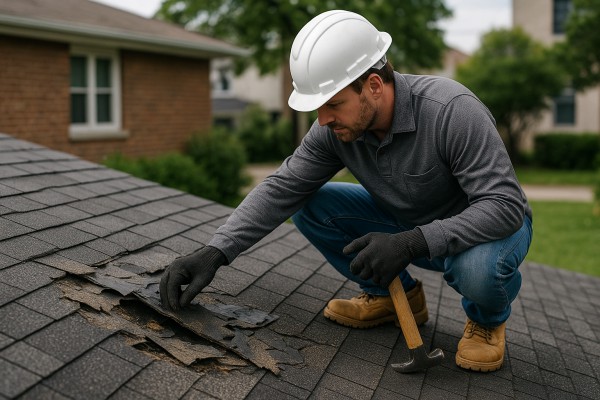
Storm damage can be quick to reveal and slow to show its full extent. A gusty wind can lift a shingle, while a heavy rain can sneak through small gaps you didn't notice. This page gives homeowners practical, trustworthy guidance on spotting damage, documenting it, making safe temporary fixes, and planning durable repairs with a professional roofer. The goal is to protect your home, avoid costly surprises, and move toward a solid repair plan as soon as possible.
What storm damage looks like
- Missing, cracked, or curled shingles, especially after high winds
- Exposed underlayment or visible granules in gutters and downspouts
- Damaged or displaced flashing around chimneys, vents, skylights, and edges
- Water stains on ceilings, walls, or attic insulation
- Sagging or soft spots in the roof deck (often a sign of structural or moisture issues)
- Gutters pulling away from the fascia or overflowing during rain
- Debris damage to soffit, fascia, or vent openings
1) Prioritize safety: stay off wet, damaged roofs and avoid walking on slick or unstable areas.
2) Check for hazards: downed power lines, gas leaks, or structural shifts—keep others out of the area.
3) If it's safe, protect the interior: place a tarp or plastic sheeting over exposed areas to minimize interior leaks.
4) Document damage: take clear photos from ground level and the inside attic if accessible, noting dates and weather conditions.
If you can't safely inspect or tarp the roof yourself, call a professional for a temporary fix—the risk of personal injury isn't worth saving a few dollars.
Quick homeowner checks you can do safely
- Look at exterior shingles and flashing from ground level; note any obvious gaps, lifted edges, or dark streaks.
- From the attic, assess for daylight, moisture stains, or musty odors indicating hidden leaks.
- Check gutters and downspouts for granules, warping, or detachment.
- Inspect around vent pipes, chimney flashing, and skylights for cracks or gaps.
- Keep an eye on ceiling stains after rainfalls and track if new spots appear.
How professionals assess storm damage
A roofer will perform a thorough inspection of both visible and hidden areas, including:
- Roof surface: shingle integrity, exposed underlayment, and flashing around obstructions.
- Edges and penetrations: fascia, soffit, vents, chimneys, and skylights for gaps or corrosion.
- Structural elements: decking, trusses, and attic framing for signs of rot, mold, or moisture.
- Water intrusion indicators: ceiling spots, wall stains, and insulation condition.
- Temporary repairs: tarping, secure fasteners, and debris removal to prevent further damage.
- Tools and tests: moisture meters and infrared imaging to locate hidden dampness.
- Shingle replacement or reseaming of damaged sections
- Flashing repair or replacement around chimneys, vents, and skylights
- Temporary tarping or boarding to stop additional leaks
- Fascia and gutter repair or reattachment
- Roof deck repair or replacement if moisture has compromised the wood
- Vent boot replacement and sealing upgrades
- Insulation drying and mold remediation when needed
Timeline and insurance considerations
- Document damage promptly: photos, dates, and weather context help with claims.
- Contact your insurer quickly and file a claim within your policy's specified window.
- Obtain a professional estimate or scope of work; ensure the contractor's assessment aligns with your insurer's requirements.
- Track temporary fixes and keep receipts for any repairs or materials used to prevent further damage.
- Expect staged payments: initial stabilization costs, followed by repair milestones after approvals.
Preventive tips after a storm
- Schedule a post-storm roof inspection to catch issues early, especially after severe events.
- Trim back trees and remove loose branches that could strike the roof in the next storm.
- Clean gutters and downspouts to maintain proper drainage and prevent standing water.
- Reinforce or replace aging flashing and seals before the next season.
- Consider upgrading to impact-resistant shingles or metal roofing in areas prone to high winds.
- Maintain attic ventilation and moisture barriers to reduce condensation and mold risk.
Storm-Damaged Roof Repair: How to Assess Damage and Restore Your Roof
Comprehensive definition
Storm damage roof repair is the process of identifying and fixing damage to your roof caused by severe weather. It goes beyond a cosmetic patch and aims to restore waterproofing, load-bearing integrity, and overall function. This work may involve:
- Replacing missing, cracked, or curling shingles or metal panels
- Replacing damaged underlayment and sections of roof decking
- Repairing or realigning flashing around hips, valleys, chimneys, vents, and skylights
- Cleaning and re-sealing gutters and downspouts
- Stopping active leaks and addressing interior moisture intrusion
- Temporary stabilization (tarps, boards) to prevent further damage until a full repair or replacement is possible
When it's typically needed
Storm damage roof repair is typically needed after one or more of the following events or signs:
- Severe wind events that peel back shingles, lift flashing, or dislodge gutters
- Hail impacts creating dimples, punctures, or pitted surfaces
- Heavy rain or blown-in rain entering through compromised seams or flashing
- Debris strikes from branches or collapses that crack decking or bend metal
- Interior signs such as dripping, dark stains on ceilings, or attic condensation
- Aging roofs with preexisting vulnerabilities that are exposed by a storm
How to assess safely (step-by-step)
1. Safety first: If the roof is actively leaking or structurally compromised, stay off the roof. Use binoculars for initial assessment; avoid ladder work on wet or unstable surfaces.
2. Ground-level check: Look for missing shingles, buckling sections, dented metal, lifted flashing, or gutters pulled away from the fascia.
3. Interior indicators: Inspect attic for roof leaks, staining, mold, or damp insulation. Note any daylight or sagging areas.
4. Exterior inspection (when safe): Check flashing around chimneys, vents, valleys, and skylights; inspect ridge caps and seam sealant; examine decking edges exposed by missing shingles.
5. Document damage: Take wide photos of the roof plane and close-ups of damaged areas, plus interior photos of any leaks.
6. Prioritize leaks: Mark active leak locations and plan temporary containment while awaiting repair.
7. Note conditions: Record weather timing, wind speeds if known, and any recent storm events for your insurance claim.
Quick temporary fixes to prevent further damage
- Cover active leaks with heavy-duty tarps secured with nails or weights and ropes (avoid creating additional punctures).
- Place plywood or boards over severely damaged sections to limit wind uplift.
- Clear clogged gutters and downspouts to keep water from backing up near the ridge and eaves.
- Seal small gaps around vents or flashing with exterior sealant as a temporary measure.
- Move valuables from the attic and protect interior finishes from further moisture.
What a professional storm-damage roof repair typically includes
- Thorough inspection of roof, flashing, decking, and attic to determine scope
- Identification of water intrusion paths and hidden damage
- Replacement or repair of damaged shingles, metal panels, underlayment, and decking as needed
- Proper flashing repair and resealing to restore waterproofing
- Debris removal and site cleanup; secure temporary stabilization as required
- Verification of ventilation and attic insulation after repair; final walkthrough and warranty discussion
Insurance and documentation tips
- Take timestamped photos before, during, and after repairs
- Create a detailed damage log: date, location, materials damaged, and estimated costs
- Share photos and notes with your insurer and adjuster; keep copies of all correspondence
- Get a written scope of work and a clear, itemized estimate from the contractor
- Confirm permit requirements and who is responsible for them
Choosing a qualified roofer for storm damage
- Verify licensing and insurance; check for workers' compensation and liability coverage
- Look for storm-damage experience and references from similar events
- Request written estimates, a defined scope of work, and a project timeline
- Ensure the contractor uses proper flashing, code-compliant decking repair, and durable waterproofing methods
- Confirm warranty terms for repairs and any follow-up inspections
Signs you should escalate to a professional
- Widespread decking damage, sagging sections, or multiple active leaks
- Rafters or trusses showing signs of softening or rot
- Complex flashing, chimney, or skylight damage requiring precise sealing
- Uncertain insurance coverage or complicated claim processes
When You Need Storm-Damage Roof Repair
Signs this service is needed
- Missing, torn, cracked, or curled shingles after a storm
- Shingles with obvious denting, gouges, or visible granule loss entering gutters or downspouts
- Loose or out-of-position flashing around chimneys, vents, or skylights
- Sagging areas or soft spots in the roof deck you can feel from the attic or ceiling
- Water stains, damp insulation, or dark streaks on ceilings and walls after rain
- Daylight visible through the attic floor or roof from the inside
- Recurrent leaks after rain, even if the rest of the roof looks intact
- Sudden and strong wind events accompanied by shingle departure or unusual roof noises
Ways you can confirm yourself as a homeowner
- Start with safety: avoid walking on a damaged roof unless you're equipped and trained. If you must, use sturdy footwear, a safety harness, and a partner to hold the ladder.
- From the ground, inspect visually with binoculars: look for missing, lifted, or buckled shingles, damaged flashing around vents and chimneys, and metal panels that have shifted.
- Inspect gutters and downspouts: collect and examine shingles granules. A spike in granule load after a storm can indicate widespread shingle damage.
- Check the attic first: look for daylight holes, water stains, damp insulation, or a musty odor. Note any roof deck softness or creaking sounds.
- Look for interior signs: new ceiling stains, damp spots, or peeling paint after a rain event are red flags that warrant a closer look.
- Photograph damage from multiple angles and distances. This helps with insurance reports and contractor estimates.
- Document the timeline: note the date and type of storm, wind speeds if you know them, and any immediate leaks you observed.
- If you do go on the roof for a quick check, keep it brief, avoid steep slopes, and do not step on damaged areas.
When to get a professional assessment
- If you observe any of the signs above, or if a severe storm passed through with hailstones, high winds, or heavy rainfall.
- When there is interior leakage or active drips, even sporadically, indicating potential hidden damage to underlayment, decking, or flashing.
- After major storms (hail, tornadoes, hurricanes, or intense winds), within 24–72 hours, to capture damage before it gets worse and to establish a timely insurance claim.
- If you're unsure about safety or were unable to confidently verify damage from the ground and attic.
- When there are wind-driven or hail impacts that left indents, cracking, or pitting on metal components around vents, flashing, and edge details.
- For hidden damage: even if you don't see obvious missing shingles, a professional can inspect for compromised underlayment, deck rot, or flashing gaps that could lead to leaks later.
- Insurance readiness: a licensed roofer can perform a thorough assessment, document damage with photos, and provide a detailed scope and cost estimate to support your claim.
- What a professional will assess: overall roof integrity, shingle condition, underlayment, decking, flashing around penetrations, vent and chimney areas, attic ventilation, and potential wind-driven uplift zones. They'll also advise on immediate temporary fixes to prevent more water intrusion and a long-term repair or replacement plan.
What's Included with Storm Damage Roof Repair
Typical inclusions
- On-site inspection and damage assessment by a licensed roofer to identify issues on the roof surface, underlayment, decking, flashings, chimneys, and penetrations. You'll receive a written damage report and a clear scope of work.
- Temporary protection to prevent further water intrusion, such as tarping or secure sealant, especially if inspections or repairs can't be completed immediately.
- Debris removal and site cleanup from the roof and surrounding area after repairs are finished.
- Roof decking repair or replacement as needed to restore a solid, leak-free foundation for the rest of the roof.
- Shingle or tile replacement with matching or near-matching materials. If an exact color or profile isn't available, a blending plan is put in place to maintain curb appeal.
- Flashing repair or replacement around penetrations (vents, chimneys, skylights) and at transitions to walls or chimneys to ensure proper waterproofing.
- Leak sealing and waterproofing at penetrations and joints to stop active leaks during the repair.
- Ice and water shield installation or replacement where required by code or by the assessment, especially in vulnerable eave areas and valleys.
- Ventilation and attic checks to ensure proper moisture control after repair and to prevent future problems related to inadequate ventilation.
- Gutter and downspout assessment, cleaning, and adjustments as needed to maintain proper drainage and protect the roof edge.
- Insurance documentation support: detailed photos, damage lists, and scope of work prepared to help with claims, along with guidance on next steps with your insurer.
- Permitting and code-compliance coordination: help obtaining necessary permits and ensuring repairs meet local building codes.
- Warranties: information on manufacturer warranties for materials and a workmanship warranty for the repair work.
- Final cleanup and site handoff: confirmation that the area is clean, safe, and ready for use, with documentation of what was repaired and what materials were used.
Not typically included
- Major interior remodeling or repairs not caused by roof damage (e.g., drywall, paint, or insulation replacement beyond moisture mitigation) unless specified in the scope.
- Mold remediation or extensive interior water-damage restoration, which is typically handled by a separate contractor.
- Structural framing repairs beyond the roof decking (e.g., rafters or trusses) unless the damage is directly tied to the roofing scope and agreed upon in the contract.
- Full roof replacement (new roof installation) as part of a “repair” scope; replacement may be a separate project or may be recommended if damage is extensive or the roof is near the end of its life.
- Cosmetic-only repairs that don't address a leak or structural integrity.
- Exterior work not directly related to the roof, such as major siding replacement or window replacement, unless specifically included in a broader hail/storm damage package.
- New gutters, downspouts, or downspout extensions beyond routine inspection, unless they're found to be damaged and are necessary to protect the roof system.
- Specialized inspections or tests that go beyond standard storm-damage assessment (e.g., nonessential third-party testing) unless separately contracted.
How the repair work typically proceeds
1. Documented assessment and written estimate: you'll get a clear report of damage and the proposed repair plan.
2. Insurance coordination: guidance and documentation prepared to support your claim.
3. Scheduling and protection: timing coordinated with weather, plus temporary measures to protect the home.
4. Material selection and ordering: choose materials that balance durability and appearance; plan for any color blending if exact matches aren't available.
5. On-site repairs and protection: decking repairs, flashing work, shingle replacement, and leak mitigation completed with safety and code compliance in mind.
6. Final inspection and warranty: verification of completed work and warranty details provided for future peace of mind.
Roofing Materials Commonly Used in Storm-Damage Roof Repair

Asphalt shingles are the default choice for many homes, and storm damage often shows as cracked tabs, lifted edges, or granule loss. When repairing, we focus on the damaged area and color-matched replacement to maintain curb appeal.
- How the service relates: we assess whether a patch is feasible or if a full or partial replacement is needed to restore proper wind uplift and water shedding.
- Material specifics: ensure replacement shingles match the same profile (3-tab or architectural) and color. We commonly upgrade underlayment and install ice-water shield in vulnerable valleys or rakes to prevent future leaks.
- Fastening and flashing: verify nail lines, reseal around vents, chimneys, and flashings to stop leaks.
- Warranty considerations: color match and warranty coverage can influence whether we patch or replace entire sections.
1) Inspect damage and determine scope
2) Choose matching shingles
3) Remove damaged shingles and install new ones with correct nailing
4) Re-flash penetrations and test for leaks

Metal roofs handle hail and wind well, but dents, punctures, or loose panels can still require repair. Repairs typically focus on sealing seams, replacing compromised panels, and refreshing fasteners.
- How the service relates: we determine if a panel can be repaired or if a section needs replacement to maintain weather-tightness.
- Material specifics: seal all seams with the appropriate sealant and reseal or replace screws; assess coating and color for a seamless look.
- Fasteners and corrosion: replace corroded or pulled fasteners; ensure all penetrations are weather-tight.
- Underlayment and edge detail: check edge flashing and valley areas; reseal to prevent leaks at transitions.
1) Check all seams and fasteners for leaks
2) Replace damaged panel sections if needed
3) Reseal seams and replace fasteners
4) Test with water and wind checks
Dimensional or architectural shingles offer improved durability and wind resistance. Storm repair may involve replacing a larger patch to preserve the staggered look and performance.
- How the service relates: often requires replacing damaged run with the same architectural profile to maintain performance and warranty.
- Material specifics: color and pattern matching is key; underlayment upgrades may be recommended.
- Wind uplift and flashing: verify proper nail pattern and reseal around penetrations.
- Longevity: repairs should maintain or extend the roof's wind rating and overall warranty.
1) Assess alignment and damage extent
2) Remove damaged shingles and install matching ones
3) Install with correct nailing pattern and reseal
4) Re-flash penetrations and verify leaks are gone
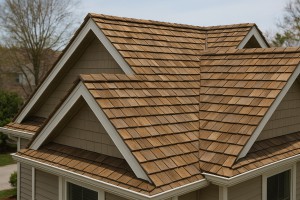
Cedar provides a natural look but is susceptible to moisture, splitting, and mold after storms. Repairs emphasize replacing damaged sections and treating new wood.
- How the service relates: sometimes full sections must be replaced to preserve uniform appearance and wood health.
- Material specifics: new cedar should be treated or stained to match aging cedar; note fire-code considerations.
- Waterproofing: add proper underlayment and ice/water shield as needed.
- Aesthetics and compatibility: blending newer cedar with older stock can be challenging; plan for a cohesive finish.
1) Identify damaged areas
2) Replace with matching cedar shakes
3) Fasten and seal properly
4) Apply stain/sealant after installation

Clay and concrete tiles are durable but brittle. Storm damage often leaves tiles cracked or loosened, requiring careful replacement.
- How the service relates: we replace broken tiles with matching profiles and colors while inspecting the deck and underlayment.
- Material specifics: ensure correct tile type and weight; sometimes a partial roof replacement is needed for stability.
- Underlayment and bedding: refresh underlayment and reseat adjacent tiles; re-seal penetrations.
- Structural checks: heavy tiles demand structural confirmation to support new tiles.
1) Locate broken tiles and inspect the deck
2) Install new tiles with proper bedding
3) Re-seal and seal around penetrations
4) Verify overall water protection

Slate is long-lasting but brittle; storms can cause cracks or slippage. Repairs require matching slate thickness and size.
- How the service relates: slate repairs often involve carefully removing damaged pieces and substituting with matching slate.
- Material specifics: use appropriate nails (often copper or stainless) to minimize future staining and corrosion.
- Underlayment: inspect and replace along with connections to flashings.
- Cost and care: slate work is meticulous and may be more expensive, but provides long-term durability.
1) Inspect for cracked or displaced slates
2) Replace with matching slate
3) Secure with correct nails and seal
4) Check flashings and surrounding tiles

Flat roofs rely on continuous membranes; storms commonly cause seam leaks or punctures.
- How the service relates: repairs focus on patches, seam sealing, and, if needed, panel or membrane replacement.
- Material specifics: EPDM uses self-adhesive or liquid adhesives; TPO/PVC rely on heat-welded seams for durability.
- Drainage and edge details: ensure slope and edge detailing remain watertight.
- UV and compatibility: use compatible patches and ensure proper curing and adhesion.
1) Clean and locate leaks
2) Apply patch or replace damaged sheet
3) Weld seams (TPO/PVC) or seal with approved adhesive (EPDM)
4) Test for leaks and verify edge protection
Understanding the Cost of Storm-Damage Roof Repair
Typical average costs for Storm Damage Roof Repair
- Shingle repair or replacement (individual shingles or small areas): $150–$800
- Flashing repair or replacement (around chimneys, vents, valleys): $200–$600
- Decking or structural repair (where the roof deck is damaged): $300–$1,500
- Leak patch and sealant work: $100–$450
- Emergency tarping or temporary protection after a storm: $100–$400
- Moderate to extensive repairs (multiple areas with damage): $1,000–$5,000
- Major damage requiring partial roof replacement: $5,000–$12,000
- Very severe cases or attic/hidden damage (if moisture has spread): $4,000–$15,000+
Note: costs vary by region, roof size, material type, and access. For a precise figure, a licensed roofer should inspect and provide a written estimate.
Cost-impacting factors: what can help keep costs down
- Timely mitigation: securing the site with tarps or boards shortly after a storm can prevent further interior damage and reduce repair scope.
- Local market conditions: in areas with high demand, prices can rise; in quieter markets, labor costs may be lower.
- Material choice: selecting standard asphalt shingles or commonly stocked materials usually costs less than premium, specialty, or impact-rated options.
- Limited damage: repairs restricted to a small area (no decking or framing damage) stay cheaper than widespread damage.
- Insurance coordination: if your insurer approves a straightforward repair and you don't replace large sections, out-of-pocket costs may be lower after deductible.
- Scheduling and procurement: repairs on a calm day with readily available materials avoid emergency surcharges and expedited shipping fees.
- Proper documentation: thorough photos and notes can speed up estimates and prevent over-scoping.
Cost-impacting factors: what can raise costs
- Hidden or widespread damage: plywood/roof decking, framing, or ventilation systems damaged beyond the visible surface drive up price.
- High pitch or difficult access: steep or tall roofs require additional safety equipment and longer labor time.
- Hail-damaged decking and underlayment: hail can crack underlayment, gutters, and attic insulation, increasing materials and labor.
- Multiple penetrations and flashing work: chimneys, vents, and skylights add complexity and cost.
- Permits and code upgrades: some repairs trigger permit fees or require compliance with updated codes.
- Debris removal and disposal: hauling away damaged roofing and insulation adds to labor and disposal charges.
- Weather-driven delays: continued bad weather can extend the project timeline, increasing labor costs.
- Replacement vs repair decision: if a large portion of the roof is compromised, insurers may favor replacement, which is substantially higher than patch-and-repair costs.
Quick estimation steps for homeowners
1. Document all damage with clear photos from multiple angles, including attic and decking if accessible.
2. Get at least three written estimates from licensed roofers; ask for itemized scope and line-item pricing.
3. Check your insurance policy: confirm coverage, applicable deductibles, and required documentation.
4. Schedule a professional inspection to determine if repairs are sufficient or if decking/structure needs replacement.
5. Prioritize safety: address any active leaks or compromised structural areas promptly.
When replacement may be more cost-effective than repair
- Damage spans multiple roof planes or a large area of shingles.
- The roof is near the end of its expected life (often 20–25 years for asphalt, less for some specialty materials).
- Frequent leaks recur after repairs, indicating systemic issues.
- The roofer estimates that repair work would be piecemeal, with high future maintenance costs.
Practical tips for staying within budget
- Obtain written estimates and compare not just price but scope of work, warranties, and material quality.
- Ask about bulk pricing for multiple repairs or parts from the same supplier.
- Schedule repairs during off-peak seasons if possible to reduce labor costs.
- Verify that the chosen contractor is licensed, insured, and has recent storm-repair experience.
How the Storm Damage Roof Repair Process Works
Step 1: Reach out and schedule
When a storm passes, the first step is to contact us. A quick phone call or online form lets you describe what happened, when it occurred, and where you're located. We'll collect your address, a brief list of concerns, and any urgent hazards you're facing.
- We'll set up a same- or next-day inspection window that fits your schedule.
- We'll ask about prior repairs, attic leaks, or interior staining to help pinpoint problem areas.
- If there are safety risks (downed lines, standing water, loose debris), we'll advise you on staying safe until we can assess in person.
On arrival, we begin with a safety-focused overview and explain what we'll look for during the visit.
Step 2: On-site inspection and safety measures
Our roofer conducts a thorough inspection from the ground and, when safe, from the roof. We document damage with clear photos and notes so you understand what's involved.
- Inspect shingles, flashing, vents, skylights, chimneys, gutters, and soffits.
- Check the roof deck for exposed or damaged areas and assess indoor signs of leaks in the attic.
- Identify vulnerable spots likely to worsen with rain, wind, or temperature changes.
- Install temporary protection (tarps or fastened coverings) if rain is likely before repairs begin.
We'll pause to review any findings with you and explain the likely repair or replacement path.
Step 3: Damage report and repair plan
We compile an itemized damage report that pairs photos with a clear scope of work. This helps you see exactly what needs attention and why.
- Outline the recommended scope: decking repairs, underlayment, flashing, vent seals, chimney flashing, gutter adjustments, and fascia work if needed.
- Provide a transparent timeline and a customer-friendly estimate that shows labor, materials, and contingency items.
- Explain insurance considerations and how the plan aligns with your claim.
You'll receive a written summary you can reference as the process moves forward.
Step 4: Insurance coordination
We assist with the insurance portion so you're not navigating it alone.
- We submit the damage report, photos, and measurements to your insurer.
- We coordinate with the adjuster to ensure the scope reflects real needs and fair coverage.
- We clarify deductibles, depreciation, and expected timelines so you know what to expect next.
Clear communication helps prevent surprises and keeps the claim on track.
Step 5: Temporary repairs and mitigation
If weather or the damage leaves gaps, we implement temporary, protective measures to minimize further intrusion.
- Deploy tarps or temporary patches over vulnerable areas.
- Clean up loose debris and secure dangling nails or protrusions.
- Schedule permanent work around forecasted weather windows to minimize delays.
These steps buy you time while maintaining safety and reducing water intrusion.
Step 6: Materials, permits, and scheduling
Choosing the right materials and verifying permit requirements keeps the project on solid footing.
- Confirm shingles, underlayment, color, and warranty terms that fit your home and budget.
- Check local permit requirements and obtain approvals if necessary.
- Lock in a start date, crew size, and a realistic completion window.
We prioritize quality materials and craftsmanship to maximize longevity and performance.
Step 7: Roof repair or replacement execution
This is the core construction phase, carried out by trained crews with protective safety practices and quality checks.
- Remove damaged shingles and deck portions as needed, then repair or replace decking to create a solid base.
- Install underlayment, then new shingles with correct nailing patterns and sealants.
- Replace or repair flashing around vents, chimneys, and transitions; reseal penetrations.
- Refinish gutters, fascia, and soffit if required; ensure proper drainage and ventilation.
- Clean the site, perform a thorough inspection, and confirm everything is watertight.
We document milestones and keep you informed if any adjustments are necessary.
Step 8: Final inspection and maintenance
We conduct a final, homeowner-focused walkthrough to verify the work and address questions.
- Check for leaks, proper flashing, and drainage performance.
- Review the warranty details and what they cover.
- Provide maintenance tips to prolong life, such as seasonal inspections and debris removal routines.
A written maintenance guide accompanies the project so you know how to keep your roof in good shape between checkups.
Residential vs. Commercial Considerations in Storm Damage Roof Repair
Scope and Scale
Storm damage on a home is usually limited to a few areas on a pitched roof. On a commercial building, you may be looking at hundreds of square feet of roof area, a flat or low-slope geometry, and multiple sections to coordinate.
- Residential: smaller crews, common asphalt shingles, attic ventilation, gutters, and penetrations around chimneys and vents.
- Commercial: large membrane systems, ballast or fully adhered installations, parapets, curbs, and rooftop equipment.
Materials, Systems, and Techniques
Residential roofs typically use asphalt shingles with standard underlayment and flashing. Repairs often involve patching, partial shingle replacement, or temporary tarping after a storm.
Commercial roofs rely on membranes (EPDM, TPO, PVC), with repairs that may include seam sealing, patching, and flashing around curbs or equipment. Techniques require specialized safety gear and sometimes cranes, lifts, or scaffolding for access.
Inspections, Permits, and Codes
For homes, inspections focus on the roof surface, attic, and signs of interior water intrusion; permits are typically straightforward through the city or county.
Commercial properties trigger more formal permitting and code reviews, with higher expectations for fire ratings, life-safety considerations, and ongoing maintenance plans. The building owner or property manager coordinates with the AHJ and the roofing contractor.
Insurance, Warranties, and Documentation
Shingle warranties are generally straightforward but weather-dependent. Commercial membranes can carry longer, more complex warranties that cover materials and labor and may require manufacturer-approved installers.
Document everything: pre-damage photos, damage reports, inspection notes, work orders, and any scope changes. A complete record helps with insurance claims and future maintenance planning.
Scheduling, Access, and Safety
Residential work tends to fit regular daylight hours with standard access and consumer-friendly logistics. You'll usually deal with limited disruptions to daily routines.
Commercial projects often need after-hours work, temporary fencing or scaffolding, and procedures that minimize impact on tenants or occupants. Access must accommodate rooftop equipment, deliveries, and ongoing operations, so safety plans are more formal and comprehensive.
Step-by-step approach
1) Assess the damage and identify all affected roof areas, including any interior signs of leakage.
2) Gather two to three bids, ensuring the contractors have credentials suitable for your building type (residential vs. commercial).
3) Create a damage timeline that accounts for weather windows, equipment needs, and access restrictions.
4) Document the project in detail and review insurance coverage for both materials and workmanship.
Quick reference
- Residential vs Commercial Considerations of Storm Damage Roof Repair
Practical takeaways for homeowners
- Know when a storm-damaged residential roof can be handled as a typical repair versus when a commercial-grade approach is required.
- Expect differences in materials, warranties, and permit processes based on roof type.
- Prioritize securing proper access, safety measures, and clear documentation to support the claim and the repair plan.
How Storm-Damage Roof Repair Varies by Location
Storm damage repair isn't a one-size-fits-all service. The region you're in shapes the types of damage you're likely to see, the best repair approach, and how quickly you'll get back to a sturdy roof. Below is a practical look at how this service differs across the United States, and how to factor location into your repair planning.
How this service varies in different regions in the United States
- Climate-driven damage types:
- Coastal/hurricane zones: high wind uplift, flying debris, salt exposure.
- Central and Southern Plains: severe hail and wind damage, sudden temperature swings.
- Northeast: heavy snow loads, ice damming, freeze-thaw cycles.
- West: wildfire embers, smoke-related staining, intense sun and dry conditions.
- Codes, standards, and inspections:
- Some states mandate wind-uplift testing or specific underlayment requirements.
- Local inspectors may have different criteria for roof repairs versus full replacements.
- Insurance practices:
- Regions with frequent storms often have specialized adjusters or public adjusters; claim timelines and documentation expectations vary.
- Some carriers prioritize rapid tarping and temporary repairs, others emphasize formal estimates and detailed scope of work.
- Materials and installation preferences:
- Hail-prone areas often favor impact-resistant shingles or metal options.
- Coastal regions may require corrosion-resistant fasteners and sealants designed for salt spray.
- Snow regions prioritize ice-dam barriers, improved ventilation, and high-snow-load ratings.
- Contractor availability and pricing:
- Rural areas may face longer wait times and limited local crews.
- Metro regions offer more options but can see higher prices and tighter scheduling.
- Supply chain access (roofing membranes, decking, fasteners) can shift with regional demand.
Regional climate considerations that drive repair strategy
- Hail-dominant regions:
- Expect punctures, dented shingles, and damaged flashings.
- Prioritize thorough shingle and flashing inspection; consider hail-rated materials for replacements.
- Snow and ice regions:
- Look for ice dam formation, related water intrusion, and sagging due to accumulated load.
- Emphasize attic insulation, ventilation, and robust underlayment; plan for phased repairs to account for seasonal weather.
- Coastal and salt-exposed zones:
- Monitor for corrosion on metal components and fasteners; ensure sealants resist salt air.
- Use corrosion-resistant hardware and compatible flashing materials.
- Dry and hot regions:
- UV exposure and heat can accelerate underlayment degradation.
- Choose heat-ready membranes and verify proper ventilation to minimize future damage.
Permits, inspections, and timelines by region
- Permits:
- Some locales require permits for any roof work; others only for full replacements.
- Expect different processing times and inspection tiers depending on city or county rules.
- Inspections:
- Regional practices vary on post-repair inspections and documentation requirements for insurance.
- Scheduling:
- Weather windows differ: aggressive rain or snow seasons can slow work or shorten safe repair periods.
- In tourist or wildfire-prone areas, peak seasons can flood contractor schedules.
Practical steps for homeowners in different regions
1) Document damage promptly with timestamped photos and notes on date of storm impact.
2) Check your local permit and insurance expectations early in the process.
3) Contact a local, licensed roofer with regional storm experience and references.
4) Choose materials compatible with your climate and local code requirements.
5) Plan for seasonal considerations (winter freezes, summer heat, wildfire risk) when scheduling repairs.
6) Ensure proper inspections and a clear, region-appropriate warranty for workmanship and materials.