Last updated: Apr 19, 2026
Palmer homeowners deal with long, cold winters where heavy roof snow and repeated freeze-thaw cycles concentrate stress at eaves, valleys, flashing, and roof edges. When snow piles up, the weight sits on the roof like a fence post-especially along overhangs and low-slope sections. Those stress points are where small problems turn into big leaks, ice dams, and expensive damage. The combination of deep snow, wind-driven drifts, and seasonal temperature swings creates a scenario where the roof acts like a reservoir that floods and refreezes along the edges, forming stubborn ice dams that back up melting water into soffits and into the interior.
The city sits in the Matanuska-Susitna Valley, where winter conditions and shoulder-season temperature swings can turn daytime melt into nighttime refreeze, a key setup for ice dam formation. When sun-warmed days push melt toward the eaves and then a cold night freezes that melt, ice dams grow along gutters and flashing. Those dams can lift shingles, crack sealant joints, and push water under roof edges. If fascia, trim, or the vented soffit system isn't keeping up with moisture, you'll see staining on ceilings, musty smells, or damp insulation in the attic. The problem compounds when attic air isn't properly insulated and vented, creating a warmer roof deck in winter that accelerates melt and refreeze cycles right where it hurts most: at the eaves, valleys, and roof-to-wall transitions.
Action starts with prevention you can actually control. Verify your attic is well insulated and air-sealed to limit heat transfer to the roof deck. In Palmer's climate, you want a continuous line of defense: proper insulation, a robust attic ventilation plan, and well-sealed penetrations around chimneys, vent pipes, and electrical fixtures. Ensure soffit vents, ridge vents, and any turbine or powered vents work in harmony so warm air doesn't pool along the roof deck. For snow load, maintain a predictable snow plan: remove excessive buildup before it becomes heavy enough to push against flashing or create unsafe loads, but avoid risky rooftop work during winter storms. If you must clear snow, use safe methods or hire a pro to prevent damaging shingles, flashing, or the gutter system.
When dam formation is already a risk, upgrade focusing on edge protection. Install or repair ice and water shield along eaves and in valleys, improve flashing where roof meets walls, and ensure gutters are clear so melt water can shed rather than back up. If you're facing recurring ice dams, a professional assessment should verify flashing integrity, venting, and insulation levels, and identify any drainage changes needed to reduce water backing up under the shingles. Prioritize addressing conditions that allow repeated freeze-thaw cycles to concentrate stress at critical points, because every cycle compounds wear and opens pathways for leaks. Short winters, long cold spells, and the mountains' influence demand proactive, year-round vigilance rather than reactive fixes.
Asphalt shingles are common in Palmer, so you'll see them on many roofs after long winters. The real constraint here is how they handle freeze-thaw cycles and wind. If installation details are weak, you'll notice faster granule loss, seal-strip failures, and occasional shingle lift after heavy wind events or rapid temperature swings. For best results, ensure you're using an installer who emphasizes proper nailing patterns, edge protection, and adequate attic ventilation to keep the mat under the granules stable through the winter. With the right underlayment and proper fastening, asphalt can stay reliable through Palmer's snow loads, but the key is meticulous workmanship on the drip edge, starter course, and perimeter fasteners.
Metal roofing shines for shedding snow during long winters, a big plus in this climate. However, that same snow-shedding behavior makes edge details and flashing around the eaves and penetrations more critical. Plan for snow management at entryways, walkways, and overhangs where drifting can create ice piles or wind-driven damage against siding and roof edges. When you consider metal, focus on continuous, corrosion-resistant flashing, secure fasteners per panel, and attention to sealants at all joints. A metal roof paired with a robust gutter and ice-guard strategy at the eaves can dramatically reduce ice dam formation and related interior leaks, provided the surrounding roof deck remains dry and well-ventilated.
Clay and concrete tiles are available options, but their weight requires a careful look at the structure. In the Himalaya-like freeze-thaw cycle you experience here, dead load and snow load must be considered in tandem. Many Palmer homes do not come with the extra structural allowance for heavy tile without reinforcing, so a careful engineering review is essential before installation. If you're set on tile, plan for a framing assessment that confirms adequate rim and ridge support, along with a fastener grid that can resist high wind uplift and ice slide along the slope. Tile can deliver long life and distinctive curb appeal, but the load and seasonal stress must be matched to the home's original design.
Beyond material type, the seasonality matters. In Palmer, the workable install window is shorter, and any delamination risk from cold-start temperatures can affect performance. Choose products with proven cold-weather performance and compatibility with your chosen underlayment. Ensure the roofing system includes a robust ice-and-water shield at the eaves and around penetrations to mitigate ice dam risks from the freeze-thaw cycles.
With Palmer's mountain winds and deep snow, edge detailing and annual maintenance become part of the comfort strategy. Inspect for lift lines after storms, verify sealant integrity around vents and chimneys, and maintain attic ventilation to reduce snow-induced condensation and hidden ice dam development. A well-balanced combination of material choice, precise installation, and proactive maintenance keeps a roof durable through Palmer's long winter season.
S&D roofing of Alaska
20172 Reich Ct, Palmer, Alaska
5.0 from 17 reviews
Better than the rest Now serving the Big Island of Hawaii
TOPP Roofing & Construction
Serving
5.0 from 34 reviews
A General Contractor Specializing in Residential and Commercial Roofing, Exteriors, and Remodels. Dedicated to Serving Alaska Businesses and Homeowners With Their Construction Needs.
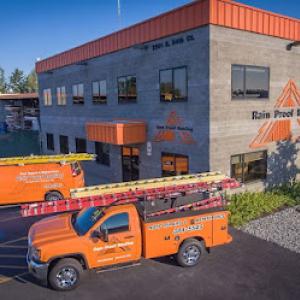
Rain Proof Roofing
(907) 373-5545 www.rainproofroofing.com
Serving
3.3 from 7 reviews
Rain Proof Roofing is one of Alaska’s largest roofing companies specializing in commercial (public, industrial) and residential roofing. Since opening its doors in 1962, the company has remained Alaska-owned and operated. Rain Proof offers nearly 60 years of experience, knowledge, manufacturer relationships and construction expertise. With offices in Anchorage and Wasilla, Rain Proof offers statewide roofing services including remote projects.

Above & Beyond Roofing & Construction
(907) 202-7090 abovebeyondroofingak.com
Serving
3.0 from 2 reviews
Established in 2007, Above & Beyond Roofing and Construction is your trusted partner for creating and maintaining beautiful, functional homes. Specializing in top-tier roofing and siding solutions, they also transform interior spaces with expert kitchen and bathroom remodeling. Their commitment to quality craftsmanship and exceptional service ensures every project, from the roofline down to the finest interior details, is handled with professionalism and care.
The practical replacement window in this area runs from late spring into early fall because snow cover, ice, and cold-weather sealing issues limit winter reroofing. Start by aligning the project with the calendar: pick a start date after the snow is gone and the ground is dry, but before the first fall storms. Map out a realistic tear-off plan that allows for a dry-in of underlayment and starter rows during favorable weather windows. Keep the scope tight enough to complete within a single stretch of good weather, and build in a couple of weather contingency days so a sudden storm doesn't push you into a rushed, unsafe finish.
Spring and summer rain plus rapid snowmelt can interrupt tear-off and dry-in schedules in the Palmer area, so project timing matters more than in milder climates. Set up a clear rain plan: tarp and perimeter protection, an exposed-fastening strategy for windy days, and a backup lay-down area for materials if the job stretches. Expect occasional thaws to create slick conditions on the roof deck; ensure the crew has non-slip footwear and a secure fall-protection plan. If a forecast calls for heavy rain or prolonged warmth-induced drying, be prepared to pause and resequence work rather than forcing a rushed day.
Transitional-season winds in the valley can affect exposed underlayment and newly installed shingles, making scheduling and staging especially important. On windy days, avoid long periods of exposed underlayment; stage underlayment where possible and keep starter and field shingles out of the wind-prone edge zones until the deck is fully covered. Use windbreaks or temporary enclosures for scaffolding, and stagger crews so at least one pair is always securing already installed sections while others advance. Keep a tight, hour-by-hour plan for the first 24 hours after the dry-in to protect the roof from sudden gusts that could lift loosely installed shingles.
Prioritize a solid dry-in, since Palmer's freeze-thaw cycles can stress imperfect seals. Start with a continuous, properly lapped underlayment and ice-water shield at eaves and valleys where they'll be most exposed during thaw swings. Ensure all penetrations (vents, chimneys, flues) are sealed with compatible flashing and sealant before shingles go down. When moving materials, keep bundles low on the roof and secure them with temporary nets or straps to prevent wind-blown damage. Maintain a clean work path and remove debris promptly to avoid ice dam material building up in gutters later in the season.
As the season edges toward autumn, watch the longer nights and cooler mornings that can slow drying times. If a cold snap or early frost creeps in, pause installation and protect the work with temporary coverings rather than forcing a cold-weather install. Final inspections should wait until the roof is fully dry and the attic is ventilated to avoid condensation. Plan for a cautious completion window that respects the valley's tendency for rapid weather shifts, ensuring the roof is sealed and ready before winter pressures rise again.
Typical Palmer-area material costs fall into clear bands. Asphalt shingles run about $400 to $750 per square. Metal roofs clock in around $700 to $1,200 per square. Clay tile brings a wide spread, roughly $1,500 to $3,200 per square, while concrete tile sits near $1,100 to $1,900 per square. For wood shingles or shakes expect about $500 to $900 per square, and synthetic or composite shingles typically range from $600 to $1,000 per square. These numbers reflect the local realities of long winters, freeze-thaw cycles, and the need to move material and crews quickly through a narrow season window.
Costs in Palmer can rise when the short warm-season work window compresses contractor availability and when weather delays from rain, snowmelt, or wind extend labor time. In practice, that means bids may come in higher if a project must start late May or push into June, or if a late spring storm delays delivery of materials. If a crew is juggling multiple roofs in a short period, you'll see price shifts tied to scheduling, overtime, and the need to stage safe access for steep sections.
Steeper roofs commonly used to shed snow in Southcentral Alaska can increase labor, staging, and safety complexity, while heavier materials may add structural-review-related cost and delay. For Palmer homes with notable slope, expect a premium on installation labor even for the same per-square material. Heavier options like clay or concrete tile require not only more lifting but potential framing checks and, occasionally, reinforcement-especially on older structures. If a roof is marginally prepared for a heavy tile upgrade, price quotes should include or note a potential structural assessment, which can affect timing and total cost.
If you're weighing options, time your project to the early warm window when weather and daylight cooperate, but prepare for possible scheduling spikes. Ask contractors to itemize costs by crew hours, staging, and any required underlayment or ice-dam prevention measures, since Palmer's climate makes those components financially consequential. For heavier materials, request a scope that covers structural considerations and potential reinforcement, so you aren't surprised by delays or price adjustments later in the season.
For Palmer homeowners, a full roof replacement typically requires a building permit through the Matanuska-Susitna Borough Building Department rather than a city-only roofing office. That means the project will be reviewed under borough standards, not a purely municipal process. Start early by confirming the permit path with the borough; relying on a local contractor who knows the Borough's expectations can save time and avoid missteps.
The borough generally requires inspections during and after the work, and processing can take several days to a couple of weeks depending on workload and project details. Plan the reroofing schedule with a realistic buffer for inspection windows, weather impacts, and any on-site questions the inspector might raise. If there are any design choices or unusual details (like a nonstandard deck or venting modifications), expect additional review that could extend the timeline.
Roof systems with greater weight, including tile products, may receive added structural scrutiny in the permit process because of local snow-load concerns. In practice, that means a heavier roof isn't just a matter of installing new material; it often triggers review of the underlying framing and potentially required reinforcements. Have the existing structure evaluated if your plan includes heavier materials, and coordinate with your contractor to address any borough-specific documentation tied to load calculations.
Before submitting, assemble a clear scope of work, including product types, fastening methods, and venting or insulation changes. Communicate proactive details to the contractor and inspector so the borough can anticipate any questions. Keep in mind that the review timing varies with project complexity and the current workload, so build in flexibility in your project calendar. If a revision is requested, respond promptly with precise updates to avoid further delays.
Storm damage claims in this area hinge on clear, dated evidence. When a claim is on the table, you need sharp, well-lit photos of the entire roof, along with close-ups of any seams, flashing, ice damming, and deformed or missing shingles. If nearby trees brushed the roof or stranded sections show frost or thaw patterns, capture those too. A simple, step-by-step damage assessment written after a snowfall or thaw helps adjusters separate weather-related damage from long-term wear. In Alaska's insurance environment, wind, snow, and hail are common triggers, so your documentation should tell that story precisely.
Older roofs can be scrutinized more closely after a winter event. If flashing looks aged, gutters are sagging, or there is evidence of recurrent ice damming, insurers may question whether damage is due to neglect or the storm itself. The more you can demonstrate consistent maintenance and timely upgrades, the more credible your claim appears. Plan ahead by keeping receipts, contractor notes, and any code-related updates tied to the roof system, especially after harsh seasons.
A licensed contractor brings credibility that adjusters recognize. They can produce professional damage assessments that distinguish between effects from covered weather events and longer-term deterioration under Alaska's aggressive climate. When a contractor accompanies the claim, their scope of work, photos, and written opinions often help prevent disputes about the cause and extent of damage. Locally, adjusters frequently rely on this expertise to adjudicate complex winter-related failures.
Keep emergency repairs limited to temporary stabilization only, and document those actions with notes and receipts. Maintain a clear line of communication with your insurer, sharing your photos, the assessment, and any contractor observations promptly. If a response seems delayed or unclear, requesting a second appraisal or involving a licensed contractor as a liaison can help move the process toward a fair, weather-backed resolution.
Snow that lingers along eaves tends to melt and refreeze repeatedly, creating a cycle that concentrates moisture where it matters most. Eaves are the first line of defense, and over time the edge fasteners and drip edges can loosen as ice builds up and pounds against the fascia. Valleys, where two roof planes meet, collect meltwater from multiple directions and act like micro ice dams in slow motion. This is where water can back up under shingles and into the roof deck if the flashing isn't integrated with a continuous, well-sealed flashing stack. In Palmer, every thaw-and-freeze sequence pushes these points toward failure, so emphasis on continuous edge support and properly sealed valley details pays dividends during the long winter.
Chimneys, roof vents, and skylights create intentional weak spots if their flashing isn't tight and continuous through seasons of frost. A single compromised flashing joint at a chimney or vent can become a leak path after a heavy snow event or rapid melt. In Palmer, those penetrations see repeated moisture exposure from meltwater that refreezes around the flashing and forms ice pockets that pry seals loose. The places where flashing transitions occur-where a wall-to-roof step or base-to-cap flashing meets-are especially vulnerable to freeze-thaw cycles that degrade sealant beds and allow slow seepage to escalate.
Fasteners and the underlayment layer bear the brunt of Palmer's freeze-thaw cycling. Over time, moisture intrusion can loosen nails or screws, and repeated temperature swings can cause metal fasteners to corrode or lose bite. Underlayment, even when properly installed, can degrade with cumulative cycles of thaw and refreeze, reducing its ability to shed water at critical joints. The result is a creeping vulnerability that manifests at the roof plane seams and around flashing, where water finds its way into the attic air space during seasonal transitions.
Seasonal wind shifts carry a punch that exposes weakened edges and misaligned shingles. Edge rows can lift, especially where fasteners have seen years of sun exposure and play in the wind. Lifted shingles create small, persistent gaps that water can exploit, turning minor winter defects into larger leak paths. This is most evident near ridge transitions, eaves, and zones where the roof meets a wall, where wind pressure can force moisture deeper into the roof system after a freeze-thaw cycle. Regular inspection and timely resealing of edge and transition zones help keep these fragile points resilient through the season.