Last updated: Apr 19, 2026
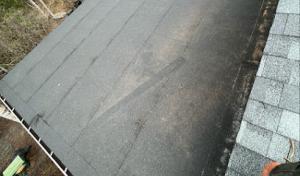
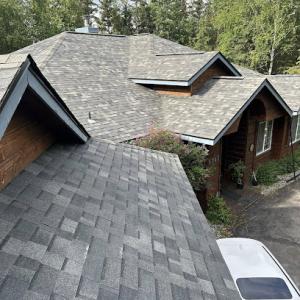
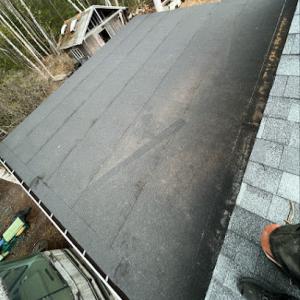
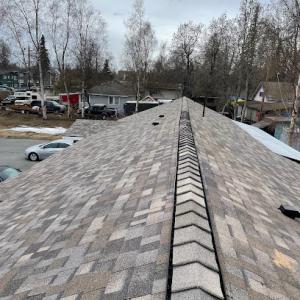
Long snow seasons, paired with repeat thaw-refreeze cycles, mean water can back up at eaves and penetrations if the roof isn't prepared for heavy snow retention and ice dam formation. In a climate where a single thaw can turn a quiet soffit into a frozen dam, every drip becomes a sign you're already late. Your edges, valleys, and roof penetrations are the first lines of defense against costly interior leaks. If you notice ice buildup along drip edges or gutters, that is not cosmetic-it's a warning that the roof system can't shed meltwater fast enough, and those pockets will push water inward at moments of peak freeze-thaw stress.
The city's roofing decisions are heavily shaped by winter roof performance rather than just summer weathering. Homes with heat loss into the attic are particularly vulnerable, because warm attic air melts resting snow, creating water that refreezes at the eaves. This freeze-thaw cycle thickens ice dams, raises interior humidity, and accelerates wood and underlayment damage. In Anchorage, a roof must be evaluated for its ability to move snow safely, manage meltwater during cold snaps, and maintain positive attic insulation and ventilation to keep the deck dry. If the attic isn't well-sealed and ventilated, even a seemingly sturdy roof can fail under a season of heavy loading and rapid thawing.
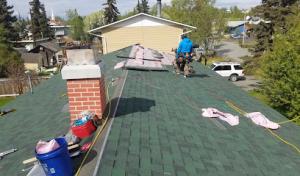
Safe replacement timing is compressed into late spring through early fall because winter access, snow cover, and cold-weather sealing conditions disrupt scheduling. If you wait for summer to schedule a roof project, you may contend with lingering snowmelt runoff, higher urgency from ice dam build-up, and shorter crews trying to finish before the first snows of elsewhere. Plan for an assessment as soon as the snowpack begins to retreat and daylight lingers, but be prepared to accelerate work whenever a mid-winter thaw creates risky interior leakage in a home with poor insulation or aging underlayment. The aim is to establish a robust plan that aligns with a weather window rather than waiting for a perfect dry season.
Focus on systems designed to resist heavy snow loads, control ice dam formation, and manage freeze-thaw cycles without sacrificing ventilation. Roofs that rely on high-mlope lines and adequately rated underlayment can keep water from penetrating into the attic space or into living areas. Pay attention to the placement and condition of eave flashings, along with proper sealing at penetrations such as vent stacks, chimneys, and skylights-areas where ice dams commonly back water into the home. A well-sealed attic, with continuous insulation and vented soffits, reduces warm-air leakage that drives early dam formation. If you're replacing windows or skylights, coordinate with roof replacement to preserve a continuous thermal envelope that won't invite future ice dam trouble.
Begin with a professional inspection focused on roof edge protection, chimney and vent penetrations, and the condition of the underlayment and decking beneath ice dam-prone areas. Ask for a documented assessment of attic insulation, air sealing, and ventilation effectiveness, because enough cold air under the roof deck is the only reliable dam stopper during a long winter. If damage shows up from thaw cycles-wet insulation, stained ceiling, or softened decking-address these issues before the next snow season begins. In every case, plan for a roof system that prioritizes rapid meltwater shedding, robust edge protections, and a sealed, well-ventilated attic to minimize freeze-thaw damage when the next winter arrives.
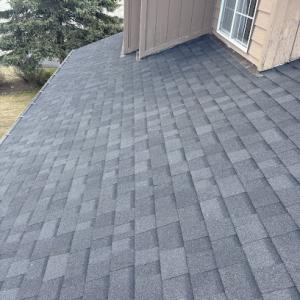
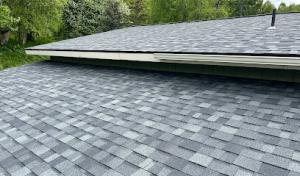
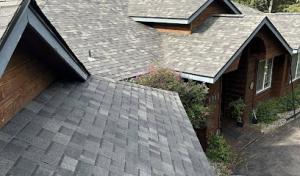
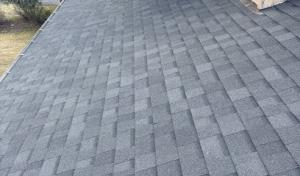
In a climate with long snow seasons and frequent freeze-thaw cycles, the two most practical roof materials for steep-slope homes are asphalt shingles and metal roofing. Asphalt shingles are familiar, easy to install, and they shed snow reasonably well when installed with proper underlayment and ventilation. Metal roofing, on the other hand, resists ice buildup, moves better under cold, and can shed heavy snow more reliably, especially on steeper pitches. When choosing between these two, consider the slope of your roof, the expected snow load, and how often you need to clear or manage drifting snow on upper sections. Both options support a robust ventilation and insulation strategy to minimize ice dam formation and interior condensation during thaw cycles.
Clay tile and slate appear in cost data, and they can be attractive, but they introduce weight and brittleness concerns that are amplified by Anchorage's snow load and freeze-thaw behavior. Tiles and slate require careful structural assessment to avoid overstressing rafters and to ensure fasteners hold through repeatedly freezing and thawing. The brittleness risk increases with temperature swings, and replacing cracked units becomes more challenging in deep snow seasons. If a home already has a strong, reinforced structure and a shallow pitch that keeps tiles from trapping heavy snow, tile or slate could work in specific instances-but weigh the long-term maintenance and potential weight penalties against practical performance in your neighborhood.
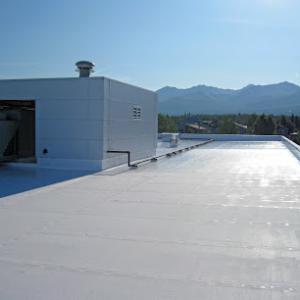
EPDM rubber roofing has a distinct role in Alaska's climate, but not on every roof. It matters locally on low-slope sections and commercial-style roofs where ponding water during thaw and seam integrity are bigger issues than on steep residential surfaces. For homes with flat or near-flat sections, EPDM can provide a reliable, watertight layer that tolerates freeze-thaw movement without the same risk of puncture or thermal cracking that some other membranes face. If your residence features a mixed roof profile, you may reserve EPDM for those low-slope pockets while keeping steeper sections in asphalt or metal.
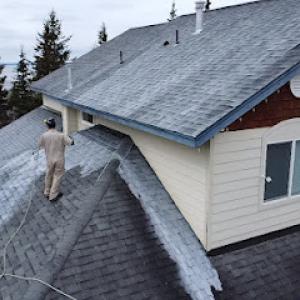
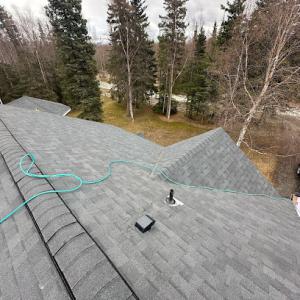
Key installation considerations revolve around fastener patterns, ice guards, and proper attic ventilation. On steep roofs, ensure eaves and valleys have integrated ice and water shield that extends several feet up from the edge to minimize ice dam risk. For metal roofs, confirm that panels are lapped and sealed to prevent snow migration into seams, and that panels are correctly fastened to accommodate expansion and contraction during cold snaps. Regular maintenance should include clearing debris from drainage paths, inspecting for loose fasteners after heavy snow seasons, and checking for any signs of corrosion or lifted shingles on metal or asphalt surfaces. A well-sealed edge, combined with a properly vented attic, helps avoid interior frost and moisture issues that are common when the roof's thermal envelope is compromised.
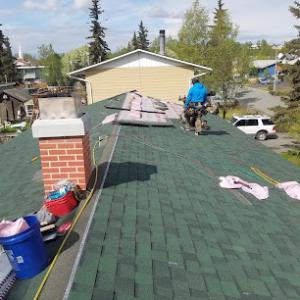
Late spring to early fall is the preferred replacement window for homes in this climate. Crews need milder temperatures and more predictable dry periods to tear off old roofs and install new materials without the snow and ice complicating every step. When planning, aim for a stretch with multiple dry days in a row and daytime highs comfortably above freezing. In practical terms, that often means coordinating around the shoulder seasons of late May through September, avoiding the deepest cold and the lingering darkness of winter mornings. A clear, dry forecast isn't just convenient; it keeps underlayment and fasteners from becoming brittle and helps sealants cure properly.
Spring thaw brings a double edge to projects. On one hand, longer days and melting snow can provide usable daylight windows for crews; on the other, hidden winter leaks may start to reveal themselves as roofs dry out. If a project begins during this transition, expect extra attention to moisture management on decks and surrounding surfaces. Protect interior spaces from unexpected drips, and stage tarps and fans to manage condensation as the roof and attic warm up and dry out. Snow piles around eaves or in shaded corners can soften quickly with sun, creating slick conditions on ladders and walkways-prioritize safe access and clear walking paths before any work begins. If winter ice dams formed, address the underlying insulation and ventilation as part of the plan, rather than treating them as a one-off fix.
Fall winds and the first snows reliably shorten the safe work season. By late September or early October, daylight is brief and temperatures drop; crews must accelerate rough-in work, deck drying, and moisture control to stay on schedule. Delays caused by early snowfall or heavy winds can push projects into a crowded calendar, and that squeeze increases the risk of weather-driven interruptions. Homeowners who wait too long may find it difficult to secure a solid slot with reputable crews and materials arriving on time. If a late-season project is unavoidable, build in a contingency for days lost to wind or early snowfall, and plan for intensified waterproofing and ice-dam mitigation strategies as the first cold snaps approach.
Coordinate a target start after a predictable stretch of dry days, with a clear plan for snow and ice reduction at the eaves before work begins. Build in a buffer for spring thaw variability and for fall weather surprises, especially when forecasts show back-to-back wet or cold periods. Communicate with the contractor about timing that aligns with material delivery windows and vehicle access for snow-free driveways. By aligning your project with the local rhythm of mild summers, intermittent thaws, and the eventual frost, you improve the odds of a smooth install and durable results through Anchorage's long snow season.
Get a clear picture of your project costs upfront - no commitment required.
Northern Snow Removal & Roofing
(907) 317-7396 northernsnowremoval.co
Anchorage, Alaska
5.0 from 8 reviews
Storm Proof Roofing
(907) 770-6666 stormproofroofing.org
205 E Dimond Blvd #549, Anchorage, Alaska
5.0 from 85 reviews
Storm Proof Roofing is a professional roofing company based in Anchorage, Alaska, providing reliable residential and commercial roofing services built for Alaska’s tough weather conditions. We specialize in roof replacement, roof repairs, new roof installation, inspections, and storm damage solutions. Our team is committed to quality workmanship, honest communication, and dependable service from start to finish. Whether you need help with leaks, aging shingles, or a full roofing upgrade, Storm Proof Roofing works to deliver durable, long-lasting results you can count on.
Harris Roofing
(907) 308-9992 harrisroofingalaska.com
Anchorage, Alaska
4.9 from 35 reviews
Harris Roofing & Contracting is a veteran-owned company proudly serving Anchorage and the Mat-Su Valley. We specialize in roofing services including installation, repair, and replacement for both residential and commercial properties. In addition, we offer high-quality interior and exterior painting, siding, and seasonal snow and ice dam removal. With a strong focus on craftsmanship, reliability, and customer satisfaction, we’re committed to protecting your home or business. We also offer discounts for military personnel and first responders. Trust Harris Roofing for dependable, local service you can count on.
Action Roofing Services
(907) 677-6969 www.actionroofingak.net
1351 E 8th Ave, Anchorage, Alaska
5.0 from 21 reviews
With a legacy spanning over 45 years, Action Roofing Services is a trusted name in Anchorage for all your roofing needs. We are a licensed, bonded, and insured company, dedicated to providing exceptional craftsmanship and unparalleled attention to detail. Our team of experienced professionals is committed to delivering quality results, ensuring the safety and protection of your home or business. We have built a reputation on reliability and superior workmanship, and we take great pride in serving our local community.

Premier Roofing
(907) 346-4131 www.premierroofingalaska.com
11580 Doggie Ave, Anchorage, Alaska
4.9 from 31 reviews
Premier Roofing is a full service roofing company in Anchorage, Alaska specializing in residential and light commercial roofing projects, including new construction, roof replacement, and roof repairs. We are a hands-on, family owned business that was established in 1996. Our company is a small, quality driven business that has achieved a well earned reputation for outstanding craftsmanship and reliability. We take great pride in being the roofer that you can trust for all of your roofing needs in Anchorage, Eagle River, and the surrounding communities.
Reds Roofing & Renovations
(907) 802-7575 redsroofingak.com
8240 Hartzell Rd Unit 4, Anchorage, Alaska
4.8 from 28 reviews
Welcome to the home of the Reds! We're a veteran woman owned and family run roofing contractor in Anchorage, Alaska. Reds Roofing is your trusted partner for roofing and home improvement services. Our family and team of professionals believe in going above and beyond for our customers, ensuring each project is executed with utmost precision and heartfelt passion—no less than we'd do for our own family. From roofing repairs and new roofs, to home renovations and improvement projects, we treat your property as it were our own, ensuring every detail is flawlessly executed. No compromise is made on quality, and we guarantee our work. Whether you have a roofing emergency, or simply planning ahead, visit our roofing website to learn more.
Greener Shingles Alaska
(907) 720-3336 totalroofcareak.com
6647 rosewood street anchorage alaska 99515, Anchorage, AK
4.8 from 16 reviews
Extend the life of your asphalt shingle roof by 5-15 years with the Greener Shingles Rejuvenator treatment. We spray your roof with bio-based oils that counteract the aging process in shingles turning back the clock on your roof. Our treatment is 15% the cost of replacing your roof, saving property owners tens of thousands of dollars.
Northern Snow Removal & Roofing
(907) 317-7396 northernsnowremoval.co
Anchorage, Alaska
5.0 from 8 reviews
Northern Snow Removal provides professional snow removal, roofing services, and landscaping throughout Anchorage, Alaska. We offer 24/7 emergency snow plowing for residential and commercial properties in Hillside, Eagle River, South Anchorage, and all neighborhoods within Anchorage. Our veteran-owned business is licensed, insured, and locally trusted. We specialize in: Emergency snow removal and plowing, Roof snow clearing and ice dam prevention, Complete roofing installations and repairs, Professional landscaping and lawn care. Call now for a free quote! Available 24/7 for emergency snow removal service.
Roof & All Construction
(907) 854-6583 roofandallconstruction.com
Anchorage, Alaska
5.0 from 7 reviews
We are a contractor working out of Anchorage, AK and surrounding communities. We are a top rated construction service provider, and from the first nail to the final creative touches our contractor and crew will turn your home into a modern, unique, and comfortable place to live. We proudly offer general contracting, roofing service, and roof installation.
General Roofing
(907) 561-1460 generalroofingak.com
119 E 54th Ave, Anchorage, Alaska
4.3 from 29 reviews
General Roofing is proud to be a local family run and operated business right here in Anchorage. We have been in business since 1973, the managing partner in the founders daughter. General Roofing has an eye for details and provides skilled quality workmanship, excellent customer service, workmanship warranties as well as product warranties. We also give back by supporting high school activities-sports and different animal rescues. We are here to discuss your roofing need's. Please feel free to give us a call, we are here to help you make the best decisions rather premium quality or more budget friendly products
Chinook Roofing
(907) 565-5500 chinookroofingalaska.com
Anchorage, Alaska
4.2 from 29 reviews
Chinook Roofing is the premier roofing company in Anchorage, AK. We specialize in re-roofing, roof cleaning and roof repair services, and our team is dedicated to providing exceptional yet affordable solutions. Experience the difference with Chinook Roofing. Call now to schedule your appointment. We proudly offer free estimates on all services in Anchorage, AK.
EZ Roofing & Construction
(907) 205-7521 www.ezroofingconstruction.com
Anchorage, Alaska
4.4 from 22 reviews
At EZ Roofing & Construction, LLC, we focus on delivering roofing and construction work built to handle Alaska?s demanding climate. We manage roof installations, replacements, repairs, and full exterior or interior construction with durable materials and steady craftsmanship. Whether reinforcing an older roof, building a new structure, or improving overall protection, we approach each project with careful planning and a commitment to long-term performance. Our goal is to provide reliable, weather-ready results that keep your home or business strong through every season.
Alaska Roof Restorations
(907) 903-1190 alaskaroofrestorations.com
240 E Tudor Rd STE 210, Anchorage, Alaska
4.4 from 14 reviews
Alaska Roof Restorations offers a proactive roofing solution as opposed to the 'old-school' mentality of tearing off roofs. We specialize in cost-efficient restoration of existing flat roof, low slope & metal roofs. We are the responsible roofing solution that saves you money by installing a lower cost system that will also save significant sums of money over the life of the building by eliminating the need to ever have to tear off and replace a roof. Additionally, our systems are renewable for the life of the building, creating a sustainable roof solution with a renewable warranty. Our seamless membrane options are applied directly on top of the existing roof material and will last for the life of the building when properly maintained.
In Anchorage, low-slope roofs face a unique danger when snow begins to melt. Drainage slows as temps hover above freezing, and repeated freeze-thaw cycles stress seams, flashings, and edge details. The result is a higher chance of water backing up under flashing, then refreezing at the eaves or along transitions. If gutters are clogged or downspouts freeze, meltwater has nowhere to go, increasing the risk of interior leaks and accelerated edge rot. Vigilant inspection after heavy snow events is essential.
EPDM is a relevant local choice for low-slope areas because it handles cool temperatures and ponding more forgivingly than some shingle systems. In practice, installations often encounter long periods of moisture exposure with limited summer warmth to dry the membrane fully. When choosing EPDM, ensure the seams are properly heat-welded or taped, and that edge detailing accommodates seasonal movement. A well-sealed EPDM field, reinforced edges, and compatible flashing details can reduce ongoing seepage risks during melt cycles.
Mixed rooflines with both steep and low-slope sections are a practical concern in this climate because snow and meltwater move differently across each surface. Snow tends to ride down steeper pitches while lingering on flatter areas, creating concentrated drainage paths that overwhelm transitions, scuppers, and terminations. Proper planning for combined systems means designing drip edges and terminations that manage both slow melt on the low-slope plane and rapid channeling on steeper pockets. Regular checks should focus on transitions where water can pool and refreeze.
Maintenance routines must address freeze-thaw vulnerabilities without assuming a quick fix will last multiple seasons. Seams can open between seasonal cycles, and flashing collars around vents or skylights can loosen with wind-driven snow. Preventive steps include keeping debris clear, testing sealants for flexibility in cold temperatures, and scheduling mid-winter checks where ice dams are most likely to form. The goal is to keep meltwater moving toward proper outlets while allowing the roof assembly to tolerate steady freeze-thaw pressure.
Find specialists in TPO, EPDM, and built-up flat roofing systems for residential and commercial properties.
Storm Proof Roofing
(907) 770-6666 stormproofroofing.org
205 E Dimond Blvd #549, Anchorage, Alaska
5.0 from 85 reviews

Reds Roofing & Renovations
(907) 802-7575 redsroofingak.com
8240 Hartzell Rd Unit 4, Anchorage, Alaska
4.8 from 28 reviews
Anchorage costs are shaped by Alaska logistics, including shipping and material availability, which can make specialty products and replacement parts harder to source than in lower-48 markets. That reality tends to push up both material and delivery timelines, especially for higher-end or niche products. In addition, short seasonal demand spikes can tighten labor availability during the main roofing window, especially after severe winter damage or storm-driven repair surges. When crews are juggling multiple sloped roofs with heavy snow retention or ice-dam mitigation work, the bid may reflect the difficulty of coordinating crews and equipment in a tight weather calendar.
The typical cost ranges listed reflect Anchorage-specific realities, not national averages. Asphalt shingles remain a common entry point for cost-effective replacement, but snow loads and ice-dam protection requirements push some homes toward stronger underlayment and better sealing details. Metal roofing, while more expensive upfront, can pay off with longer life in a climate with freeze-thaw cycles if installed with proper insulation and attic ventilation. Synthetic/composite shingles offer a balance between weight, durability, and availability, but sourcing can still be a challenge in winter. For exceptionally durable options, slate and clay tile bring substantial weight and long lifespans, yet they demand structural review and a longer labor window. EPDM rubber roofing presents a different approach suited to flat or low-slope sections, but its performance hinges on precise flashing and membrane seams in cold conditions.
Steeper roofs designed to shed snow, added ice-dam protection details, and possible structural review for heavier materials can all push local project pricing upward. Short summer windows mean you should plan a weather buffer for material delivery and crew availability, and expect occasional delays if a late spring thaw or early autumn freeze narrows the installation days. If winter storms threaten early start or late completion, contractors may implement phased work or temporary protection to mitigate ongoing snowfall and moisture intrusion.
Start with a conservative estimate that accounts for heavier underlayment, upgraded insulation, and enhanced ventilation to combat freeze-thaw cycling. Confirm that the chosen roofing system includes robust ice-dam protection details and appropriate edge metal or gutter solutions. Factor in potential structural reinforcement if the existing deck or rafters show signs of age or deflection under heavier materials. Finally, align delivery windows with the local peak construction calendar to minimize stockouts and reduce downtime between material orders and installation.
Don't let upfront costs delay a critical repair - these contractors offer payment plans to fit your budget.
Storm Proof Roofing
(907) 770-6666 stormproofroofing.org
205 E Dimond Blvd #549, Anchorage, Alaska
5.0 from 85 reviews
In Anchorage, a full roof replacement typically requires a building permit through the Municipality of Anchorage Building Department. The process is designed to ensure the roof assembly can handle long snowy seasons, freeze-thaw cycles, and the potential for ice dam formation. The permit timeline can hinge on the scope of work, site access, and whether any nonstandard materials are planned. Before scheduling an installer, verify that the permit application covers the intended plan set, including underlayment choices, ventilation changes, and any added insulation or drainage improvements.
Projects usually involve rough-in and final inspections. The rough-in check focuses on framing, deck connections, and roof sheathing attachment, ensuring the structure can support the weight of heavy snow loads. The final inspection confirms the completed work matches the approved plan and that penetrations, flashing, and venting comply with local code and climate considerations. Be prepared for inspectors to look closely at ice dam protection, insulation continuity, and ventilation pathways, since good air flow helps prevent moisture-related issues during Anchorage's long winter.
Plan review may be triggered when the scope includes structural changes or unusual roofing materials. If the project adds deck repairs, framing alterations, or moves to heavier roof assemblies (for example, upgraded underlayment, extended overhangs, or metal or tile systems), expect closer scrutiny. Submittals should include updated load calculations, roof-to-wall connections, and details for any retrofits to prevent wind uplift or snow retention problems. If a project sticks to re-roofing with the same material and no framing changes, the review can be straightforward, but it still requires a compliant permit path.
Start with a complete plan set that shows roof geometry, fastener patterns, and any deviations from standard construction. Keep a clear trail of contractor licenses and material certifications. Coordinate with the contractor to schedule inspections during the work sequence, minimizing delays caused by weather windows or snowfall. If minor changes arise after permit issuance, contact the Building Department early to determine if a permit amendment or plan revision is needed. Maintaining clear documentation helps avoid rework and keeps the project moving through Anchorage's permitting tide.
Alaska insurers commonly focus on roof age, prior damage history, and material choice, which makes maintenance records and before-and-after photos especially useful in Anchorage claims. When a winter storm hits and the snow deepens, the claim review can hinge on the roof's wear pattern and any visible evidence of freeze-thaw cycles. If a roof has known weak spots or past fixes, expect adjusters to scrutinize those areas closely. A careful file with dated repairs, shingle replacements, and visible sagging or cracking helps establish a baseline for what's needed now, rather than what used to be.
Wind, ice, and winter storm damage can shape adjuster decisions in Anchorage more than hail-driven claim patterns seen in other regions. Ice dams, layered ice formation along eaves, and wind-blown debris can prompt higher repair estimates or changes in recommended methods. Snow load events often reveal hidden failures in underlayment, flashing, and ridge vent integrity. If an area experienced a heavy freeze-thaw swing, the claim may pivot toward remediation of moisture intrusion and upgraded detailing to resist future cycles, not just patchwork.
Coverage outcomes can vary after severe seasonal events, so a clear written scope of work and photo documentation are important when filing local roof claims. Keep a concise ledger of when storms struck, where ice dams formed, and what sections of the roof showed leaking or accelerated wear. Before-and-after photographs that show the condition before repairs and after temporary mitigation are particularly valuable. A detailed description of the material choice and its expected performance under Alaska's snow retention demands can help align expectations with the adjuster's assessment, reducing ambiguity when settlement discussions begin.
Connect with contractors who help homeowners navigate the claims process from damage assessment to final approval.
Reds Roofing & Renovations
(907) 802-7575 redsroofingak.com
8240 Hartzell Rd Unit 4, Anchorage, Alaska
4.8 from 28 reviews
Roof & All Construction
(907) 854-6583 roofandallconstruction.com
Anchorage, Alaska
5.0 from 7 reviews
In Anchorage, warranty value depends heavily on whether the roof assembly was installed for cold-climate ventilation, ice protection, and snow management rather than just product selection. A solid warranty should reflect how the system handles extreme freeze-thaw cycles, ice dam prevention, and concentrated snow loads. Look for language that ties coverage to performance in Arctic-specific conditions, not only general durability.
Manufacturer and workmanship coverage matter more when freeze-thaw movement and winter leak pathways can expose installation errors quickly. Ensure the warranty clearly distinguishes between the roof panel or shingle material, the underlayment, flashing, and fasteners, and how each contributes to cold-weather performance. Verify whether coverage includes frost-related buckling, ice dam damage, and interior leaks caused by improper connections at eaves and penetrations.
Homeowners in Anchorage should compare warranty terms with the actual local failure points of eaves, valleys, penetrations, and low-slope transitions. Eaves and rakes see the most ice buildup; valleys are prone to refreezing and ice dams; penetrations for vent stacks and skylights can become leak pathways if flashing and sealants crack in cold cycles. A robust warranty will address these failure modes with specific repair or replacement rights.
Read the fine print for exclusions tied to freeze-thaw movement, snow load events, and insufficient ventilation or ice protection. Confirm that contractor workmanship is covered for a reasonable period and that the phrasing does not leave critical failure avenues unprotected. Ask how claims are evaluated after heavy snow seasons and during rapid thaws.
Keep a detailed log of seasonal inspections, de-icing measures, and any observed ice dam formation. Warranties fare better when installation and maintenance steps are documented, and when there are predictable inspection milestones aligned with Anchorage winters.