Last updated: Apr 19, 2026
Lewiston sits at the confluence of the Snake and Clearwater rivers in a canyon setting, creating a warmer low-elevation environment than many other Idaho communities. That heat in summer compounds the aging pattern of common roof systems: more sun exposure on south-facing slopes, more heat cycling at the attic edge, and faster breakdown of reflective coatings. At the same time, winter brings pronounced snow events and extended freeze-thaw cycles. The result is a roof that must withstand large seasonal temperature swings, not a single, predictable weather pattern. When planning or inspecting, expect the roof to show accelerated wear from heat, then stress from cold and moisture as winter returns.
In practical terms, high summer heat reduces the life of asphalt shingles, loosens underlayment grip, and accelerates granule loss on many profiles. Metal panels may expand and contract visibly, tightening fasteners and revealing edge seals if sheathing or purlins aren't fully supported. If a roof has southern exposures or broad overhangs, the heat load is concentrated where flashing meets vertical surfaces. A proactive homeowner should look for early signs: lifted edges, accelerated color fading, and pinhole or micro-crack patterns near the hottest roof planes. Addressing these symptoms quickly-by resealing vulnerable seams, checking fasteners, and ensuring adequate ventilation-helps slow a heat-driven deterioration cycle.
Winter snow events in this canyon setting aren't just about weight. The meltwater interacts with cold surfaces, refreezing at vents, penetrations, and around flashing, which can pry seams apart. Moisture moves through the valley more readily than in drier inland areas, making flashing details and underlayment performance critical. Pay attention to any condensation on underside of decking during the shoulder seasons, which signals underlayment stress or inadequate ventilation. Ice dam risk climbs where attic insulation is uneven or attic vents are blocked. Proper drainage is essential: check gutters and downspouts for clogs, ensure fascia is continuous, and confirm that water flows away from the foundation rather than toward roof edges or into low valleys.
Because flashings in canyon cases face both heat and moisture, high-quality flashing detail matters more here than in milder climates. At the valleys, rakes, and along perimeters, ensure that flashings are integrated with proper sealants compatible with chosen roofing materials. Underlayment should be rated for cold weather and moisture resistance, with seams properly lapped and protected from wind uplift. Consider secondary anti-ponding strategies on flat or low-slope sections to minimize freeze-thaw cycling at interfaces. Where roof penetrations exist-vents, pipes, chimneys-tight seals and corrosion-resistant flashing are non-negotiables. On metal roofs, look for standing seams that maintain continuity and confirm that fasteners are corrosion-resistant and properly sealed.
A roof in this climate benefits from a balanced attic system that swallows heat in the summer and doesn't trap moisture in winter. Ensure adequate attic ventilation with a combination of soffit and ridge or high-cap exhaust, preventing heat buildup that accelerates aging. Insulation should be sufficient to keep attic temperatures from spiking under peak sun, which, in turn, reduces expansion and contraction cycles on roofing edges. When performing maintenance or replacement, inspect attic air pathways for obstructions, and repair any gaps that could funnel warm, moist air into sheathing and underlayment zones.
During a routine check, look for accelerated granule loss on shingles, blisters or curling on close-to-sun surfaces, and minor detachment at flashing corners. For metal roofs, pay attention to seam separation and fastener corrosion. For tile roofs, inspect for cracked or loose units, especially along eaves where heat and wind tools can pry tiles loose. In all systems, confirm that drainage paths remain clear and that no moisture has penetrated behind flashing or into decking. Regular, targeted upkeep tailored to this canyon climate extends the life of the roof and reduces the risk of major repairs later.
In this canyon setting where the Snake and Clearwater rivers braid through steep terrain, the roof ages on a different clock. Freezing nights followed by warm days crack open shingles and flashing, then the next thaw pushes water into tiny seams. For Lewiston homeowners, winter snow loads aren't just a burden on gutters; they delay tear-offs and expose vulnerable roof areas if work starts too late in the season. If crews push a late-season replacement, you risk wind-driven snow and ice backing up into valleys, hips, and valleys that weren't prepared for the extra moisture. Your roof becomes a storage area for meltwater that refreezes into ice dams, forcing leaks that show up only after the first warm snap or the first heavy melt. The result is accelerated aging and more repairs, not a clean, long-lived installation.
Plan your project so the roof is fully protected before the first deep freeze. In this climate, bare edges, flashing around chimneys, and vent penetrations are the weak points that heat cycles and moisture exploit first. If a tear-off can't be completed in a single pass, schedule at least the hard supply work and temporary coverings early so exposed deck and underlayment don't sit damp through autumn nights. You're not just buying time-you're reducing the chance of hidden damage surfacing after a mid-winter thaw. Weather windows in late fall can be tight: high winds, seasonable precipitation, and rapidly darkening daylight shorten the days you have to complete steps like removing old layers, sealing vents, and applying a water-tight underlayment. Don't let a late November push jeopardize the roof's ability to shed snow and meltwater.
Spring in this region arrives with storms and strong winds that can turn small flashing or shingle issues into active leaks after winter wear. A previously sound installation can suddenly reveal gaps around roof penetrations or along eaves where ice and snow sat long enough to degrade underlayment or sealant. The moment you notice any dampness along walls, ceilings, or near interior corners, treat it as a red flag for a spring inspection. Lewiston's spring winds can whip moisture right into exposed joints, and that moisture travels quickly through attic spaces when attic air isn't well ventilated. Prioritize a post-winter inspection that focuses on flashing, sealant joints, and any areas that stored heavier ice at the roof edge. If you catch issues now, you prevent the cascade of leaks that follow spring storms.
As autumn settles, damp roof surfaces and clogged valleys become a timing issue because they interfere with clean installation conditions before winter arrives. Leaves and debris trap moisture against the deck, which accelerates underlayment wear and can conceal damage from earlier freezes. By scheduling work with a dry, cool spell and ensuring valleys are clear of debris, you protect the roof's performance as temperatures fall. In practice, the window narrows quickly: once fall rains begin, you want the roof fully sealed and tested before heavy snows return. If you wait too long, you risk moisture seeping into seams when the first thaw arrives and the roof must perform under a heavier, wetter load. Stay ahead with a proactive pre-winter check that targets moisture traps, flashing integrity, and attic ventilation to keep your roof one season ahead of Lewiston's microclimate.
Asphalt remains common, and in this canyon setting the hot dry summers can accelerate granule loss, sealant fatigue, and surface aging compared with cooler mountain markets. The granular layer can wear unevenly as heat cycles drive expansion and contraction, especially on roofs with heavy shading changes or near exposed rock faces that reflect sun. If choosing asphalt, prioritize a higher rating for granule adhesion and a match to your roof slope to minimize ponding and rapid heat buildup. In Lewiston, you'll want a shingle with robust sealant performance and a credible warranty against curling or blow-off after winter cycles. Consider a many-tab design that sheds heat a bit better and avoids long, intimate sun exposure on darker surfaces. Ensure proper underlayment for moisture migration from canyon winds and occasional rapid melt cycles.
Metal fits the valley's snow-shedding needs and can offer long life under fluctuating temperatures, but installers must account for expansion, fastening, and noise expectations in a city that also sees intense summer heat. In Lewiston, metal panels expand and contract with temperature swings; fastener placement, panel seams, and fastening patterns matter to prevent leaks and oil canning. Choose a panel profile with proven freeze-thaw resilience and a corrosion-resistant coating suitable for the valley's moisture exposure. Proper attic ventilation and roof-to-deck sealant strategies reduce condensation risk under metal. If you like a quieter roof, opt for thicker panels, solid foam-backed underlayment, or add a sound-dampening underlayment. Expect some rhythm of creaking on hot afternoons, but well-installed metal can outperform in snow and ice while standing up to rapid winter thaws.
Clay tile and concrete tile can perform well in dry, sunny periods but their significant weight demands structural inspection before installation in a canyon climate where freeze-thaw exposure matters. In Lewiston, moisture movement and valley humidity challenge these options if roof decks aren't reinforced or properly vented. Wood shakes bring a classic look and good performance when seasoned and properly installed, yet they are susceptible to moisture damage and decay in areas with persistent damp air or roof gaps that allow driving rain to soak the layers. Synthetic products offer a broader range of finishes and weight profiles, but their long-term behavior under repeated freeze-thaw and canyon moisture should be tested under a local warranty. In all cases, calculate the combined load, ensure moisture management with high-quality underlayment and ventilation, and plan for more frequent inspection after winter thaws and spring moisture events. In this setting, the key is how each option handles heat exposure, weight, and slow-moisture movement across the roof plane.
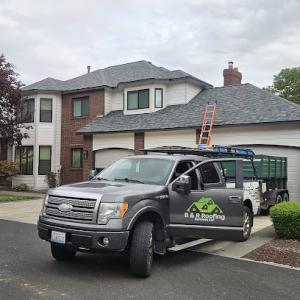
B & R Roofing Services
(509) 508-3183 lcvalleyroof.com
Serving
5.0 from 16 reviews
Serving the Lewis Clark valley and surrounding areas. As a trusted, family-owned roofing company with more than 40 years of experience, we provide reliable repairs and replacements that keep your home or business safe and sound. We love being able to help others and are always ready to make sure that people get quality work for reasonable prices. Safety is a key aspect of our work, and we and our team pay close attention to the details to ensure quality results for our customers. It’s important to us that we are reliable, honest, and always work with integrity.
Concrete, clay, metal, and asphalt each carry their own local sticker factors in a canyon layout. Provided local pricing ranges run about $320 to $520 per square for asphalt shingles, $600 to $1200 for metal, $900 to $2000 for clay tile, $850 to $1900 for concrete tile, $600 to $1200 for wood shingles or shakes, and $500 to $950 for synthetic or composite shingles. Those figures reflect Lewiston's mix of steep lots, limited staging space, and the summer heat that speeds aging and the winter freeze-thaw cycles that test seals. When you start a project, expect bids to sit within these bands, but with winter scheduling and recent weather events there can be noticeable nudges either direction.
Summer heat in the confluence of two rivers accelerates wear on asphalt and synthetic options, while winter cycles push roofing systems to repeatedly cycle between freezing and thawing. That combination increases the likelihood of premature shingle lift, seal failure, and faster edge deterioration, so some crews hedge their estimates to cover higher material waste and more careful installation. In practical terms, if you're lining up work near or after a harsh wind or hail event, expect prices to rise as demand tightens crews and stock.
Steeper hillside neighborhoods, multi-level homes, and canyon access constraints are common here and can sharply raise labor and teardown times. The crew may need to haul materials up narrow driveways or set up longer staging lines for equipment, which adds days to a project and can bump costs by a noticeable margin. When you see a price spike, check if the bid includes extra for teardown on an upper level or a tighter workspace that requires more safety gear or specialized equipment.
Different materials resist the canyon's heat and moisture exposure in distinct ways. Asphalt remains the most budget-friendly upfront, but metal and tile options offer longer life in this climate, potentially reducing life-cycle costs despite higher initial prices. If you're weighing short-term savings against long-term performance, the local climate tends to favor options with strong wind resistance, good underlayment, and robust sealants. In this setting, a careful blend of sturdy installation and material choice helps your roof weather Lewiston's hot summers, freeze-thaw cycles, and moisture movement.
When planning a full roof replacement, the City Building Department typically requires a permit for the majority of residential reroofing projects. The permit process is designed to document the scope of work and ensure the structure maintains proper fire ratings, ventilation, and drainage through the canyon-driven climate. The permit is typically submitted by the roofing contractor after the project scope is defined, so homeowners should confirm exactly what assembly and tear-off details are being permitted. This means you should get a clear written scope from the contractor that lists the new roof system, underlayment, fasteners, and any attic or vent work that will be included under the permit. If you have a mix of roof surfaces, skylights, or a secondary structure, discuss which elements require permits and whether any trenching or trim work will be included.
As part of the review, the Building Department looks for code-compliant methods that handle the canyon's heat loads, freeze-thaw cycles, and moisture movement. Expect questions about underlayment type, roof venting strategy, and fastener choices, especially if the home sits high on the canyon walls where sun exposure and wind can be more intense. The contractor should provide drawings or product data that align with the current code requirements and with the project's geographic considerations. If existing rafters or sheathing show signs of damage from moisture or heat, the plan may need supplementary details or a partial tear-down under the permit to verify structural integrity before the new roof is installed. Clear documentation helps prevent delays and ensures the installation meets city standards for the long-term performance in this climate.
Lewiston inspections commonly include an in-process underlayment or rough-in stage and a final inspection after installation is complete. The in-progress check focuses on the underlayment quality, ventilation clearance, and attachment methods before the visible roofing goes on. That stage is your opportunity to catch mismatches between the contractor's installed layers and the permit scope, especially regarding underlayment type and any required drain or overflow considerations in the valley areas. The final inspection confirms that the completed roof matches the permit drawings and that all penetrations and flashings are properly installed for the canyon's freeze-thaw and moisture exposure patterns. Coordinate with the contractor to schedule inspections promptly, as delays can add time to the project and potentially expose the structure to weather if the project extends into shoulder seasons.
Keep a dedicated folder with permit numbers, scope documents, and inspection dates. Before work starts, verify that the contractor's submission includes tear-off details, the exact roofing assembly, and ventilation provisions. If uncertain about any permit element, request written clarification from the Building Department and ensure the contractor is aligned. After the install, review the final inspection checklist and confirm any required post-installation items, such as attic vent adjustments or drip-edge alignment, are noted in any closing paperwork. A well-documented permit and inspection path helps ensure the new roof stands up to the valley's heat, moisture, and freeze-thaw cycles for years to come.
In this canyon setting at the confluence of the Snake and Clearwater, wind and hail events can spike quickly, and when they do, claims often stack up while adjusters work through a backlog. The insurance market itself stays relatively steady, but that doesn't mean your roof won't feel the sting of a busy storm season. You want to be prepared for bursts of claim activity and longer-than-expected claim handling during active periods.
When a claim is filed, expect requests for clear photo documentation and a well-scoped replacement plan. Insurers serving Lewiston may want photographs that show both the affected areas and the broader roof surface to distinguish new damage from older wear. A clearly documented replacement scope helps prevent back-and-forth later in the process. Evidence distinguishing recent storm damage from prior reported damage can matter a lot, especially if the roof already showed wear from the canyon's heat, freeze-thaw cycles, or moisture movement in the valley.
Because adjusters may review prior damage history before approving replacement, prompt documentation matters. If spring storms or hail create issues, capture the most recent conditions as soon as you can-do not wait for leaks to worsen. Take wide-angle shots of the roof and close-ups of damaged sections, vent penetrations, and flashings. Keep a dated record of any seasonal concerns, such as heat-related aging or recurring moisture intrusion in valleys or eave lines. This proactive approach helps the adjuster see the current impact clearly and reduces the chance of disputes about prior problems.
Build a simple, current wall of evidence: a dated photo log, a written summary of visible damage, and a proposed replacement scope that reflects what a modern roof needs in this climate. If you experience a storm, reach out to your insurer with these materials promptly after inspection by a qualified roofer, so the investigation can proceed on a solid, consistent footing. In Lewiston, where the microclimate accelerates aging in certain roof joins and surfaces, timely documentation is especially valuable.
In Lewiston, repeated freeze-thaw cycles can widen small defects around penetrations, valleys, and flashing transitions that may have stayed minor in a milder climate. Those microcracks and loose sealants creep into bigger leaks over the years, especially where the roof meets chimneys, skylights, or vent pipes. If you notice moisture pockets near a chimney or along a metal flashing bend after a thaw, you're likely seeing this pattern in action. Addressing those spots promptly helps prevent rapid deterioration of underlying decking and insulation.
Hot summer exposure can shorten the service life of aging asphalt roofs and sealants, especially on sun-exposed slopes above the canyon floor. The intense sun on south-facing pitches accelerates granule loss and softens shingle edges, inviting wind uplift and early curling. On roofs with aging reflective coatings or compromised granules, heat-driven breakdown can show up as accelerated granule shedding, dark spot staining, or sudden edge detachment after a heat wave.
Leaf debris and fall moisture can trap water in valleys and drainage paths, a recurring local maintenance issue before winter weather arrives. Clogged valleys turn into water reservoirs that evaporate and reroute under shingles, promoting rot and moss growth on shaded sections. Regular cleaning before the first freezes reduces ice dam risk and helps maintain consistent drainage across the roof surface.
Small signs-firmer granule loss, hairline leaks near fasteners, or moss colonization in protected low spots-should prompt a closer inspection. In this canyon environment, preventive checks timed to seasonal transitions are your best defense against costly damage later.