Last updated: Apr 19, 2026
In this inland valley, the roof endures a relentless two-season rhythm. Hot, dry summers push materials to expand, creak, and shift against fasteners and flashing. Then cold, wet winters follow, causing moisture to move in and out, followed by freeze-thaw cycles that crack, pry, and poke at seams, nails, and penetrations. This pattern-expansion in heat, contraction with moisture, and freeze-thaw stress at every stack, vent, and chimney-drives the wear you'll notice first at flashings and along roof penetrations. It's not marine moisture or hurricane exposure that does the biggest damage here; it's this pronounced summer heat and winter moisture swing.
Look for early warning signs near the most exposed transitions: roof penetrations, edge details, and any area where flashing ties into the deck. In summer, you may feel a slight movement or hear more creaking as membranes and sealants expand. Come late fall and through winter, gaps open up where moisture can work its way under shingles or underlayment, and freeze-thaw cycles push those gaps into cracks. The result is accelerated deterioration of sealants, misalignment of shingles, and sooner-than-expected deterioration around vents, chimneys, and skylights. Because this climate swings so hard, the first noticeable trouble often appears at the Flashings, not in the middle of a field of shingles.
Late spring through early fall is the best replacement window locally. The reason is simple: fewer rain delays, steadier installation conditions, and the ability to cure sealants and underlayment before the next winter. If a project must occur outside that window, prepare for potential weather interruptions and plan additional protection around penetrations. For roofs already showing signs of the stress cycle, scheduling work before the heaviest heat of summer reduces heat-related delays and helps ensure a longer layup for new materials. If a roof is near the end of its life, proactive replacement in this window minimizes disruption from weather-induced contractions during the following winter.
The places most stressed in this climate are the flashings and any roof penetrations. Regular inspections should focus on the intersection of flashing with decking, along ridges, and around vents. Look for hairline cracks in sealants, lifted edges, and rusting or loose fasteners where heat has driven expansion. In winter, inspect after freezes for new gaps or displaced flashings. In summer, pay attention to areas where shingles butt up against flashings or chimneys, as heat-driven movement can loosen the seal over time. Prevention hinges on high-quality installation, properly sized flashings, and durable sealants that remain flexible through cycles.
The dominant residential materials in Walla Walla are asphalt shingles, metal roofing, clay tile, concrete tile, wood shingles/shakes, and synthetic/composite shingles. The hot, dry summers followed by cold, wetter winters create bold cycles of expansion and contraction in roofing systems, so the material you choose has to tolerate heat exposure in the attic and flashings, plus moisture movement in winter. That means flashing quality and underlayment selection matter more here than in many other inland climates. When you're evaluating options, the goal is a system that minimizes movement damage, keeps moisture out during freeze-thaw cycles, and supports a long service life in a sun-soaked valley.
Asphalt shingles still dominate entry-level and mid-range roofs, and they pair well with many Walla Walla homes because installation is straightforward and replacement paths are familiar. For this climate, look for heavy, laminated shingles with good granule adhesion and a reliable, sealed underlayment that can resist wind-driven rain and summer heat. Pay particular attention to the attic ventilation and roof deck dryness during installation; the heat of summer can drive moisture into seams before the roof is fully shingled. In older homes, ensure flashing around chimneys, vent stacks, and skylights is upgraded to continuous metal with integrated sealant channels. A well-installed asphalt system can handle the freeze-thaw cycles, but cracked seals at any penetration point or a compromised underlayment will invite moisture intrusion over a few winters.
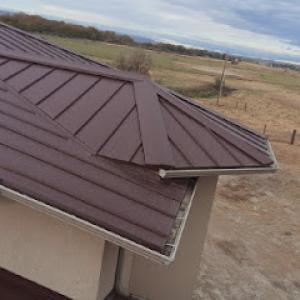
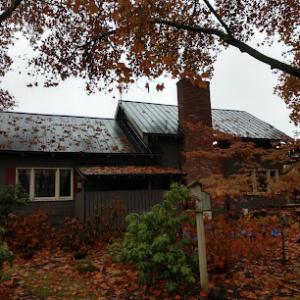
Metal roofs excel in hot summers because they shed heat quickly and can carry a longer lifespan with minimal maintenance. In Walla Walla's climate, metal panels are less susceptible to expansion cracking than some other materials, but proper installation matters, especially around flashing and panel overlaps. Choose a metal system with a standing seam or concealed fasteners to reduce exposed points where moisture can intrude during wet winters. The flashing where metal meets walls, dormers, and chimneys must be continuously sealed and integrated with a compatible underlayment to handle winter moisture. If you opt for metal, plan for a roof profile that accommodates snow guards only if you have significant winter precipitation; even without heavy snow, wind-driven moisture and freeze-thaw cycles call for precise panel alignment and drainage planning.
Clay and concrete tiles bring a distinctive look and a strong wind resistance profile, but they come with substantial weight. Heavier tile systems are common locally, so reroof planning often involves structure reinforcement and careful installation detail that differs from a shingles-only market. You must verify the existing structure can support the loaded roof, or budget for structural upgrades. Tile systems demand precise underlayment choices to manage moisture, and flashing must be integrated with counter-flashing that seals effectively around penetrations. In cold months, movement at roof edges and around hips can cause cracking if the substrate shifts or if fasteners are not properly sized for the load. If you pursue tile, anticipate a tighter installation window and additional inspection steps to ensure long-term performance through heat, sun, and freeze-thaw swings.
Wood shingles and shakes offer a classic appearance that suits certain neighborhoods, but they require careful maintenance to resist summer heat and winter moisture. In Walla Walla, air-dried or treated wood products can suffer from rapid weathering if ventilation is suboptimal or if underlayment isn't rated for high heat exposure. Synthetic or composite shingles provide additional resilience against rapid expansion and contraction and can mimic natural textures with lower maintenance, yet you still need robust flashing and an appropriate underlayment system to handle moisture movement. Whichever path you choose, ensure the flashing around chimneys, vents, and dormers is continuous and compatible with the roofing material's expansion characteristics.
VW Quality Roofing
(509) 525-9970 www.vwqualityroofingllc.com
1215 E Alder St, Walla Walla, Washington
5.0 from 32 reviews
Over 25 Years of Experience For All Your Residential and Commercial Roofing and Gutter Needs. We provide 24 hr emergency services and FREE Estimate (509)629-0600 Más de 25 años de experiencia para todas sus necesidades de canalones y techos residenciales y comerciales. Brindamos servicios de emergencia las 24 horas y presupuesto GRATIS (509)629-0600

Alpha Roofing
(509) 240-4884 www.alpharoof1.com
128 N 2nd Ave Unit 1909, Walla Walla, Washington
4.8 from 37 reviews
Alpha Roofing is a licensed, insured, and dual-certified roofing and siding contractor proudly serving Walla Walla and beyond. As GAF and Owens Corning certified professionals, we specialize in residential and commercial roofing, siding installation, roof repairs, and replacements. Locally owned by Walla Walla natives, we’re committed to quality craftsmanship, honest service, and giving back to our community. We offer free estimates, 24/7 emergency repairs, insurance claim support, and discounts for veterans and seniors. Serving Walla Walla, Pullman, Spokane, Tri-Cities, and surrounding areas. Trusted. Certified. Local.
R & Z Roofing
(509) 301-9335 rzroofingwa.com
103 Owens Rd, Walla Walla, Washington
4.6 from 18 reviews
Reliable roofing contractor, servicing Southeastern Washington and Northeastern Oregon since 2004. We look forward to putting a great, worry free roof on for you!
Gillespie Roofing
(509) 525-8527 www.gillespieroofing.com
3400 E Isaacs Ave, Walla Walla, Washington
3.8 from 9 reviews
Gillespie Roofing, Inc. Trusted Experts in Walla Walla, Tri-cites and NE Oregon A Legacy of Satisfied Customers

Elsom Roofing
(509) 525-9477 www.elsomroofing.com
Serving
4.5 from 19 reviews
Elsom Roofing, Inc. was formed in early 1990 after it's founder, Dan Elsom, discovered the need for an additional roofing company in the Walla Walla Valley. In 1992, Elsom Roofing began providing seamless gutters and downspouts. Elsom Roofing does commercial and residential work. We provide all types of roofing from composition to concrete tile. Elsom Roofing also specializes in I.B. Roof Systems, a PVC material, for flat and low pitched roofs.
Late spring through early fall is the practical reroofing window for this area. In this climate, crews benefit from long dry spells and fewer weather interruptions than during the wetter winter period. If you're aiming for a clean tear-off and a solid install, targeting May through September gives your team the best chance to complete without weather-driven delays. Start planning a few weeks ahead, because good local crews do run close to full schedules during peak season. A well-timed project reduces the chance of moisture lingering under old layers and helps protect interior spaces from the first fall cold snap.
Spring rain and occasional hail can disrupt tear-offs and leave exposed decking vulnerable if timing is off. If a forecast shows a wet spell or a hail event is possible, consider delaying the removal of old shingles or flashing until the forecast clears enough for a solid window of dry days. Exposed decking that sits under weighty rain or hail can swell and absorb moisture, complicating the installation and potentially accelerating future decay. When you do pull the trigger, plan for a dry, consecutive stretch of days so new underlayment and flashing can be installed without re-exposing the structure to repeated moisture cycles.
Autumn storms and gusty winds bring more debris onto sloped roofs, which can complicate clean-up and end-of-season work. Debris loading increases wear on ridge lines, vent stacks, and flashings, and sharp gusts can move loosely installed components before the roof is fully sealed. If fall weather looks unsettled, you may want to wrap up the tear-off early and schedule a full finish when solid winds have diminished and the ground is calmer for material transport. Protecting newly exposed decking from late-season moisture is also a practical concern during scheduling.
If the roof is already showing frequent leaks, obvious signs of moisture intrusion, or the structure exhibits pronounced expansion and contraction movements after seasonal cycles, it's wise to evaluate replacement timing sooner rather than later. Look for curling, cupping, or missing shingle portions, as well as any repeating leaks around flashings, penetrations, or ventilation points. When uncertainty exists, a local roofer can perform a quick inspection to determine whether you're facing a prudent patch or a full replacement, factoring in the hot-summer/cold-winter cycle that drives material movement here.
In Walla Walla, you're looking at asphalt shingles around $420-$780 per square, metal $700-$1200, clay tile $1100-$2000, concrete tile $900-$1700, wood shingles/shakes $550-$1300, and synthetic/composite shingles $450-$900 per square. These ranges reflect how locally sourced materials, labor intensity, and contractor availability come together in our dry-wet cycle. Asphalt remains the most economical entry point, while tile options bring heavier crews and longer install times.
Clay or concrete tile commands higher pricing in this market because of heavier materials and more labor-intensive installation, especially on existing roofs with variable decking or ventilation needs. You'll typically see a noticeable price lift when selecting those heavier systems versus basic asphalt. This isn't just about material cost; it's about handling and long-term performance in the hot-summer, cold-winter cycle that stresses flashings, underlayment, and movement joints.
Project pricing can also shift locally based on permit timing through the City of Walla Walla, seasonal scheduling pressure during the preferred dry-weather window, and repair needs uncovered after wet-winter wear. Dry summers compress the window for reroofing, which can push prices up if your project competes with many neighbors aiming for the same stretch. If a roof reveals extensive moisture intrusion after winter, expect additional costs for repairs, flashing replacement, and ventilation adjustments that weren't apparent at initial quotes.
For most homeowners, plan for the mid-point of your chosen material's range to cover contingencies in a dry year. If clay or concrete tile is on the table, add a buffer for heavier crews and potential decking reinforcement. Keep an eye on scheduling as summer approaches, and be prepared for price fluctuations tied to permit timelines and spring-wet-season investigations that may uncover repair needs before installation can proceed.
When planning a full roof replacement, a permit from the City of Walla Walla Building Department is required. This ensures the project complies with local building codes, wind and seismic considerations, and proper venting and flashing details that tackle the region's freeze-thaw cycles. Having the permit in hand before work begins helps avoid delays that can arise from on-site inspections or plan corrections.
Plan review and permit issuance commonly take about 1-2 weeks under normal conditions. That window matters for scheduling, especially during the city's preferred reroofing season, which typically aligns with dry, moderate weather. If a project hits peak season or if plans require adjustments, the timeline can stretch. Coordinating with the chosen contractor and submitting complete, accurate plans helps keep the process moving smoothly and reduces the risk of weather-driven hold-ups.
Walla Walla conducts a final inspection after installation to verify flashing, ventilation, and overall code compliance. This final check is your assurance that the roof system was installed with attention to proper flashing detailing around intersections, penetrations, and roof-to-wall transitions, as well as the appropriate ventilation pathways to address attic moisture during hot summers and cold winters. Expect the inspector to review how the new materials interact with existing or newly installed underlayment, drip edge, and eave detailing to withstand expansion and contraction.
Start the permitting process early in the planning stage and keep the contractor in the loop about any plan-review notes. If weather windows are tight, discussing expedited options with the Building Department can help, especially for critical sequences like underlayment installation and flashing assembly. Maintain a clean, accessible attic or roof space to aid the inspector, and have product data ready for review. Clear communications about venting calculations and installation methods reduce the chance of rework during the final inspection.
Seasonality affects both permit timing and inspection readiness. Dry, mild periods serve as optimal windows for plan reviews and permit processing, while hot summers and winter freeze-thaw cycles influence scheduling of the actual installation. Ensuring all required documentation, permits, and materials are prepared ahead of time supports a smoother path from approved plans to a compliant, long-lasting roof.
Roof claim activity in this area tends to follow storms or hail events rather than hurricane or coastal wind-loss patterns. After a damaging event, the first week often reveals granule loss, scuffing, and visible hail impact marks on shingles or tiles. Those signs can grow into leaks as days heat up and temperatures swing, so timely documentation matters when the weather settles.
Washington insurers commonly expect detailed damage documentation for Walla Walla roof claims, including photos and a roof condition report, and adjusters may perform on-site inspections. Take clear photos from ground level and from the ladder line of sight, capturing every side, vent flashing, and edge details. A dated sequence showing gradual deterioration can help an adjuster see the progression beyond a single snapshot.
Homeowners may also be asked for contractor invoices and third-party evaluations during claim settlement, making pre-replacement documentation especially important after spring hail or storm damage. Keep invoices for any temporary repairs, plus independent assessments that describe the roof's current condition and life expectancy. If a contractor notes underlying issues like moisture intrusion or interior staining, share those findings with the insurer promptly to avoid later disputes.
Be prepared to explain how the roof's expansion and contraction cycles, driven by hot summers and cold winters, may have stressed flashings and joints. Maintain a consistent maintenance log, noting any previous leaks, missing shingles, or damaged vent boots. Clear, organized records reduce back-and-forth and help ensure your claim reflects the true condition after weather-driven wear.
In this climate, freeze-thaw cycles commonly stress shingles and flashings first, making edge details and penetrations more vulnerable than broad field areas. The way water penetrates at eaves, transitions to vent stacks, and around skylights often reveals itself after rapid temperature swings. When edges shift with moisture and ice, small compromises become gateways for leaks that migrate inward along fastener lines or under first courses of shingles.
Summer heat in this valley can accelerate material expansion and affect fastener performance, which is a key local concern for both metal systems and shingle roofs. As panels and tabs breathe with the sun, misaligned or undersized fasteners can loosen, allowing edge lift or panel movement. This is especially problematic where roofing intersects with gutters, chimney bricks, or vent flashing, creating pressure points that amplify wear at the fastener zone.
Ongoing moisture and temperature swings influence roof longevity across material types, so failures often trace back to movement and water entry rather than a single extreme-weather event. When boards, underlayment, or seam tapes expand and contract, seams pull apart, and telltale damp spots migrate toward penetrations. Over time, that movement invites corrosion, deck rot, and accelerated degradation of sealants, all signaling an aging system that failed to accommodate Walla Walla's cyclical rhythm.