Last updated: Apr 19, 2026
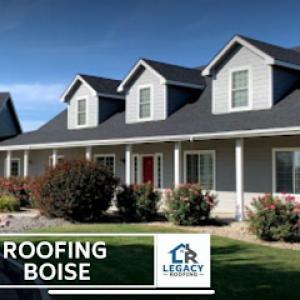
Legacy Roofing
(208) 901-1142 legacyroofingidaho.com
10909 Pelican Ln, Nampa, Idaho
5.0 from 264 reviews
Locally owned and not investor-backed, Legacy Roofing of the Treasure Valley is proud to serve Boise, Meridian, Nampa, Caldwell, and Eagle with honest, stress-free roofing and window services. We know a new roof is a major investment in the Treasure Valley so Chuck and our local team keep the process simple, no high-pressure sales, ever. Whether you need a roof replacement in Boise or new shingles in Nampa, we help you find the right fit, the right materials, and the right price. We also offer window replacements to make your home more comfortable and energy-efficient. For new roofs, roof repairs, exterior renovations, and more we can help! We have installed over 1,000 new roofs in the Treasure Valley since 2020!
Mountain View Roofing
(208) 353-2952 mtviewroofing.com
3412 Wilson Ln, Nampa, Idaho
4.9 from 155 reviews
We are a locally-owned family business that specializes in residential and commercial roofing. We pride ourselves on being hardworking, honest and fair!
M3 Roofing & Exteriors
18403 N Wild Goose Ave, Nampa, Idaho
4.9 from 150 reviews
M3 Roofing and Exteriors, located in Nampa, Idaho, delivers roofing solutions with quality and durability you can depend on. Our dedicated team expertly protects your home from the elements with high-quality roofing and gutter services. Serving Nampa and surrounding areas since 2020, we are committed to customer satisfaction and efficient service. From new roof installations to repairs, M3 Roofing and Exteriors safeguards your home with excellence.
E & H Roofing
(208) 608-5569 www.ehroofing.com
9530 S Powerline Rd, Nampa, Idaho
4.9 from 142 reviews
E & H Roofing Company is a well-known local expert roofing contractor who you can trust to provide a sound and secure roof at an affordable price. We pride ourselves on having more than 20 years of experience in exceptional craftsmanship and excellent customer service. We work with homeowners to ensure a seamless transition from start to finish. E & H Roofing company offers you a FREE residential roof estimate, roof consultations, pitch and flat roof applications, extended warranties and attractive economic options for all customers. We will also work with your insurance company and replace your roof with little or no out of pocket expense.

Three Brothers
(208) 917-1616 threebrothersllc.com
2025 N Bingham Dr, Nampa, Idaho
4.7 from 584 reviews
With Three Brothers, you are guaranteed to have a lasting home renovation project, installed by experts. Our team goes above and beyond to provide expert, friendly service. As a family-owned company, we make customer satisfaction our number one priority. We offer roofing, gutter, windows, siding, and bathroom remodeling services. Give us a call today to learn more about our premier company, or fill out our online form now to request a free estimate!
Knox Construction
2025 N Bingham Dr, Nampa, Idaho
4.9 from 52 reviews
Our mission at Knox Roofing & Construction is to provide quality workmanship along with great customer service. With 3 generations of experience behind us, we know that the integrity of our staff, high-quality materials, and a strong work ethic is key to being a leader in our industry. Serving both residential and commercial clients for new construction, remodel, renovations, and repairs. With continuing to educate ourselves, and our staff we stay on top of some of the newest, and advance technologies which results in superior quality, and service.
Osmus Roofing
(208) 463-9433 www.osmusroofing.com
Garrity Blvd, Nampa, Idaho
4.6 from 27 reviews
Since 1992, we have been servicing both commercial and residential locations with all roofing needs. Call us today to request a free estimate!
Excel Roofing
(208) 284-5879 excelroofing.us
10578 Tysen Springs St, Nampa, Idaho
5.0 from 9 reviews
We take great satisfaction in providing you with a quote that is reasonable, and competitive, and will provide your roof with both value and durability. You’ll never be in the dark regarding the cost of your roofing project because of our dependability and transparency. For your next job in Nampa, ID, Excel Roofing Inspections is the clear choice due to our outstanding track record and affordable prices. Set up an appointment right now to find out more about our extensive services. We’re honored to continue offering top-notch roofing services to Nampa residents and property managers. Turn to Excel Roofing & Inspections when quality and experience matter because we handle every job with pride, reliability, and integrity

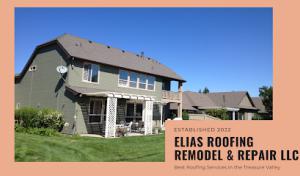
Elias Roofing Remodel & Repair
(208) 906-7693 www.eliasroofingllc.com
2816 Raccoon Ct, Nampa, Idaho
4.2 from 15 reviews
Remember those carefree days as a kid playing on the roof in summer watching the stars come out or fireworks, hanging Christmas lights in the winter. So do we! That's why we have a love and passion for roofing to give you a superior quality new roof to create new memories for years to come! Above all else you need a roof and it matters who you choose. Elias Roofing provides high quality roofs in Southwest Idaho & surrounding areas! Specializing in new installation, re-roofing, damage/wear tear repairs, industrial-commercial-residential, and emergency repairs. Elias Roofing is a locally family owned! BBB accredited hablamos Español

North West Contracting Services
(208) 696-8394 idahocontractingpros.com
3116 Garrity Blvd suite 121, Nampa, Idaho
4.3 from 11 reviews
"Transforming spaces into personalized havens, our contracting firm embodies craftsmanship and innovation. From the heart of homes to expansive exteriors, we specialize in an array of projects, each a testament to our dedication and expertise. Imbued with precision and creativity, our services encompass the artistry of kitchen and bathroom remodels, the seamless integration of additions, the solidity of concrete work, the protective embrace of siding and roofing, the allure of custom decks, and the illuminating elegance of windows. With every project, we craft not just structures but stories—tailored spaces that resonate with individual tastes and elevate the essence of every dwelling."
Wright Choice Roofing
(208) 875-4892 namparoofingcontractor.com
61 N Jefferson Pl, Nampa, Idaho
5.0 from 4 reviews
If you are looking for a professional roofing contractor in Nampa, ID, we are the one for you. Wright Choice Roofing has the experience and ability to assist you with your property needs, from damaged roof repairs to roof replacements. We are committed to staying on schedule and within budget with our roofing services. In addition, we keep our communication with our clients open to ensure quality control throughout the process up to the final phase. You can rely on us to troubleshoot and resolve issues confidently and on time.
Kodiak Roofing
(208) 936-6298 www.facebook.com
2608 E Locust Ln, Nampa, Idaho
5.0 from 3 reviews
Full service roofing company based out of the Treasure Valley in Idaho. In addition to roofing, we also handle seasonal lighting. We are experienced and operate with integrity.
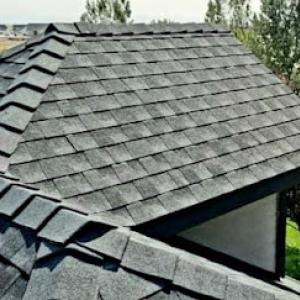
In this area, the most common roofing choices stay within the following ranges per square (one roofing square equals 100 square feet). Asphalt shingles are the baseline, with metal, clay tile, concrete tile, wood shakes, and synthetic/composite shingles following closely behind in cost and installation considerations. Asphalt shingles typically land in the 350 to 600 USD per square range, making them the practical spring storm choice for many homeowners. Metal roofing tends to be higher, often 900 to 1,800 USD per square, reflecting its longevity and wind resistance in Treasure Valley winds. Clay tile sits on the higher end, roughly 1,100 to 2,600 USD per square, with concrete tile slightly lower on average, about 900 to 1,700 USD per square. Wood shakes fall around 700 to 1,200 USD per square, while synthetic or composite shingles occupy an intermediate position at roughly 800 to 1,500 USD per square. These figures anchor expectations when you're evaluating bids after a hail event or windstorm.
Spring storms can tighten the schedule in this market. After a heavy hail or wind event, a surge of reroofs competes for the same late-spring to early-fall labor window. In practical terms, you may see higher bids or tighter scheduling during that peak period, especially on larger homes or roofs with complex shapes. If you're navigating a post-storm timeline, aim to lock a contractor early and be prepared for some variability as crews shift between urgent repairs and full replacements. In Nampa, the pace of work often accelerates once the weather clears, but the window can close quickly if multiple roofs come up for replacement in parallel.
Heavier tile systems-primarily clay and concrete-may trigger additional scope in this market. Beyond the base roofing price, you'll want to anticipate a possible structural review or reinforcement needs if the existing deck or trusses show signs of age or prior inadequate support. While the base per-square costs reflect material and installation, the total project cost can rise when structural assessment or reinforcement is required. This is particularly relevant if you've got an older home or one with a roof span that adds significant load. Factor in potential engineering notes and faster lead times for ordering heavier tiles, as these can extend timelines and budgets compared to asphalt or metal.
For asphalt shingles, you'll typically see the 350-600 USD per square range, giving you a straightforward replacement option with broad contractor availability. Metal roofing moves up to 900-1,800 USD per square, delivering impressive durability and wind resistance that pays off in long-term protection. Clay tile lands around 1,100-2,600 USD per square, reflecting its premium look and substantial weight; concrete tile is commonly 900-1,700 USD per square, offering a balance of weight and performance. Wood shakes generally fall near 700-1,200 USD per square, prized for character and insulation value. Synthetic or composite shingles sit in the 800-1,500 USD per square band, blending durability with easier handling compared to natural materials. In practice, a storm-damaged roof will often require a careful comparison of initial material cost against long-term performance, local weather resilience, and potential structural adjustments.
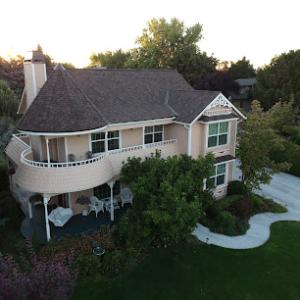
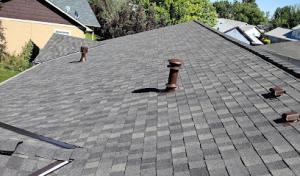
In this climate, roofs endure long, hot summers that push asphalt shingles to their limits, especially on sun-exposed roof planes facing south and west. The intense sun can accelerate aging, causing earlier granule loss, color fading, and increased brittleness. In practice, that means you may see the edges of shingles curling or a potential for hairline cracks along fastened seams during mid-summer heat. If your roof has aging or stressed sections, those areas tend to show wear first on the highest, sunniest slopes. Regular checks after the peak heat period help catch problems before water intrusion becomes an issue.
Cold winters in this area bring repeated freeze-thaw cycles that test sealants, flashing joints, and valley details. When water enters through hairline gaps and refreezes, it can pry apart sealant bead lines and broaden small gaps around vent pipes or chimney flashings. Over multiple seasons, those micro-movements translate into more substantial leaks or wind-driven uplift in storms. Homes with poorly ventilated attics or insufficient insulation tend to experience faster wear on sheathing edges and roof penetrations because temperature differentials drive more movement at the roof deck.
Installation timing matters locally because very hot summer conditions can complicate shingle work while winter conditions are less favorable for replacement. In practical terms, aim for shoulder seasons when the asphalt is still pliable enough for clean nailing and proper adhesion without the scorching heat that can drive off moisture too quickly during application. Short prime replacement windows-often in late spring or early fall-mean planning ahead helps, because crews will have fewer delays caused by heat-triggered schedule gaps or icy mornings. If a spring storm hits close to the start of a replacement window, rapid assessment and decision-making are key to prevent escalating interior damage while crews are mobilizing.
Look for granular loss on sunlit slopes, especially after a dry, hot spell. Check around valleys, along flashed penetrations, and at the eaves where water tends to back up if airflow is restricted. After winter, inspect for hairline cracks or lifted edges near seam lines and around chimneys or vents. A proactive approach-catching wear in its early stages-helps keep the roof deck dry and the attic environment stable through Nampa's winter cycles. If storm debris or hail impacts are visible, treat those areas as potential weak points and have them inspected promptly to avoid slow leaks that can progress under seemingly sound layers.
Explore specialists in steel, aluminum, and standing seam metal roofs built to last 50 years or more.
Mountain View Roofing
(208) 353-2952 mtviewroofing.com
3412 Wilson Ln, Nampa, Idaho
4.9 from 155 reviews
M3 Roofing & Exteriors
18403 N Wild Goose Ave, Nampa, Idaho
4.9 from 150 reviews
In this city, a full roof replacement typically requires a permit through the City of Nampa Building Department. Planning around the spring storm season means you should initiate the permit request early, so you don't get caught in a rush if weather interrupts work or if inspections are backed up. A clear scope with shingle type, ventilation, and underlayment details helps the process move smoothly.
Begin by submitting the project plan via the building department's portal or in person at the permit counter. Expect to provide roof type, square footage, and fastening method, plus a description of underlayment and attic ventilation. The permit review often includes a check for proper underlayment, nailing patterns, and ventilation as part of the final approval. If heavier materials like tile are chosen, the reviewer may request structural confirmation or a stamped framing plan to verify roof loading is adequate.
Inspections are commonly scheduled at key milestones: after underlayment and ventilation are installed, and again after the visible roof sheathing and final fastening are in place before shingles go on. A final inspection is usually required after completion to close the permit. Your roofer should provide access for the inspector and ensure that documentation matches what was approved. If any discrepancies show up, be prepared to address them quickly so your project doesn't stall.
Ventilation adequacy is a frequent focus of inspections, especially in areas with hot springs and long summers. Ensure the chosen underlayment meets local specifications and that fastening patterns align with wind and code requirements. Heavier tile options may trigger added attention to roof loading, so structural verification or reinforcement might be needed before a permit is issued or before final approval. If your plan includes clay or concrete tiles, talk through potential modifications with the permit reviewer early to avoid delays during the inspection window.
Spring storms can tighten the window for reroof work, and permit processing times may compress the achievable schedule. Align start dates with anticipated inspection dates and local weather forecasts to minimize interruptions. If a storm damages the roof, document damage promptly and coordinate with both your insurer and the building department to keep the permit on track while repairs proceed.
Asphalt shingles remain a dominant choice for homes in this market due to broad replacement demand and a price-sensitive reroof landscape. In a climate that moves from hot days to spring hail, asphalt offers solid performance for the long run without overcomplicating installation. For most homeowners, the familiar look and straightforward replacement process make asphalt a practical option when planning around a single-story or compact roof footprint. The material's forgiving nature also helps when addressing a mix of roof lines common on smaller Nampa neighborhoods, where maintenance crews and crews familiar with local weather patterns are an easier fit.
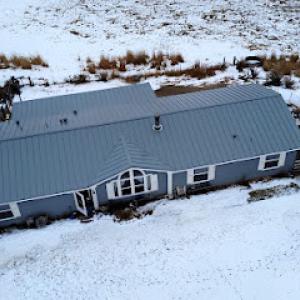
Metal roofs have strong local traction, reflecting homeowner interest in durability under sun exposure and storm-prone conditions. A metal roof can provide excellent resistance to hail impacts and wind-driven debris while offering lighter weight compared to heavier tile options. The reflective properties of a metal system can help mitigate heat transfer, which matters during Treasure Valley summers. In cases where a home has cathedral or sharply pitched sections, metal's clean lines and rapid installation can also reduce on-site disruption. Proper underlayment and ventilation remain essential, as metal systems respond differently to temperature swings and ventilation needs than traditional shingles.
Clay and concrete tile appear in the market, yet they require careful evaluation before committing. The heavier weight of these systems can affect structural considerations and may demand reinforcement in roofs with marginal aging or limited structural support. In high-wind scenarios and with the region's spring storm activity, tile can provide excellent durability when properly installed, but the added weight and potential for breakage during severe hail should be weighed against the existing roof structure. Builders and installers with local experience will assess fastener patterns, underlayment choices, and the suitability of posture for higher wind zones. If lighter options are preferred, synthetic substitutes can offer similar aesthetics with easier handling and installation.
Synthetic or composite shingles present a middle ground between traditional asphalt and premium options. They can provide enhanced durability and color retention in direct sun, while maintaining compatibility with standard roof decks. For homes with complex layouts, a mixed approach-combining materials on different roof planes-can balance performance with the visual rhythm of the neighborhood. Regardless of material, the emphasis should be on comprehensive underlayment, proper ventilation, and fastening that meets local expectations for wind and storm resilience.
Spring storms bring a peak of wind, hail, and variable moisture, making timely assessment and documentation critical after damage is suspected. Insurance documentation becomes a practical tool for homeowners who want a smooth claim process. In practice, gathering photos of damaged areas, notes about hail size, and a clear chronological record of seasonal weather events helps when discussing replacement options with contractors. The short prime replacement season means prioritizing a plan that fits within favorable weather windows, ensuring materials are delivered and crews can complete work without weather-related delays. A coordinated approach focused on material suitability for the home's structure, combined with accurate damage records, will support a steady path from assessment to final installation.
Explore specialists in steel, aluminum, and standing seam metal roofs built to last 50 years or more.
Mountain View Roofing
(208) 353-2952 mtviewroofing.com
3412 Wilson Ln, Nampa, Idaho
4.9 from 155 reviews
M3 Roofing & Exteriors
18403 N Wild Goose Ave, Nampa, Idaho
4.9 from 150 reviews
In this region of the Treasure Valley, hail and wind activity can spike claim frequency after major weather events, and that surge often slows settlement timelines. If you've had recent inspections or upgrades, keep those records handy and organized. Date-stamped photos taken after a storm help establish pre-loss condition and can shorten debates over wear and tear versus new damage. Having repair invoices and contractor notes ready also makes it easier to demonstrate what was already addressed before the event.
When shingles or decking show new impacts, timing matters. In the days after a hail or wind event, insurers will want clear evidence of damage and causation. Take fresh photos from multiple angles, focusing on affected areas, flashing, and vent connections. If a roof has sustained punctures or granule loss, capture close-ups that show the state of the underlayment and any visible water intrusion. Keep repair estimates and any temporary measures documented, because adjusters will review whether the roof could have remained functional during the interim and what risks were introduced by delaying full replacement.
If several homes in your Nampa neighborhood experience damage in the same event, claim handling can become more document-heavy and site inspections by adjusters are especially important. In such cases, ensure every affected roof has a single, consolidated file: incident date, photos, inspection notes, and repair history. Coordinating with your insurer to schedule a joint site inspection can help align expectations and reduce back-and-forth. Ask for a written review timeline and keep a log of all correspondence, including names and dates, so the process remains transparent under a tighter field inspection schedule.
Connect with contractors who help homeowners navigate the claims process from damage assessment to final approval.
M3 Roofing & Exteriors
18403 N Wild Goose Ave, Nampa, Idaho
4.9 from 150 reviews
E & H Roofing
(208) 608-5569 www.ehroofing.com
9530 S Powerline Rd, Nampa, Idaho
4.9 from 142 reviews
In spring, wind and hail can hit roofs here hard enough to punch gaps in shingles, lift flashing, or loosen vents. Leaks often show up around dormers or edges where wind-driven rain finds its path. Missing shingles after a storm is common, and flashing damage around exhaust stacks or valleys can gutter water into attic space if left unchecked. A steady drip inside the living area or stains along ceilings after a storm call for immediate inspection, especially on shingles that look cracked, split, or severely curled. Because many local crews advertise fast response, homeowners should be prepared for a triage call that identifies whether a schedule delay or staged fix is needed before full replacement can begin.
When a storm dumps hail or strong winds, a roofer may perform temporary dry-in work to limit interior damage while weather clears. Expect tarping to cover exposed decking or vents and a quick repair to secure loose flashing until permanent materials arrive. The goal is to prevent additional water intrusion during the days or weeks it takes to line up a full replacement, particularly if a longer stretch of unsettled weather is forecast. In this market, crews often split the job into a rapid, safe emergency response and a subsequent, complete repair plan.
Weather-related delays are a real local issue, so temporary tarping and staged repairs can be part of the normal post-storm process. If leaks persist after a tarp is in place, prioritize a documented inspection to verify underlayment integrity and vent/furring stability. Communication matters: confirm whether the same crew will complete the full replacement or if a follow-up crew is needed. Keep an updated contact list and a clear log of rain events and observed water intrusion to assist insurance documentation and the repair timeline.
When you can't wait, these contractors offer fast response times to stop leaks and prevent further damage.
Elias Roofing Remodel & Repair
(208) 906-7693 www.eliasroofingllc.com
2816 Raccoon Ct, Nampa, Idaho
4.2 from 15 reviews
Treasure Valley Exteriors
(208) 943-7308 www.treasurevalleyexteriors.com
Serving
4.8 from 649 reviews
Although steep-slope residential reroofing dominates the area, the local contractor market shows meaningful demand for flat and low-slope roof work on additions, porches, and mixed-use properties. These projects require careful planning to handle the temperature swings and strong wind events typical after spring storms. When you're looking at a new addition or a covered porch, expect a transition from your existing roof that lands flush and watertight, with attention paid to how the new surface integrates with the old. That means not only selecting materials suited for low-slope performance but also coordinating with the existing roof's drainage and ventilation strategy to avoid ponding and ice buildup.
Nampa inspections place emphasis on underlayment quality and drainage-related details, which makes low-slope transitions and tie-ins especially important on reroof projects. Before installation, verify that the underlayment chosen for the low-slope section is rated for decking and compatible with the expected weather exposure. Ensure that the fascia and drip edges are in good shape to promote clean overflow into gutters or downspouts. Space and slope underlayment seams so they do not align with potential hail-caused damage zones on the main roof. Pay particular attention to any low-slope runoffs near protrusions; plan for extra flashing where the roof meets a vertical wall or a shallowly pitched addition.
Homeowners with skylights or roof penetrations should pay close attention to flashing details because freeze-thaw movement and storm exposure can exploit weak transitions. For low-slope areas, install continuous flashing at the skylight base and run it up the sidewalls a bit to resist wind uplift. Use proper sealant with compatible accessories at all step-downs where the low-slope section meets a steeper plane. When a roof penetrates a parapet or an overhang, ensure the flashing is continuous and that any joints are taped or mechanically fastened to prevent water tracking. In addition, all penetrations through the low-slope surface should receive upgraded sealant and matching termination details around any vent stacks or exhausts to reduce the risk of small leaks that can grow with successive hail events.
Find specialists in TPO, EPDM, and built-up flat roofing systems for residential and commercial properties.
E & H Roofing
(208) 608-5569 www.ehroofing.com
9530 S Powerline Rd, Nampa, Idaho
4.9 from 142 reviews
Treasure Valley Exteriors
(208) 943-7308 www.treasurevalleyexteriors.com
Serving
4.8 from 649 reviews