Last updated: Apr 19, 2026
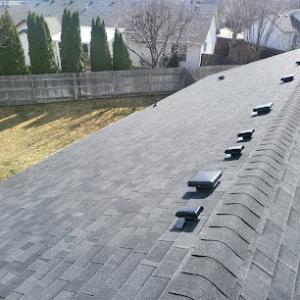
Eagle roofs face both winter snow accumulation and repeated freeze-thaw cycling, which can shorten shingle life and make leak patterns appear after cold snaps. When temperatures swing above and below freezing, water expands inside micro-cracks and then freezes, prying shingles apart just enough to loosen granules and weaken seals. That means the same roof you thought was sturdy after a good snow melt may reveal moisture ingress or wind-driven damage days later. Pay attention to dark spots, curling edges, and granule loss after a cold snap-these are early warning signs that a storm-driven cycle has stressed the roof beyond its aging tolerance. If you notice sudden moisture on ceilings following a thaw, treat it as a potential entry point rather than a latent nuisance.
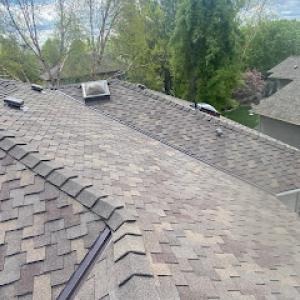
Spring in the Boise-Eagle area brings hailstorms and windy fronts that create recurring repair demand and seasonal scheduling pressure for roofers. Hail can ding asphalt or metal surfaces and compromise protective granules or panels, while gusts lift loose edges and loosen fasteners. After a round of spring weather, it's common to see an uptick in small leaks around chimneys, vents, and transitions. If a contractor suggests a minor patch, verify that the repair addresses underlying damage and flashings, not just surface aesthetics. A single hail event can accelerate wear on high-contrast roof features such as valleys or skylight tabs, so appointments should be scheduled promptly after the storm, not delayed until the next availability window. Fragmented leak patterns often emerge first along ridge lines or near headers where wind pressure concentrates.
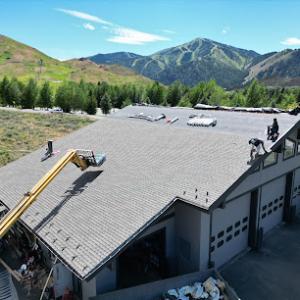
Late spring through early fall is the preferred replacement window in Eagle because winter access, summer heat, and late-fall moisture each create installation complications. If you anticipate a full roof replacement, start planning as soon as weather and scheduling align, because high-demand periods can push start dates into peak heat or early rain. For those assessing mixed material roofs (asphalt, metal, tile, or composites), the best outcomes come from dry, moderate days with consistent temperatures-conditions that are more reliably found in late spring to early fall. During this window, coordinate with a contractor to secure sheathing, underlayment, and flashing configurations that best handle freeze-thaw exposure and spring wind loads. If a storm has recently affected your area, insist on a thorough inspection that probes not only surface shingles but also roof-to-wall interfaces, vent penetrations, and attic ventilation, where pressure differences during wind events can drive unseen damage. Stay ahead of the clock: delaying critical repairs can turn minor damage into structural risk as temperatures shift and moisture cycles resume.
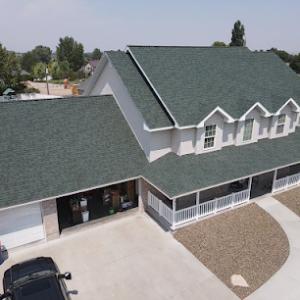
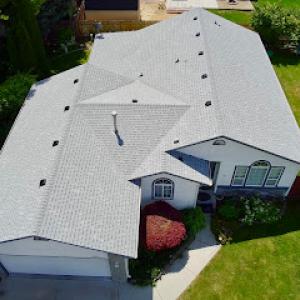
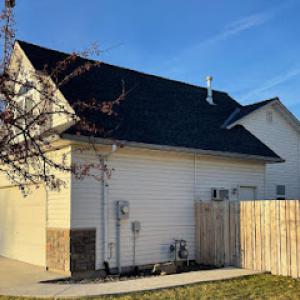
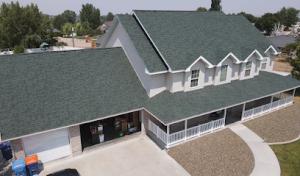
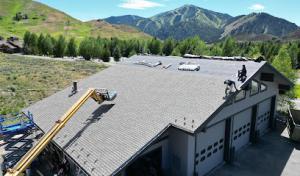
In Eagle, the dominant residential mix features asphalt shingles and metal roofing, and many homes that started as entry-level builds now sit alongside upscale properties with metal accents. Asphalt remains a straightforward, familiar option for most neighborhoods, delivering dependable wind resistance and a relatively simple repair path after spring hail. Metal roofs bring excellent performance in high-wind events and freeze-thaw cycles, with the added benefit of shedding run-off quickly after winter storms. For a homeowner balancing appearance and longevity, these two materials form the realistic core choices to compare side-by-side.
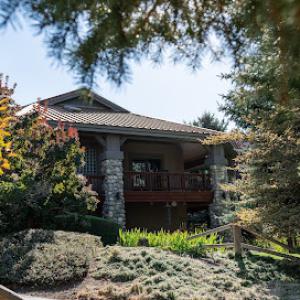
Clay tile and concrete tile appear in higher-end neighborhoods where elevation and curb appeal matter. In Eagle, tile roofs stand up to sun and wind but require careful substrate and underlayment planning to handle freeze-thaw movement. Concrete tile tends to offer a robust warranty window and a broader fire rating, but it adds weight and can demand structural checks before installation. Wood shakes or shingles are less common in newer subdivisions due to maintenance and moisture sensitivity, but they persist in certain character-filled plots. When considering tile or wood, the key factor is how well the roof deck and fasteners accommodate expansion and contraction during freeze-thaw cycles.
Synthetic or composite shingles provide a middle ground in both appearance and resilience. They can mimic wood or slate while offering better impact resistance and lighter weight. In this market, composites can be an attractive compromise for homes where storm exposure meets the need for a faster replacement cycle after hail events. The material's behavior under rapid temperature swings matters: look for underlayment compatibility and a sealing system that remains resilient as temperatures swing from freezing to thawing.
Eagle's mix of newer subdivisions and custom builds means material choice often balances storm resilience, appearance, and replacement cost rather than applying a single solution everywhere. In practical terms, assess the typical wind exposure, hail history on your street, and the long-term maintenance expectations for your chosen roof. A roof's edge detail, overhangs, and gutter interfaces should be planned with freeze-thaw dynamics in mind, ensuring seal integrity and a robust underlayment layer. For homes leaning toward high-end finishes, prioritize a system that delivers both curb appeal and dependable performance through Eagle's spring hail and wind seasons, while still performing reliably through freeze-thaw cycles. The right choice aligns your neighborhood's look with a tested, resilient envelope that stands up to the valley's climate quirks.
Typical pricing in this area runs about $350-$650 per square for asphalt shingles, $700-$1200 for metal, $1100-$1800 for clay tile, $1000-$1700 for concrete tile, $600-$1100 for wood shingles or shakes, and $700-$1200 for synthetic/composite shingles. Those numbers reflect the 1-square unit that roofing pros use, which means a standard 10-by-10-foot section. In practice, a full roof replacement is priced by the number of squares in the roof, plus additives like flashing, ventilation upgrades, underlayment, and disposal fees. A 2,000-square-foot roof translates to about 20 squares, but actual square count depends on roof pitch, complexity, and dormers.
Seasonal timing and its effect on costs matter here. The spring hail and wind season can push prices upward across the Boise metro, including this area. After a storm, claim volume increases and contractor schedules tighten, which can lead to longer lead times and higher bids. If a replacement is scheduled in the weeks immediately following a large hail event, expect some premium pricing or added costs for expedited work. Conversely, a calm stretch with open schedules may produce more favorable quotes, but it's still wise to lock in materials and crews early if you anticipate long lead times.
Material choice matters more than in many markets, because the local roof mix includes both standard asphalt systems and heavier premium products like tile and cedar on custom homes. Asphalt remains the most economical and quickest to install, but tiles-clay or concrete-offer long-term durability in a climate with freeze-thaw cycles and intense spring sun. Cedar and other specialty materials provide aesthetics and performance but require qualified installers and higher maintenance. Synthetic or composite shingles can offer a middle ground in weight, wind resistance, and lifespan. When budgeting, consider not just the per-square price but also long-term maintenance, warranty terms, and the roof's expected life in Eagle's climate.
To plan effectively, determine roof size and direction early. Accurately estimating squares helps compare bids fairly. If a contractor recommends premium materials, ask for a side-by-side comparison that includes installation details, underlayment, ventilation optimization, and any required structural upgrades. For steep-slope or complex roofs, expect higher labor costs tied to safety measures and shorter crew productivity. If you're weighing tile versus asphalt, factor in weight-bearing requirements for the existing structure and potential reinforcement needs, which can add to both cost and timeline.
Finally, think about the entire replacement package. Beyond the raw material price, add in underlayment upgrades, attic ventilation improvements, drip edge, ridge vent improvements, and proper flashing around chimneys, valleys, and walls. In this marketplace, a well-planned replacement that considers climate realities and architectural goals can extend roof life and reduce nuisance repairs during freeze-thaw cycles, spring storms, and windy days.
Bravo Roofing
(208) 515-9425 www.bravoroofingidaho.com
Eagle, Idaho
4.9 from 64 reviews
Local, Family Owned and Operated roofing company dedicated to quality roof replacements. We are a certified installer of GAF and Owens Corning roofing shingle systems. We also offer financing and a full 50 year system warranty with all of our roofs. We also work closely with your homeowners insurance. Contact us today for a free inspection and estimate.
Idaho Roofing Partners
(208) 917-1869 idahoroofingpartners.com
2600 N Croft Ln, Eagle, Idaho
5.0 from 40 reviews
How does a roofing contractor become a cornerstone of the local community? Since 2016, Idaho Roofing Partners has offering unparalleled roofing services to residential and commercial customers in Eagle, ID and the surrounding areas. We are a licensed and insured roofing contractor, committed to delivering top-notch workmanship and customer service. Our mission is to ensure every job is done right the first time, fostering a culture of positivity and excellence that shines through in every project we undertake. Whether you need a new roof, a re-roof, or roof repair and replacement, Idaho Roofing Partners is here to provide quality services that last. We specialize in a variety of roofing services to meet every need and budget.
Pro Tech Roofing
(208) 939-6714 protechroofing.us
1986 E State St, Eagle, Idaho
5.0 from 6 reviews
Pro Tech Roofing has been serving the commercial roofing needs of the Treasure Valley and beyond since 1991. Locally owned and operated we are commercial and industrial project experts. We specialize in commercial Single-ply and Metal roofing
Bork Roofing
(208) 869-6674 www.borkroofing.com
Serving
5.0 from 260 reviews
Bork Roofing is your trusted roofing contractor in Star, ID, offering top-quality residential and commercial roofing services. Whether you need a new roof installation, re-roofing, or roof repairs, our expert team is here to help. We specialize in providing durable and reliable roofing solutions that stand the test of time, ensuring your home or business stays protected from the elements. At Bork Roofing, we pride ourselves on delivering exceptional craftsmanship, outstanding customer service, and competitive pricing. Reach out to us today for all your roofing needs, and let us keep your property safe and secure.
Straightline Design
(208) 271-4346 www.straightlinedesignllc.com
Serving
4.8 from 78 reviews
No matter what your exterior needs are, the experts at Straightline Design, LLC have you covered. Family-owned and local, we specialize in roofing, siding, and gutter installation. We use the best products, and employ true professionals that will get the job done right.
Sawtooth Customs
(208) 740-9201 www.sawtooth-customs.com
Serving
5.0 from 34 reviews
Fast, professional roof repair and insurance claim services backed by 20+ years of experience as licensed roofing contractors in the greater Boise area. Let us help you get your new roof covered by your home insurance. * We respond to texts & calls immediately * * 24/7 emergency tree removal *
AF Roofing
(208) 210-9618 afroofinginc.com
Serving
5.0 from 28 reviews
We know that roofs are one of the most important aspects of any home or business. That’s why we work hard to make sure your roof is repaired and replaced as quickly as possible so you can get back to life without worrying about leaks or other issues. Our team has over 20 years experience in this industry, so you can trust us with your roofing needs.

Power House Exteriors
(208) 830-5823 phexteriors.com
Serving
5.0 from 34 reviews
Our mission is to build relationships in the community through clear communication and trust. This is the key to any successful partnership and it’s our core value. We are here to provide solutions to our customer needs, to be problem solvers that you can rely on. Your home is your sanctuary, the place you go to at the end of the day to recharge, let us create that with our Power House team of contractors.
Rebel Roofing
(208) 703-9998 rebelroofingidaho.com
Serving
4.8 from 94 reviews
Rebel Roofing provides roofing and gutter installation and repairs throughout Treasure Valley, ID.
Meridian Roofing
Serving
5.0 from 110 reviews
friendly roofing business, specializing in residential re-roofing we do inspections and repairs. Call or text with questions 2082585239 Brandon I'm the owner and I pick up my phone or at least I will call you back.
Intermountain Roofing Company
(208) 713-5871 intermountainroofingcompany.com
Serving
5.0 from 47 reviews
Family owned roofing company proudly serving the Treasure Valley since 1996. We use quality materials and all our employees are certified installers to insure every roof turns out perfect.

Dodd Exteriors
(208) 295-9421 www.doddroofs.com
Serving
5.0 from 272 reviews
Dodd Roofing and Exteriors is a premier provider of top-tier roofing and exterior services. They pride themselves on their commitment to quality workmanship, customer satisfaction, and integrity. Specializing in both residential and commercial projects, their team brings years of experience to every job, ensuring the highest standards are met. They offer a comprehensive range of services including roof repairs, installations, and replacements, as well as siding and gutter work. Whether it's a minor repair or a major renovation, they approach each project with the same attention to detail and dedication. Their mission is to provide clients with durable, efficient, and aesthetically pleasing solutions that stand the test of time.
A full roof replacement in Eagle typically requires a permit through the City of Eagle Building Department. The process can feel tedious, but missing a step can halt work, trigger rework, or even penalties that stretch into the next season. Before any shingles come off or a hammer ring, you should expect the permit to be opened with the city. The application is not a guesswork exercise: you'll need to present basic project details such as the scope, roof type, and a rough timeline. This isn't the place for "tell me later" plans; the city wants concrete information so code compliance can be evaluated from day one.
The local process generally starts with a permit application that includes basic project details before work begins. A responsible contractor or the homeowner who is handling the project should provide accurate roof type, square footage, and any structural or venting changes. In Eagle, the timeline can hinge on how well these details align with the current codes, especially around wind uplift and ice dam considerations that are common in the Treasure Valley climate. If the plans show any deviations from standard practice-such as added vents, skylights, or changes to drainage-be prepared to supply extra information or revisions. In practice, clear plans reduce delays and keep the project moving through the approval queue.
Inspections are part of the Eagle process during and after installation to verify compliance with local code expectations, including wind and ice load requirements. You should anticipate an inspection at key milestones: an interim check while the roof deck is exposed, a mid-application review if structural changes are planned, and a final inspection once the new roof is complete. Failing an inspection isn't a personal failure; it's a signal that something did not align with Eagle's specific wind-resistance or ice-melt expectations. Common stumbling blocks include improper nailing patterns, inadequate underlayment, or fasteners that don't meet the local uplift requirements. A clear, organized set of inspection records and a tidy, easily accessible roof installation can smooth the path and reduce the chance of rework. If adjustments are needed after inspection, address them promptly to avoid project delays and potential re-inspection fees. In this region, timely adherence to wind and ice-load standards is not optional-it's a practical protection against costly damage in spring hail and winter freeze-thaw cycles.
In the Eagle-Boise area, hail and wind events can temporarily spike roofing claims and lead adjusters to request detailed damage assessments and contractor estimates. If a storm rolls through and leaves dents or lifted shingles, expect a thorough inspection that supports a claim with close-up photos, service records, and notes on how the roof was performing before the event. The emphasis is on ensuring the damage is storm-driven, not simply wear from years of exposure. Provide clear timelines showing when the damage occurred and how long the roof has shown related symptoms.
Carriers serving Idaho may scrutinize pre-existing wear versus storm-created damage, which matters in Eagle where freeze-thaw aging and storm impacts can overlap. After a long winter, shingles may already show curling or granule loss; a storm knock could exacerbate those issues or reveal new issues beneath the surface. Be prepared to document both the condition before the event and the changes after. Honest, organized records help the adjuster distinguish what was caused by the weather from what was simply aging.
Documentation of permits and proper installation can matter for maintaining coverage when a roof is replaced in Eagle. While the response to a hail or wind event focuses on the damage, insurers may review installation quality and past repair history. Keep a file with contractor estimates, proof of prior workmanship, and any diagnostic reports. Clear pictures from different angles, a dated damage map, and a concise narrative aligning the storm timeline with observed damage can support a smooth claim process and reduce back-and-forth with the carrier.
Connect with contractors who help homeowners navigate the claims process from damage assessment to final approval.
Idaho Roofing Partners
(208) 917-1869 idahoroofingpartners.com
2600 N Croft Ln, Eagle, Idaho
5.0 from 40 reviews
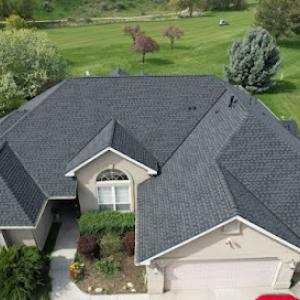
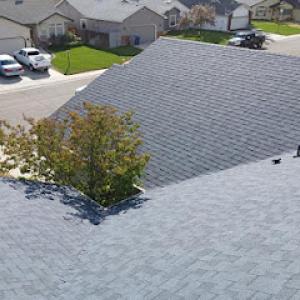
Asphalt shingle roofs in this area endure repeated winter freeze-thaw cycles that push and pull the underside of the shingle layers, gradually loosening granules and edge caulking. In spring, that damage can become more visible after the last frost, and summer heat can cause expansion that stresses fasteners and fingering joints near edges and valleys. When planning repairs or replacements, consider that proper installation conditions-dry, moderate temperatures and a clean, well-ventilated attic-help the shingles seat and seal more reliably, reducing early failure from movement or moisture intrusion. Look for hairline granule loss, cupping, and curling along lower slopes after hail or wind events, and verify that underlayment and flashing have kept pace with surface wear.
Tile, concrete, and clay varieties stand out on steeper Eagle homes and bring enduring beauty, but impact from hail or gusty winds can compromise the system beyond what surface cracks show. A hit can fracture tiles, crack underlayment sheets, or disturb the alignment of battened or metal-supported tile, creating hidden pathways for water. After a hailstorm or severe wind, inspect not just the visible surface but also the integrity of ridge caps, fastener patterns, and edge tiles. A misaligned or cracked tile can trap moisture within the roof deck, inviting decay or rot over time if not addressed promptly with proper resealing or re-tiling.
Wood shingles and shakes reflect Eagle's climate swings-from snowy winters to warm, dry summers-by expanding and contracting with moisture and heat. This movement can widen gaps at seams or create splits along grain lines, inviting moisture ingress and algae or mold growth in shaded spots. Closer monitoring after heavy rain seasons or rapid temperature shifts helps catch softening underlayment, cupped shingles, or fiber loss before leaks appear. If a hail event lands on wood roofs, inspect for impact dents that compromise water shedding or arcing of the roof line, and consider targeted repairs to maintain overall system integrity.
The most popular roofing material in the US. Find pros who install, repair, and replace asphalt shingles.
Idaho Roofing Partners
(208) 917-1869 idahoroofingpartners.com
2600 N Croft Ln, Eagle, Idaho
5.0 from 40 reviews

The market shows especially strong demand for re-roofing rather than niche specialty work, reflecting a homeowner base focused on replacement and repair of existing homes. You will notice many crews who can handle asphalt and metal, with capable teams for tile and Cedar or composite options. Time matters: spring hail, wind, and freeze-thaw cycles drive repairs, so you want a crew that can move efficiently without cutting corners.
Quick response and cleanup are unusually prominent hiring priorities in this area, aligning with storm-driven repairs and occupied neighborhoods. Start by calling two or three teams with solid local footprints and ask how they prioritize same-day or next-day assessments after a storm. Check how they communicate scheduling, weather delays, and post-work cleanup. Inquire about recent projects in your subdivision and ask for client references you can visit or call.
Established, affordable, locally owned, and family-owned contractors all have visible presence, so compare responsiveness and reputation alongside the obvious qualifications. Look for full-time crews rather than multi-day subcontracting stalls. Request a written scope that covers shingle, metal, or tile options you're considering, plus anticipated life expectancy after the last storm pass. Confirm they carry appropriate insurance and have a clear process for material protection, debris containment, and neighbor notification.
During the estimate window, ask how the contractor preserves your landscape and handles property access during storms. A strong plan includes tarping and debris containment, daily cleanups, and a defined sequence for tear-off and installation to minimize weather exposure. Verify they protect adjacent structures, avoid damage to gutters, and club labor with clear daily logs or photos of progress.
Before signing, confirm the warranty framework and what it covers-roof system, workmanship, and any long-term material guarantees. Favor contractors who provide a written project timeline with milestones and a single point of contact. A clearly defined post-installation inspection schedule helps ensure issues are addressed promptly, preserving peace of mind through the next storm season.