Last updated: Apr 19, 2026
This area sits on the South San Luis Obispo County portion of the Central Coast, where dry summers give way to wetter winters in a Mediterranean rhythm. That seasonal cycle means roof systems there must shrug off long, hot sunny stretches and brief but meaningful periods of rain without enduring freeze-thaw cycles. The absence of sustained snow reduces concerns about frost damage, but it also pushes you toward materials and assemblies that handle expansive sun exposure, UV wear, and day-to-day temperature swings. When planning a reroof, you're balancing long-term weathering from sun and marine moisture with the practical need for a roof that drains well and resists warping or cracking under repeated heat and cool-down cycles.
Even though Nipomo isn't perched directly on the shoreline, the coastal character brings salt-laden air and higher humidity compared with inland inland valleys. Those marine elements can accelerate corrosion for metal components and dent or degrade exposed fasteners, plus contribute to faster granule loss for asphalt products. Tile roofs and certain composite systems sit in a similar boat: they must tolerate salt exposure and damp air without premature fading, coating deterioration, or sealant degradation around penetrations. When evaluating roof systems, the goal is a design that minimizes fastener corrosion, preserves underlayment performance, and maintains edge details that resist salt spray ingress. It also helps to choose color and surface textures that reflect solar load while staying visually compatible with Nipomo's tile- and stucco-dominated housing stock.
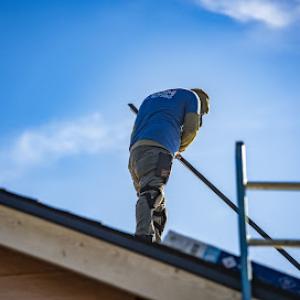
Seasonal winds are a real consideration in this region. The wind patterns can stress roof edges, fasteners, and vent penetrations, especially on exposed ridges and south-facing slopes. A roof assembly that relies on simple attachments may falter over time in persistent gusts, so wind-rated underlayments, properly sealed penetrations, and edge-fastening strategies matter. In Nipomo, you'll often see roofs that emphasize robust edge detailing, corrosion-resistant components, and secure flashing at chimneys, skylights, and transitions to ensure wind-driven rain doesn't infiltrate the attic. The ideal system invites a balanced approach: materials with strong wind performance, reputable sealants, and a well-thought-out valley and rake detailing that maintains drainage and reduces wind uplift risk where the roof meets walls.
Local reroof timing tends to align with the Central Coast's dry spring and fall windows, which provide easier tear-off and dry-in conditions than the winter storm period. This timing reality translates into practical planning: if a roof is nearing the end of its service life, scheduling removal and replacement in a dry, mild window reduces the chance of weather delays and moisture intrusion during the critical reinstallation phase. The roofs in Nipomo are often visible and functional year-round, so selecting a replacement that tolerates quick re-coverage if a brief storm occurs during the work window helps avoid extended project timelines. When coordinating a reroof, coordinate with crew availability and anticipate coastal seasonality to minimize exposure risk.
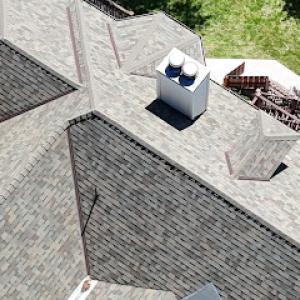
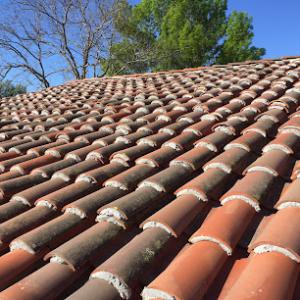
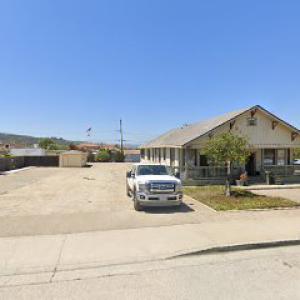
The local housing stock frequently features designs that pair well with coastal-sensible materials. Clay tile and concrete tile are common, thanks to their durability and fire resistance, but require careful structure consideration to support weight, especially on an older or lighter-frame home. Synthetic and composite shingles offer a lower weight option with coastal wear resistance and quicker installation timelines, while metal roofing provides a long service life and strong wind performance when properly installed. Asphalt shingles continue to be a practical choice for certain homes, particularly where roof pitch and ventilation align with standard installation methods. Each option brings its own balance of weight, UV resistance, color stability, and maintenance needs under Nipomo's sun-drenched summers and damp winters.
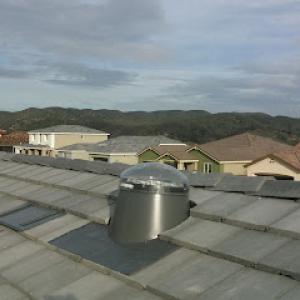
Because marine moisture and salt exposure can affect fasteners, edge details, and flashings, periodic inspection of metal components, penetrations, and sealants is prudent. Look for granule loss on asphalt-based products, hairline cracks on concrete or clay tiles, and any signs of movement along ridges or hips. Roofs in this area benefit from proactive vent and flashing upkeep, with attention to coastal salt accumulation on exposed metal works. A well-maintained roof here not only stands up to wind and sun but also preserves the home's envelope against moisture intrusion during the wetter months. When in doubt, a targeted attic inspection after the rainy season reveals potential intrusion paths and helps refine the choice of material and finish for the next cycle.
The Central Coast climate in this area blends sun, coastal moisture, and seasonal winds in a way that presses roofing materials to perform beyond basic weather resistance. Exposure to marine-influenced air means fasteners, flashings, and finish coatings are under a multi-directional strain: sun baking on metal components, salt air flirting with corrosion, and wind driving moisture under edges and penetrations. Choose systems that anticipate these forces, and set up detailed detailing in fastener patterns, sealants, and edge protection. When evaluating options, simulate a few typical days of coastal sun angles and telltale wind directions to see where water or air intrusion could occur around penetrations, ridge lines, and transitions.
In Nipomo, metal roofing selection needs attention to coastal-condition corrosion resistance because Central Coast air can be harder on exposed fasteners, flashings, and lower-grade finishes. Look for coatings designed for marine environments, and confirm that exposed fasteners use closed- or sealed-fastener assemblies with corrosion-resistant hardware. Evaluate the finish system for long-term UV stability and color retention, since sun exposure is persistent in this inland-meets-coastal setting. Pay attention to the underside and hidden edges of the metal panels too; a well-sealed overhang and drip edge helps keep salt-laden spray from creeping into fastener rows. If the roof has a complex ridgeline or multiple valleys, verify that the panel seams and flashing transitions are continuous and not prone to creasing or micro-movement in higher wind events. For reroofing, prioritize lighter, properly ventilated assemblies that minimize wind uplift risk without inviting thermal cycling issues.
Clay and concrete tile are common in this part of San Luis Obispo County, but their weight can trigger structural review concerns during full reroofs or material changes. Before selecting tile, confirm that the existing structure, attic space, and shear capabilities can support the added dead load of new tile, especially when replacing a lighter covering with a heavier one or changing tile profiles. In a high-wind cycle, ensure the chosen tile and underlayment are rated for uplift and edge retention, with appropriate mechanical fasteners and slope-specific installation patterns. Clay and concrete offer excellent longevity and fire resistance, but the installation details must account for coastal substrate conditions and potential moisture-driven movement. If replacing like-for-like, consider a modern paver-style or flatter-profile tile that reduces windage at eave edges and ridge lines without sacrificing look or performance. Research adhesive or mechanical fixing methods appropriate for marine environments to keep tiles secure during seasonal gusts.
Asphalt shingles remain common partly because they avoid the structural burden of tile while still fitting the pitched-roof housing stock seen in neighborhoods. For Nipomo, this means selecting shingles with enhanced UV resistance and stout granule retention to fend off sunlit days and moisture exposure from sudden coastal breezes. A practical approach is to pair high-durability shingles with a proven underlayment system that provides a robust secondary barrier against wind-driven rain. When considering synthetic or composite shingles, look for products with reinforced polymeric layers that resist expansion and contraction from temperature swings and maintain edge seal integrity in windy seasons. In settings where roof geometry features many hips and valleys, ensure the chosen shingle lines are compatible with metal or composite ridge closures to prevent wind-driven infiltration at transitions.
Beyond material choice, the installation method matters as much as the product. Coastal air can exploit small gaps, so emphasize continuous underlayment across hips and valleys, with properly sealed penetrations for stacks, vents, and skylights. Ensure the flashing at roof-to-wall transitions receives corrosion-resistant metals and is mechanically fastened in a way that remains secure through seasonal cycles. Finally, coordinate with a roving wind-load assessment for the specific home shape and neighborhood, confirming that the finished system aligns with both the local architectural expectations and the realities of coastal exposure.
Efficient Roofing | Nipomo | Santa Barbara
(805) 720-6353 efficientroofinginc.com
Pomeroy Rd, Nipomo, California
5.0 from 44 reviews
Roofing experts on shingles, Spanish tile, flat tile, Tpo Flat roofs, Bitumen membrane flat roofs, and metal roofs.
Wicks Roofing & Solar, Inc.- Nipomo
(805) 881-3986 wicksroofing.com
2170 Hutton Rd, Nipomo, California
4.5 from 80 reviews
Roofing, Solar and Energy Storage in California is a rapidly expanding technology. From the latest composite materials and photovoltaic (PV) modular cells to DC rapid charging for Electric Vehicles (EV). The team at Wicks is dedicated to learning about and quickly applying into practice the best products and processes designed for lasting value. It’s no wonder that the Central Coast turns to Wicks Roofing and Solar. We are the preferred company for Home Owners, Real Estate Developers and General Contractors throughout the tri-counties.
Leo's Roofing
(805) 801-2064 www.facebook.com
1480 Camino Mariposa, Nipomo, California
5.0 from 12 reviews
Protect your home or business with Leo's Roofing, the premier roofing contractor serving San Luis Obispo and Santa Barbara Counties. We offer top-quality roofing solutions for both residential and commercial properties. Your roof is your building's primary defense, and we're dedicated to providing reliable, professional, and expertly crafted roofing services. Using only top-grade materials and innovative techniques, we ensure lasting durability. At Leo's Roofing, we build more than just roofs; we build lasting relationships based on integrity and transparency.
GN Roofing
(805) 878-4395 gnroofingcontractor.net
Serving
4.9 from 99 reviews
GN Roofing is a family owned and operated roofing company located in Santa Maria, California. We offer a variety of services from maintenance, repairs & replacement for different roof systems. Request a free quote today! (805) 878-4395. Our services are for residential and commercial properties within the counties of Santa Barbara & San Luis Obispo.
Axiom 360
Serving
4.9 from 59 reviews
With over 15 years of experience in the industry, our team of certified professionals is committed to delivering top-quality roofing from new installations to comprehensive repairs. People are different now than they were years ago. We are smarter, more connected, and have a greater awareness of the world around us. This is especially true when it comes to our interactions with businesses. We are no longer content with being treated like numbers on a spreadsheet. We want quality and great customer service throughout the entire project. That’s why we go the extra mile to make sure every project is completed on time, within budget, and to the customer’s complete satisfaction.

Roofing Concepts Pro.
(805) 925-8456 www.roofingconceptspro.com
Serving
4.6 from 24 reviews
SINCE 2000, ROOFING CONCEPTS, INC. has been the trusted choice for roof repairs, replacements, and maintenance across Santa Maria, San Luis Obispo, Paso Robles, Lompoc, Santa Barbara, and the entire Central Coast. We specialize in Spanish tile, asphalt shingles, metal, and flat roofs for both residential and commercial properties. 📍 Serving Santa Maria (93454, 93455), San Luis Obispo (93401, 93405), Paso Robles (93446), Lompoc (93436), Santa Barbara (93101, 93105), and surrounding areas. ✅ LOCALLY OWNED & OPERATED ✅ TRUSTED. LOCAL. PROVEN PROS. FOR OVER 25 YEARS ✅ SERVING THE CENTRAL COST WITH THOUSANDS OF SATISFIED CUSTOMERS ✅ 25 YEARS OF EXCELLENCE
Roof Maxx of S San Luis Obispo, CA
Serving
5.0 from 8 reviews
Roof Maxx® offers a revolutionary roof restoration service, providing an eco-friendly, cost-effective solution for extending your roof's life. Specializing in roof rejuvenation, our innovative treatment revitalizes aging shingles, ensuring they remain flexible and waterproof. Ideal for roofs over 7 years old, Roof Maxx's unique formula penetrates deep into shingles, restoring their original functionality. This process not only enhances roof durability but also postpones the need for expensive replacements. Our professional roof maintenance services further protect your investment, keeping your roof in top condition. Trust Roof Maxx for sustainable, efficient roofing solutions.

Coast Roofing
(805) 773-1422 www.coastroofing.co
Serving
4.4 from 25 reviews
Here at Coast Roofing we understand that your home is one of your biggest investments! That's why we take extra care of your home through every step of the process and only offer top quality roofing craftsmanship. Coast Roofing has installed roofs on a wide variety of commercial buildings. From grocery stores, water treatment plants, to large churches and shopping centers. We are a trusted name for all commercial property along the central coast.

Pristine Roofing
(805) 889-7838 www.pristineroofingca.com
Serving
5.0 from 24 reviews
We are a full-service roofing and solar contractor located in San Luis Obispo, specializing in delivering comprehensive roofing and solar energy solutions for residential, commercial, and industrial clients. With a strong commitment to quality, craftsmanship, and customer satisfaction, our team of experienced professionals works closely with each client to design and execute tailored solutions that meet their specific needs and budget.
JB's Roofing / Central Coast Skylight Solutions
Serving
4.8 from 23 reviews
JB's Roofing/Skylight Solutions has worked on thousands of roofs throughout San Luis Obispo County and has a proven track record for high quality, leak free roof and skylight installations at a very reasonable price. All roof installations are performed by a licensed roofing contractor who continues to stay educated and up to date on the best roofing practices and quality materials which ensures you will receive a worry free, long lasting, quality roof system. We specialize in all kinds of roofing, tubular skylights installation, skylight replacement, and carpentry work, so don't hesitate to give us a call to see how we can add value to your home and give you the experience and treatment you deserve as a homeowner or professional.
West Coast Roofing
(805) 922-1581 westcoastroofingsm.com
Serving
3.3 from 7 reviews
West Coast Roof Contractors has over 35 years of local experience. We offer quality workmanship at affordable prices. We are locally owned and operated with honest, reliable, & knowledgeable services. We service Residential, Commercial, and Indust
Melena Roofing Partnership
(805) 928-5299 melenaroofing.com
Serving
All types of roofing Single Ply Tpo PVC Termite repair Facial boards Roof certification No job to small
When storms roll through the Central Coast, those Nipomo rains can show up with little warning and upend a tear-off schedule in a hurry. If a reroof was set for a winter window, you must have a same-day dry-in plan ready-tarps, vents, and temporary weather protection that can be deployed fast when a front stalls over the coast. A half-day delay due to a sudden downpour isn't a small thing in this climate, and it can cascade into days of shielded work that strains crews and homeowners alike. Make sure your contractor confirms a dry-in contingency before any shingles come off, so you can shield interior spaces and avoid wind-driven moisture seeping under underlayment.
Fall brings gusts that can complicate underlayment placement and debris control before the wet season fully sets in. Dry, windy days in this region require meticulous staging: tarping stacked materials, securing rolls of underlayment, and keeping the jobsite clean to prevent debris from blowing under new layers. If a tear-off lands on a breezy spell, you should expect a pause in work rather than pushing ahead-underlayment alignment and fastener security are step-sensitive in these conditions. Talk to the crew about having wind-safe anchors and edge protection ready, so installation can resume safely as soon as calmer days return.
Hotter summer stretches affect installation pace and material handling, but they are generally less disruptive than winter rain events for full replacement scheduling. Hot days demand hydration, shade, and timing to avoid heat-related work stoppages, yet they rarely force complete pauses in progress. Use the quieter hot season to address sequencing: confirm material deliveries, verify attic ventilation improvements, and line up scissor lifts or ladder access so that when fall winds shift, the crew can swing into targeted, risk-aware work without last-minute delays.
Coordinate with the roofing team to lock a fall window that minimizes wind exposure and to lock in a same-day dry-in plan. Stock extra fasteners and edge protection, and designate a rain plan that triggers at a moment's notice. In this town, readiness translates directly into fewer leaks and a smoother reroof from tar paper to shingles.
When you consider moving to clay or concrete tile, the weight load on your home's structure becomes a real factor. In this market, the roof framing and supporting members were often built for lighter materials, so a heavier tile reroof can push existing systems toward their limits. If the framing isn't upgraded or reinforced, you risk sagging, fastener failures, or accelerated wear on soffits and walls where wall plates bear the brunt. Before deciding, schedule a professional structural assessment that focuses on attic rafter spacing, header strength, and the integrity of the existing load path from roof to foundation.
Homes switching from lighter materials to clay or concrete tile may encounter more scrutiny from builders and inspectors, especially when existing structural drawings are older or less detailed. The change in weight isn't cosmetic; it translates to deeper calculations about live loads, wind uplift resistance, and potential need for revised nailing patterns. If your roof deck doesn't show ample confirmatory signs of adequate shear transfer, you could face additional reinforcement requirements. In short, the transition warrants a careful, planful approach rather than a straightforward swap.
This issue matters more here than in many inland California markets because tile is a dominant local roof type rather than a niche upgrade. The region's climate and coastal influence place higher demands on fasteners, underlayment, and edge protection to resist wind uplift and moisture intrusion. A heavier tile system can also interact with existing ventilation and attic space differently, affecting condensation control and long-term roof performance. Expect a thorough review of truss alignments, rafter tails, and potential need for crane-accessible installation if the structure isn't readily prepared for a heavier, multi-piece tile assembly.
Begin with a qualified structural evaluation focused on roof framing and deck capacity, then obtain a stamped assessment or engineer's letter detailing load-bearing capabilities. If reinforcement is advised, discuss options that minimize invasive modifications while restoring adequate capacity, such as upgrading joists, adding purlins, or adjusting the roof-to-wall connection details. Clarify with the contractor how tile weight interacts with wind-rated underlayment and edge clips to ensure that the final assembly remains robust against Nipomo's seasonal winds.
When you shop for a reroof, you'll encounter material bands that look different from inland areas. Asphalt Shingles run roughly 300 to 650 USD per square, a practical middle-ground if timing and budget are tight. Metal Roofing sits higher at 600 to 1200 USD per square, reflecting the faster install and longer service life but weighing on the budget. Clay Tile ranges from 1100 to 2100 USD per square, and Concrete Tile from 1000 to 1800 USD per square, capturing the added weight and structural considerations common to many Nipomo homes. Wood Shingles or Shakes come in around 700 to 1200 USD per square, while Synthetic or Composite Shingles stay between 500 and 900 USD per square. These ranges reflect how local logistics shift price and schedule.
In this market, tile projects often cost more than the sticker price suggests. Heavier systems can trigger structural review needs and slower installation. Tear-off and loading logistics become a bigger factor when you're dealing with clay or concrete tile, so plan for longer windows and potential coordination with crane or wagon-load schedules. You'll notice the labor component grows as weight and fragility rise, not just the price of the material itself. If you're replacing an older roof, you may also need deck reinforcement or upgraded underlayment to keep the system reliable under Nipomo's sun and coastal moisture.
Central Coast weather windows can tighten scheduling in the dry spring and fall periods, which can affect labor availability and project timing even when material pricing is stable. If your reroof is tied to a tile or heavy system, the crew may need precise sequencing to avoid exposing the interior during Santa Ana swings or late-winter drizzle. Have a flexible start window and confirm that the contractor's crew can stage heavy materials without delaying the line of work. Short-term rain gaps in this area aren't unusual, and a well-timed dry spell matters for keeping you on track.
Compare material costs against expected labor and potential structural needs. If you lean toward clay or concrete tile, ask about additional deck reinforcement and underlayment upgrades. For asphalt or metal, verify wind-rated and impact-rated specifications that align with seasonal gusts. Finally, build a realistic schedule that accounts for the typically tighter dry-season windows, and confirm a concrete timeline with your chosen contractor before any material haul.
Nipomo homeowners typically deal with the county building process rather than a separate large-city permitting system, because Nipomo is an unincorporated community in San Luis Obispo County. The county's building division handles plan review, permit issuance, and inspections. To start, a building permit application is submitted to the county, and project details are tied to the property's parcel record.
Full reroofs in Nipomo typically require a building permit, with review by the local building division and inspections that can include rough framing when structural work is involved and a final completion inspection. Even when only selected roofing components are being replaced, verify whether a permit is needed if overhead structural elements or attic framing are affected. Structural or seismic concerns trigger a higher level of review and documentation.
Heavy tile roofs add weight and may need structural confirmation before work proceeds. If the proposed roof system includes heavier materials like concrete or clay tile, anticipate plan review that confirms framing, attic access, and roof-to-wall connections meet current code requirements. Provide clear roof layout, species and grade of sheathing, nailing schedules, and any retrofit plans for attic ventilation or moisture control. Submittals should reflect the local wind exposure and coastal-influenced climate to avoid later compliance issues.
Expect inspections to cover rough framing if structural work is involved, followed by a roof sheathing and underlayment check, and a final completion inspection after the roof is installed. The sequence helps verify that load paths, hardware, and flashing details align with permit plans. If you replaced like-for-like with no framing changes, the process may be lighter, but still requires a final inspection.
Lead times can vary locally, especially for heavier tile roofs that may need plan review or structural confirmation before work proceeds. Coordinate with the contractor to align permit submittals with the anticipated roofing schedule and factor in potential review delays for complex assemblies or weather-related pauses. Early engagement with the county plan reviewer can help identify required documentation and reduce back-and-forth during the permit process.
Prepare a complete submittal package: site plan, roof framing details, material specifications, and any structural retrofit notes. Maintain open lines of communication with the county building division and the contractor, and keep an updated calendar that reflects permit milestones, inspections, and any required re-submittals.
California insurers commonly want roof age, prior work history, and proof that the contractor was properly licensed, which makes documentation especially important before a Nipomo reroof. Gather signed contracts, material specs, and a clear record of previous roof layers and their installation dates. Keep digital copies of warranties and all inspection notes from the installer. When the work is done, obtain a detailed lien-release and a final summary of what was replaced, including underlayment, flashings, and any retrofits. The goal is to provide a clean, traceable history that can stand up to a lender or insurer review years down the line. A neighborly tip: store photos of the old roof at the start and after each major step; it helps prove what was changed and why, should questions arise later.
After a claim, adjusters may request photos and sometimes engineering input for certain roof types, which is particularly relevant for tile systems common in Nipomo. Take high-resolution images of all roof surfaces, flashing details, valley intersections, and any visible damage. If engineering input is needed, provide stamped drawings or third-party assessments that confirm the roof's structural integrity and load capacity in the local marine-influenced climate and wind patterns. Maintain a chronological file of communications with the insurer and the contractor. Clear, organized records shorten back-and-forth and reduce the chance of disputes over what was replaced or repaired.
Nipomo is not typically treated as a high-wildfire zone, but statewide insurer pullbacks and tighter underwriting in California still affect how homeowners approach roof replacement and maintenance records. Even without a wildfire designation, the combination of sun exposure, marine moisture, and seasonal winds means insurers look closely at roof age and maintenance history. Prioritize thorough documentation and a consistent maintenance log, so that future policy reviews can move forward with less friction and fewer surprises.