Last updated: Apr 19, 2026
In this coastal-valley pattern, reroof projects land on a practical calendar: the long dry season is the window for tear-off and drying-in. When the Santa Maria Valley settles into late spring through early fall, you get the most predictable weather for safe removal, sheathing inspection, and underlayment work without sudden rain interruptions. The Mediterranean rhythm means you should target a completion window that avoids the transition weeks into late fall, when marine moisture can drift in and threaten dry-in performance. Plan around historically dry stretches and keep a short, weather-tue operating buffer in your schedule so a late heat spike or a stray marine front doesn't derail progress. If you have a two-story or tile-loaded roof, aim to start after a few dry days and finish before the first significant marine wind surge picks up in late autumn.
Strong fall coastal winds in this valley can complicate every stage of reroofing, even when rain isn't the trigger. Staging becomes critical: securing tarps, keeping underlayment properly aligned, and moving materials without allowing wind-driven debris to scour the fascia or neighboring properties. The normal wind gusts can lift underlayment edges or shift bundles, so plan extra securement for underlayment, starter strips, and drip edge. Keep a well-practiced crew rotation on windy days to limit the time any one person spends on exposed edges. If a mid-season gust hits, you may need to pause long enough to re-secure and re-tack, rather than forcing progress that risks leaks or damaged membrane. Weather-forecast-aware scheduling helps: watch for marine fronts that bring sudden humidity increases and adjust staging accordingly.
Extended summer heat in this part of the Central Coast affects asphalt shingles, but it also shapes how you sequence the work for other materials. In peak heat, asphalt shingles can become more pliable and adhesive timing matters for proper nailing and seal-down. For heavier tile or metal installations, heat can affect panel fit and fastener behavior, so sequence the work to place exposed areas in cooler parts of the day and avoid long stretches where shingles sit hot and brittle before the underlayment is fully cured. Rubberized underlayment or synthetic options often handle heat differently, so coordinate with the product installer to schedule the underlayment and coverboard laying during the coolest feasible hours, then move to final, rapid placement of deck and tiles. If a late-summer heat wave overlaps with a short dry window, shorten the initial tear-off span to minimize exposure and avoid prolonged underlayment exposure to sun and hot air.
Think in three passes: first, safe tear-off and inspection; second, underlayment, flashings, and drip edge with careful attention to the ridges and valleys that direct coastal moisture; third, final roof coverings and sealants. The sequence matters more here because of temperature swings and wind exposure. Build contingencies for compressed schedules and temporary weather holds. Keep neighbors informed when a front is forecast and plan to shield work areas with breathable tarps that don't trap heat or amplify glare. In this climate, the timing choice is almost as important as the materials chosen, because a well-timed reroof minimizes wind exposure, moisture intrusion risk, and early wear from heat-related handling.
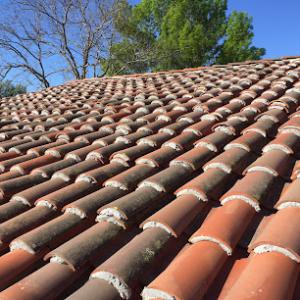
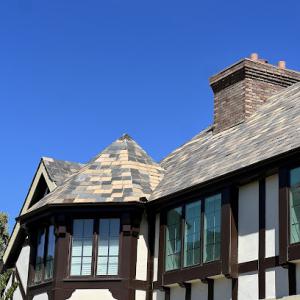
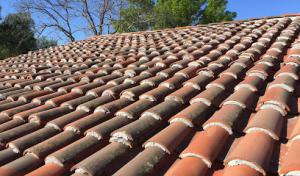
Tile roofing is particularly common on this coast-adjacent valley, where clay and concrete tile shape the skyline rather than niche premium options. The mix of inland heat and marine influences means the roof faces a tug-of-war between dry summers and wet winters, with salt in the air complicating metal components. That combination makes flashing details and tile fastening more than just a once-and-done concern-they're ongoing maintenance questions. If flashing corrodes or fasteners loosen, even a durable tile surface can start letting in moisture years earlier than expected. In this setting, the visible roof surface matters less than what's hidden beneath: waterproofing, underlayment, and the way tiles shed water around hips, valleys, and chimneys.
Metal flashings on tile roofs are especially vulnerable to long-term salt exposure. When corrosion wears the flashings, you end up with slow leaks that aren't always obvious from ground level. The hard part is that tile can look perfectly sound while the underlayment beneath has aged past its prime. In this climate, the decision about reusing serviceable field tile versus replacing aged underlayment is common for older roofs. Reusing tiles can save upfront labor, but if the underlayment has degraded, the visible tile won't prevent hidden water damage. The result is a roof that looks intact while the interior structure slowly deteriorates. Paying attention to flashing seams, corner flashings, and valley intersections is not cosmetic; it's a preventive measure against costly repairs down the line.
When you're evaluating a tile roof, start with a careful water test of flashing details around chimneys, vent stacks, and transitions to walls. Salt-laden air accelerates corrosion, so ask for a probe into the condition of metal from the point where flashing meets tile and where tiles overlap. If a roof shows exposed fasteners, consider replacing them with corrosion-resistant options and resealing every fastener line. For older tile roofs, have a qualified roofer assess whether the underlayment beneath the field tiles remains sound. If underlayment is suspect, plan for removal and replacement to avoid chasing leaks after a weather-driven problem begins. For homes with clay and concrete tiles, ensure replacing tiles is done with compatible profiles to preserve proper drainage and wind resistance.
In a climate like this, timely reroofing conversations hinge on the interplay between tile durability and flashing longevity. Tile can outlast the waterproofing beneath, so field tile replacement may not always be the first remedy when leaks appear. The goal is to maintain a continuous, watertight barrier from ridge to eave, with flashing components behaving well under salt exposure. Consider selecting flashing materials with proven coastal performance and matching tile types that resist cracking and wind uplift. A cautious approach favors early intervention: addressing small flashing failures and micro-leaks before they grow into larger, more invasive repairs. In Santa Maria, where the coastal breeze and salt aim for every seam, staying ahead on tile and flashing can save both stress and structural damage later on.
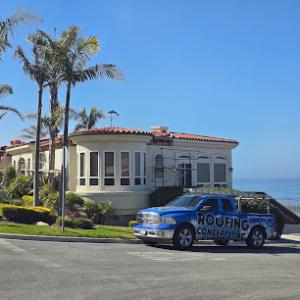
Find contractors who specialize in clay and concrete tile roofs, known for their durability and curb appeal.
Roofing Concepts Pro.
(805) 925-8456 www.roofingconceptspro.com
325 Plaza Dr # 3B, Santa Maria, California
4.6 from 24 reviews
Efficient Roofing | Nipomo | Santa Barbara
(805) 720-6353 efficientroofinginc.com
Serving
5.0 from 44 reviews
GN Roofing
(805) 878-4395 gnroofingcontractor.net
116 S College Dr, Santa Maria, California
4.9 from 99 reviews
GN Roofing is a family owned and operated roofing company located in Santa Maria, California. We offer a variety of services from maintenance, repairs & replacement for different roof systems. Request a free quote today! (805) 878-4395. Our services are for residential and commercial properties within the counties of Santa Barbara & San Luis Obispo.
Roofing Concepts Pro.
(805) 925-8456 www.roofingconceptspro.com
325 Plaza Dr # 3B, Santa Maria, California
4.6 from 24 reviews
SINCE 2000, ROOFING CONCEPTS, INC. has been the trusted choice for roof repairs, replacements, and maintenance across Santa Maria, San Luis Obispo, Paso Robles, Lompoc, Santa Barbara, and the entire Central Coast. We specialize in Spanish tile, asphalt shingles, metal, and flat roofs for both residential and commercial properties. 📍 Serving Santa Maria (93454, 93455), San Luis Obispo (93401, 93405), Paso Robles (93446), Lompoc (93436), Santa Barbara (93101, 93105), and surrounding areas. ✅ LOCALLY OWNED & OPERATED ✅ TRUSTED. LOCAL. PROVEN PROS. FOR OVER 25 YEARS ✅ SERVING THE CENTRAL COST WITH THOUSANDS OF SATISFIED CUSTOMERS ✅ 25 YEARS OF EXCELLENCE
West Coast Roofing
(805) 922-1581 westcoastroofingsm.com
1950 Olive Dr, Santa Maria, California
3.3 from 7 reviews
West Coast Roof Contractors has over 35 years of local experience. We offer quality workmanship at affordable prices. We are locally owned and operated with honest, reliable, & knowledgeable services. We service Residential, Commercial, and Indust
Wicks Roofing & Solar, Inc.- Nipomo
(805) 881-3986 wicksroofing.com
Serving
4.5 from 80 reviews
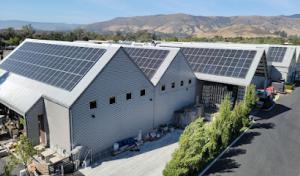
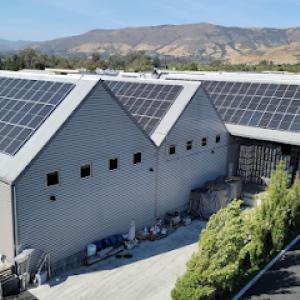
Roofing, Solar and Energy Storage in California is a rapidly expanding technology. From the latest composite materials and photovoltaic (PV) modular cells to DC rapid charging for Electric Vehicles (EV). The team at Wicks is dedicated to learning about and quickly applying into practice the best products and processes designed for lasting value. It’s no wonder that the Central Coast turns to Wicks Roofing and Solar. We are the preferred company for Home Owners, Real Estate Developers and General Contractors throughout the tri-counties.
Efficient Roofing | Nipomo | Santa Barbara
(805) 720-6353 efficientroofinginc.com
Serving
5.0 from 44 reviews
Roofing experts on shingles, Spanish tile, flat tile, Tpo Flat roofs, Bitumen membrane flat roofs, and metal roofs.
Leo's Roofing
(805) 801-2064 www.facebook.com
Serving
5.0 from 12 reviews
Protect your home or business with Leo's Roofing, the premier roofing contractor serving San Luis Obispo and Santa Barbara Counties. We offer top-quality roofing solutions for both residential and commercial properties. Your roof is your building's primary defense, and we're dedicated to providing reliable, professional, and expertly crafted roofing services. Using only top-grade materials and innovative techniques, we ensure lasting durability. At Leo's Roofing, we build more than just roofs; we build lasting relationships based on integrity and transparency.
Clark Roofing
Serving
4.9 from 41 reviews
Clark Roofing is a veteran owned company and is proud to be serving the Santa Barbara and Ventura County's. We service all Roofing types and repairs and take Pride In servicing our Communities.
Roof Maxx of S San Luis Obispo, CA
Serving
5.0 from 8 reviews
Roof Maxx® offers a revolutionary roof restoration service, providing an eco-friendly, cost-effective solution for extending your roof's life. Specializing in roof rejuvenation, our innovative treatment revitalizes aging shingles, ensuring they remain flexible and waterproof. Ideal for roofs over 7 years old, Roof Maxx's unique formula penetrates deep into shingles, restoring their original functionality. This process not only enhances roof durability but also postpones the need for expensive replacements. Our professional roof maintenance services further protect your investment, keeping your roof in top condition. Trust Roof Maxx for sustainable, efficient roofing solutions.
Axiom 360
Serving
4.9 from 59 reviews
With over 15 years of experience in the industry, our team of certified professionals is committed to delivering top-quality roofing from new installations to comprehensive repairs. People are different now than they were years ago. We are smarter, more connected, and have a greater awareness of the world around us. This is especially true when it comes to our interactions with businesses. We are no longer content with being treated like numbers on a spreadsheet. We want quality and great customer service throughout the entire project. That’s why we go the extra mile to make sure every project is completed on time, within budget, and to the customer’s complete satisfaction.
7 Rios Roofing
(805) 617-6580 www.7rios-roofing.com
Serving
5.0 from 12 reviews
🛠️ About 7 Rios Roofing INC 7 Rios Roofing INC is a trusted roofing company dedicated to providing high-quality roofing services for both residential 🏡 and commercial clients. With a strong commitment to: Excellence, Safety, Customer Satisfaction…our team brings years of experience and expert craftsmanship to every project. Whether it’s 🛠️ roof installation, repair or maintenance, 7 Rios Roofing INC ensures durability and reliability you can count on. We take pride in serving our community with integrity and professionalism, making sure every roof is built to last. 🧱 📧 Email: Bark35fk@gmail.com
A To Z Roofing
(805) 588-6888 www.atozroofinglompoc.com
Serving
4.4 from 49 reviews
A to Z Roofing in Lompoc, CA, is more than a reliable resource for comprehensive roofing services at an affordable rate. We also take pride in installing seamless gutters that are made to last. Our unwavering commitment to exceeding customer expectations is just one of the many reasons our valued clients turn to us anytime they need our assistance. When you put the needs of your roof in our hands, you can rest assured that we are a Fully Licensed, Insured, Bonded, and Family-Owned & Operated Company.

Eddie's Roofing
(805) 819-0534 www.eddiesroofinginc.com
Serving
4.0 from 26 reviews
roofing contractor roof repairs new roofs skylights free estimates
Santa Maria's wet winter pattern concentrates leak calls into storm periods, when active water intrusion often appears after long dry months with little warning. That unpredictable swing means a roof can seem fine for months, then suddenly reveal a steady drip or a sudden gush once a winter storm rolls in. Your first line of defense is recognizing the cadence: dry spells lull you into assuming the roof is sound, then a heavy storm tests every seam, flashing, and penetration. Track the typical storm windows in your neighborhood and plan for imminent vulnerability as those fronts approach.
The combination of inland heat, marine moisture, and coastal salt exposure makes timing and flashing durability critical in this climate. After a dry fall, leaks may show up quickly with the first real rain, especially at valleys, rakes, and where old seals have aged. Wind-driven spray can lift shingles or tiles, revealing underlayment weaknesses you didn't notice during blue-sky inspections. In Santa Maria, reroof strategies should emphasize durable flashing at chimneys, vents, and dormers, plus secure edge details where wind can pry seams apart.
Because reroof work can pause during heavy rainfall, temporary dry-in and tarping are especially important locally when storms arrive mid-project. If your crew faces a rain interruption, insist on a robust dry-in: cover exposed roof decks with a weather-resistant underlayment and seal the edges against wind-driven rain. Tarping should be tight, with weighted edges and clear access for crews to resume work promptly when weather allows. A proactive approach reduces the risk of water intrusion while the project sits under a partial roof, and it buys valuable time before interior damage begins.
The local contractor signal mix shows emergency repair is one of the most active specialties in Santa Maria, matching the city's winter leak-response needs. If a leak erupts during a storm, you want a crew that can pivot quickly from inspection to mitigation-first securing the site, then addressing flashing and penetration points, and finally scheduling a permanent repair without delay. Expect rapid on-call service during wet conditions, and verify that your chosen contractor carries appropriate weather-ready materials and portable containment to prevent interior damage as crews work.
In this market, the dominant material mix runs from low-cost asphalt shingles up to high-end clay and concrete tile. Costs vary widely depending on whether the home has a lightweight roof assembly or a heavier tile system that requires reinforced framing and different underlayment details. Asphalt shingles generally fall in the 350-650 USD per square range, while metal roofs run about 700-1200 USD per square. Clay tile sits roughly 900-1700 USD per square, and concrete tile is similar at about 950-1700 USD. Synthetic or composite shingles land around 420-750 USD per square, and cedar shakes typically run 700-1250 USD per square. These ranges reflect material choice plus local labor for Santa Maria's dry-summer, wet-winter cycle, where timing and staging can swing total project time and cost.
Winter weather delays can push crews off an exposed roof, increasing labor hours and pushing out the schedule. Fall winds in this area can slow installation and staging, especially for larger or tile-heavy jobs where crews need extra setup time to protect underlayment and flashings. When weather interrupts a reroof, you'll often see a higher price tag attached to labor because crews need to return, re-check underlayment integrity, and reseal flashing details that may have shifted in the interim. If a project stretches beyond the planned window, you should expect incremental charges for extended mobilization and possible temporary protective measures on the jobsite.
Tile reroofs in this climate demand careful work beyond just replacing field tiles. Underlayment must be compatible with tile systems, and flashing around chimneys, vents, and transitions must be robust to coastal moisture and wind-driven rain. Broken tile replacement can be as costly as the field tiles themselves when you factor in selecting exact color and texture to match the roof line. If you're choosing clay or concrete tile, anticipate higher labor times for accurate lapping, drip edge alignment, and secure anchoring in wind-prone spells, which all contribute to the overall per-square cost.
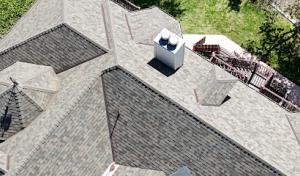
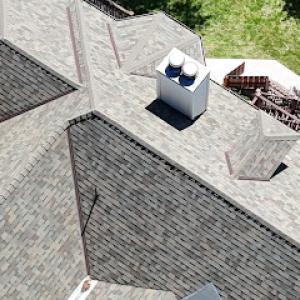
The most popular roofing material in the US. Find pros who install, repair, and replace asphalt shingles.
Roofing Concepts Pro.
(805) 925-8456 www.roofingconceptspro.com
325 Plaza Dr # 3B, Santa Maria, California
4.6 from 24 reviews

A full reroof in Santa Maria typically requires a permit through the City of Santa Maria Building & Safety Department. The process is not a "no-paperwork maintenance" task, but a structured review that helps protect homes from salt exposure, inland heat, and coastal wind effects that stress flashing and tile performance. Your project file should include project scope, roof materials, and methods that address local climate challenges, such as wind-driven water intrusion and long-term moisture management. Expect the permit to set a clear timeline for tear-off, replacement, and any necessary repairs to flashing and venting.
Homeowners should anticipate plan review and inspection coordination with the city rather than treating reroofing as a straightforward, self-contained job. The plan review checks that the proposed roof assembly aligns with current code, weatherproofing details, and safe access for workers. In Santa Maria, where dry summers meet wet winters and marine-influenced moisture, the reviewer will look closely at edge detail, underlayment selection, and fastener schedules, ensuring that the chosen system can hold up under seasonal salt and wind exposure. During plan review, you may be asked to provide product data, installation details, and manufacturer endorsements for components such as flashing, ridge caps, and underlayment rated for higher moisture and salt exposure.
The local inspection flow commonly includes a rough-in inspection during tear-off and a final inspection after completion. The rough-in focuses on how the roof deck is prepared, how underlayment is installed, and whether eave and rake edges, valleys, and roof-to-wall transitions are properly flashed before any new material is laid down. This early check helps prevent moisture issues that could arise from coastal winds or heat-driven expansion. The final inspection confirms that the new roof is fully installed to code, that flashing around chimneys and vents is continuous and corrosion-resistant, and that any penetrations are sealed to resist Santa Maria's seasonal salt load and dew patterns. Keeping a clear line of communication with the city inspector can help address questions quickly and keep the project on schedule.
When planning, align reroof timing with local weather windows to minimize exposure of the roof deck to winter moisture. Have all permit documents, product data, and installation guides ready for review, and coordinate with the city early if adjustments to the plan are needed. Because Santa Maria's climate blends inland heat, coastal moisture, and wind, provide explicit details on flashing materials, sealants, and roofVent choices that perform under salt exposure. Scheduling inspections promptly, confirming access for the inspector, and rectifying any identified issues at rough-in or final can streamline the process and reduce the chance of weather-related delays.
In Santa Maria, the insurance climate has tightened beyond the mountain-fire zones, and that tightening shows up when underwriting and renewing policies. The mix of inland heat, marine moisture, and salt air means insurers scrutinize roof condition and age more closely, because a tired roof carries more risk of leaks and storm-related damage during the wetter months. This isn't about alarm-it's about knowing that a roof's age and current condition can tilt policy decisions, even for houses that look sound from the curb.
Homeowners should expect insurers to want clear photo documentation of roof condition and may send adjusters for site visits after reported damage. In many cases, a well-documented history-photos taken before a problem arises, plus recent shots after incidents-can streamline claim review. The coastal exposure Santa Maria faces means that signs of wear, corrosion on metal components, or flashing gaps are not trivial details; they are the kinds of evidence insurers examine to determine coverage scope and payout timing.
Some carriers push for wind-rated details or upgraded flashing, which matters locally because coastal wind exposure and corrosion concerns are part of the roof-risk picture. A roof that integrates robust flashing transitions, corrosion-resistant fasteners, and wind-resilient edging stands up better to Santa Maria's gusts and salty air. If a roof is older or shows wear around penetrations, addressing those issues proactively can influence both renewal decisions and claim outcomes.
Keep an up-to-date set of interior and exterior roof photos, focusing on the attic, flashing, and vent seals. Schedule regular inspections that specifically evaluate sealants, edge metal, and any tile or shingle failure points exposed to coastal winds. When choosing upgrades, prioritize components rated for wind exposure and corrosion resistance, knowing that insurers may value these improvements in the underwriting equation. Being proactive with documentation and durable details can help protect coverage when the weather shifts.
Connect with contractors who help homeowners navigate the claims process from damage assessment to final approval.

In Santa Maria, the long dry season can hide penetration problems until winter rains expose failed skylight or vent flashing. Before installation, map sun exposure and wind-driven spray patterns from the coast. Choose materials and flashing that resist salt and humidity, and align skylights with rafters to minimize cut edges. Emphasize robust sealant choices that stay flexible through heat cycles and salt exposure. Plan for occasional cleaning access and clear drainage away from critical flashing.
On tile roofs common in Santa Maria, penetration detailing is more specialized because surrounding tiles and flashings must be integrated without creating future leak paths. When a skylight or solar penetration point is added, design a tile-compatible curb that matches the roof slope and allows for seamless integration with nearby tiles. Ensure surrounding tiles are cut cleanly and vent flashings sit under adjacent tiles rather than over them. Use overlapping flashings and a continuous sealant bead that remains compatible with clay or concrete tiles. Every mounting must respect the tile setting pattern to prevent cracks from seasonal ground movement and wind uplift.
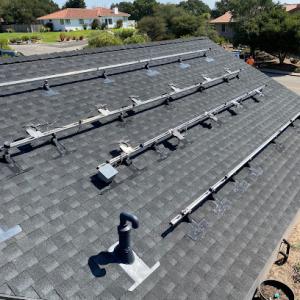
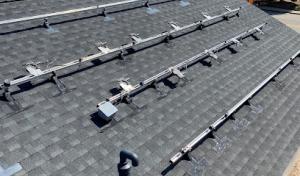
For solar penetrations, coordinate with panel racking to minimize boarding cuts in the tile field. Consider raised mounts or ballasted systems if tile integrity is a priority, and ensure flashing bases receive reinforced sealing where metal and tile meet. In coastal-valley climates, stainless or non-corrosive components resist salt exposure over time. Verify that penetrations are aligned with existing soffit vents or ventilation paths to avoid trapping moisture behind flashing.
After the first winter rainy season, recheck all skylight and solar penetrations for signs of microleaks, flange deformation, or tile edge lifting. Schedule mid-season inspections if coastal winds shift or seasonal rains intensify. Regular touch-ups with appropriate sealants prevent slow seepage from turning into visible leaks.
Find contractors experienced in skylight installation, flashing, and leak repairs to bring natural light into your home.
GN Roofing
(805) 878-4395 gnroofingcontractor.net
116 S College Dr, Santa Maria, California
4.9 from 99 reviews
Roofing Concepts Pro.
(805) 925-8456 www.roofingconceptspro.com
325 Plaza Dr # 3B, Santa Maria, California
4.6 from 24 reviews
Efficient Roofing | Nipomo | Santa Barbara
(805) 720-6353 efficientroofinginc.com
Serving
5.0 from 44 reviews