Last updated: Apr 19, 2026
Winter in this corner of the lake brings substantial snowfall that weighs down roofs and tests every flashing, vent, and seam. Ice damming isn't just a nuisance-it's a clear risk to your attic, ceiling, and interior living space. Freeze-thaw cycling around Grand Traverse Bay turns even minor weaknesses into recurring winter leaks. A small gap in a vent boot or a tired gutter connection can become a persistent problem when a cold snap follows a heavy melt. The combination of heavy snow, fluctuating temperatures, and concentrated snowfall along the shore means that prevention and timely action are essential, not optional.
Snow blankets the roof and begins to shed heat through the attic or through compromised insulation. When heat escapes unevenly, snow near the eave remains frozen while higher up starts to melt, refreeze at the colder edge, and create a dam. Water backed up behind the dam finds gaps in flashing or ventilation and forces its way inward through small openings. In Traverse City winters, that cycle often repeats across multiple storms, widening the damage over the season. Even a modestly vented roof with marginal insulation can become a repeated leak source once freezing pressure starts.
Act quickly on any signs of ice buildup along the eaves, ridges, or near dormers. Clear snow from overhangs with a plastic scoop or non-metal tool to avoid puncturing shingles or flashing, and keep a safe distance from the edge. Inspect attic insulation and ventilation to ensure attic temperatures stay closer to outdoor temperatures, reducing the frequency of melt and refreeze on the roof surface. If you notice frost patterns on the roof or interior staining that tracks seams and flashing, address those weak points before the next freeze. Regular checks during thaw cycles are essential because damage can escalate fast in the cold wind and lake-effect snow cycles you experience here.
Winter access for crews is often limited by snow cover and icy roof surfaces, so many homeowners defer full replacement until late spring. However, immediate repairs to flashing, ice dams, and ventilation can prevent larger failures and interior damage. If ice damming is persistent or you detect active leaks, prioritize quick, targeted fixes-such as securing or replacing compromised flashing, sealing gaps around vents, and rebalancing attic ventilation. A professional can safely remove ice, evaluate structural loading from accumulated snow, and propose a plan that minimizes disruption when temperatures climb and the ground thaws.
Plan for the prime installation season to align with ice dam risk reduction. With snow levels fluctuating and access improving as temperatures rise, coordinating a staged approach-addressing flashing and ventilation now, then proceeding with more extensive upgrades during late spring-can reduce the chance of repeat leaks. Keep gutters clear of ice and debris to ensure proper drainage as snowpack recedes, and consider adding insulation upgrades or ventilated soffits where the attic tends to overheat. In this climate, proactive design and timely maintenance are the best defenses against the persistent winter onslaught.
Fall storms and high winds are a known seasonal scheduling risk in this area and can stress roofing during installation. As summer fades, a rapid shift to brutal wind events and driving rains puts roofs to the test before the first deep freeze. If a project drags into late fall, a mis-timed crew or a rushed job can leave vulnerable flashing, exposed fasteners, and imperfect seals ripe for wind-driven uplift. The days shorten, weather windows tighten, and a single gust can turn a steady project into a damaged roof with water intrusion. Plan with a local weather pattern in mind: storms intensify quickly after cold fronts roll off the bay, and crews should be prepared to pause work when sustained winds exceed safe thresholds.
Local homeowners often need to distinguish between gradual winter wear and sudden storm-related shingle or flashing damage for insurance purposes. Snow load and freeze-thaw cycles wear materials slowly, showing up as granule loss, curled edges, or minor shingle lift over time. In a storm, you'll see more abrupt symptoms: torn or missing shingles, ripped flashing around chimneys and skylights, and sudden leaks near vent stacks after a wind event. Document symptoms with dated photos and keep a log of recent storm dates. If damage follows a significant wind or hail event, contact your insurer promptly and request an adjuster visit to separate pre-existing wear from storm-relevant damage. A local roofer who understands our bay winds can help interpret what counts as new damage versus aging wear.
The bay-driven winds can stress traditional ridge and edge details, especially on older roofs with aging sealants. Look for loose or missing shingles along the eave lines and near roof-to-wall intersections. Flashings around vents, chimneys, and skylights are particularly vulnerable to uplift during gusts above neighborhood norms. In Traverse City, the combination of heavy Lake Michigan snow loads, rapid freeze-thaw cycles, and sudden wind shifts can push even a well-installed roof toward failure if the installation wasn't prepared for third-point wind events. If you notice ripple or curling at the edges after a windy day, or the first heavy rain reveals active leaks near flashing, treat it as urgent and call a local contractor who can quickly stabilize the area and prevent interior damage.
Prepare a rapid response list for the next windstorm: keep a spare shingle bundle and flashing tape accessible, know the quickest path to shut off attic ventilation in a leak scenario, and identify a nearby, trusted local roofer who handles storm response well. When a storm hits, safety first: avoid walking on a wind-lifted roof, and have a professional assess from the ground or with proper fall protection. After a storm, inspect for missing fasteners, lifted edges, and damaged seals around vents and chimneys. In this market, storm response demand is high, and timely action can move a roof from aging into claim-worthy protection before more water damage compounds the problem. A swift, informed response not only protects the home but also supports a clearer, faster insurance process.
Find local contractors experienced in assessing and restoring roofs after hail, wind, and severe weather events.
Northshore Exteriors
(231) 202-2260 www.northshoreexteriorsllc.com
3417 Cass Rd, Traverse City, Michigan
5.0 from 339 reviews
Loon Roofing & Construction
(231) 392-1512 www.loonroofingconstruction.com
515 S South Long Lake Rd, Traverse City, Michigan
5.0 from 49 reviews
One Way Exteriors Roofing Gutter & Windows
(231) 907-2882 onewayexteriors.com
2969 N Keystone Rd, Traverse City, Michigan
4.9 from 48 reviews
Northshore Exteriors
(231) 202-2260 www.northshoreexteriorsllc.com
3417 Cass Rd, Traverse City, Michigan
5.0 from 339 reviews
When you need dependable protection for your family, you can trust Northshore Exteriors, LLC. For more than 25 years, we've been offering top-notch roofing services in Traverse City, MI, at a reasonable price. Our experienced roofers will be with you from inspection to completion, ensuring results that meet or surpass your hopes. Whether it's a minor leak that needs to be addressed or a complete roofing installation, you can be sure you're in safe hands. Contact us today to receive a complimentary estimate. We look forward to working with you.
Loon Roofing & Construction
(231) 392-1512 www.loonroofingconstruction.com
515 S South Long Lake Rd, Traverse City, Michigan
5.0 from 49 reviews
At Loon Roofing & Construction, we proudly offer our customers the highest quality roofing services tailored to your needs. Our Traverse City roofers are dedicated to providing exceptional services for residential homeowners and businesses, ensuring every project is completed with safety and efficiency levels exceeding industry standards. We understand that different projects require differing levels of expertise, which is why our experts have the necessary skills and knowledge to assist you with anything from simple repair jobs after a storm to complex new roof installation projects. We firmly believe in offering competitive prices and guaranteeing professional results that can stand the test of time.
One Way Exteriors Roofing Gutter & Windows
(231) 907-2882 onewayexteriors.com
2969 N Keystone Rd, Traverse City, Michigan
4.9 from 48 reviews
Superior Exteriors is Northern Michigans premier roofing and seamless gutter installation company! Launched in 2016, with quality and speed in mind, we have had the honor of serving many of your family and neighbors. Call today get on our 3 week guarantee install from the date of deposit!

Summit Point Roofing
(231) 299-0079 summitpointroofing.com
2748 N Garfield Rd Suite 15, Traverse City, Michigan
4.9 from 62 reviews
At Summit Point Roofing, our job isn’t done until the customer has a smile on their face. This takes a level of time and commitment other roofing companies simply can’t provide. At Summit Point Roofing, we hire first-class people, provide exceptional customer service, and honor your investment by doing outstanding work.
Preferred Roofing Services
(231) 709-5933 www.preferredroofingservices.com
3040 N Keystone Rd, Traverse City, Michigan
4.8 from 91 reviews
Preferred Roofing Services in Traverse City offers top-quality commercial and residential roofing solutions. With a commitment to excellence and durable materials, we ensure your roof withstands harsh Michigan weather. Our services include roof replacement, repair, inspections, and emergency services. Trust our licensed, insured team for a hassle-free experience.

F S Roofing & Construction
(231) 463-1821 www.fsroofingllc.com
4107 S Manor Wood Dr, Traverse City, Michigan
4.9 from 74 reviews
F S Roofing is a trusted roofing company based in Traverse City, MI, providing exceptional roofing services for residential roofing. F S Roofing is a family owned roofing company in Northern Michigan with over 25+ years of combined roofing experience. Our goal is to help make your roofing purchase experience go smoothly and to take care of our customers like family. With a commitment to delivering top-quality workmanship and customer satisfaction, F S Roofing has quickly become a trusted name in the roofing industry.
Landmark Exteriors
(231) 492-0637 www.landmarkexterior.com
2282 Cass Rd Suite B, Traverse City, Michigan
4.8 from 44 reviews
We're your trusted leader in the exterior renovation and construction industry, specializing in roofing and window solutions that enhance the beauty, durability, and energy efficiency of your property. With commitment to excellence, we offer a comprehensive range of services, including steel metal roofing, shingle roofing, and window installation. We take pride in delivering top-tier craftsmanship, superior materials, and unmatched customer satisfaction. Landmark Exteriors is your trusted partner for roofing and window solutions that combine style, durability, and energy efficiency. With a commitment to quality craftsmanship and customer satisfaction, we enhance the beauty and functionality of your property while providing lasting value.
Revive Exteriors
(866) 466-3351 revivemihome.com
1650 Barlow St Ste 1, Traverse City, Michigan
4.9 from 25 reviews
Revive Exteriors specializes in top-quality roofing, siding, window, and gutter solutions for residents of Northwest Lower Michigan. With a focus on craftsmanship, durability, and affordability, we are dedicated to enhancing the beauty and functionality of your home. Our experienced team ensures every project is completed with the highest standards of service, providing long-lasting results that you can trust. Revive Exteriors is here to deliver exceptional exterior solutions for your home.
Grand Traverse Roofing
(231) 392-4696 grandtraverseroofing.net
333 E State St ste d, Traverse City, Michigan
5.0 from 11 reviews
You can rest assured your roof is in good hands with our team of dedicated roofing specialists.
Big Top Roofing
(231) 668-3014 www.bigtoproofs.com
3039 Marmac Ave, Traverse City, Michigan
5.0 from 11 reviews
Big Top Roofing, Siding & Dumpster Rental is your trusted local expert for high-quality roofing, siding, and waste management solutions. We take pride in delivering top-notch craftsmanship, durable materials, and exceptional customer service. Whether you need a new roof, siding installation, or a convenient dumpster rental for your project, we’ve got you covered. Serving Traverse City areas, we ensure reliability, affordability, and efficiency in every job. Contact us today for a free estimate and experience the Big Top difference!

Herbert Roofing
(231) 465-3506 www.herbertroofing.com
201 E Seventeenth St Suite E, Traverse City, Michigan
5.0 from 6 reviews
Welcome to Herbert Roofing, the esteemed authorities in roofing excellence throughout Northern Michigan. With an outstanding track record spanning over three decades, we are the unquestionable leaders in the industry. If you're in search of top-tier roofing solutions, look no further! At Herbert Roofing, our highly skilled team, based in Traverse City, is equipped with the expertise and proficiency to cater to a diverse range of roofing services tailored to your specific needs. From a flawless residential roof installation or a prompt commercial repair or replacement, we've got you covered.

Complete Roofing & Repair
(231) 642-1161 completeroofingrepair.com
837 Robinwood Ct, Traverse City, Michigan
4.5 from 8 reviews
Complete Roofing and Repair is able to help with Commercial and Residential roofing needs.
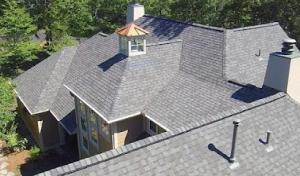
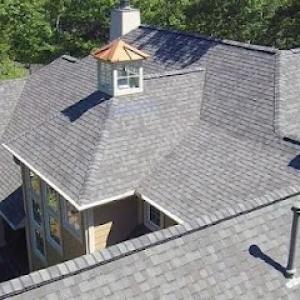
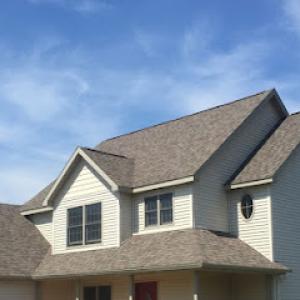
Snow, ice, and rapid freeze-thaw cycles shape every practical roofing choice in this area. When winter storms roll in from Lake Michigan, a roof that sheds snow reliably and resists ice damming is worth prioritizing. The region's short prime installation window also means picking materials that go on and perform well in a single season matters. The prevailing local pattern is clear: asphalt shingles and metal roofing dominate because they align with typical home layouts and seasonal needs more smoothly than heavier premium options.
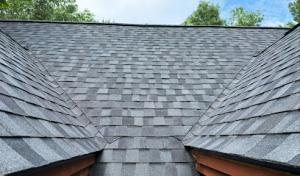
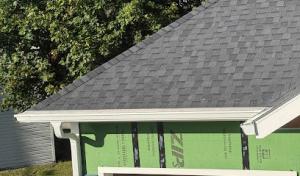
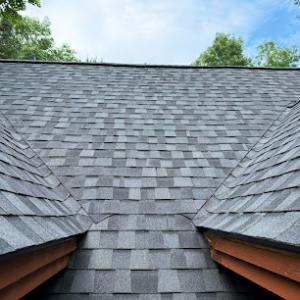
Asphalt shingles. In this climate, a standard asphalt shingle roof is a workhorse option. It installs quickly enough to fit the narrow spring-to-fall window and performs well with the annual freeze-thaw cycles when paired with a solid underlayment and proper attic ventilation. Look for shingles with a good ice dam resistance rating and a warranty that covers wind and moisture. An emphasis on a tight installation and accurate attic heat management helps keep gutter lines clear and reduces the risk of ice buildup along the eaves.
Metal roofing. Metal is a close second for Traverse City homes that see heavy snow and repeated freeze-thaw. It sheds snow more predictably than many other materials, which lowers the chance of large snow loads pressing heavily on any single point. A standing-seam profile tends to handle harsh winter winds and ice dam conditions well, provided the fasteners and seams are correctly installed. Metal also reduces the risk of ceramic or mineral granule loss in areas with frequent freeze-thaw cycles. When choosing metal, ensure the system is paired with a high-quality drip edge and underlayment designed for cold weather.
Wood shingles and shakes appear on some properties, but the northern Michigan environment demands close attention. Wood can be vulnerable to moisture intrusion and splitting when cycles of damp winters and rapid temperature swings occur. If choosing wood, expect extra maintenance: high-quality underlayment, solid ventilation, and an aggressive plan for keeping the roof dry and free of standing water after storms. In damp periods, wood can swell and crack, which invites leaks if not addressed promptly.
Clay tile and slate are available in the area, but their higher installed cost and heavier structural demands limit their use on standard residential re-roofs. In homes with existing framing designed for lighter loads, tile or slate can overburden the structure and complicate replacements during the short installation season. If these materials are in the plan, a structural assessment and targeted reinforcement are essential, along with a careful, staged installation approach to avoid winter downtime.
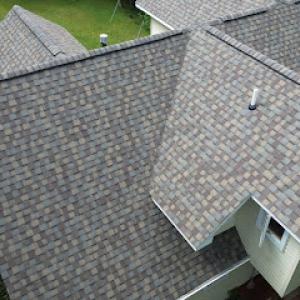
In practice, the best-fit choice hinges on how well the roof can shed snow, resist ice dams, and tolerate freeze-thaw cycles while fitting the home's existing structure and the practical installation window. Prioritize reliable underlayment, solid ventilation, and precise installation to ensure long-term performance through Michigan winters.
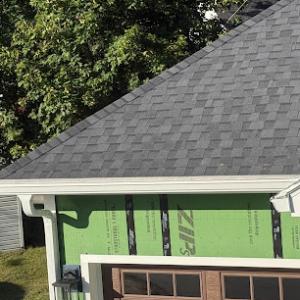
Most Traverse City roof replacements are scheduled from late spring through early fall to avoid snow, ice, and prolonged moisture exposure. The short prime installation season means crews aim to hit solid weather blocks where freezing conditions won't complicate tear-off, underlayment, and shingle set-up. If a project begins in late spring, you gain a full window of dry, consistent days; starting too late presses work into cooler, windier days that slow progress and raise risk of moisture infiltration.
Spring thaw brings mixed days-sun breaks, then rain, then sleet. That pattern can extend project timelines and increase the risk of exposed decking staying wet after tear-off. When shingle removal exposes deck surfaces, any unexpected rain or rapid cold snaps can lead to temporary sheltering needs and drives to reseal or dry out framing before new material is installed. Contractors here plan contingencies for delayed drying times and may stage work to avoid exposing finished sections to lingering moisture. If the forecast calls for back-to-back storms, you should expect pauses rather than rushing to finish during a thaw window that doesn't truly stabilize.
Homeowners who wait into late fall may face weather delays from wind and colder temperatures even before winter conditions fully set in. Cold, windy days can make fasteners harder to drive and shingles less forgiving, increasing the chance of installation mistakes or storm-related damage to exposed portions of the roof. Early fall tends to offer a narrower, more predictable rhythm: dry days, manageable temperatures, and fewer extended wet periods. Pushing a project toward late fall invites days lost to wind storms and deteriorating deck conditions, which compounds the risk of moisture intrusion during tear-off and early assembly.
In practice, a solid plan targets a sequence that minimizes exposure windows. Start with a weather-ready week where warm days and dry air are forecast, align supply delivery to begin with roof removal, sheathing check, underlayment, and shingle application in consecutive stages. Have a contingency buffer for a potential cold snap or a surprise rain event. Durable, well-timed coordination helps keep the project from stalling mid-progress and protects the structure from the unique freeze-thaw cycle that characterizes winters here.
Get a clear picture of your project costs upfront - no commitment required.
Northshore Exteriors
(231) 202-2260 www.northshoreexteriorsllc.com
3417 Cass Rd, Traverse City, Michigan
5.0 from 339 reviews
Big Top Roofing
(231) 668-3014 www.bigtoproofs.com
3039 Marmac Ave, Traverse City, Michigan
5.0 from 11 reviews
In this market, you'll feel the pinch of a short northern Michigan installation window. Spring thaw brings a narrow stretch where crews can reliably get on a roof, and fall storms compress scheduling and labor availability into the warmest months. That means price and timing often move together: quicker projects during peak window can push trade rates higher, and you'll want to plan a few weeks to align materials, weather, and crew availability.
Material choice across the standard options runs from asphalt shingles at roughly 350 to 550 USD per square to slate at 1200 to 2000 USD per square. Metal roofing is a frequent pick in this climate, with a typical range of 700 to 1100 USD per square. In practice, you'll see the most predictable budgets come from asphalt or metal in modest-to-mid pitched structures common in local neighborhoods. Steeper roof designs, which are common in snow country to shed ice and reduce thaw-related damage, tend to raise labor and staging costs compared with simpler low-pitch roofs. This is due to extra scaffolding, longer removal and installation times, and the need for additional worker safety measures when snow or ice is present.
In Traverse City winters, the combination of heavy lake-effect snow, repeated freeze-thaw cycles, and ice dam risk means selecting a system with solid underlayment, appropriate ventilation, and a roofing product that resists water intrusion at the eaves. Asphalt shingles provide an economical baseline, but if long-term performance and low maintenance are priorities, metal or synthetic options may offer better resistance to ice dams and wind uplift. Slate and clay tile deliver durability but require a substantial structure to support the weight and a longer, more complex installation window, which can drive up both cost and scheduling risk in the peak season.
Start with a realistic season plan: identify a 4-6 week window in late spring or early summer when weather is typically favorable, and then align it with supplier and crew availability. Get multiple written estimates that itemize underlayment, ventilation, ice and water shield, and flashing, so you can compare long-term performance against upfront cost. For steeper roofs, expect a higher per-square price due to extra staging and safety measures, and consider temporary protection during the shoulder months to guard against early snow or thaw cycles.
Don't let upfront costs delay a critical repair - these contractors offer payment plans to fit your budget.

F S Roofing & Construction
(231) 463-1821 www.fsroofingllc.com
4107 S Manor Wood Dr, Traverse City, Michigan
4.9 from 74 reviews

Landmark Exteriors
(231) 492-0637 www.landmarkexterior.com
2282 Cass Rd Suite B, Traverse City, Michigan
4.8 from 44 reviews
In this city's municipal jurisdiction, a full roof replacement typically requires a building permit. The permit process helps ensure that work respects Lake Michigan snow loads, repeated freeze-thaw cycles, and the short prime installation window between spring thaw and fall storms. If a project only replaces a limited area or performs repair work, verify with the Building Department whether a permit is still needed for that scope.
Permits are issued by the City of Traverse City Building Department, with plan review focused on code compliance and drainage considerations. Plans should show how the new roof will handle snow shedding, ice dam protection, attic ventilation, and gutter/drainage layout so meltwater flows away from walls and foundations. The review also checks fastener types, underlayment, and roof startup details that affect long-term performance under cold winters.
Inspections are commonly scheduled after tear-off and after completion, and re-inspection may be required if corrections are needed. Depending on the season, inspections can be impacted by winter weather, so coordinate with the inspector and your contractor to avoid delays during heavy snow periods. Prepare access routes, clear egress, and ensure that temporary safety measures are in place so inspections can occur even when lake-effect snow is ongoing.
To smooth the process, start conversations early with your contractor about the permit timeline, required documentation, and drainage planning. Have site plans ready that show roof venting, attic insulation, ice-damming prevention, and downspout extensions directed away from foundations. Finally, remember that obtaining the permit does more than satisfy a rule; it anchors the project in Traverse City's climate realities, helping your new roof survive dynamic winters and protect nearby structures. If your roof features complex dormers, multiple slopes, or unusual venting, the plan review may require additional detail about flashing continuity, snow guards, and precast eave overhangs. In practice, securing permits well before the spring thaw helps ensure the long windows of allowable work aren't squeezed by late-season storms. Ask for a written determination on drainage changes.
Michigan homeowners insurers typically cover wind and hail damage, but underwriting has tightened and deductibles have increased in some cases after major storms. In a place where lake breezes carry battering hail and the occasional derecho, that tightening can catch a homeowner off guard if a claim is filed after a rough season. Understanding that your insurer may scrutinize the cause and timeline of damage helps you navigate conversations with adjusters without overpromising on repairs that aren't clearly storm-related.
Traverse City homeowners should document roof condition with photos before and after storms because adjusters may require proof that damage was storm-related rather than long-term winter wear. Take dated pictures of shingles, flashing, vents, and any ice dam buildup along the eaves and gutters. Keep a simple log of dates when storms arrived, temperatures swung from above freezing to below, and any visible changes to the roof surface. When you file, attach a thorough photo record and note nearby weather events; this can clarify whether damage aligns with a specific storm event rather than a slow, cumulative decline from freeze-thaw cycles.
Claim timing and coverage details can vary by insurer under Michigan rules, making formal contractor estimates especially important when weather damage is disputed. Have a local contractor familiar with Traverse City winters provide a detailed estimate that connects observed damage to the storm events you tracked. This kind of documentation helps when an adjuster questions the severity or cause of issues such as ice dam-related leaks, shingle curls, or flashing failures. If a claim is delayed or denied, review the insurer's specific policy language and prepare professional estimates that corroborate the timing and scope of damage, rather than relying on impressions. In tight winters, it is prudent to address clear-need repairs promptly to reduce ice dam risk and secondary water intrusion while the weather window allows.
Skylight work appears repeatedly in the local contractor market, suggesting leak-prone roof penetrations are a common homeowner concern. In winter, freeze-thaw cycles can expose weaknesses at flashing transitions around chimneys and skylights faster than on uninterrupted roof planes. These details often become the first failure points during snow buildup and spring melt before the main field of roofing fails. Recognize that skylight frames and valley flashing sit at the intersection of two or more roof surfaces, so any minor imperfection can amplify every warm spell and freeze.
During a routine snowfall or after a thaw, look for small drips at the base of the chimney or around skylight perimeters inside the attic. On the exterior, check for hairline cracks in sealant where flashing meets shingles, and pay attention to any ridges or gaps where metal flashing appears to bow away from the roof deck. In attic spaces, note staining or damp insulation directly beneath these penetrations, especially after a big storm or rapid warm-up.
Regularly clean debris from skylight gutters and around chimney flashings to prevent ice dams from forming directly at the transition points. Sealant around skylight curb and chimney flashing should be inspected each fall and touched up if you notice small gaps or squeezed mastic. If you see recurring ice dam buildup at these penetrations, consider upgrading to a flashing kit designed for cold climates and ensure the sealant remains flexible through subzero cycles. In snow-heavy winters, proactive checks after each heavy snowfall help keep the vulnerable edges from chasing leaks into living spaces.
If moisture appears in the attic despite basic maintenance, or if flashing shows persistent movement or rust, a local roofer with storm-season experience should reflash or replace the troublesome area. Early intervention can prevent broader roof failure during the next melt and heavy snow events.
Find contractors experienced in skylight installation, flashing, and leak repairs to bring natural light into your home.
Northshore Exteriors
(231) 202-2260 www.northshoreexteriorsllc.com
3417 Cass Rd, Traverse City, Michigan
5.0 from 339 reviews
Loon Roofing & Construction
(231) 392-1512 www.loonroofingconstruction.com
515 S South Long Lake Rd, Traverse City, Michigan
5.0 from 49 reviews
One Way Exteriors Roofing Gutter & Windows
(231) 907-2882 onewayexteriors.com
2969 N Keystone Rd, Traverse City, Michigan
4.9 from 48 reviews