Last updated: Apr 19, 2026
Repeated winter snow accumulation followed by thaw-refreeze swings can trap water at eaves and around flashing details. When snow rests on the roof, heat flowing from the attic can melt it from the bottom up. As temperatures drop again, that melted water refreezes at the junctions, creating ridges and ice dams that force meltwater to back up under shingles and flashing. Those conditions are classic in this market and demand immediate attention to avoid leaks, compromised decking, and accelerated roof wear.
The cold-season roof problems in this area come more from persistent snow load, attic heat loss, and ice damming than from coastal storm exposure. You may notice attic warmth despite frigid nights, a sign that insulation or ventilation is letting heat escape into the attic space. That heat concentrates at the eaves and around vents and chimneys, fueling ice dam formation. When ice dams form, they dolor water into previously protected seams, flashing, and ledger areas, which can lead to interior damage and costly repairs.
Watch for ice buildup along eaves, curled or lifted shingles, and granule loss near the lower roof edge. Spotted water stains on ceilings or walls in upper rooms after a thaw are a red flag. If gutters are unusually heavy with ice or if you see daylight through the roof boards in the attic, that indicates compromised integrity. Do not ignore a persistent drip from attic penetrations during or after a thaw cycle-small leaks today become large, structural problems tomorrow.
Clear the roof edges where safe to remove loose snow, but avoid risky climbs on icy surfaces. Improve attic ventilation by ensuring soffits are unobstructed and a steady flow of air reaches the roof deck. Add or upgrade insulation in the attic to reduce heat transfer to the roof line; even modest improvements can dramatically reduce melt-refreeze cycles. Install heat cable along critical sections of the roof edge if you have a history of ice dam issues, following manufacturer instructions and ensuring proper installation around vents and skylights. Seal gaps around penetrations and around the chimney to minimize warm air leaks into the attic. For flashing details, keep a close eye on metal seams-let a pro reseal or replace compromised flashing promptly before water finds its way into the home.
If repeated winters produce ongoing ice damming, frozen gutters, or visible seepage after every thaw, a more comprehensive approach is warranted. A long-term fix often involves upgrading insulation, sealing air leaks, and addressing roof ventilation along with a targeted roof surface improvement that reduces snow retention in problem areas. In Mount Pleasant, scheduling such work for late spring through early fall aligns with the practical realities of tear-off, deck drying, and sealing-winter conditions make these tasks risky and slow. Don't wait for the next freeze-thaw cycle to expose vulnerabilities; plan ahead to protect the home's interior and the roof structure.
Mount Pleasant sits in central Michigan where roofs must endure both prolonged winter cold and warm, humid summers in the same annual cycle. That combination makes the aging pattern of shingles and underlayment less about salt-air wear or hurricane uplift and more about repeated freeze-thaw movement. Each cycle pushes edges of shingles up and down, opening micro-cracks and loosening granules. Over several winters, those micro-damages accumulate, creating uneven wear across sections of the roof. The result is a roof that looks fine from the ground but reveals compromised lifting, spalling, or curling when inspected up close.
In this climate, snow piles up and then refreezes along the eaves as temperatures swing. When attic ventilation is insufficient or insulation is spotty, meltwater will back up behind ice dams and seep under shingles. The effect concentrates at the lower slopes first, but it can creep toward mid-roof areas if heat loss is uneven. Ice damming accelerates underlayment wear, which in turn accelerates moisture intrusion into sheathing. Over several winters, repeated moisture intrusion and subsequent drying cycles can warp boards, rot decking, and shorten the life of roof systems more quickly than you might expect.
Unlike roofs in areas with relentless year-round storms, this market experiences a distinct winter-to-spring reset followed by a warm humid peak. During the cold stretch, freeze-thaw cycles stress shingles' surface and underlayment seams. When temperatures rise in late spring and summer, expansion and contraction intensify, especially at penetrations and transitions. That back-and-forth encourages fasteners to loosen and sealants to crack. The cumulative effect is not sudden collapse, but a gradual, location-specific aging pattern where flashings around vents, chimneys, and skylights degrade differently than the mid-roof field.
Certain roof products tolerate freeze-thaw better, but no material is invincible to Mount Pleasant's cycle. Asphalt shingles with thicker, polymer-modified layers resist corner-cracking for a season or two longer but still show granule loss under repeated freeze-thaw. Metal roofs shed snow more predictably and resist ice damming at edges, yet panels can suffer from thermal expansion gaps if fasteners are not properly installed. Synthetic shingles often offer better dimensional stability, while concrete or clay tiles behave differently on slopes and can be heavier, affecting installation and edge detail durability. The local wear pattern often rewards systems that balance flexibility with robust underlayment.
Homeowners commonly notice that aging reveals itself first at eaves and valleys where ice damming concentrates moisture. Prioritize a roof system that addresses both exterior and interior heat flow. Ensure attic insulation is continuous without gaps, and that soffit and ridge vents create a balanced ventilation path for year-round humidity control. When evaluating replacement or repair, focus on the condition of underlayment and flashings, not just visible shingles. A roof that ages well here anticipates mid-winter stress by integrating sealed transitions, reinforced edge protection, and a durable, well-sealed deck. Regular inspections after significant thaws and at the end of winter can catch creeping damage before it accelerates.
Asphalt shingles stay the backbone of most homes around here. They handle Mid-Michigan winter swings with a straightforward installation, and they're widely available in a range of profiles. In this climate, consider shingles with those laminated or architectured layers for added wind resistance and greater edge stability, since freeze-thaw cycles tend to target edges and penetrations first. Heat and humidity in the summer can accelerate aging, so choose a product with a robust asphalt blend and a reputable granule warranty. When evaluating a roof, pay attention to the edge detailing, valleys, and around anything that penetrates the deck, like vents and chimneys. These are the spots where aging tends to accelerate after a cold snap followed by a warm spell.
Metal can be a smart choice for Mount Pleasant because snow tends to shed more readily, reducing the weight load and load-bearing risk on the roof structure. The practical benefit is less ice buildup along eaves, which means fewer opportunities for ice damming. The key is to plan for snow movement in a way that respects entryways, stairwells, and overhangs. Pay particular attention to the snow paths over entries and the lower sections of the roof; installations should include snow guards or similar devices where heavy snowfall is common. Valleys need clean transitions to prevent ice dam pockets, and fastener patterns must be chosen to withstand winter temperature swings without panels lifting. A standing seam profile often offers the best performance in this area, but a properly installed exposed-fastener system can also work if careful detailing is used at penetrations and transitions.
Clay and concrete tile are available, but their weight requires structural confirmation before installation, and their performance in freeze-thaw cycles needs attention. The risk of cracking increases if shingles move or if ice forms within the troughs and freezes behind the tile color or underlayment. In this market, clay and concrete tiles are less typical for many Mid-Michigan homes compared to asphalt or metal, mainly due to the heavier roof loads and the potential for freeze-related cracks around hips, ridges, and penetrations. If considering tiles, ensure the structure is rated for the weight, and discuss freeze-thaw resilience with the installer so joints and fasteners are designed to accommodate expansion and contraction.
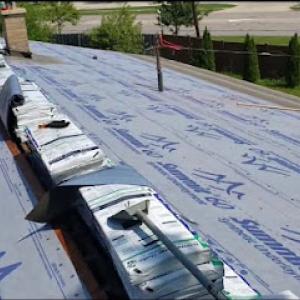
Edges and penetrations consistently show the worst wear in Mount Pleasant winters. Ensure proper underlayment with adequate ventilation and drainage to minimize standing water near eaves and in valleys. Ice dam protection at eaves, proper drip edges, and sealed flashing around chimneys, vents, and skylights are essential. Where overhangs exist, ensure the roof deck is solid, and fasteners are corrosion-resistant to withstand winter moisture. For any material choice, the installation details around edges, valleys, and terminations matter as much as the material itself.
A winter-ready roof in this area benefits from a proactive maintenance mindset. Keep gutters clear of leaves and debris to promote steady drainage during freeze-thaw cycles. After heavy snows, inspect for loose panels or shingles that could be loosened by wind or temperature shifts. A periodic check of sealant around penetrations and flashing helps prevent moisture intrusion as temperatures swing from above freezing to subzero and back again. A locally trusted roofer should assess the roof after the first major thaw of spring to catch any early signs of edge deterioration or ice dam indicators.
Chad Moody Building & Remodeling
(989) 573-0881 www.chadmoodybuilding.com
Serving
4.6 from 24 reviews
Chad Moody Building and Remodeling is a remodeling, building, and roofing company located in Midland, Michigan. We offer a variety of services to meet all of your home-improvement expectations. We have many options of quality products for your kitchen, addition, and roofing needs. We offer competitive pricing of high-grade shingles for new roof and replacements. We seek to exceed your every expectation and need!
Eagleview Exteriors
(989) 330-8361 eagleviewexteriors.net
Serving
5.0 from 2 reviews
Roofing, Siding, and Gutter Contractor covering the greater central Michigan area. We are based in Mount Pleasant, Mi, and we service all surrounding areas. i.e. Lansing, Big Rapids, Midland, Saginaw, Bay City, Clare, Houghton Lake, Traverse City. Offering top of the line products and installation at a great price!
Innovative Exteriors
(989) 484-9877 innovativeexteriorsmi.com
Serving
4.6 from 9 reviews
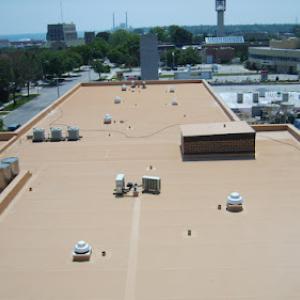
Innovative Exteriors, Inc. is a premier flat roofing contractor in Midland, Michigan, with over two decades of expertise in high-quality Duro-Last® roofing systems. They offer services across Mid-Michigan and surrounding areas, specializing in installation, repair, and maintenance for both residential and commercial properties. Their commitment to excellence includes offering durable, energy-efficient roofing options with fewer seams and leaks, backed by industry-leading warranties. Innovative Exteriors prides itself on its dedication to customer satisfaction, ensuring quality service and support throughout the lifecycle of each project.
Midland Roofers MI
(989) 600-5703 www.midlandroofersmi.com
Serving
4.4 from 7 reviews
"Roofing Experts in Michigan With 38 years of experience, Midland Roofers is your trusted partner for all your roofing needs in Michigan. Whether you need a new roof, re-roofing, repairs, or maintenance, our team delivers top-notch craftsmanship and personalized service. Also being a licensed builder, can take the worry and stress off from you. We specialize in re-roofs, additions, and remodels, ensuring that your roofing project is completed to the highest standards. Contact us today for a free estimate and let us protect your home with quality roofing solutions."

A&M Metal Roofing
Serving
3.0 from 2 reviews
Looking for a durable and aesthetically pleasing roofing solution? Our company offers expert installation of high-quality metal roofs. With years of experience, we ensure precise craftsmanship and a long-lasting finish for your home. We are dedicated to providing professional service and customer satisfaction. Trust us to protect your property with a superior metal roofing system.
In Mount Pleasant, autumn wind and hail events can damage roofs just before winter, making fast documentation especially important before snow obscures evidence. A quick walk around the gutters, edges, and vent flashings after a storm can reveal loose granules, lifted shingles, or dented metal. Take clear photos from multiple angles, including close-ups of any lifted tabs, granule loss, or damaged flashing. Keep a dated log of the storm, wind speeds if available, and notable symptoms like accelerated shingle curling or damp spots on ceilings once winter sets in. Delays can blur the picture for a claim, and winter weather can hide what you need to prove later on.
Michigan insurers commonly expect photo documentation, adjuster review, and contractor or independent roof reports for wind and hail claims affecting homes in this area. A well-lit sequence of photos that shows the entire roof, as well as any interior signs of damage such as attic condensation or staining, helps the adjuster assess impact. A professional roof report from a trusted local contractor can corroborate observable damage and help interpret whether issues stem from a recent event or aging materials. When arranging documentation, prioritize a written summary that links specific storm characteristics-wind direction, duration, hail size-to observed roof conditions. Timely submission, with a clear chain of evidence, reduces ambiguity and the risk of coverage denial due to gaps in documentation.
Local claim outcomes can be influenced by roof age and material type, with older roofs facing more scrutiny even when coverage remains broadly available. Metal roofs and certain shingles may reveal hail impact differently than composite or clay, potentially affecting repair versus replacement recommendations. Be prepared for an adjuster to request material samples or a roof replacement estimate if damage is widespread or if aging components heighten the risk of future leaks. The goal is to establish a defensible link between the observed condition and the triggering event, while acknowledging legacy wear that could complicate the claim.
Typical Mount Pleasant material pricing runs about $350-$700 per square for asphalt shingles, $600-$1400 for metal, $1000-$2800 for clay tile, $900-$2400 for concrete tile, $550-$1000 for wood shingles or shakes, and $450-$900 for synthetic or composite shingles. Those figures reflect a town with mixed aging roofs and a steady demand for replacements after winter wear. When budgeting, use this as a baseline and adjust for roof complexity, as steep pitches or multiple layers add up quickly.
Costs in Mount Pleasant can rise when winter damage creates a short seasonal rush for late-spring and summer scheduling, compressing labor availability during the preferred installation window. Ice damming and freeze-thaw cycles can drive longer project timelines, especially if extra repairs are found once old roofing is stripped. If a crew has to extend a project due to moisture intrusion or decking issues, expect additional material and labor charges to appear on the final invoice.
Steeper residential rooflines, tear-off of multiple aging layers, and decking repairs after ice-dam moisture intrusion can all push local project totals upward. Clay or concrete tiles, while offering durability, carry heavier installation demands and higher disposal fees, making those options more sensitive to regional winter damage patterns. Synthetic or composite shingles can provide a mid-range alternative that balances performance with cost, particularly in areas predisposed to freeze-thaw cycling.
A practical approach is to plan replacement for late spring or early summer when weather is typically favorable and crews can keep to a steady pace before the next winter. If a late-season window becomes tight due to winter-related backlogs, you may see incremental increases in both material and labor costs. When possible, obtain multiple written estimates that itemize tear-off, disposal, underlayment, flashing, and any decking repairs, so you can compare apples to apples and anticipate any unexpected shingle or sheathing needs.
For a full roof replacement, expect to go through the local building department rather than a no-paperwork process. The permit path is standard practice in this area, and the department keeps close track of project activity to ensure the work meets local codes and climate realities, including freeze-thaw cycles and snow load considerations.
Contractors generally submit project details and material specifications to the Mount Pleasant building department before any replacement work proceeds. This submission typically includes roof type, underlayment, fasteners, and flashing details, along with a timeline. In winter, a clear schedule and weather contingency plan help avoid delays once colder temperatures arrive.
Inspections are usually performed during installation and after the roof is in place. A common focus is flashing around penetrations, valleys, vents, and chimneys, as well as proper alignment and fastening of underlayment. The inspector will verify that components match the approved plan and that installation practices align with local wind, snow, and ice dam considerations that are particular to the area.
A final inspection is required to close the permit. This final review confirms that the completed roof aligns with the approved specifications, passes safety checks, and addresses potential freeze-thaw vulnerabilities. If any deficiencies are found, follow-up inspections or corrected work will be scheduled, so keep the contractor's documentation and any warranty information organized to support a smooth closeout.
In Mount Pleasant, common trouble spots include eaves vulnerable to ice damming, flashing transitions that open during freeze-thaw movement, and areas where spring moisture lingers after snowmelt. Ice dams form when heat escaping from the attic melts snow at the eave, refreezing along the edge and backing water under shingles. If gutters are clogged or soffits allow heat escape, the resulting leaks can travel well inland, damaging ceilings and insulation. Inspect eaves each late winter and early spring; treat any ice buildup promptly and consider upgrading insulation or vents to slow future melt.
Where two roof planes meet, or where a chimney, vent, or skylight sits, flashing takes the brunt of freeze-thaw cycles. In winter, shifting snow and ice push on these joints, widening gaps and letting water sneak through. When summer heat returns, shingles expand and contract; previously minor gaps become channels for water intrusion. Pay special attention to valley flashings and step flashing along walls; tuck-point damaged sealants and reseal when you see dark staining or damp plywood.
After snowmelt, areas that held moisture don't dry quickly. Soffit vents and underlayment can stay damp, inviting mildew or rot. In this region the soil moisture and cooler nights slow evaporation, so leaks may appear well into late spring. A linchpin is ensuring proper underlayment integrity and a continuous drip edge that directs water away; even small breaches can become family-wide headaches.
Autumn's arrival brings stronger winds and gusts. If a roof already carries wind or hail damage, those issues can worsen quickly once snow and freeze cycles begin. Damaged shingles or loose flashing act like open invitations to meltwater intrusion. By late autumn, granule loss on asphalt or lifted edges that catch ice makes winter leaks more likely. A clear path to prevention is addressing visible damage now: reseal step and valley flashing, replace missing shingles, and restore vented soffits so the attic stays cooler and drier during cold snaps.