Last updated: Apr 19, 2026
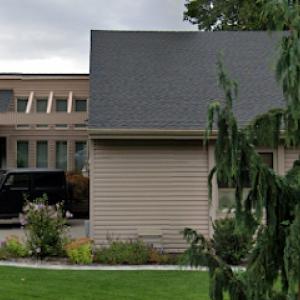
In the dry Columbia Basin, roofs face far less annual moisture than western Washington, but UV exposure and summer heat are relentless. That combination accelerates wear on asphalt and synthetic shingles, and it stresses underlayment and flashing during temperature swings. When you plan maintenance or a replacement, think through how a roof in this climate endures long, hot days followed by cold, freezing nights. The goal is to minimize expansion and contraction cycles that lead to premature aging.
Hot, dry summers push shingles to expand, dry out sealants, and bake nails and fasteners. Come winter, that same roof contracts as temperatures drop, which can stress penetrations, joints, and the underlayment. The repeated cycle-sun, heat, then freeze-acts like a slow roast-and-shock test for everyday roofing materials. Asphalt and synthetic options are particularly sensitive to this pattern, so choosing materials with robust heat resistance and flexible, UV-stable components pays off in longer life. If you have a metal roof, note that while metal handles heat well, it can still suffer from thermal movement at fasteners and joints if not properly insulated and sealed.
In a home with a typical Richland roof, start annual checks just after the hot season ends. Look for lifted edges, cupping, or granule loss on asphalt or synthetic shingles-the telltale signs that heat exposure has begun to compromise the surface. Inspect flashing around chimneys, vents, and skylights for hairline cracks or loose sealant that could admit moisture during occasional spring storms. In winter, check for ice dams if any insulation gaps exist in the attic; cold spells can force meltwater to back up under the shingles, creating hidden leaks. For those with clay or concrete tiles, watch for hairline cracks that can propagate with freeze-thaw cycles; even small cracks can become leaks after a few seasons of stress. A loose or wobbly ridge cap often points to wind-driven spring storms that need attention before the next season.
Spring and fall provide the best windows for replacement in this climate because winter snow and freeze conditions can limit access and scheduling, while peak summer heat can complicate installation. Favor cooler, drier days for tear-offs and new installs to minimize heat exposure for adhesives, sealants, and underlayment. If replacing asphalt or synthetic shingles, ensure the installation plan accounts for adequate attic ventilation and a high-quality underlayment that remains flexible in low temperatures. For metal roofs, confirm that fasteners and roof penetrations are properly sealed and that the panel seams are backed by an appropriate coating that resists UV degradation. Tile roofs (clay or concrete) demand precise setting and an appropriate substrate to manage weight and movement through seasonal temperature shifts. Work with a contractor who understands how Richland's wind patterns and sun exposure can stress ridge lines and penetrations.
A roof's life in this climate is not just about the shingles. Attic insulation and ventilation determine how much heat reaches the roof deck and how much meltwater can linger during occasional spring thaws. An adequately insulated attic reduces heat buildup, slowing the aging of underlayment and sealants. If you have a tendency toward hot attic spaces, consider upgrading insulation and adding ridge vents or soffit systems to balance airflow. A well-ventilated attic reduces the likelihood of heat-induced deck warping and helps maintain the integrity of roof penetrations during winter freezes.
Develop a seasonal routine that targets Richland's unique stressors. In early spring, inspect for heat-induced cupping or lifted shingles and reseal flashing as needed before the next round of spring storms. In late summer, perform a quick exterior check after the hottest days to catch any early signs of UV deterioration or granule loss. After heavy spring winds, walk the roof only if safe, and look for displaced shingles or damaged vents. Keep an eye on trees overhanging the roof; a wind-blown branch can cause impact damage that becomes a vulnerability during freeze-thaw cycles. Maintain regular gutter cleaning to prevent ice dams and ensure proper drainage during the shoulder seasons. By aligning maintenance with the heat-freeze cycle, the roof remains resilient against the Tri-Cities' distinctive climate.
In this area, hail, wind, and storm-related roof damage drive insurance claims more than you might expect. Post-storm documentation is essential for a strong claim in this Tri-Cities climate. Photos of dents, granule loss, lifted edges, and compromised flashing create a clear record of what happened and when. If you use wind or hail as the trigger for a claim, you must show the sequence: storm event, resulting roof issues, and any subsequent leaks or interior staining. A dated log helps ensure your claim isn't disputed later.
Spring winds paired with periodic rain can reveal flashing weaknesses you didn't notice during the drier months. Even when the sky dries out, wind-driven spray can lift edges of shingles or rip sealant from valleys and vents. A handful of hours of rain during a windy stretch can create active leaks that seem to come and go, making it tempting to dismiss them. Do not. Document if water enters the attic or ceiling after a spring shower, and check the attic for signs of condensation or moisture near penetrations. These details guide whether flashing needs resealing, replacement, or a more thorough flashing retrofit before the next dry season.
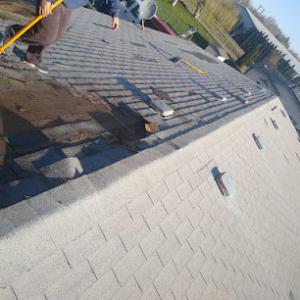
Occasional hail events can leave impact damage that's easy to miss on some materials. The resulting dents, fractures, or granule loss may not be immediately visible from ground level or on a quick walk-around. This affects inspection timing and claim support because some damage only becomes obvious after a few days of sun or after a subsequent rain test. If hail activity has occurred, plan an in-depth roof inspection within days, focusing on edge curl, fastener shifts, and the condition of softer or composite overlays. A careful hand-scan of shingles, metal panels, and any decorative features yields information you'll rely on when filing or negotiating a claim.
Time is critical after a storm. Begin documentation within 24-48 hours if safe access is available. Use a ladder with a spotter, take wide-angle exterior shots, and zoom in on suspected impact points and flashing seams. Inside the attic, photograph any dark stains, moisture, or mold growth that aligns with roof penetrations. Keep a storm-date log alongside each photo set and note any interior symptoms-like peeling paint or warped trim-that correlate with outdoor conditions. This targeted evidence strengthens your claim and supports prompt, accurate repairs.
Capture storm footage and stills from multiple angles, focusing on edges, vents, valleys, and flashings. Create a simple, dated file for each roof area, labeling potential damage and its location. After a storm, schedule a professional roof inspection if any leaks emerge or if visible damage persists for more than a day. If a claim seems warranted, assemble your evidence promptly and organize it by event date, damage type, and affected roof sections to streamline the process.
Find local contractors experienced in assessing and restoring roofs after hail, wind, and severe weather events.
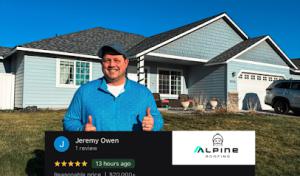
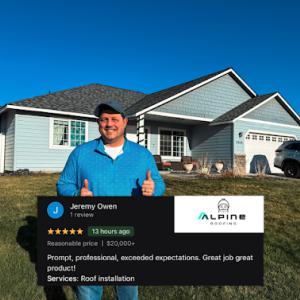
Alpine Roofing
(509) 870-3388 alpineroofingpro.com
2016 Logston Blvd, Richland, Washington
4.9 from 254 reviews

Black Diamond Roofing
(509) 943-7663 www.bdrcinc.com
2418 Garlick Blvd, Richland, Washington
4.9 from 265 reviews
Alpine Roofing
(509) 870-3388 alpineroofingpro.com
2016 Logston Blvd, Richland, Washington
4.9 from 254 reviews
Alpine Roofing is your trusted roofing expert, proudly serving Eastern Washington, Northern Idaho, and surrounding areas. As a CertainTeed Select ShingleMaster and Carlisle-certified contractor, we deliver premium roofing solutions tailored to your needs. Offering 0% interest and no-payment-due financing, we make quality roofing affordable. Voted the #1 roofer in the Northwest, we specialize in asphalt shingles and flat roofing systems with exceptional craftsmanship. Serving Spokane, Coeur d’Alene, Kennewick, Walla Walla, Yakima, and beyond, Alpine Roofing ensures quality and customer satisfaction. Contact us today!

Eminent Roofing
(509) 537-4537 eminentroofing.com
1339 Tapteal Dr #110, Richland, Washington
5.0 from 109 reviews
Master Elite Certified Contractor for GAF, Certified for James Hardie Siding Products, giving you options. Focusing on residential and new construction roofing and siding in the Tri-Cities and surrounding areas. Bringing you positive quality at an affordable price. We pride ourselves in accomplishing exactly what we say. Call now for your no obligation quote!
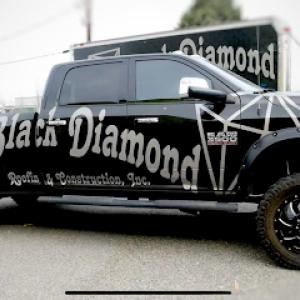
Black Diamond Roofing
(509) 943-7663 www.bdrcinc.com
2418 Garlick Blvd, Richland, Washington
4.9 from 265 reviews
Black Diamond Roofing & Construction, Inc. is home to the top roofing contractor in the Richland, WA area. Since 2003, we’ve helped thousands of residential and commercial building owners with their roofing needs. Whether you need help with a quick fix or a full roof replacement, you can depend on us to do the job right. Live outside of the Tri-Cities (Richland, Pasco, Kennewick)? No problem-we offer service up to 250 miles outside of the greater Richland area. Call us now at (509) 943-7663 now to speak with a roofer you can trust. We also do siding and solar tubes/sun tunnels! Certified by GAF, Malarkey, Owens Corning, and Brava. #ShineBrightBuiltRight
Crystal's Roofing
(509) 792-9141 www.crystalsroofingllc.com
92 Ridgecliff Dr, Richland, Washington
5.0 from 12 reviews
Crystal's Roofing was founded many years ago under the values of professionalism, diligence, and integrity in the city of Richland, WA. Our team is locally known for its professionalism and cost-effectiveness. Our company grew from ground up thanks to the referrals from our clients. Our clients don’t hesitate to recommend us to their families, friends, and co-workers because they know what we deliver; an exceptional service with high-quality finishes and great customer service. Here in Crystal’s Roofing we have a free estimate company policy, so feel free to contact our customer service number to ask for a free estimate for your upcoming project; you can also schedule an on-site visit. New Roof or Repair Services? It doesn’t matter,
Call The Roofer
(509) 727-3373 calltheroofer.net
326 Wenas Ct, Richland, Washington
5.0 from 9 reviews
Call The Roofer is a locally owned and operated roofing company proudly serving homeowners and businesses throughout the Tri-Cities area, including Kennewick, Richland, and Pasco, Washington. Our team specializes in high-quality roof installations, repairs, and replacements designed to protect your home, enhance curb appeal, and deliver lasting value. We believe every property deserves a roof built with craftsmanship, care, and honesty — and that’s exactly what we provide. From small leak repairs to complete roof replacements, our roofing professionals handle every project with precision and pride. We work with the most durable materials on the market — including asphalt shingles, metal roofing, and flat roofing systems.
A&A Roofing Services
Serving
5.0 from 291 reviews
A&A Roofing Services in Kennewick, WA provides expert roof replacements and professional roofing solutions for homes and businesses across the Tri-Cities. Our skilled contractors handle tear-offs, re-roofs, and new installations designed to withstand Eastern Washington’s unique challenges, including high winds, heavy rain, and extreme temperature swings. We also repair leaks, replace aging shingles, and restore storm-damaged roofs to keep properties safe and looking their best. Known for reliable service and quality workmanship, we take pride in protecting local homes year-round. A&A Roofing Services is licensed, insured, and trusted in Kennewick as experienced roofing contractors committed to excellence.
Northwest Roofing & Exteriors
(509) 919-2955 northwestroofingandexteriorsllc.com
Serving
5.0 from 22 reviews
At Northwest Roofing & Exteriors we provide quality you can count on. With over 20 years experience we pride ourselves on making sure our customers are happy. Our services include repairs, siding, shingle, metal work, and TPO for both residential and commercial properties. We are proud to offer competitive prices and financing solutions to help any budget. Let us give you a free quote. We would love to earn your business. Please visit our Facebook page for more information.
Perfect Circle Construction
(509) 735-1178 perfectcircleinc.com
Serving
5.0 from 15 reviews
Perfect Circle Construction is a top-rated roofing contractor based in Kennewick, WA, serving Richland, Pasco, and the Tri-Cities area for 40 years. We specialize in residential and commercial roofing, including roof replacement, roof repair, and storm damage restoration. We’re also experts in skylight installation and sun tunnels, helping homeowners bring natural light into their spaces. As GAF-certified roofers, we install energy-efficient, long-lasting roofing systems backed by industry-leading warranties. Our family-owned, licensed, and insured company is known for trusted service, quality workmanship, and roofing solutions built for the Tri-Cities. Request a free estimate on our website.
Timberline Construction & Roofing
(509) 539-9277 timberlineconstructionroofing.com
Serving
4.6 from 11 reviews
Timberline Construction & Roofing is committed to excellence in every aspect of our business. We uphold a standard of integrity bound by fairness, honesty and responsibility in all of our jobs. We are a locally owned and operated business with more than 25 years of experience operating out of Tri-Cities, serving all of Washington State, NW Idaho and surrounding areas. There is no job too big, or too small for our team. Call today and let us put our residential and commercial construction experience to work for you!

A+ Roofing
(509) 948-7775 www.aplus-roofingspecialist.com
Serving
4.7 from 56 reviews
We are family owed local roofers for 30 years of experience. OUR NAME SAYS ALL. " The best of the best" great job. Great reasonable estimate with higher quality roofing materials and a good warranty craftsmanship contract.
Pantoja's Construction
Serving
5.0 from 54 reviews
Family owned business located in Tri-Cities, Washington. Serving the surrounding areas of Tri-Cities, Idaho and Oregon State. We provide quality work and competitive prices whether is Commercial or Residential. New Roof, Re-Roof, and Siding. 17+ Years of Experience
Columbia Roofing
(509) 412-1799 columbiaroofinginc.com
Serving
5.0 from 70 reviews
🛡️ Shielding Your Home with Unmatched Expertise 🏠 Choose Us for a Roof That Lasts! Columbia Roofing INC is a leading roofing company, committed to providing top-quality roofing services and solutions 🏗️. 🛠️ We are proud to have a team of highly skilled, experienced, and dedicated professionals, who strive to deliver excellence in every project we undertake. 📧 Email: columbia.roofing@hotmail.com
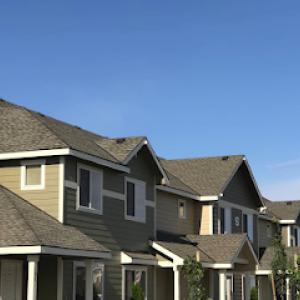
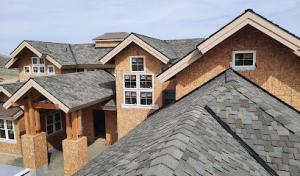
In this area, the dominant replacement market spans asphalt shingles, metal, clay tile, concrete tile, synthetic/composite shingles, and slate. The cost differences between lightweight systems and heavier ones are noticeable in both material price and installation complexity. Asphalt shingles sit at the low to mid end of the spectrum, while concrete and clay tiles push into higher price tiers. Metal roofs tend to fall in the mid-to-upper range but offer longer life and better performance in sun-heavy summers and freeze-prone winters. Synthetic or composite shingles sit between asphalt and the lighter tile options, providing a compromise of weight, durability, and cost. Heavy systems, such as clay tile, concrete tile, and slate, not only cost more per square but often require a stronger roof deck and sometimes additional framing. This can add hours on the crane or scaffold and drive up labor charges, especially if decking needs repair or reinforcement.
Where Richland's climate imposes more stress, the roof structure matters more during replacement. Heavy materials require a careful assessment of decking condition, joist spans, and overall load capacity. If the existing structure shows wear, you may face decking repairs or reinforcement before or during the tile or slate install. Lightweight options-like asphalt, metal, or synthetic shingles-tend to go in more quickly and with less prep, but you still want a solid deck to maximize the new roof's life in extreme sun and winter cycles. Budget for potential substructure work if the plan calls for heavier systems, and discuss a deck inspection with your roofer before ordering materials.
Storm-driven demand spikes in the Tri-Cities can affect scheduling and pricing after wind or hail events, especially for fast-turn re-roofing work. If a major wind or hail event hits, expect a tighter window for material availability and a rush on crews, which can raise both material and labor costs. Planning ahead and keeping a predictable replacement window can help avoid premium surge pricing. If you're balancing a replacement around summer heat and winter freezes, you'll find asphalt or metal often fit the quickest timelines, while tiles or slate may require more planning and longer lead times due to heavier handling and specialty installation crews.
Asphalt Shingles: 350-700 USD per square. Metal Roofing: 700-1400 USD per square. Clay Tile: 1000-2100 USD per square. Concrete Tile: 900-1800 USD per square. Synthetic/Composite Shingles: 500-1000 USD per square. Slate: 1500-3500 USD per square. Heavy systems often translate to higher upfront costs and potentially more labor if decking or framing needs attention. If replacement happens after a major storm, expect scheduling delays and potential price adjustments, but timely planning can help keep projects on track.
In this climate, a full roof replacement isn't just about swapping shingles. Most full roof replacements in Richland require a permit through the City of Richland Building Department. A permit sets the project within a framework that ensures the work addresses not only the visible surface but also the structural and moisture-management details that matter in the Columbia Basin's hot, arid summers and frost-prone winters. If the contractor starts without a permit, you risk having the work halted, penalties, or a difficult path to compliance later. A permit also helps protect your property value by documenting that the roof was installed to current standards, an important consideration when seasons swing and hail or wind work their way into the forecast.
City inspections in Richland typically verify decking, underlayment, ventilation, and flashing during and after installation rather than treating the roof as a simple tear-off-and-replace job. Decking integrity ensures the roof has a solid, dry foundation even after winter cycles and heat stress. Underlayment and ventilation are checked to confirm the attic and roof cavity stay dry during long, hot days and cold snaps, which is crucial in preventing ice dams and heat-related conditioning issues. Flashing around chimneys, vents, and transitions is evaluated to deter leaks that can begin as small drips but cause big problems as seasons shift. Expect several touchpoints with the inspector, not a single, cursory pass.
Final approval from the City of Richland is required before the roofing project is closed out. This is not a mere formality; it signals that the work has been reviewed for code compliance and that drainage, ventilation, and moisture control have been accounted for in the finished roof system. If the permit card isn't closed properly, you may face future trouble selling the home or refi processes, and you could encounter compliance notices that interrupt use of the space above your living area. Plan for a clear path to closeout-engage a contractor who tracks permit status and coordinates with the Building Department to ensure the inspection sequence is completed in a timely, documented manner.
Ask for the permit number and verify it with the Building Department before work begins. Schedule inspections as the project milestones dictate, especially after decking and underlayment installation and again after flashing work. Keep the inspector informed about any changes in materials or roof geometry, since deviations can require rechecking. Maintain organized records of all permits, inspection reports, and contractor communications so that final approval proceeds smoothly and your roof replacement can endure the Basin's varied climate across seasons.
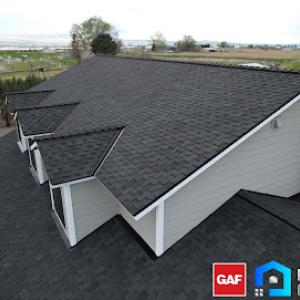
Asphalt shingles remain common, and many local roofs still rely on them because the installation is straightforward and repairs are readily available. In this hot-dry climate, the intense summer sun can accelerate granule loss and surface aging compared with cooler, cloudier parts of Washington. Look for shingles with higher asphalt albedo or reflective granules to help cut heat buildup on the attic. A cool roof upgrade can extend the life of an asphalt system in Richland's sun and reduce cooling loads, but expect more rapid aging if the attic isn't well insulated or vented. If you choose asphalt, consider thicker formulations or higher quality granule blends and plan for proactive maintenance-especially after hot summers or hail-damaged years.
Metal is a practical fit in this dry climate because it handles heat well and sheds snow efficiently, which matters in the shoulder seasons. In windy springs, the main challenge is detailing: ensure ridge caps, fasteners, and flashing are corrosion-resistant and properly sealed to counter wind-driven rain and dust. Pay attention to panel overlap and the underlayment system, since improper installation in windy conditions can create leaks at seams. Metal's long life suits Richland's cycles of sun, freeze-thaw, and occasional hail, but your roof's edges, valleys, and penetrations deserve meticulous, weather-ready sealing. If you expect high heat and heavy sun, a reflective coating or lighter color can boost energy performance without sacrificing durability.
Clay and concrete tiles do appear in parts of the Tri-Cities housing stock and bring a distinctive look. They perform differently here than in wetter coastal markets because UV exposure, freeze cycles, and weight are bigger concerns than constant moisture. Tiles can crack under freeze-thaw stress or from hail impacts, and their substantial weight necessitates a solid structural assessment. In Richland's dry climate, ensuring a robust roof deck and appropriate underlayment is critical to prevent moisture intrusion during rare but impactful rain events. When selecting tile, prioritize systems with proven wind resistance and verify that the installation accommodates thermal movement and expansion in summer heat. A tile roof can be a striking long-term investment if the structure supports it and maintenance is staged to address cap RSA joints and fastener integrity.
Synthetic or composite shingles offer a lighter alternative with decent fade resistance and improved impact tolerance. In this climate, they can strike a balance between performance in sun exposure and wind stress, especially when paired with a high-quality underlayment and ventilation strategy. Whatever choice, the key is pairing the roof with proper attic insulation, ridge and soffit ventilation, and a thoughtful, weather-conscious installation plan to weather-rich springs, hot summers, and cold snaps.
Richland's leak calls often center on penetrations and transitions because even a dry climate will expose weak flashing during spring wind-and-rain events. That means every vent, chimney, and roof-to-wall transition deserves careful scrutiny after storms. Check around step flashings and any sealant joints where flashing meets siding or sheathing. If you notice loose metal, cracked caulk, or algae-like staining that creeps along seams, address it before a gusty wind drives water under the edge. In practice, reflash or reseal those critical junctions every spring and after severe wind events, not just during the off-season.
Low-slope sections need close attention in Richland because winter freezes and snow can slow drainage and raise the chance of ice-related backup at vulnerable edges. Look for pooling water near overhangs, edge metal, and valley intersections after heavy rain or thaw cycles. If water lingers, consider improving runoff with a slight slope correction, enhanced edging, or a through-fastened membrane that resists wind-driven infiltration. Do not overlook the corners where two slopes meet, since ice dams tend to form there first and silently push water under shingles or underlayment.
Skylights are a meaningful local service category in this market, making curb flashing and surrounding underlayment important inspection points after storms. After a storm, inspect the curb flashing for gaps, damaged seals, or loose fasteners. Check the underlayment around the skylight for any signs of movement or moisture staining. If flashing shows wear or if the surrounding deck shows any squishing or soft spots, plan a targeted repair rather than waiting for a full roof replacement.
A practical approach is to schedule inspections after spring wind-and-rain events and again after the first heavy freezes, focusing on penetrations, transitions, and skylight interfaces. This targeted, timely attention can reduce lingering moisture and curb expensive damage from small issues turning into big problems.
Find specialists in TPO, EPDM, and built-up flat roofing systems for residential and commercial properties.
Alpine Roofing
(509) 870-3388 alpineroofingpro.com
2016 Logston Blvd, Richland, Washington
4.9 from 254 reviews
Call The Roofer
(509) 727-3373 calltheroofer.net
326 Wenas Ct, Richland, Washington
5.0 from 9 reviews
Northwest Roofing & Exteriors
(509) 919-2955 northwestroofingandexteriorsllc.com
Serving
5.0 from 22 reviews
Before the next storm season, gather basic evidence of your roof's condition. Eastern Washington insurers commonly want photos, a professional estimate, and clear notes separating storm damage from age-related wear when evaluating claims. Take wide exterior shots and close-ups of shingles, flashing, vents, and any existing hail impact marks. Keep a dated binder or digital folder of these images so an adjuster can see the baseline if a wind event or hail hits later in the year. A current professional roof estimate that outlines replacement or repair scope helps prevent a back-and-forth over what's needed when a claim arrives. If you've recently had maintenance or resealing done, document that work with receipts and a brief notes sheet on what was addressed and when.
After a Tri-Cities wind or hail event, collect fresh photos showing the immediate damage. Adjusters may request pre- and post-damage comparisons, which makes dated inspection photos especially useful. Store these in the same organized folder you prepared earlier. If new damage appears after a storm, record the date and time, and note weather conditions that could influence damage interpretation (for example, wind gusts, hail size, and direction). Keep any correspondence with your roof contractor and insurer in one place, so it's easy to reference during the claim review. Some carriers serving this region have tightened underwriting, so Richland homeowners may need stronger pre-loss and post-loss documentation than in the past. Clear, concise notes help separate storm-driven damage from age-related wear.
When the adjuster arrives, provide a copy of the professional estimate and the pre-loss photo set to set a factual baseline. Point out areas where aging materials show consistent wear, and separate those from new storm-related impacts such as cracked shingles, dented conductors, or damaged flashing. If possible, accompany the adjuster on the roof to point out specific concerns and answer questions about insulation, ventilation, and how weather extremes here stress the system. After the visit, follow up with a written summary of agreed findings and any missing documentation the carrier requests.
Connect with contractors who help homeowners navigate the claims process from damage assessment to final approval.
Alpine Roofing
(509) 870-3388 alpineroofingpro.com
2016 Logston Blvd, Richland, Washington
4.9 from 254 reviews
Eminent Roofing
(509) 537-4537 eminentroofing.com
1339 Tapteal Dr #110, Richland, Washington
5.0 from 109 reviews
Black Diamond Roofing
(509) 943-7663 www.bdrcinc.com
2418 Garlick Blvd, Richland, Washington
4.9 from 265 reviews