Last updated: Apr 19, 2026
Your roofing season in this heat-heavy, freeze-prone area is typically pushed toward late spring through early fall. Cold, wet winter conditions can interfere with moisture-sensitive installation details, so wait-for-spring to fall windows are the practical lane. Scheduling within that window helps ensure sealants cure properly, underlayment dries before frost, and any lingering moisture from a wet winter has a chance to evaporate. If a project begins too early in the spring, lingering ground moisture and cool nights can slow adhesive cures and slow tear-off crews more than expected. Plan for a solid stretch where daytime temperatures reliably stay above the mid-40s at night and stay warm enough to keep shingles and membranes pliable without cracking.
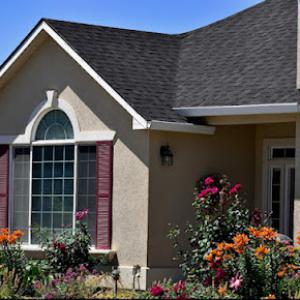
The hot, dry summers bring extra UV exposure and heat stress on exposed roofing. Dark asphalt systems and aging sealants particularly pay attention to this. In practical terms, think about choosing materials and colors that reflect rather than absorb heat when your roof is highly visible from the street or fields. Metal roofs, when finished with cool-coat or lighter shades, can mitigate heat load and expand- contraction cycles. If using asphalt, consider shingles with better UV resistance and longer sealant memory to resist drying out under relentless sun. For aging sealants and flashing, anticipate more frequent inspection intervals after the second or third hot season, because sun exposure accelerates wear on edges, tabs, and seals.
Spring and fall storm periods in the area bring wind and hail interruptions that affect tear-off scheduling and temporary dry-in planning. Wind can curl edges, lift shingles, or shift underlayment, so crews often stagger tear-off to avoid exposing the deck during high-wind forecasts. A practical approach is to plan a staged removal if a sudden wind event is forecasted, keeping temporary weather protection in place until the next break in wind or a lull in storm activity. Hail storms, common in shoulder seasons, can damage existing roofing deck and create the need for prompt assessment and possibly accelerated repair to prevent interior leaks once a full tear-off begins. Ensure the dry-in plan includes tarps, temporary seals around penetrations, and a clear route for water to shed off the roof if an unplanned rain arrives mid-install.
Durable, heat-tolerant sloped roofing systems fare best under these conditions. A layered approach-solid underlayment, well-sealed flashing, and a deck that's free of moisture before installation-reduces long-term vulnerability. In hotter stretches, confirm that underlayment choices resist cupping or warping from sun exposure and that fasteners are compatible with the chosen materials to avoid premature loosening. For metal or concrete tile options, verify that fastener patterns and panel overlaps account for expansion and contraction due to the wide diurnal temperature swings. If opting for wood shingles or shakes, select treated or naturally rot-resistant species and apply a heat-tolerant sealant to slow drying and cracking.
Coordinate with the crew to align tear-off timing with forecasts that favor dry, warm days but avoid the peak heat of mid-summer. Build in a buffer of a few days for weather delays, especially during spring wind or fall storm seasons. Discuss temporary protection needs for any long-standing roof sections that might be vulnerable during a longer project window. Finally, communicate a contingency plan for unexpected freezes or heat spikes that could affect adhesive cures, securing the job timeline and ensuring a durable, weather-ready roof once the project completes.
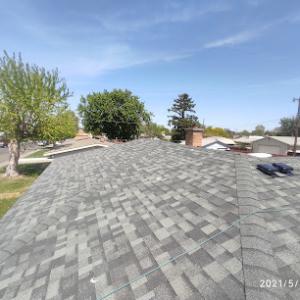
Asphalt shingles remain a familiar sight on many Hermiston homes, prized for affordability and straightforward replacement. In this climate, the prolonged summer heat and sun can accelerate granule loss, brittleness, and seal-strip aging over time. That means you may notice color fading, more brittleness at the edges, or minor curling after several hot seasons. When selecting asphalt, look for heavier, dimensional shingles with a good warranty and a reflective or cooling granular blend to help push back heat absorption. A quality underlayment paired with a balanced attic ventilation strategy reduces heat buildup and helps the shingles resist accelerated wear. If your roof has extended south-facing exposure or a long eave line, consider upgrades like higher wind-rated shingles and edge reinforcement to keep granules in place during the fiercest days.
Metal roofing stands out for sun exposure tolerance and durability during wind events, provided it is properly fastened and installed. In this environment, metal panels or shingles that are screwed or snapped with corrosion-resistant fasteners perform well across a wide temperature range and through repeated heat cycles. The key to lasting performance is a robust attachment plan: solid deck preparation, correct fastener spacing, and wind-rated seams. When choosing metal, you'll benefit from reflecting coatings and credible warranties, as well as a thoughtful panel profile that minimizes the risk of hot-summer expansion issues. For homes with strong prevailing winds, ensure the fastener pattern aligns with local wind zones and that the edge detailing resists uplift. A sloped roof with a penetrating ridge vent system and well-sealed penetrations helps keep attic temperatures moderated, further extending metal's lifespan in this climate.
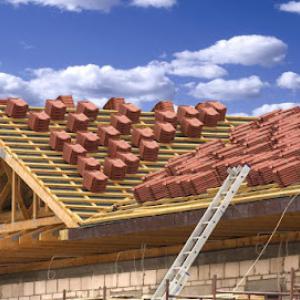
Clay and concrete tiles add a distinctive look and can deliver long life when properly supported. In a climate with intense summer cycling and winter moisture exposure, their weight and underlayment dependence matter more than in milder zones. Clay and concrete tiles demand a strong, well-braced roof structure to handle the load, and the underlayment must be compatible with both seasonal drying and moisture movement. If a tile roof exists or is planned, the attic insulation and ventilation must be aligned to prevent condensation that could compromise the substrate over time. Pay attention to fastener selection and aesthetic details like proper hip and valley flashing to resist wind-driven water intrusion. Regular inspections to check for cracked or displaced tiles after storms or severe heat spikes will help maintain performance and prevent leaks.
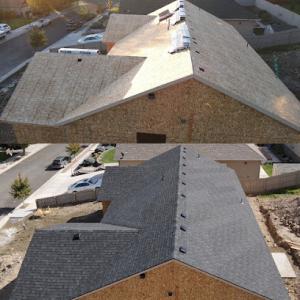
In this area, mixed configurations often appear when local builders balance heat tolerance, wind performance, and weight or budget constraints. A blended approach-combining different shingle types on different roof planes-can optimize performance. For example, higher wind or sun-exposed bays might benefit from a more wind-resistant shingle or a reflective overlay, while shaded or interior slopes might perform adequately with standard asphalt. When considering any elevation in material hardness or weight, ensure the rafters and roof deck can carry the added load without compromising structural integrity. The seasonal shift from hot summers to frosty winters makes consistent roof geometry, minimal penetration counts, and clean drainage crucial for long-term reliability.
Regardless of material, proactive maintenance tailored to this climate reduces the likelihood of premature failure. Schedule mid-summer inspections to catch heat-related degradation early, and perform a post-winter check for signs of ice damming, moisture intrusion, or loosened fasteners. In windy periods, inspect for uplift-related issues around ridges and along eaves, and reseal any worn flashing. For clay or concrete tiles, replace cracked pieces promptly to prevent water ingress and freeze-thaw damage. A well-ventilated attic paired with effective attic insulation supports consistent roof performance across the seasonally diverse conditions, helping any roof type endure the demands of this irrigation-driven wind corridor.
C & C Roofing
(541) 720-1104 www.ccroofservices.com
2345 N Townsend Rd, Hermiston, Oregon
5.0 from 96 reviews
A local Roofing Company, “Specializing in all types of roofing”
Daniel Tejeda Siding & Roofing
(541) 571-3612 www.dtsidingandroofing.com
32925 E Columbia Ln, Hermiston, Oregon
4.7 from 13 reviews
Providing costumers the highest quality roofing and the most competitive pricing in your area
Quality Roofing
(509) 491-0521 qualityroofingkennewick.com
Serving
5.0 from 78 reviews
Quality Roofing is a locally-owned roofing company serving the needs of homeowners. Our roofing contractors provide roof inspections, roof replacements, roof repairs, and new construction roof installation. We remove the burden from our valued customers by managing the entire process. We pride ourselves on taking great care of our customers and providing the utmost respect to their homes from inspection to replacement. We are excited to be experiencing fast and steady growth over the last few years.
A & S Roofing
(509) 947-1123 asroofingllcwa.com
Serving
5.0 from 17 reviews
At A & S Roofing, we have been the trusted roofing contractor serving Kennewick, WA, and surrounding areas with 20+ years of experience. Our experienced team specializes in a wide range of services, including attic venting, gutter installation, re roofing, roof inspection, and more. With a keen eye for detail and a commitment to quality, we deliver exceptional craftsmanship and durable roofing solutions. We prioritize customer satisfaction by offering competitive pricing, timely project completion, and outstanding customer service. Choose A & S Roofing for reliable and professional roofing services that protect your property and enhance its curb appeal.

A+ Roofing
(509) 948-7775 www.aplus-roofingspecialist.com
Serving
4.7 from 56 reviews
We are family owed local roofers for 30 years of experience. OUR NAME SAYS ALL. " The best of the best" great job. Great reasonable estimate with higher quality roofing materials and a good warranty craftsmanship contract.
Do Right Roofing - Chimney Skylight, Vents, Metal Roof Repair, Roof Replacement in Kennewick WA
(509) 231-8831 dorightroofers.com
Serving
5.0 from 14 reviews
We started our roof repair and replacement company in 2012, but have over three decades of relevant industry experience behind us. Throughout the years, we have handled countless projects for numerous residents in Kennewick, WA, and we will gladly assist you as well. At Do Right Roofing, we will do our best to accommodate all your demands because your satisfaction is our main priority. Discover a competent and dependable partner in us!
Mid Columbia Integrity Roofing
(509) 378-0590 mid-columbiaintegrityroofing.com
Serving
5.0 from 5 reviews
About us Mid-Columbia Integrity Roofing, LLC, prides itself on superior customer service and would love the opportunity to show you what experience and expertise can mean for the overall value of your project. We're proud to offer the highest quality, most unique merchandise on the market today. From our family to yours, we put lots of love and careful attention in each item. We hope you enjoy our work as much as we enjoy bringing it to you.
Silverbow Roofing
(509) 586-1015 www.silverbowinc.pro
Serving
4.2 from 22 reviews
35+ Years of Excellence Started in 1987 with just a dream, a Chevy, and a 3-man crew, Silverbow Roofing has always been committed to delivering unmatched roofing services to our community. At the time, we specialized in shingle re-roofs and hot asphalt roofing and have slowly expanded to become Kennewick’s most trusted one-stop shop for complete exterior makeovers.
A-JC's Construction Roofing & Remodeling Contractors
Serving
5.0 from 1 review
Remodeling General Contractor Roofing Specialists with Experience in all aspects of Construction.
R & Y Construction
Serving
3.0 from 2 reviews
R & Y Construction serves as a roofing contractor in the Washington, Oregon and Idaho areas. We’re a team of fully-certified professionals who tackle everything from complex large projects to smaller scale jobs. Fueled by our commitment to excellence, we go the extra mile to make sure clients are completely satisfied with our work. Call us today to schedule a consultation.
Kennewick Roofing Company
Serving
4.0 from 1 review
If your home or business is in need of roofing services, look no further than Kennewick Roofing Company! Our team of roofing contractor experts will do the job exactly how it needs to be done, whether you are looking for roof inspection services, roof repair services, or roof installation services for new construction or roof replacement for your home or business. Our team of roofers knows how to pay attention to detail and make the right recommendations to ensure that your home or commercial property stay protected for many years to come. Give us a call today and we can provide you a free no obligations quote on your new roof or other roofing services!
Roldan Roofing & Construction
642 E Oregon Ave, Hermiston, Oregon
"After years of standing up to heavy wind and rain, it's no wonder your roof needs attention. If your roof looks worn-out or has started to leak, turn to the pros at Roldan Construction Services, Inc. We offer affordable roofing services in Hermiston, OR. With over 15 years of industry experience, you can count on us to deliver exceptional results. From roof replacements to roof repairs, we can handle all your roofing needs. Schedule an appointment with our roofing company today by calling."
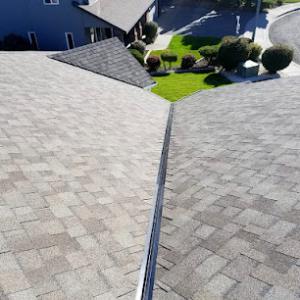
In Hermiston, wind-related damage often shows first at ridge caps, rake edges, eaves, and metal flashing transitions rather than across the entire roof plane. The combination of hot summers and gusty fall events means the places where roof components meet or are anchored bear the brunt before the rest of the surface-ridge lines where two planes meet, the sharp edges along the eaves, and the joints where flashing meets walls or vent stacks. Expect those transition zones to wear out or lift sooner when sustained winds reload the house with force. Your inspection should start there, especially after a windy spell or a hail-based storm.
Hail and wind events in spring and fall can create mixed damage patterns that require close photo documentation of shingles, vents, gutters, and soft metal components. Instead of assuming uniform damage across the deck, look for micro-blisters on asphalt shingles, granule loss along the lower sections, and granule embedment around ridge caps. Photograph every odd deformation or displacement of shingles, as well as any denting on vent collars, metal flashings, and the tops of gutters. Documenting soft metal components-nails, screws, and edge trims-helps determine whether the problem stems from wind-blown impact or repeated thermal cycling. In practice, the best results come from a rapid, thorough photo log taken soon after a storm, paired with a note on wind direction, intensity, and any accompanying hail reports from the area.
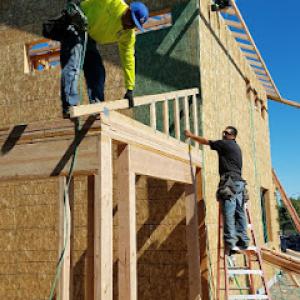
Occasional high-wind conditions in the Hermiston area make material staging, fastening quality, and edge detailing more important than in calmer markets. When choosing or replacing roofing materials, pay special attention to how the edges are secured and how flashing is integrated with the roof planes and wall infills. Ridge caps should be mechanically fastened with corrosion-resistant hardware, and laps along the edges should not rely on adhesive alone in high-wind zones. Consider the practicalities of staging materials on-site during gusty days: loose bundles, exposed fasteners, and temporary supports become a safety hazard and a potential source of wind-driven damage if not managed carefully. A skilled installer will also verify that drip edges and gutter fasteners are robust enough to resist wind-driven debris, which can pry loose flashing if left unchecked.
In addition to rapid documentation, anticipate that minor issues can escalate after a season of repeated wind and hail. Small gaps, loose fasteners, or thin flashing not only invite water intrusion but also create new leverage points for future wind events. The most reliable response is a proactive, detail-focused approach: inspect the entire perimeter after each major storm, verify edge detailing and flashing integrity, and ensure that every attachment point has a solid, corrosion-resistant fastener pattern. This city's climate rewards attention to the edges, the transitions, and the components that face the elements most directly.
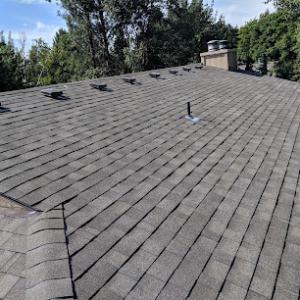
Fields around the irrigated hub kick up a lot of fine dust and lightweight debris during harvest and irrigation cycles. This sediment can settle on shingles, clog gutters, and conceal early signs of wear. In practice, a roof can look fine from ground level, but close-up inspection reveals granule loss, fine cracking, or minor lifting that dust rain makes harder to notice. On lighter-colored shingles, dust can mimic staining, leading homeowners to misread the roof's condition. Regular cleaning and a careful visual check after big dust events help keep the true state visible.
Homes near the edge of developed areas often take the brunt of wind-blown debris, dust trails, and tumble-down vegetation from farm fields. Wind can lift loose edges of shingles, loosen vents, and shove debris into valleys and drainage paths. Over time, repeated exposure accelerates wear in exposed eaves, vent flashings, and edge clips. If a property sits on the rural-urban fringe, expect more frequent minor repairs and a shorter window before replacement decisions get made.
Dust and debris readily collect in valleys, gutters, and downspouts. Clogged drainage paths trap water, which adds freeze-thaw stress in winter and can start small leaks around fasteners. In spring and fall, storms deposit extra load, sometimes hiding micro-movements in shingles or flashing. A blocked valley traps moisture near the interior attic space and can shorten the roof's effective life if not addressed promptly.
After strong winds or dust-laden storms, schedule a thorough roof inspection within 24 to 48 hours if safe to access. Look for lifted edges, popped nails, or missing granules. Inspect around vents, skylights, chimneys, and transitions to walls. Pay attention to gutters and downspouts for sediment deposits, which signal heavy debris movement during the last wind event. If shingles reveal exposed matting or brittle edges, treat it as an early wear indicator.
Keep gutters clear to prevent standing water and ice dam risk in winter. Use a soft brush or blower to remove surface dust from the shingle top without abrading granules. Check for loose or missing flashing after high-wind days and re-secure with the correct fasteners. If debris piles up along the roof edge, gentle removal with a long-handled tool prevents stepping on damaged areas. For edge-of-town homes, consider a more frequent wake-up check schedule in late summer and early fall before harvest intensifies dust events.
Hot-summer, cold-winter cycles and wind exposure mean choosing shingles with robust granule embedment and wind-resistant fasteners helps resist dust-related masking of wear. If a roof is already showing early granule loss or surface micro-cracking, plan for a conservative replacement timeline rather than waiting for larger visible failures.
Use these local ranges per square: Asphalt Shingles 350 to 750, Metal Roofing 700 to 1300, Clay Tile 1000 to 1900, Concrete Tile 900 to 1600, Wood Shingles/Shakes 550 to 1100, Synthetic/Composite Shingles 600 to 1100. In practice, these reflect the higher summer heat driving faster wear, plus the winter freeze-thaw cycles that stress edges and fasteners. For a typical home, expect asphalt to be the baseline, with metal and tiles carrying noticeably higher upfront costs but longer life and better heat resistance. Pricing fluctuates with material batches, local labor demand, and the extent of demolition or underlayment work needed after a particularly harsh season.
In Hermiston, costs can rise during the preferred late spring to early fall replacement window because more homeowners try to avoid winter moisture delays and storm-season interruptions. If you're targeting a replacement, plan for a stretch when crews are at peak capacity and material shipments are stable. Winter work tends to compress into shorter windows with higher labor premiums, and you'll see some providers pushing to complete before the first heavy freeze. If you have the flexibility to wait for shoulder seasons, you may still secure solid workmanship while avoiding premium scheduling charges.
Material choice has an outsized cost impact locally because Hermiston homeowners often weigh heat tolerance, wind performance, and lifespan against lower upfront pricing. Metal roofing, while higher in upfront cost, can offer superior wind resistance and reflectivity that helps curb cooling loads in intense summer heat. Clay and concrete tiles excel in heat tolerance and long life but add weight and require a sturdy, well-prepared structure. Wood shingles/shakes bring a classic look and solid wind performance when properly installed, yet they demand regular maintenance in sun-drenched, dry heat. Synthetic/composite shingles can balance price and performance, offering decent heat resistance with lower weight and maintenance than wood.
If you're replacing in a heat-prone season, allocate budget buffers for possible higher labor hours and expedited delivery fees during peak demand. Factor in the cost-per-square differences between materials to determine whether the longer lifespan and better wind performance of metal, tiles, or composites justify the higher initial investment. For homes with strong southern exposures, a reflective underlayment and proper attic ventilation can amplify the material's performance, sometimes making a mid-range option more cost-effective over the life of the roof.
For a full re-roof, a building permit is typically required. The process in this area is handled by the City of Hermiston Building Department, so your first stop should be the department's office or website to pull the right forms and checklist. Before you schedule any work, confirm your property meets setback, HOA, and drainage requirements, since a re-roof can affect venting and water flow across the eaves. Because the local climate swings from hot, intense sun to cold, wet winters, the permit review panel will look closely at material compatibility with your roof pitch and the chosen underlayment. Starting the permit early helps prevent delays once a contractor is ready to pull materials.
Inspections are scheduled as work progresses and again after completion. A good timeline to expect is a framing-like milestone early on (if any structural work is involved), followed by a mid-progress check that focuses on underlayment, flashing, and venting details, and a final inspection that zeroes in on installation standards and flashing details around chimneys, skylights, and roof-to-wall transitions. The inspector will verify that drip edges, corrosion-resistant fasteners, and proper nailing patterns align with local codes and the upgraded climate-resistant standards recommended for the area. Expect questions about attic ventilation and proper shingle or panel alignment as part of the final walk-through.
Given the mix of hot summers, freeze-thaw cycles, and gusty winds near irrigation channels, choose roofing materials with proven temperature stability and wind performance. Ensure your contractor wears and maintains a reliable edge seal on eaves and rakes, as well as a solid flashing detail around vents and valleys. Have the permit set and any required plans readily available on site for inspections, and keep a dated photo log of progression steps. If a discrepancy arises between the as-built condition and permit drawings, address it promptly with the Building Department so your final inspection can proceed without delay.
Hermiston homeowners should expect insurers to request clear documentation of roof condition because Oregon carriers commonly want photos, repair history, and a detailed scope of work. You want a steady, organized set of records that can travel with the claim from first notice to resolution. Start by gathering recent roof assessments, dated photos from different angles, and any professional notes about material condition, flashing, and visible wear. A simple, labeled binder or digital folder helps avoid questions during a stressful claim window and reduces delays caused by missing details.
Wind and hail exposure matters in Hermiston claims, so adjusters may want close access to the existing roof and evidence separating storm damage from heat-related aging. When storms sweep through the valley, remember that fast-moving hail can leave pinpoint damage that looks similar to sun-soaked deterioration on shingles or metal seams. Photograph the roof from ground level and from a ladder vantage if safe, capturing property edges, vents, and perimeters. If any trees or debris weigh into life on the roof, document their impact as part of the overall condition. Having a clear narrative of weather events tied to specific areas of damage helps distinguish what happened when, reducing back-and-forth with the insurer.
Oregon's tighter underwriting environment makes pre-loss roof records more valuable for Hermiston homeowners replacing older roofs or filing weather-related claims. Keep a running log of asphalt granule loss, curling edges, flashing corrosion, and any prior repairs or patchwork. Include contractor inspection summaries that note material type, expected lifespan, and maintenance gaps. When a claim comes, you want a pre-loss file that proves the roof's baseline condition and timelines. A thorough, organized history can prevent misunderstandings and support a smoother settlement, especially when the climate combines intense sun, winter freeze-thaw cycles, and strong winds.