Last updated: Apr 19, 2026
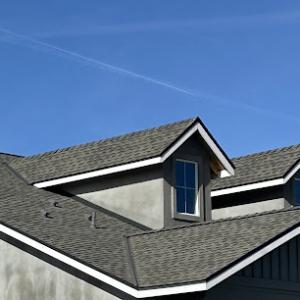
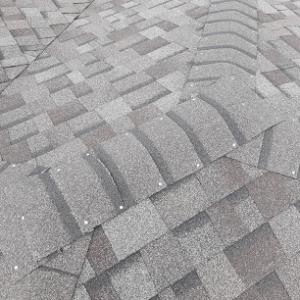
Central Wyoming hail and strong wind exposure make roof damage documentation a routine part of ownership in Casper. A quick annual check after winter and again after the spring storm season helps catch small issues before they become costly failures. Keep a simple photo log: dated shots from multiple angles, close-ups of damaged shingles or flashing, and notes on any missing granules or algae staining. When hail or high winds strike, document promptly-insurance claims move faster with clear, timestamped evidence that shows the roof's condition before and after the event. If a prior repair exists, photograph that too, so the insurer understands whether new damage is layered on top of older issues.
Spring hail storms and strong winds can reveal older damage and also disrupt already-tight contractor schedules in Casper's short roofing season. Plan ahead for photos and a trusted roofer's inspection in the weeks following a major storm, not two months later when crews are booked. Weather windows in late spring to early summer tend to fill quickly, so having a pre-vetted local contractor on standby reduces downtime and exposure to further weather damage. When hail hits, initiate the claim with the insurer promptly and share the photo log and wind-rip damage notes to establish a clear timeline. If the season is already crowded, you may need to align your replacement with the next available slot rather than chasing a rushed post-storm patch.
Local insurers commonly scrutinize roof age, photo evidence, and detailed estimates in Casper because hail and wind claims are frequent in this market. That scrutiny isn't meant to stall you; it's designed to ensure the right replacement decisions are made, given the harsh exposure and likelihood of accelerated wear. Be prepared to demonstrate the roof's life expectancy, the severity of hail impact, and any wind-related damage to gutters, vents, and flashing. An independent third-party inspection can add credibility to your claim, especially if the insurer requests a second opinion. Having a professional assessment that ties specific damage to storm events helps speed approvals and reduces back-and-forth.
When damage is confirmed, alignment with a contractor who understands Casper's climate realities matters. Look for crews that specialize in hail and wind resistance and can propose high-performance options that hold up to seasonal extremes. A realistic plan includes robust edge protection, reinforced joints, and membrane details that resist wind uplift and moisture intrusion. If the roof has reached the end of its typical life expectancy or bears concentrated damage, a full replacement may be more reliable than piecemeal repairs, particularly in a market where severe weather is a recurring risk.
Ensure the claim file includes: a dated narrative of storm events, a comprehensive damage inventory, high-resolution damaged-area photos, and a finished scope of repairs or replacement with a line-item estimate from a Casper-friendly contractor. Keep communications concise and record every contact with the insurer. If a draft settlement or hold occurs, respond swiftly with updated evidence, including any new damage found during a re-inspection. In this climate, proactive documentation and timely contractor collaboration are the most reliable way to keep a claim moving toward a solid, durable resolution.
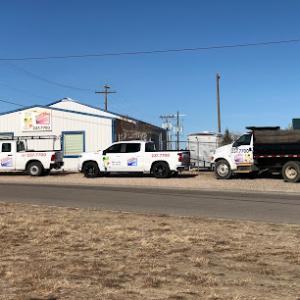
Find local contractors experienced in assessing and restoring roofs after hail, wind, and severe weather events.
Breit Roofing
(307) 337-5220 www.breitroofing.com
1340 Nottingham Dr, Casper, Wyoming
4.9 from 115 reviews
Elite Roofing
(307) 365-2621 eliteroofingwyoming.com
1720 E 3rd St, Casper, Wyoming
5.0 from 6 reviews
MC Roofing
(307) 315-6105 www.casperroofs.com
1701 East E Street, Casper, Wyoming
4.9 from 28 reviews
MC Roofing is a roofing contractor that specializes in roof inspection, repair, and replacement. Roof repair is an expensive commitment, so make sure the job is done right. Call today!
Casper Roof
(307) 313-1723 casperroofco.com
902 E A St, Casper, Wyoming
5.0 from 10 reviews
Casper Roof provide dependable roofing solutions across Wyoming. We specialize in new roof installations, replacements, expert repairs, and protective coatings. We deliver quality work with lasting results. We do both residential and commercial installations, and we’re committed to keeping your property safe and secure. Contact us today for a free estimate.
Elite Roofing
(307) 365-2621 eliteroofingwyoming.com
1720 E 3rd St, Casper, Wyoming
5.0 from 6 reviews
At Elite Roofing, we are committed to providing our customers in Wyoming with the highest quality roofing services. We bring many years of experience in roofing and repairs, so you can rest assured we will get the job done right. Elite Roofing is dedicated to providing our customers with the best possible roofing services throughout Wyoming. We understand that your time is valuable, and we will work with you to schedule your project at a time that is convenient for you. We are also committed to providing our customers with the best possible value. We offer competitive pricing, and we will work with you to find the right solution for your budget.
Green Vista Roofing
(307) 763-3700 greenvistaroofingwy.com
304 N Jackson St, Casper, Wyoming
4.5 from 11 reviews
At Green Vista Roofing, quality you can trust is at the core of everything we do. We understand that a roof is not just an essential part of your property but also a symbol of security and protection for your loved ones or business. That’s why we go above and beyond to deliver roofing solutions that stand the test of time. From using premium materials to employing a team of experienced professionals, we ensure that every aspect of our service reflects the highest standards of craftsmanship and reliability. Our commitment to excellence is not just a promise but a guarantee that your roofing project, whether it’s residential or commercial, will be handled with utmost care, precision, and a dedication to achieving unparalleled results.
Ledges&Edges
Casper, Wyoming
3.7 from 3 reviews
Ledges&edges roofing gladly serving casper
Excel Roofing Casper
(307) 237-7700 www.excelroofing.com
Serving
5.0 from 5 reviews
Excel Roofing, has been a trusted name since its establishment in 1993. For nearly three decades and 40,000 customers, we've stood as a symbol of reliability, integrity, and unwavering commitment to our community's roofing needs. When you choose us, you can "Expect The Very Best". We firmly stand behind our work, and that's why we say, "You don't pay a cent until you're content." This motto, championed by our President J Bretz.
JRP Roofing
Casper, Wyoming
3.0 from 2 reviews
Local contractor serving the Casper area for roofing! Are you tired of the roofer that never returns your calls? Or doesn’t show up for appointments? Then call us! JRP Roofing was started by two individuals that were tired of working for the corporate entities that take up the majority of the business here in Casper. We look at our customers as family and treat them as such with superior work quality and amazing customer service!
Drury Brothers Roofing Wyoming
948 E F St, Casper, Wyoming
2.7 from 3 reviews
Residential and Commercial Roofing, siding and gutters. Serving Casper, WY and surrounding areas for over 25 years.
Winter in this area brings cold snaps, heavy snow, and freezing temperatures that shorten the safe installation window for full replacements. Because sealants can become brittle and flashings may not cure properly when temperatures stay below freezing, many homeowners delay large re-roofs until spring. If hail damage is suspected or confirmed, the insurance process can push work into late spring or early summer, but the actual install should still wait for temperatures reliably above freezing and for dry days. Plan your project with a target that avoids the peak winter risk, but recognize that late spring to early fall remains the most practical window for a complete roof replacement.
Late spring through early fall is typically the preferred re-roofing period due to milder temperatures and more predictable schedules. In Casper, that window aligns with longer daylight hours and more cooperative weather, which helps crews complete work in a timely fashion and reduces the chance of weather-related delays. However, even during this main season, the weather can surprise you. Late summer heat, wind, and occasional thunderstorms can slow progress, complicate material handling, and increase the risk of wind-blown debris or shingle damage if the crew is rushing to beat a later storm. Preparation matters: choose a dependable crew that prioritizes proper nailing patterns, sealing, and step-through protection so a hot, windy day doesn't derail a multi-day project.
Begin planning with a two-step approach. First, map out a target install period that avoids the heart of winter and the hottest weeks of summer, while keeping an eye on local storm forecasts. Second, build in a flexible schedule buffer for mid-season weather interruptions. In practice, that means coordinating with the contractor to identify a window of 1-2 weeks of good weather and avoiding back-to-back high-wind days or heat waves when possible. If hail damage is present, work with the insurer to prioritize an early-mid summer start, but remain prepared for a short delay if a late-season storm rolls through or ground conditions become unsafe for heavy equipment.
In Casper, field conditions can shift quickly. Snowmelt and mud in shoulder seasons can hinder material movement, while dry, high-wind days can challenge securing everything from shingles to underlayment. The right crew will stage materials for quick access, protect vulnerable-edge installations in wind-prone locations, and coordinate with you about roof access points and ladder safety. Expect a tighter schedule in late summer when heat and wind compress available daylight hours, and plan for extended days if storm chances rise.
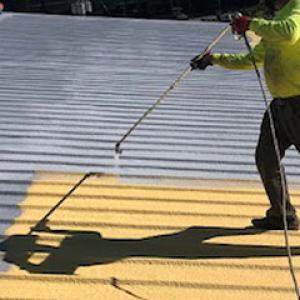
Casper's mix of central Wyoming hail, brisk winds, and long snowy months pushes homeowners toward roofing materials that can handle impact and stand up to wind uplift, while still staying practical during its relatively short replacement window. Asphalt shingles and metal roofing are two leading choices because they strike a solid balance between resistance to hail and wind, installer familiarity, and performance in heavy snow. Asphalt shingles offer straightforward repair paths after hail hits and tend to shed snow predictably when paired with proper ridge and intake ventilation. Metal roofs, meanwhile, excel at wind resistance and have compelling durability benefits in harsh winters, though the lighter snow load dynamics and potential noise considerations in heavy snowfall should be planned for with insulation and underlayment choices.
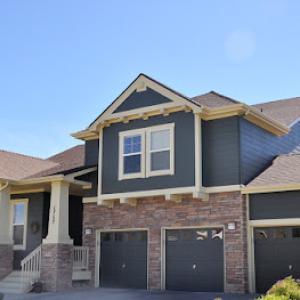
In the local housing landscape, asphalt shingles and metal roofing remain the most common for reliable, year-round performance. Asphalt is forgiving on existing roof decks and compatible with a wide range of house styles found across the city, making it a practical default. Metal roofs, with their resilience to hail and wind, can be a smart upgrade for homes that see frequent storm events or want a longer service life, especially where seasonal maintenance windows are tight. Clay and concrete tile do exist in the area, but their higher installed cost and structural demands often limit their use to homes with stronger framing or dedicated overbuilds. They can bring a distinctive look, but the long lead-in to replacement and potential snow-drift considerations mean fewer installations for typical Casper lots. If a homeowner is attracted to a tile aesthetic, it's essential to verify structural support and wind ratings with a qualified roofer before committing.
Wood shingles and shakes persist as a niche option in Casper, favored by those chasing a traditional, rustic appearance. They require careful maintenance to resist moisture damage, and in hail-prone seasons they may demand more frequent inspection after storms. For homeowners who want a classic look with different performance profiles, synthetic or composite shingles can offer a compromise: they often mimic the texture of wood while delivering enhanced impact resistance and reduced maintenance demands, though the feel and aging characteristics differ from real wood. The choice of synthetic products should consider the local freeze-thaw cycle, which can test any material's deck-level attachment and sealant integrity over time.
When evaluating roof types for a Casper home, focus on how a system handles repeated hail exposure, strong winds, and snow accumulation, all within a constrained installation window. Ask for a storm performance summary that highlights hail impact grades, wind uplift ratings, and the expected life of the chosen material under Wyoming weather patterns. Consider how the roof color and texture interact with snow shedding and ice dam risks, since snow retention along eaves can influence moisture management and interior comfort. Finally, confirm that the selected material aligns with the house's current structure, attic ventilation, and insulation strategy to ensure that the roof performs as intended across Casper's extreme seasonal shifts.
Costs in this market reflect a harsh mix of central Wyoming hail, winds, and a compressed repair season. When a storm hits, demand spikes can push pricing and wait times higher, even as crews try to squeeze projects into a short window between winter snow and summer storms. For a homeowner, this means planning ahead matters: knowing your material options, typical per-square costs, and how weather-driven delays can affect the total project timeline and price. In Casper, asphalt shingles sit at a relatively affordable baseline, while premium materials like clay or concrete tile present a steeper initial outlay and longer lead times if storms have just swept through. The price bands below are typical under normal conditions, but remember that storm-driven demand can push them higher.
Casper cost ranges run about $350 to $750 per square for asphalt shingles. This option remains the most common starting point for many homes in the area, balancing cost with practical performance. If hail or wind has damaged existing layers, you may see added charges for debris removal or temporary protection during a short replacement window. In older neighborhoods with flatter roof lines, asphalt can be quicker to install, helping you minimize on-site exposure to winter snows and damaging mid-season wind gusts. Expect a straightforward job to stay closer to the lower end of the band, but be prepared for a bump if the deck shows moisture or requires repairs.
Metal roofs run about $700 to $1400 per square in Casper. This material choice pays back with strong resistance to hail and wind, and it often offers shorter replacement windows when weather allows. If your roof already carries metal tangs or fasteners, installation can proceed efficiently; if not, the crew may need extra time to secure a drip edge, underlayment, and proper venting. Storm-driven demand can tighten schedules, so factor in potential delays and the possibility of higher material lead times. The premium upfront can translate into better long-term reliability and insurance-friendly performance in high-wind environments.
Clay tile sits in the $900 to $1800 per square range, while concrete tile runs about $900 to $1500 per square. Both options deliver excellent durability and hail resistance, but these tiles are heavier and require structural assessment or reinforcement where needed. In Casper, a tile roof may extend the project timeline because of the weight and fragility during installation, and after a hail event you could encounter higher demand for qualified tile crews. If your budget allows, tile can provide a longer service life and better wind performance, offsetting the higher upfront cost over time.
Wood shingles or shakes come in roughly $600 to $1100 per square. The aesthetic is appealing in certain Casper neighborhoods, but wood is more susceptible to hail-induced stress and requires vigilant maintenance. Expect more frequent inspections during the first season after replacement, as hail wear can reveal micro-cracks that affect water shedding. In harsh wind days, wooden components may demand tighter fastening and careful seam sealing to maintain weather integrity.
Synthetic or composite shingles typically range from $500 to $1000 per square. This category blends durability with wind and impact resistance, often delivering a balanced mix of cost and performance suitable for Casper's climate. Installation crews may prioritize newer synthetic products during tight windows post-storm, so verify lead times and confirm that the chosen product carries the local warranty terms that address wind and hail exposure.
Get a clear picture of your project costs upfront - no commitment required.
A full re-roof in this area typically requires a permit through the City of Casper building department. That permit helps ensure the new roof system meets local code requirements for wind resistance, drainage, and fire safety, especially in a climate that regularly hammers shingles with hail and high winds. If the project involves replacing underlayment or making structural changes, the permit becomes even more critical to document the scope and materials used. Skipping this step can lead to fines, delays, or problems with future sales, so securing the permit should be treated as an integral part of the project timeline rather than an afterthought.
Casper permit submissions generally require the roof scope of work and contractor information before work begins. The plan should clearly outline the chosen roofing система, underlayment, attic ventilation strategy, and any auxiliary components like ice and water shield in vulnerable eaves or valleys. Having contractor details ready helps the city verify licensing and insurance, which can influence inspection outcomes and mitigation of potential warranty disputes down the line. If the project touches gutters, skylights, or venting penetrations, list them as separate line items to avoid back-and-forth during review. A well-documented submission reduces the chance of permit delays and last-minute changes that complicate a tight spring-to-summer installation window.
Inspections typically occur after framing or underlayment and again at final completion. The first check is designed to confirm the roof deck is sound and the chosen underlayment and fasteners meet code expectations for wind zones and temperature swings. The final inspection verifies that the roof is fully installed, with flashing, penetrations, and ventilation functioning as intended. In Casper, weather constraints can compress or push out those inspection windows, so coordinate timing with the inspector and the contractor ahead of the coldest months. Some neighborhoods or HOAs may add their own review requirements, which can introduce additional steps or notice periods. When that happens, factor those extra approvals into the project schedule to prevent miscommunications that slow down weather-dependent work.
Even with city approvals in place, neighborhood covenants can demand additional documentation or specific architectural guidelines for color, material, or profile. If an HOA is in play, request a copy of its review checklist early and align the material choices to match those expectations. Noncompliance can trigger rework or fines and can extend the replacement timeline during the critical wind and hail seasons. Planning with these extra layers in mind helps avoid surprises and keeps the project on track when temperatures start to rise and spring storms threaten arrival.
Casper is a high-claim roof market because central Wyoming hail and wind events generate frequent insurance activity. When a storm rolls through, the damage can be subtle at first glance but costly after the adjuster visits. Having a roof that already shows wear can push a claim into a wind- or hail-damage category rather than routine replacement, speeding up or complicating the process depending on documentation.
Many carriers serving Casper want detailed estimates, date-stamped photos, and clear damage documentation before approving roof-related payouts. Photo timing matters: capture before-and-after shots, close-ups of granule loss, dented metal, lifted shingles, and failed flashings. Keep a weather log of storm dates and neighborhoods affected, and attach contractor notes that match the photos.
Depreciation and requests for wind-resistance upgrades can affect claim timing and out-of-pocket costs for older roofs. Some insurers apply depreciation to the roof's value, reducing payout unless upgrades are shown to meet current standards. If wind-resistant features are discussed, understanding which upgrades are reasonable for Casper's winters helps prevent surprises at the table with the adjuster.
If a hail event hits, start documenting immediately and coordinate with a local roofing pro who understands Casper's exposures. Obtain a written scope from a trusted contractor, then compare it to the insurer's estimate. Organize a clean file with dated photos, receipts, and correspondence so the claim process has a clear trail that stands up under scrutiny.
In peak wind and hail seasons, a proactive documentation routine can shorten downtime and reduce stress when weather resumes. Work with a Casper-area roofer who files timely notes, photos, and updated scopes to keep claims moving.
Casper's freeze-thaw cycles and heavy snow turn small roof penetrations into active leak points during winter and spring melt periods. A loose chimney flashing, vent boot, or ridge vent can pool water and refreeze, widening gaps and driving interior damage quickly. When a storm hits, treat any damp spot as urgent and plan for a temporary fix rather than hoping it dries out. The longer water sits, the more insulation and decking absorb moisture, costing more to dry and repair later.
Emergency response matters in Casper because mid-winter repairs may be limited, making temporary protection important until full replacement weather returns. If you spot active dripping, stage a temporary shield with heavy plastic and a sturdy board over the leak, seal around penetrations, and create a drip edge that guides water away from the interior. Avoid tarps that flap in the wind and rip away during a blizzard. Contact a reputable local contractor to assess whether the leak is isolated or part of a larger failure, and arrange priority service if a freeze-thaw cycle is forecast.
Although the market is dominated by pitched residential re-roofing, some homeowners still need specialized help for skylights and low-slope sections. Skylight flashing must be integrated with the surrounding roof to resist snow loads and wind-driven rain. For low-slope zones, verify the seam and membrane integrity and plan timely repairs before winter pushes water toward the interior. In Casper, proactive attention to these areas can prevent widespread, costly damage when meltwater runs downhill.
Find contractors experienced in skylight installation, flashing, and leak repairs to bring natural light into your home.