Last updated: Apr 19, 2026
The Miami-Dade wind-resistance standard governs every roof replacement project in this area, and that strict standard does not loosen for aging roofs or tight budgets. In this market, a roof is not just a cover; it is a barrier against hurricane-force pushes and flying debris. The June-to-November window amplifies risk, pushing many homeowners from a planned re-roof to urgent storm-driven work. The result is a local economy that prioritizes wind-resistance, rapid installation, and the ability to withstand a direct hit rather than chasing the latest trend in style. When a storm is forecast, crews and crews' schedules tighten, and dependable durability becomes the deciding factor between peace of mind and emergency chaos.
For a re-roof in a hurricane-prone climate, the first obligation is to achieve reliable wind resistance that meets or exceeds the code expectations. That means choosing a roof system with strong nailing patterns, secure underlayment, and proven fasteners designed for high-velocity wind loads. In Homestead, contractors emphasize products and assemblies that can resist uplift pressures and protect against blown-in rain, not just curb appeal. If a shake of wind or a stray nail is possible, the chosen system should prevent water intrusion and structural compromise long after the storm passes. Plan for a layout that minimizes exposed edges and ensures continuous protection along hips, valleys, and roof-to-wall connections. The goal is to minimize the risk of catastrophic failure during the most demanding weather events.
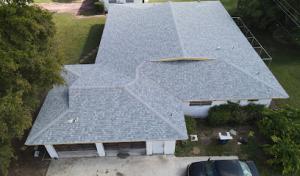
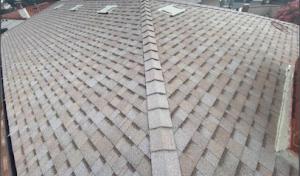
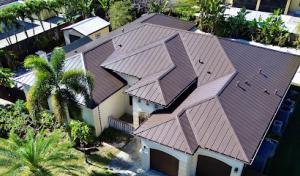
Materials must perform in a hot, wet subtropical climate with intense humidity and salt exposure from the coast. Metal roofs offer excellent wind performance when installed with proper fasteners and sealants, but edge detailing and reflective coatings matter to curb heat gain. Concrete and clay tiles deliver exceptional durability and a strong wind footprint, provided that the underlayment and fastening method are designed for the local wind speeds and uplift demands. Asphalt and synthetic shingles can be reliable when paired with robust underlayment and wind-listed components, but generic installations without wind-rated upgrades fall short in this climate. In fact, the market often steers toward re-roofing and emergency-ready assemblies, so insist on a tested wind-resistance package rather than a purely aesthetic upgrade. The shade and spray of the season call for materials that resist thermal expansion and contraction without compromising seals around vent connections and chimneys.
With the hurricane season shaping homeowner decisions, timing becomes a weapon against risk. If a storm warning is issued, the priority shifts from design nuance to securing a roof that remains intact under duress. Even in a non-emergency scenario, plan for potential quick-turn installs during late spring or early fall when weather windows are more forgiving but the threat remains real. Work with a contractor who can sequence a project to wrap in high-widelity wind detailing, complete with corrosion-resistant fasteners and roof-to-wall connectors that stay tight under pressure. In this market, a proactive schedule beats a rushed, post-storm scramble every time.
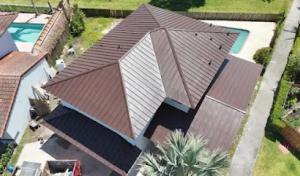
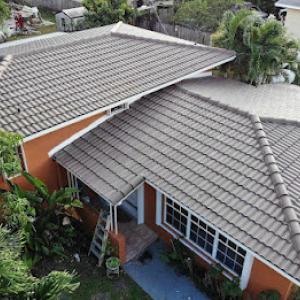
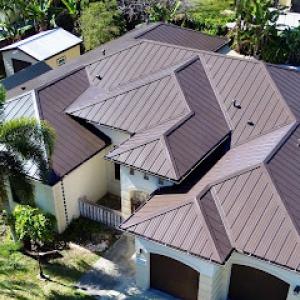
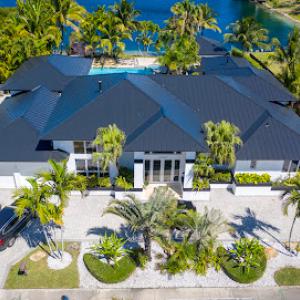
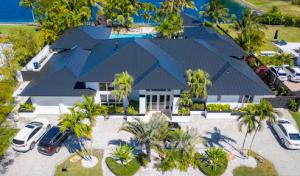
Tile roofing is especially prominent in the Homestead market, matching the area's South Florida residential architecture and the large number of local contractors specializing in tile systems. This isn't just about style; tile systems have a track record in this climate for long life when properly installed. Metal roofing is also unusually active locally, reflecting homeowner interest in wind performance and lower maintenance in a hot, humid coastal-influenced climate. In Homestead, material choice is not just aesthetic: heavier tile systems, fastening methods, and underlayment durability matter because prolonged heat, humidity, and tropical storms all stress the roof assembly differently.
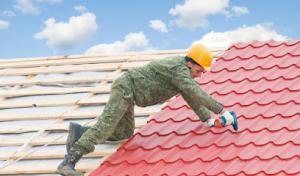
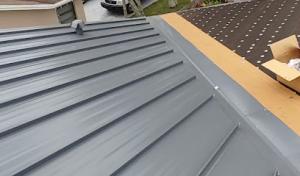
If wind tolerance is a priority, metal roofs offer certain advantages because of their lightweight profile and rapid installation. However, not all metal styles perform the same in a Miami-Dade wind event. Standing-seam metal with proper sealed fasteners generally holds up well, while exposed-fastener panels require careful fastening patterns and diode-like edge detailing to resist uplift. Tile, when installed to the local wind standard, can be exceptionally strong but hinges on how the tiles are fastened and how the underlayment and roof deck are prepared. The key is a wind-rated system, not a visually steep pitch alone. Expect contractors to emphasize a correctly installed underlayment layer, high-quality fasteners, and reinforced edge detailing.
Prolonged heat and high humidity stress roof assemblies differently here. Tile domes or barrel tiles expand and contract with temperature swings, so a high-quality sealant and proper bedding are essential to prevent micro-leaks that can saddle the attic with moisture. Metal roofs respond to heat with potential expansion gaps if fasteners aren't properly installed or sealed. In either path, the insulation and ventilation strategy matters: you want a roof fully vented to minimize condensation and attic heat buildup, which can otherwise accelerate wear on any roofing system.
Tile systems in this market must be paired with a durable underlayment designed for tropical humidity. Confirm that the installation plan includes a water barrier at eaves and hips, plus continuous rake and ridge ventilation. Heavier tile systems require a reinforced roof deck and often a more robust fastening scheme at the edges and hips to resist uplift during a storm. For metal, check that the substrate is solid and that the fastener pattern is specified for either a standing-seam or concealed-fastener profile, with proper sealants at all penetrations and penetrations flashed to handle heavy rains and wind-driven spray.
In practice, you'll want an annual inspection after hurricane season to verify that fasteners remain tight, seals stay intact, and flashing hasn't suffered from salt spray or debris impact. Tile should be checked for cracked or loose tiles, and the mortar or bedding around tiles should be monitored for deterioration. Metal roofs benefit from inspections of seam integrity, fastener gaskets, and any corrosion-prone edges, especially in coastal spray zones. A proactive maintenance routine reduces risk during a storm and extends the life of the chosen system.
Find contractors who specialize in clay and concrete tile roofs, known for their durability and curb appeal.
Stone House Roofing
(305) 239-8838 shbuildingroup.com
28124 SW 159th Pl, Homestead, Florida
5.0 from 32 reviews

Paula Roofing
(786) 352-9005 www.paularoofingllc.com
18395 SW 293rd St, Homestead, Florida
5.0 from 140 reviews
Paula Roofing is a family owned company, we are registered and licensed in the state of Florida. Our clients are our top priority, we provide top quality service which sets us apart from the rest. Weather you need new residential construction, a leak repair, or reroof installed dont hesitate to give us a call. 305-508-0480 786-352-9005
Tj Platinum Roofing
706 NW 7th Ct, Homestead, Florida
5.0 from 70 reviews
Welcome to TJ Platinum Roofing , where we are dedicated to providing top-quality roofing solutions for residential and commercial properties. With years of experience in the industry, our skilled team of roofers delivers expert craftsmanship, excellent customer service, and reliable results. Whether you need roof repairs, replacements, maintenance, or new installations, we are here to ensure your roof is not only functional but also enhances the beauty and value of your property. Trust TJ Platinum Roofing for all your roofing needs and enjoy peace of mind knowing your property is in good hands.

Roof Repair Miami Pros
Homestead, Florida
5.0 from 32 reviews
Roof Repair Miami offers homeowners an easy solution for repairing roof leaks or other related issues. Our roofers have the knowledge and experience to answer any questions you may have regarding your roofing service. With over a decade of experience in roofing our technicians have the expertise in commercial, industrial, and residential roofing. Our goal is to provide our customers with competitive pricing for any roof leak repair as well as exceptional customer service. We are open 7 days a week and are ready to help you with your emergency.
Stone House Roofing
(305) 239-8838 shbuildingroup.com
28124 SW 159th Pl, Homestead, Florida
5.0 from 32 reviews
Stone House Roofing is a Florida State Certified Roofing company operating mainly in Cutler Bay, Homestead, and all Miami-dade area. We service Commercial and Residential buildings. Our services include New Roofs, Re-roofing, and Roof Repairs. Materials used include but are not limited to TPO and other single-ply Membranes, Modified Bitumen, Liquid Applied Membranes, Silicone Coating, Metal Roofs, Tile Roofs, and Shingle Roofs.
Ri Florida Roofing
(786) 491-0345 www.rifloridaroofing.com
3479 NE 4th St, Homestead, Florida
5.0 from 24 reviews
Empresa dedicada a la construcción y reparaciones de todo tipo de techo comercial y residencia
Place Roof
1108 N Flagler Ave, Homestead, Florida
5.0 from 24 reviews
Need a roof that stands the test of time and weather? Place Roof, serving the Homestead, Florida area, offers expert roofing contractor services. We're dedicated to providing quality craftsmanship and reliable solutions for all your roofing needs. Discover peace of mind knowing your home is protected by a sturdy, dependable roof. Let Place Roof be your trusted partner in safeguarding your investment.
Bob Hilson & Company
(305) 246-0209 www.hilsonroofing.com
401 NW 14th Ave, Homestead, Florida
4.6 from 42 reviews
For more than 40 years, Bob Hilson & Company has been servicing Miami, FL and the South Florida region with top quality roofing services. We only use the highest quality materials and our team of roofers is experienced and highly skilled. Whether it is a roof repair or a complete roof replacement, we are your trusted Miami roofing experts. Call today for a free estimate.
Sky Line Roofing Systems
(786) 841-7655 skylineroofingsystems.site
111 S Homestead Blvd, Homestead, Florida
5.0 from 11 reviews
Sky Line Roofing Systems is your trusted partner for all roofing needs. Located in the heart of Homestead on S Homestead Blvd, our store provides a comprehensive selection of high-quality roofing materials and supplies. Whether you are a professional contractor or a dedicated DIY enthusiast, you will find everything required to complete your project with confidence. We are committed to offering durable, reliable products that stand up to the unique challenges of the Florida climate. Stop by and discover the finest roofing solutions available.
Addison Roofing
(305) 506-7772 www.addisonroofinginc.com
20231 SW 321st St, Homestead, Florida
4.6 from 28 reviews
Addison Roofing specializes in shingle , , metal , tile and flat roofs for residential homes in South Florida. Our approach and practice as a roofing company break the 'typical roofing contractor' mold and we have earned a reputation with homeowners for delivering dependable and first-rate roofing service. We have dedicated our entire business to making your roof replacement simple and affordable. Addison Roofing successfully provides trustworthy and professional level roofing
Heights Roofing
(305) 247-7663 www.heightsroofing.com
414 NW 9th Ave, Homestead, Florida
5.0 from 9 reviews
Your roof, safe and secure; The roof of your home is one of the most important parts of the housing structure. Protecting and maintaining the integrity of your roofing system is critical to keeping your family safe from the elements and protecting the investment you have made. If you are searching for a roofing contractor in and around Miami-Dade County, South Florida we hope you will allow us to discuss your next roofing project and show you how we save our customers money while helping create added value in your homes and /or commercial properties.
AM Best Roofing
(305) 245-0602 ambestroofing.com
Serving
5.0 from 10 reviews
Serving the South Florida community for over three decades, AM Best Roofing is a trusted roofing contractor dedicated to maintaining strong client relationships by providing reliable and courteous service. Known for their prompt response to roofing issues, they have earned a reputation as the go-to destination for all roofing needs. With a focus on keeping clients dry and free from roofing troubles, AM Best Roofing offers a comprehensive range of services, from leak repairs and routine maintenance to re-roofing solutions for flat, shingle, tile, and metal roofing systems.
Fast Roofing #1
27600 SW 172nd Ave, Homestead, Florida
5.0 from 7 reviews
Roofing contractors in Florida.
Summer in this area brings frequent heavy rain and afternoon thunderstorms that can interrupt tear-offs and reduce safe on-roof work hours. When a storm rolls in, crews may have to abandon work mid-day, leaving exposed deck and underlayment vulnerable to soaking and wind-driven spray. That means you should plan for longer project timelines than you expect on paper, and expect weather-driven delays even with a solid crew and buffer days. If a forecast shows a tight rain window, communications with the contractor should include clear options for rescheduling without triggering rush decisions.
The local climate makes replacement timing more restrictive because exposed roof decks and underlayment are vulnerable when rain arrives on short notice. Prolonged exposure can compromise the dry-in, especially on roof sections with open eaves or complex intersections. To minimize risk, discuss with your contractor the sequence of work so deck exposure is minimized, and confirm that the project plan accounts for quick coverage of exposed areas during any unexpected rain. This is not a situation to press for speed at the expense of a proper dry-in. A few extra hours of planning up front can save days of weather-related setbacks later.
Homeowners in this area often need to plan larger projects around drier, more predictable weather windows rather than purely around contractor availability. The wet season can shorten workable hours and push ancillary tasks-like flashing, venting, and ridge cap work-into less favorable light or moisture conditions. When you map out a re-roof, identify a primary dry period that aligns with your roof type, then build in a backup plan for late-season gaps caused by storms. If a big project spans multiple elevations or elevations with tall sections, consider staggering portions to keep critical work (like underlayment nailing and wind-rated detailing) protected during rain events.
Hurricane-ready re-roofing under Miami-Dade wind requirements requires attention to fastening patterns, edge detail, and continuous protection during the wet season. If a storm forecast appears during a planned deck-in, you'll want a contingency: temporary sealing measures for exposed areas and a rapid re-seal plan once rain subsides. Talk with your contractor about pre-storm prep steps and post-storm checks, so a minor wind event doesn't undo days of careful work. In practice, this means choosing a window with minimal storm risk, preparing for quick tarp coverage, and ensuring ductwork, chimneys, and vents are properly sealed as work resumes.
Get a clear picture of your project costs upfront - no commitment required.
Bob Hilson & Company
(305) 246-0209 www.hilsonroofing.com
401 NW 14th Ave, Homestead, Florida
4.6 from 42 reviews

In this market, a full re-roof typically requires a building permit within the Miami-Dade regulatory framework. The permit process is designed to ensure the roof assembly meets wind resistance standards relevant to the southeast Florida coastline, where storms and high wind events are a routine consideration. Before any new material goes onto the house, a permit checklist will usually call for details on roof type, deck condition, underlayment, and fastener schemes. The process is not merely bureaucratic: having the correct permit set helps protect the home from insurance hiccups after a storm and ensures that the installation aligns with local wind-vulnerability requirements. For a homeowner, initiating the permit early with a licensed contractor helps avoid delays once weather windows open.
Roofing inspections in this area are typically staged. An in-progress inspection is commonly tied to the roof deck or underlayment stage, verifying that the deck is sound and the selected underlayment and fasteners meet Miami-Dade wind standards. This checkpoint helps catch issues before addressing the full roof cover. A final inspection closes out the permit and confirms that the completed roof system complies with applicable building codes and wind-resistance criteria. Coordinating around the inspection schedule is practical during a busy storm season, because even small deviations-such as mismatched underlayment or fastener spacing-can trigger rework or new inspection cycles. Keeping the contractor informed about anticipated inspection dates helps align materials delivery, staging, and access needs.
Wind-mitigation features are a central topic in this climate, where roof geometry, attachment methods, and fastening patterns directly influence both code approval and later insurance documentation. When selecting a roofing system, verify that the proposed design includes the wind-resistance details required by Miami-Dade standards, as this information is often reviewed during the permit phase and again during the final inspection. Documentation associated with wind mitigation-such as installer certifications, fastener counts, and method statements-can simplify future insurance processes and potential claims. If a homeowner plans upgrades or retrofits, discuss how those changes will be reflected in the permit scope and the corresponding inspection milestones to maintain uninterrupted code compliance.
Provided local pricing ranges run from about 350 to 650 USD per square for asphalt shingles, 750 to 1250 for metal, 1500 to 2600 for clay tile, 900 to 1500 for concrete tile, 600 to 1100 for wood shingles or shakes, and 400 to 800 for synthetic or composite shingles. These numbers reflect typical job sites in this market, where tile and wind-sensitive installs drive the upper end of the spectrum. In practical terms, you'll see a noticeable gap between a straightforward re-roof on a simple slope and a full replacement that adds weather-ready upgrades or repairs to the deck. In Homestead, costs are commonly pushed higher by Miami-Dade-style wind resistance expectations and the labor intensity of premium materials.
Storm-season demand spikes can shorten the time window to secure crews, and that pressure often nudges prices up a bit. Roofing crews in this area are accustomed to high heat, frequent afternoon storms, and the need for meticulous underlayment and fastener patterns for wind resistance. Tile and metal roofs routinely require more labor hours for precise wind-fastening, deck inspection, and sealant work around eaves and penetrations. Synthetic and composite options can offer a balance between upfront cost and wind performance, but you'll still be paying a premium for installation accuracy in a high-wind climate.
For a hurricane-ready approach, the cost spread you see here often reflects not just material but the wind-mitigation details your home may need. A straight re-roof on a standard slope can stay within the lower or mid part of the ranges, while a replacement that adds upgraded fasteners, better underlayment, and secure edge details tends to press toward or beyond the upper ends. Clay and concrete tiles, while costlier, bring long-term durability in storm zones if installed with the right fastener pattern and flashing. Metal roofing, while pricey upfront, can offer strong wind resistance with lighter deck loading and faster installation.
Think through whether the project is a simple re-roof or a more complex scenario that includes storm damage, deck repairs, or premium wind-mitigation upgrades. Factor in the local labor intensity and the seasonal demand spikes that can alter both availability and price. If you're balancing upfront cost against long-term performance, a mid-range option with robust wind-fastening details often delivers the most dependable protection in this climate.
Don't let upfront costs delay a critical repair - these contractors offer payment plans to fit your budget.
You'll notice carriers scrutinizing roof age, condition, and paperwork more closely than in calmer markets. In this high-claim environment, a roof isn't just about keeping rain out; it's about demonstrating resilience against hurricane winds. Insurers expect a documented history of maintenance, visible signs of recent repairs, and a coherent narrative about how the roof handles the worst storm scenario. If your roof looks aged or weathered, you'll feel the impact in underwriting, renewals, and the ability to secure or maintain coverage.
When you shop for or renew a policy, you may be asked for detailed roof photos, condition reports, and evidence of wind-mitigation features. Clear, up-to-date photos showing the entire roof from multiple angles help. A simple, professional condition assessment that notes any loose tiles, lifted edges, or flashing issues can prevent gaps in coverage. Wind-resilience features-like properly installed fasteners, reinforced hips and ridges, and certified hurricane clips-are not cosmetic add-ons; they influence both risk perception and your bottom line.
Because underwriting has tightened in recent years, roofing decisions often hinge on insurability as much as leak prevention. When choosing materials and installation methods, consider how likely the system is to survive a high-wind event and how easily insurers can verify those features after a storm. A well-documented wind-mitigation approach reduces the chance of claim friction later, even if the upgrade costs are visible now. Think about repairability and inspection-friendliness as you plan: a storm-ready roof should invite confidence from both you and the adjuster.
Start with a candid assessment of exposed edges, hips, ridges, and penetrations. Photograph and record the date of any prior repairs, then organize this dossier for easy sharing with your insurer or broker. If you're contemplating re-roofing, prioritize installations that meet wind-resistance benchmarks and that can be clearly documented for future claims review. Your goal is a roof that tells a transparent story-one that supports coverage decisions and preserves peace of mind when a storm forecast looms.
Connect with contractors who help homeowners navigate the claims process from damage assessment to final approval.
Paula Roofing
(786) 352-9005 www.paularoofingllc.com
18395 SW 293rd St, Homestead, Florida
5.0 from 140 reviews
Flat and low-slope roofing is a meaningful local specialty in Homestead, indicating a real share of homes, additions, porches, or mixed residential-commercial structures with drainage-sensitive roof areas. These spaces often sit at the transition between a traditional pitched roof and a flat extension, catching more daily weather stress from heavy rains and tropical showers. The heat combined with humidity accelerates wear on seams and joints, making steady, targeted maintenance essential.
In Homestead's heavy-rain climate, low-slope sections are especially vulnerable to moisture intrusion when drains, scuppers, transitions, or flashing details are not maintained. Debris buildup, ladder-like clogs, or misaligned flashing can create standing water or slow leaks that hide under parapets or along wall penetrations. Scuppers and overflow paths must deliver rainwater away from the structure promptly, not back into the interior. Transitions between a flat surface and a pitched roof or adjoining porch should be walked carefully for signs of wind-driven water intrusion after a storm.
These roof areas often become the first trouble spots during summer downpours and tropical weather even when the main pitched roof still appears serviceable. Look for staining on ceilings near interior corners after a sudden downpour, and check exterior edges for fanned water marks or bubbling paint where moisture may be seeping beneath. The heat can soften sealants, so jigs of flashing and sealant lines should be inspected after the wet season's first heavy rains.
Start with the drainage hardware: ensure gutters and downspouts are secure, free of leaves, and able to move water away from the fascia. Inspect scuppers for blockages and test their flow by gently flooding the surface from a safe source to observe drainage. Examine transitions where the flat surface meets a wall, curb, or deck for lifted membranes, cracked caulk, or loose metal flashing. Finally, look at penetrations such as vents, skylights, and edge trim; reseal or replace deteriorated flashing material before a storm returns.
Find specialists in TPO, EPDM, and built-up flat roofing systems for residential and commercial properties.
Stone House Roofing
(305) 239-8838 shbuildingroup.com
28124 SW 159th Pl, Homestead, Florida
5.0 from 32 reviews
Addison Roofing
(305) 506-7772 www.addisonroofinginc.com
20231 SW 321st St, Homestead, Florida
4.6 from 28 reviews
Skylight work appears often enough in the Homestead market to merit special attention, suggesting leak-prone penetrations are a recurring local service need. In a climate with intense sun, wind-driven rain, and frequent storms, flashing around skylights and other penetrations can become a weak point before the main field of roofing fails. When a re-roof is due, those weaknesses get a second chance to cause interior damage if not addressed properly. The goal is to treat every penetration as a potential leak site, not as a quick add-on during a recover.
During a re-roof, prioritize a continuous, multi-layer flashing approach around skylights, vent pipes, and chimneys. In hot, sun-drenched days, flashing materials must resist thermal cycling without buckling. In Homestead's storm season, secure metal step flashings, counter-flashing, and sealant joints so wind-driven rain cannot pry them loose. A tight transition between the skylight flashing and the roof surface matters more than the skylight itself. Make sure fasteners are corrosion-resistant and driven to the correct depth to avoid wicking.
If a skylight is being replaced or moved, consider a curb-mounted unit with reinforced framing and a low-profile, high-slope roof plane to shed rain quickly. Ensure the curb is integrated with drip edges and a waterproof membrane underlayment that extends well beyond the skylight perimeter. The sealant layer should be continuous and free of gaps, with additional protection at joints where sunlight and heat intensify aging. In re-roofing projects, confirm that flashing around the skylight is not an afterthought but scrutinized at the same level as the field shingles.
Before agreeing to a re-roof, inspect the existing penetrations for signs of degradation: hairline cracks in sealant, corroded fasteners, or discoloration that hints at moisture intrusion. Ask for a detailed plan that shows how each penetration will be flashed and sealed, including any vent sleeves or chimney areas. During installation, look for clean cuts around skylight base, a continuous bead of sealant, and an overlap that directs water away from the opening. Finally, verify that a reputable roof membrane underlayment remains intact beneath all penetrations to prevent leaks from summer storms.
Find contractors experienced in skylight installation, flashing, and leak repairs to bring natural light into your home.