Last updated: Apr 19, 2026
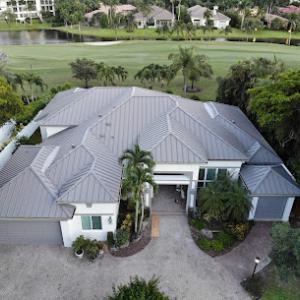
The High-Velocity Hurricane Zone sets a sharper bar for wind resistance than most Florida markets. A roof replacement isn't just about looks or lifespan; it's about standing up to gusts that can fling debris, peel panels, or lift edges off as a storm roars through. You'll want a roof system that's explicitly tested and assembled to survive rapid pressure changes, with fasteners, underlayment, and flashing chosen to resist wind-driven water intrusion. In practice, this means focusing on the roof's ongoing anchorage, edge protection, and the ability of materials to resist uplift at every seam and transition. When a contractor talks about "retrofits" or "wind-rated assemblies," those terms aren't optional extras here-they're the baseline.
County-level practice emphasizes how a roof is attached, how edges are sealed, and how openings around vents, skylights, and chimneys are protected. The salt-air environment accelerates corrosion, so every metal component, from nails to clips, should be corrosion-resistant and installed with attention to reduced vulnerabilities at corners and eaves. Look for attachment methods that minimize fastener corrosion risk and maximize pullout resistance, especially at hip and valley joints. A well-executed wind-mitigation strategy can be the decisive difference between a roof that sheds wind-driven rain and one that fails during a storm. Ask specifically about engineered trusses or rafters braced for high winds, sealant choices that remain flexible under heat and humidity, and flashing that remains watertight after months of heavy rain. In this market, the best crews don't just install a roof; they engineer a system designed to hold together under prolonged pressure.
That long, wet season isn't just a weather note-it's a calendar reality with serious consequences for roof safety and insurance documentation. Reroof timing is often weighed against the peak months when storms are most likely to strike. If aging or damaged roofing elements could fail under heavy rain or gusty winds, the prudent choice is to address those weaknesses before the height of the season. Even if a storm loss isn't pending, the climate pattern makes proactive reroofing a shield against pileups of claims after a storm, when contractors are busiest and weather windows are short. Consider staging a plan that prioritizes components most vulnerable to wind uplift and water intrusion: edge protection, ridge cap integrity, and transitional details at walls, chimneys, and vent penetrations. Keeping the roof system fresh and tightly joined reduces the risk of rapid deterioration when tropical moisture fuels a late-season system.
When evaluating proposals, prioritize those that specify wind-rated underlayments, corrosion-resistant fasteners, and a zero-tolerance approach to loose edges. Seek confirmation that the roof's design accounts for Miami-Dade wind speeds, including uplift calculations for the specific material choice. In this climate, even durable materials like metal or concrete tiles gain a lot from detailing that ensures continuous wind-resistance across the field, hips, and ridges. Do not overlook the importance of attic ventilation in a hot, moist environment, as proper ventilation supports both roof longevity and interior comfort during intense rain events. Coastal exposure means a breeze that travels from sea to roof deck; protective measures should acknowledge salt exposure and the faster onset of material fatigue. If a contractor hesitates on wind-related specifications, treat that hesitation as a red flag and seek a second opinion from a local expert who routinely works within the High-Velocity Hurricane Zone.
In this climate, coastal salt exposure and hurricane uplift dominate what counts in a roof system. The dominant residential choices-asphalt shingles, metal, clay tile, concrete tile, synthetic/composite shingles, and slate-each respond differently to salt air, wind pressures, and the long rainy season. The performance gap between ordinary installations and those designed for severe wind uplift is especially pronounced near the shore. A roof that looks good in a dry season but loses grip during a named storm will quickly manifest its weak links. This section helps you compare options with those realities in mind.
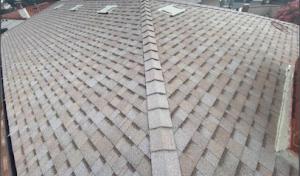
Asphalt shingles can be a practical, cost-conscious choice, but in this market they must be installed with hurricane-grade underlayment and fasteners sized for high wind zones. Look for shingles rated for elevated wind uplift and a reliable sealant that resists moisture during the heavy rains. Synthetic or composite shingles offer improved impact resistance and lighter weight, which helps with uplift resistance when paired with a well-anchored deck and corrosion-resistant nails. In both cases, the edge matters: proper ridge venting and secure hip-and-ridge detailing reduce tear-off risk during tropical storms. Also, consider a premium underlayment that stays pliable in heat and humidity to prevent leaks when tropical downpours arrive.
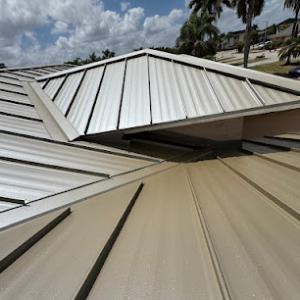
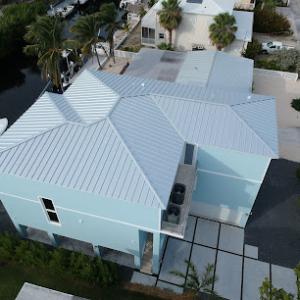
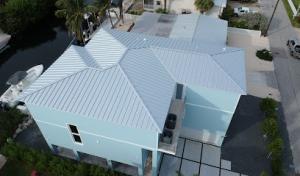
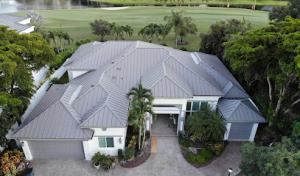
Metal roofing responds well to wind when installed with a continuous deck attachment and corrosion-resistant fasteners. Near-shore homes face added corrosion pressure from salt air, so choose metal panels and screws with coastal-grade coatings and seals. Look for exposed-fastener schemes only if fasteners are rated for salt environments; otherwise, opt for concealed-fastener systems in areas with high uplift potential. A coated or painted finish that resists chalking and salt spray will extend service life. For Miami's storm seasons, ensure panel-to-panel seams are sealed with butyl or foam gaskets designed for humid, salty air, and verify that gutters and downspouts are integrated to carry water away from the roof edge without pooling near the structure.
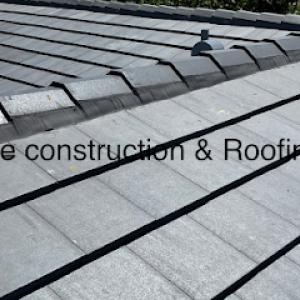
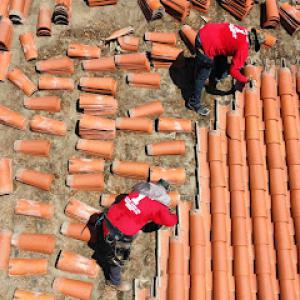
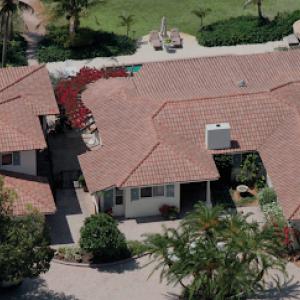
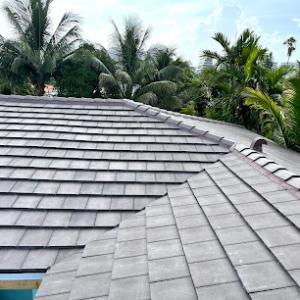
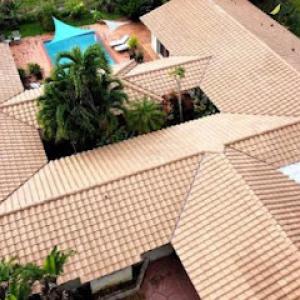
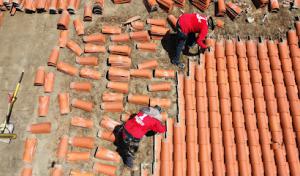
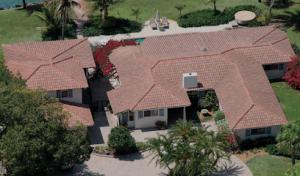
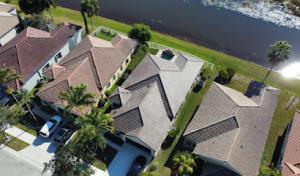
Clay and concrete tiles remain common because they suit Mediterranean and tropical-inspired architecture, but their wind performance hinges on a strong, properly fastened battens-and-deck system. Tile roofs need careful attention to edge and parapet detailing, since uplift is concentrated along eaves and ridges. Concrete tiles are heavier and typically more robust against hail, but installation must address hurricane uplift with approved fasteners and corrosion-resistant hangers. In coastal zones, ensure battens are treated and metal components are stainless or coated for salt exposure. A well-sealed roof deck with continuous underlayment helps prevent water intrusion during the heavy rainy season, when multiple storms can stress the system in quick succession.
Slate and high-end tile can offer excellent longevity and aesthetic appeal, but their weight and installation complexity demand a structurally sound deck and precise fastener patterns. For storm-season reroof timing, slate and tile projects should be scheduled in the drier months with attention to wind-rated installation methods and corrosion-resistant hardware. Slate's rigidity makes it less forgiving if deck movement occurs, so a meticulous inspection of the substrate before installation pays off in long-term performance. In all tile systems, coastal exposure requires attention to edge-fastener security and waterproof detailing around chimneys, vents, and skylights to minimize wind-driven leaks during hurricane season.
The daily thunderstorm pattern from roughly May through October turns small roof defects into active interior leaks in minutes. A hidden puncture or loose flashing can weep through underlayment, drip down into ceilings, and ruin valuables before you can grab a bucket. In a neighborhood where shingles age fast under salt air and wind, even a modest attic vent or seam can become a flood point after a few hours of back-to-back downpours. If you notice a drop, treat it as an emergency-don't pause to finish a cup of coffee or wait for a sunny window.
Scheduling emergency dry-in work is more difficult during hurricane season because repeated rain events reduce safe tear-off windows and increase the need for temporary protection. Roofer crews must coordinate tarps, temporary coverings, and staged removal with wind gusts and surface slickness. If a storm seems imminent, you need a plan for rapid tarping and immediate access to a crew that can secure the deck and underlayment before interior damage escalates. A proactive approach-calling for a night or early-morning dry-in when weather loosens briefly-can be the difference between a fast fix and a long remediation.
Fast-response leak service is especially important in Miami because exposed roof decks and underlayment can be hit by another storm within a day during the wet season. If a leak is found, you want a crew that arrives with waterproof tarps, quick-sealing materials, and a staged plan to cover the most vulnerable areas immediately. Document the leak with photos, identify the likely path of water intrusion, and communicate a tight, interim repair to keep moisture away from electrical or ceiling cavities. In the heat and humidity, moisture travels fast; temporary coverings need to be secure, vented, and checked after every shower of rain. A reliable local contractor will bookmark a short-term patch while mobilizing a longer-term repair, so you don't have to juggle multiple trips under a tightening deadline.
Proper Roofing Inc. - Top Rated Roofing, Windows & Remodeling.
(786) 891-1771 www.properoofing.com
1011 Ives Dairy Rd Suit 210, Miami, Florida
5.0 from 612 reviews
With nearly three decades of experience, Proper Roofing has been a trusted leader among Miami's roofing companies. Specializing in top-tier roofing solutions, their team of expert contractors provides superior service for both residential and commercial properties. Whether you need a full replacement, professional repair, or a new installation with shingles, tile, or metal, their commitment to using quality materials ensures lasting results. Their expertise also extends to exceptional kitchen and bathroom renovations, bringing a new level of craftsmanship and reliability to your home improvement projects.
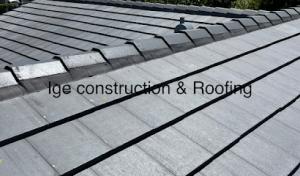
Ige Construction & Roofing
Miami, Florida
5.0 from 143 reviews
ROOFING AND CONSTRUCTION
Mibe Group
(786) 808-6212 miamibestroofing.com
16300 SW 137th Ave, Miami, Florida
5.0 from 134 reviews
MIBE GROUP is Miami's Best Roofing We are A Licensed & Insured Company Is our commitment to treating customers as we’d like to be treated. Our dedication to ensuring 100% satisfaction, using only high-quality materials and superior workmanship, have made us one of the premier roofers in Miami Dade, Broward and Monroe Counties. Our reputation for quality, service and integrity has enabled us to expand our services beyond roofing to other Home Improvement specialties. Today MIBE Group is your trusted one-stop professional service provider for: New Roofs, Roof Replacements, Roof Repair, Flashing Repair and Waterproofing Services.
Orian Roofing & Construction
(305) 707-4457 www.orianroofingmia.com
Miami, Florida
5.0 from 87 reviews
Orian Roofing and Construction offers roofing services for homes and businesses in Miami-Dade County. Our team helps property owners with their roofing needs. We provide roof repair, roof replacement, shingle roofing, tile roofing, flat roofing, waterproofing, roof inspections, and maintenance services. We use materials that meet Miami-Dade standards. We focus on proper installation, strong structure, and long-lasting roof performance. We also offer financing options, including 0% interest and low monthly payment plans.
Miami Roof-Tech
(305) 722-7606 miamirooftech.com
2977 McFarlane Rd Penthouse 1, Miami, Florida
4.9 from 139 reviews
Miami Roofing contractor specializing in tile, shingle, flat and metal roofs for residential and commercial properties.
MRT Construction
2485 NW 65th St, Miami, Florida
5.0 from 105 reviews
MRT Construction is a Licensed, Insured & Bonded Commercial and Residential Roofing Contractor in the State of Florida that specializes in different types of roofing systems; working with homeowners, general contractors, real estate developers, and property management companies.
Jireh Roofing Contractor USA
(305) 900-9322 www.jirehroofingcontractorusainc.com
1400 NW 119th St, Miami, Florida
4.9 from 210 reviews
Jireh Roofing Contractor USA, INC is a family-owned business with licenses covering Six significant construction categories. We specialize in delivering top-notch roofing and construction services to both commercial and residential property owners throughout the state of Florida. Our foundation rests upon years of experience, unwavering determination, and a commitment to craftsmanship. We pride ourselves on offering roofing and construction services that are not only high in quality but also affordable and reliable. Providing Roofing Service in Miami, Broward, Palm Beach County & Areas Near You! Disclaimer: We are NOT associated with any other “Jireh Roofing” we are a ONE AND ONLY entity under licensure as, Jireh Roofing Contractor USA INC!
Top-Grade Roofing
(786) 616-2932 tgroofingfl.com
14900 SW 136th St Suit 109 A, Miami, Florida
5.0 from 63 reviews
"Top- Grade Roofing is a top-quality family owned and operated roofing contractor. We specialize in all aspects of residential , commercial and industrial roofing systems as well as sheet metal. A job well done, customer satisfaction and job safety are the signature of our work. Whether it is new construction, restoration, re-roofing or roof maintenance, you will receive the best quality work at highly competitive prices. We are confident in our safe reliable roof systems built to keep your building safe in Florida's year round ever-changing weather."
T&S Roofing Systems
(305) 676-7043 www.tsroofingsystems.com
2519 NW 38th St, Miami, Florida
4.8 from 1158 reviews
Since 2004, T&S Roofing Systems has been providing quality roofing services to homeowners and building owners in Miami-Dade and Broward County. Our team is focused on estimating projects accurately and installing roofs with the highest standard of quality.
Flash Roofing & Sheet Metal
(786) 237-9440 flashroofingmiami.com
16677 SW 117th Ave, Miami, Florida
5.0 from 59 reviews
Welcome to Flash Roofing and Sheet Metal, LLC, a family-operated business with over 30 years of roofing experience serving the greater Miami-Dade County, FL area! We provide expert residential and commercial roofing solutions, including installations, repairs, replacements, and waterproofing. Our skilled team specializes in durable metal, tile, shingle, and flat roof solutions. We ensure every project is completed efficiently without compromising quality. We proudly serve Miami, Hialeah, Doral, Coral Gables, Key Biscayne, South Miami, North Miami Beach, Opa-locka, Medley, Sweetwater, and Pinecrest. Our service area also includes Miami Springs, West Miami, Westchester, and Virginia Gardens.
Dynasty Roofing
(786) 935-7228 dynastyroofingllc.us
1227 NW 29th St, Miami, Florida
4.9 from 106 reviews
Family business dedicated to serve Florida, Dynasty Roofing is a company that specializes in repair and installation of roof, we have more than 30 years of experience in all types of repairs and installation of roof. Commercial and domestic flat roof, we offer free estimate and help you determine which is the ideal roof for your home. Changing the roof of your house or repairing it can be a difficult process if you do not have the knowledge so in Dynasty Roofing we always educate our customers before making deals with them, we want to help you in your repair or installation of roof.
Flat and low-slope roofing is a meaningful part of the market, especially on multifamily, commercial, and some modern residential structures exposed to intense summer rainfall. Drainage design must prioritize rapid water outflow toward approved scuppers or internal drains, with a bias toward gradual slope toward these outlets. In practice, this means confirming a minimum positive slope toward the drainage points and verifying that all transitions to drains are free of sharp changes that can trap water. Include redundancy in outlet paths where possible, since coastal areas see sudden downpours that can overwhelm a single line.
Miami's frequent heavy rain makes ponding control and flashing reliability more urgent on low-slope roofs than in drier Florida markets. Regularly inspect for standing water after a storm and after the wet season's peak. If ponding persists beyond 48 hours after a rain event, investigate deck coatings, ballast where applicable, and the condition of membrane seams. Pay particular attention to areas around penetrations, vents, and equipment curbs where water can accumulate and undermine attachment details. Ponding should be viewed as a symptom of underlying slope or drainage path issues, not just a surface problem.
Coastal exposure and salt air mean flashing material must resist corrosion and remain integrated with the roof deck. Inspect edge flashing and terminations at parapets, gutters, and scuppers for any sign of lifting, corrosion, or membrane damage. In high-rain regions, flashing should be reinforced where the membrane interlocks with metal edges or terminations. Keep salt spray at the top of mind: fasteners and sealants in these zones should be chosen for coastal durability and periodic resealing during dry spells to prevent leaks during storms.
Roof coatings and restoration are locally relevant because some owners try to extend low-slope roof life between major storm seasons rather than schedule a full replacement immediately. Use coatings that are compatible with the existing membrane and that maintain UV and water resistance while maintaining slip resistance for maintenance crews. Regular cleaning of debris from drainage outlets and scuppers helps maintain performance, especially after the peak rainy season when gutters and drains can clog with palm fronds and salt-laden debris.
Storm-season reroof timing matters in Miami. If a full replacement is planned, coordinate scupper and drainage system inspection early enough to account for any required improvements without delaying the next hurricane window. For repairs, prioritize flashing integrity and deck seam reliability, since failures there are most likely to lead to rapid water intrusion during heavy summer downpours. When scheduling restoration work, align it with the wet-season lull to minimize disruption and exposure to salt air during critical attachment and sealing phases.
Find specialists in TPO, EPDM, and built-up flat roofing systems for residential and commercial properties.
Taylor & Sons Roofing & Construction
9825 W Flagler St #1929, Miami, Florida
4.9 from 140 reviews
Orian Roofing & Construction
(305) 707-4457 www.orianroofingmia.com
Miami, Florida
5.0 from 87 reviews
Miami Roof-Tech
(305) 722-7606 miamirooftech.com
2977 McFarlane Rd Penthouse 1, Miami, Florida
4.9 from 139 reviews
A full reroof in the area typically requires a permit, with the licensed contractor submitting plans to the local building department for review. The review process looks closely at how the new roofing system will perform under hurricane wind loads and how the attachment details will meet wind-resistance standards specific to Miami-Dade and nearby Broward jurisdictions. Expect questions about fasteners, nailing patterns, underlayment, and any modifications to eaves, hips, and ridges that influence wind performance. Having precise, code-aligned drawings ready can shorten the path to approval and help avoid delays caused by missing information.
Inspections in this market commonly occur after roof removal, again before the installation is completed, and then at final approval. The first post-removal check verifies that all damaged or compromised sheathing has been replaced or repaired and that the substrate is sound for the new system. The intermediate inspection focuses on the installation methods, penetration details, and the securement of the roof deck and underlayment. The final inspection confirms that the overall assembly complies with wind-resistance requirements and that the workmanship meets the standards expected by the authority having jurisdiction. Scheduling inspections around weather windows can help keep the project on track, particularly during the wet season when delays are more likely.
Miami-Dade and nearby Broward jurisdictions are known for close attention to wind-resistance and wind-mitigation requirements during reroof review and inspection. Expect the plan set to address secondary water drainage, proper nailing for the chosen roofing type, and the installation of any wind-m mitigation upgrades such as clipped nails, upgraded fasteners, or hurricane straps where specified. The inspectors may request documentation of product approvals, engineering letters, or manufacturer installation manuals that prove the selected system is certified for the local wind speeds. Having these items ready at submission supports a smoother review and reduces the chance of renegotiation mid-project.
As a homeowner, you should be prepared to provide property records, prior permit history, and any available mitigation documentation from the previous roof. Ask the contractor to annotate the plan set with site-specific details, including roof slope, exposure category, and any nearby obstructions that could influence wind loads. Keeping a clear line of communication with the building department helps clarify expectations and can prevent misalignments between the installed system and the approved plan. Remember that the permit and inspection process is designed to ensure long-term durability against Miami's coastal wind and storm-season challenges.
Asphalt shingles run about $350-$650 per square, metal $700-$1400, clay tile $1200-$2500, concrete tile $900-$1700, synthetic/composite $350-$750, and slate $1800-$4500. These figures reflect local supplier pricing and the specialty work that Miami crews perform, including hurricane-oriented fasteners and underlayment choices that tolerate the salt air and frequent sun. If a tile-heavy home needs a matching color or profile, expect the higher end of the range, since long-lasting coastal finishes and corrosion-resistant components cost more up front.
Reroofing costs can rise after hurricanes or major storms when demand surges for tear-offs, dry-ins, and emergency repairs across the county. In practice, that means lead times stretch, crews may charge rush or after-hours premiums, and material scarcities push prices higher than typical dry-season bids. If you're approaching the storm window, plan for a contingency of 5-15% above the usual quote to cover potential expedited work, accessory swaps, and extra sealants required for wind-driven rain.
Tile-heavy architecture and coastal corrosion concerns push labor and accessory costs above inland norms. Wind-oriented installation requirements demand careful attachment details, higher-rated underlayment, and corrosion-resistant fasteners, which adds to the bill. Expect higher costs for attic ventilation work, upgraded flashing at transitions, and premium sealants designed to resist salt spray. In practice, a well-ventilated, properly fastened system with durable flashings will pay off during hurricane season, even if the upfront price is a bit higher.
Don't let upfront costs delay a critical repair - these contractors offer payment plans to fit your budget.
Orian Roofing & Construction
(305) 707-4457 www.orianroofingmia.com
Miami, Florida
5.0 from 87 reviews
T&S Roofing Systems
(305) 676-7043 www.tsroofingsystems.com
2519 NW 38th St, Miami, Florida
4.8 from 1158 reviews
City Roofing
(305) 248-2994 mycityroofing.com
22700 SW 172nd Ct, Miami, Florida
4.8 from 383 reviews
Insurance carriers scrutinize roofs here, and this market is known for wind-driven claims. Replacement or repair can hinge on documentation of roof age, overall condition, and whether the storm left damage. If a roof shows wear or past repairs, expect more friction when filing after a storm season.
Keep a detailed record you can share with the insurer: roof age, last full replacement date, shingle or tile type, attic ventilation, and evidence of proper fastener patterns. In this climate, salt air and heavy rains accelerate deterioration, so dated inspections with clear photos matter. An insurer may request a professional assessment to verify that hail or wind damage fits the claim, not prior wear.
After you replace, emphasize code-compliant attachment, new clips, strengthened underlayment, and impact-resistant finishes when available. Documentation that your roof is mechanically fastened to withstand higher wind speeds can influence credits and eligibility, especially if the previous roof aged out before the storm season.
If a reroof is planned, aim earlier in the season when rains are lighter and before hurricane activity peaks. Delays can leave a policyholder facing higher deductibles, longer claim processes, or gaps in coverage right as a big weather event looms. Start the conversation early with the carrier and your roofer to align on evidence you will submit after work is finished.
Coastal exposure compounds risk in this market. Salt air accelerates corrosion and flashing wear, so detailing a weather-ready system matters. When choosing materials, note that some products perform better under hurricane codes and salt spray; installers should describe attachment methods, breakaway panels, and sealants. Your records should capture product names, wind-resistance ratings, and whether hurricane-rated components were included.
Keep copies of inspection dates, contractor letters, and wind-rated product documentation. Share these promptly after completion to avoid post-storm delays or coverage questions. This practice protects home value and helps ensure you can rely on credits when the wind season arrives for better protection.
Connect with contractors who help homeowners navigate the claims process from damage assessment to final approval.
Taylor & Sons Roofing & Construction
9825 W Flagler St #1929, Miami, Florida
4.9 from 140 reviews
Homes closer to Biscayne Bay and Miami's barrier-island shoreline face more aggressive salt-air exposure than inland neighborhoods. Salt particles drift inland on every breeze, settling into fasteners, flashings, and metal accessories. That exposure can accelerate corrosion even when the primary roof covering isn't metal, and it wears down the small but crucial components that keep the roof watertight and wind-resistant. In practice, this means more frequent checks of ridge vents, metal transition pieces, and drip edges, especially after heavy storms or sustained salty easterly winds. The result is a gradual loosening of seals and a higher risk of leaks in corners where salt tends to linger.
Material selection in coastal pockets has to balance hurricane uplift resistance with marine exposure. A near-shore property benefits from coatings and alloys designed to resist salt corrosion, plus fasteners that hold up under salt-logged air and strong gusts. Even if the main roof covering isn't metal, choose underlayment, flashing, and accessory hardware with proven coastal performance. That combination reduces the chance of rust blooms, fastener fatigue, and compromised seams after a sustained blow or a wet season. For some homes, this means leaning toward systems with robust corner and edge protection and components rated for salt exposure.
Warmer, wetter seasons bring heightened risk of accelerated wear, so plan reroof or reseal work with storm-season timing in mind. Schedule proactive inspections before hurricane season to verify flashing integrity, sealant condition, and corrosion on metal parts. After heavy rains or tropical activity, perform a targeted check of all penetrations and edge metal. If corrosion shows up on even unseen fasteners, treat early to prevent faster degradation and potential leaks when winds rise. This is where local weather patterns and coastal exposure meet everyday durability decisions.
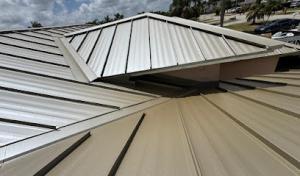
Explore specialists in steel, aluminum, and standing seam metal roofs built to last 50 years or more.
Proper Roofing Inc. - Top Rated Roofing, Windows & Remodeling.
(786) 891-1771 www.properoofing.com
1011 Ives Dairy Rd Suit 210, Miami, Florida
5.0 from 612 reviews
Mibe Group
(786) 808-6212 miamibestroofing.com
16300 SW 137th Ave, Miami, Florida
5.0 from 134 reviews
In Miami, a large stock of tile roofs means underlayment aging and storm-displaced tiles are common homeowner concerns even when the tile surface itself appears durable. The wind-driven rains of local storms can push moisture under cracked or loose tiles, and aging underlayment loses its grip when salt air corrodes fasteners. After a tropical season, check for soft spots, popped tiles, or lifted edges around roof penetrations. If you see movement, don't wait for a full reroof; a targeted underlayment refresh can stop leaks before they start.
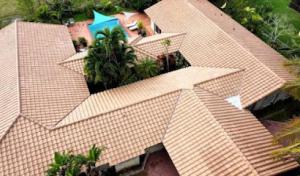
Because many homes combine complex rooflines with tile profiles, leak tracing can be more difficult than on simpler shingle roofs after heavy summer storms. Start with the high-risk zones: valleys, along ridges, and where roof planes meet walls. Salt-spray-exposed fasteners and cracked clay or concrete tiles create narrow pathways for rain. Use a binocular inspection from ground level to identify displaced tiles, then confirm with a careful attic check for telltale damp spots that migrate after a rain event. When resealing, pay special attention to hip and ridge caps, which often bear the brunt of wind pressure.
Skylight leak risk is amplified in Florida's wind-driven rain events, where flashing weaknesses can show up during tropical storms before they are obvious in dry weather. Inspect skylight flashing from both exterior and interior sides, especially after a hurricane shutter cycle or a heavy storm. Look for lifted metal flashings, torn mastic, or gaps around the curb. Seal or replace damaged gaskets promptly, and consider upgrading to flashing with corrosion-resistant materials designed for coastal environments. If a skylight loses its seal, even a small breach can become a conduit for rain toward the ceiling below.
When a leak is suspected, start at the source by mapping water intrusion paths in the attic and then backtrack along the tile layout to potential entry points. Lightly press along the underlayment with a screwdriver or probe only if you're equipped to avoid causing further damage. For complex rooflines, photograph each plane and flash line-storms can shift a tile or flashing in ways that aren't obvious after a dry spell.
Find contractors who specialize in clay and concrete tile roofs, known for their durability and curb appeal.
Proper Roofing Inc. - Top Rated Roofing, Windows & Remodeling.
(786) 891-1771 www.properoofing.com
1011 Ives Dairy Rd Suit 210, Miami, Florida
5.0 from 612 reviews
Mibe Group
(786) 808-6212 miamibestroofing.com
16300 SW 137th Ave, Miami, Florida
5.0 from 134 reviews
Taylor & Sons Roofing & Construction
9825 W Flagler St #1929, Miami, Florida
4.9 from 140 reviews
In this market, homeowners often hire for reroofing rather than minor tune-ups, so contractor experience with full tear-off, dry-in, and inspection sequencing matters more than generic handyman-style repair capacity. A crew that treats the job as a complete rebuild will protect attic ventilation, underlayment, and nail patterns against salt air and high winds. Expect crews to outline step-by-step what happens from tarp to final seal, and look for clear, written sequencing that minimizes exposure windows.
Quick response and cleanup are especially valued in Miami because storm-season jobs can leave homes exposed if crews are delayed or debris is not removed before the next rain. Ask for a realistic timeline, with milestones for roof removal, deck drying-in, and weather contingency. Confirm that the crew will do a thorough debris and nail removal at the end of each day and a final sweep before water can intrude. A tight wrap-up plan reduces the chance of shingles or fasteners traveling with the next squall.
The local market includes many long-established and family-owned companies, which matters in a city where warranty follow-through and post-storm availability are practical concerns. Look for a contractor with a stable ownership group, a verifiable regional presence, and a record of honoring warranties after big events. Ask for references from nearby neighborhoods that faced similar hurricane-season timelines. A crew that prioritizes consistent communication, on-call support after storms, and scheduled follow-ups will minimize the risk of gaps should a late-season resealing or inspection be needed.
Choose a crew that assigns a single point of contact for scheduling, weather-related delays, and post-work inspections. In practice, this means a crew arriving with a ready-to-go dry-in plan, pre-curated materials matched to your climate exposure, and a checklist that travels with them from tear-off to final cleanup. If the team can't articulate who handles the final warranty follow-up or inspection sequencing, keep looking.