Last updated: Apr 19, 2026
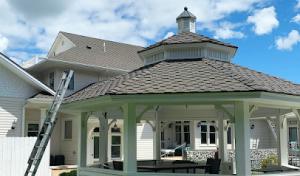
Your best window to tear off, dry in, and finish a roof replacement stretches from late spring through early fall. Winter freezing conditions and spring moisture can complicate the process, slowing detours like tear-off staging, drying times, and final installation. If you aim to avoid weather-related setbacks, plan the project for a stretch when days are reliably warm and dry, with enough daylight to complete each stage before the next cold snap. This is not just about comfort on the job; it reduces the risk of issues such as adhesive failure, underlayment moisture entrapment, and shingle set irregularities that can happen when a project drifts into wet or freezing periods.
Yakima's hot, dry summers push prolonged UV and heat stress onto all roof surfaces. Shingles and underlayment can degrade faster when exposed to clear skies and high daytime temperatures. In practice, this means the upper surface of the roof ages more quickly, and you'll notice more granule loss, color fading, and potential yard debris damage from sun-exposed flashing and vents. The dry heat also accelerates expansion and contraction cycles when the sun comes up and the metal or asphalt surfaces heat through the day. A roof in good condition will tolerate this stress, but aging materials may show early cracking, curled edges, or color inconsistency if neglected.
When winter arrives, cold, wet conditions shift the workload of the roof. The season flips from summer drying and expansion to winter contraction and moisture exposure. Moisture can infiltrate small gaps, cause micro-leaks, or slow down a dry-in process if rain or snow arrives during installation. The freeze-thaw cycle further stresses vulnerable joints, fasteners, and edge detailing. This pattern matters most for older roofs: if shingle granules are already thinning, or if there are known flashing weaknesses, winter exposure can turn those preexisting issues into noticeable leaks or interior damage after a season of stress.
Before committing to a reroof, inspect with Yakima conditions in mind. Look for signs of sun aging on asphalt shingles-rounded edges, pronounced cupping, or brittleness at the cutouts. Cedar shakes that show significant splitting or moss growth may indicate deeper deck concerns once winter moisture hits. If metal roofing reveals oxidation at fastener points or panels that are easily dented, the long-term performance may hinge on replacing underlayment and resealing ridges. Tile roofs, particularly concrete or clay, should be examined for cracked laps or broken tiles that can trap moisture. In heat and drought, the deck can also dry out, making it more prone to squeaks and board movement; in winter, that same deck may contract and reveal gaps around penetrations. If multiple areas show aging signs, it's prudent to plan a full reroof during the favorable late-spring to early-fall window.
Coordinate with the dry-season pattern to reduce the risk of moisture-related delays. Start with an on-site inspection that identifies which areas receive the most direct sun and which junctions accumulate more staining or wear. Prioritize flashing and edge detailing in your plan; these edges endure the most severe temperature swings and are common failure points after several seasons. Consider ventilation and attic conditioning as part of the project scope; a well-ventilated attic reduces attic heat buildup, which in turn lessens the thermal stress on the new roofing layer throughout Yakima's long sun-filled days.
If an older roof shows heavy granule loss, brittle shingles, or substantial deck concerns, treat the replacement as a seasonal investment rather than a rushed spring project. A measured approach-confirming dry days, allowing adequate curing time for underlayment, and coordinating access for material staging-helps ensure the new roof reaches its expected lifespan despite Yakima's climate swings. In short, align reroof timing with the late-spring to early-fall window, while letting the sun's intensity and winter moisture guide your decisions on materials, flashing, and ventilation.
In a place like this, hail events can leave sharp, sudden damage on asphalt, metal, or cedar shakes, while long, blistering sun accelerates material deterioration. You need to distinguish sudden impact damage from long-term sun wear when deciding whether to pursue repair or replacement. A dented or cracked shingle, torn flashing, or a perforation from hail requires immediate attention, but sun-bleached edges and granule loss can mimic wear that's less obvious until a leak shows up. Treat any new, unexpected roof irregularity after a hail event as a red flag that merits a quick, thorough inspection from a trusted roofer.
Spring rains in Yakima can turn a small roof opening into an active interior leak quickly, especially if damage is discovered after a wind or hail event. If you notice droplets in the attic, stained ceilings, or damp drywall after a storm, prioritize rapid temporary protection. Place a sturdy tarp or roof patch over the affected area, secure edges to resist wind uplift, and avoid walking on damaged sections to prevent further penetration. Time is of the essence: even a modest opening can escalate into significant interior damage with seasonal showers, so arrange a professional assessment as soon as conditions allow.
Because winter snow and freezing temperatures can slow permanent repairs in Yakima, temporary dry-in and emergency protection can be especially important after sudden damage. When cold snaps arrive, moisture that's not promptly managed can freeze and widen cracks, complicating subsequent repair work. If you can't get a repair crew on site right away, ensure the exposed roof is covered with a high-quality, wind-resistant tarp, and seal around the tarp edges to minimize drafts. Document the damage with photos for insurers and contractors so the recovery work can proceed as soon as weather permits.
After a storm, schedule an on-site roof inspection within 48 hours if possible. Focus on flashing around chimneys, vents, and skylights; edge protection along eaves; and the integrity of penetrations from the roof surface. Ask the inspector to identify items that pose an active leak risk versus wear that could be deferred until a full reroof makes sense. In Yakima's climate, a fast, targeted assessment helps determine whether a repair keeps a roof dry now or signals that a more extensive replacement is the prudent move for the long term.
Find local contractors experienced in assessing and restoring roofs after hail, wind, and severe weather events.

Roof Maxx of Yakima, WA
(509) 895-4540 getroofmaxx.com
5901 Crestfields Rd, Yakima, Washington
5.0 from 50 reviews

State Wide Contracting
(509) 985-1339 www.waroofers.com
715 S 2nd St, Yakima, Washington
4.9 from 56 reviews
Willy's Roofing
(509) 584-3695 willysroofingllc.com
2318 S 1st St, Yakima, Washington
4.8 from 100 reviews

Roof Maxx of Yakima, WA
(509) 895-4540 getroofmaxx.com
5901 Crestfields Rd, Yakima, Washington
5.0 from 50 reviews
Roof Maxx® is a scientifically formulated, and 100% safe, plant-based roof rejuvenating spray treatment that was developed by the world’s largest private research and development company.
State Wide Contracting
(509) 985-1339 www.waroofers.com
715 S 2nd St, Yakima, Washington
4.9 from 56 reviews
With many years of experience and dedication, we specialize in roofing and gutters. We offer many services ranging from repairs, full installations, to gutter cleaning services. We are reliable, fast, efficient, and most importantly trustworthy. We opened our doors in 2011 and we’ve gone to great lengths to be seen more than a general contractors. We are dedicated to providing customers with a variety of exceptional services, you can count on State Wide Contracting to deliver. Call us today for a FREE inspection and book an appointment! We offer a new roof no mess system. Ask for details.
Willy's Roofing
(509) 584-3695 willysroofingllc.com
2318 S 1st St, Yakima, Washington
4.8 from 100 reviews
Yakima valley roofing company. we work with any type of roofs commercial and residential. We are Insurance claims experts. No job is too small or big for us!!
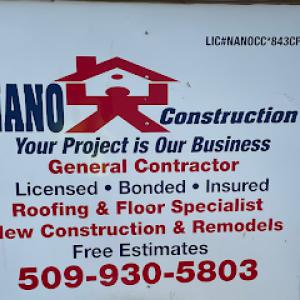
Nano Construction
1313 Pleasant Ave, Yakima, Washington
4.8 from 16 reviews
my company would be defined in 3 things respect,responsibility, and your satisfaction
Paramount Roofing & Construction
Yakima, WA
5.0 from 6 reviews
Local Roofing contractor in Yakima County. Certified Installers provine 50 year warranties on all our roof installs.
Superior Roofing
(509) 452-0676 www.superiorroofingllcwa.com
608 N 20th Ave, Yakima, Washington
4.4 from 12 reviews
We are an established, local company that provides top quality roofing services to our valley. We specialize in in the installation , repair, and maintenance of residential roofs. We offer competitive pricing and use highest quality materials.
Town & Country
420 N 20th Ave, Yakima, Washington
4.8 from 4 reviews
Since 1988, Town & Country Siding & Window has been Central Washington’s trusted contractor for roofing, gutters, siding, windows, decks, and patio covers. Our experienced team provides expert roof installation, roof repair, and inspections, along with seamless gutter installation, cleaning, repair, and protection solutions like gutter guards, heat cables, and snow retention. We also specialize in durable siding replacement, custom deck builds, and patio cover installations to protect and enhance your home. From start to finish, we deliver quality craftsmanship, fair pricing, and lasting results for homeowners and businesses across the region.
American Home Construction
Yakima, Washington
5.0 from 3 reviews
When it comes to roofing, you need a team that can handle any repair or installation. With the right roofing contractor, your home can stay well-protected for years to come. Choose American Home Construction, LLC to take care of your roofing needs.
All Weather Roofing of Yakima
412 S 58th Ave, Yakima, Washington
4.3 from 4 reviews
With over 40 years experience in the roofing industry, owner Stuart Evans offers his expertise, integrity and quality care for all your roofing needs. - Accredited by the Better Business Bureau - Certified Malarkey Roofing Product Installers - Member of Central Washington Homebuilders Assoc. Services include: roof removal and disposal, roof maintenance and repairs, and applications in asphalt composition, laminate, designer, fiberglass, architectural shingles, cedar shakes/cedar shingles, metal roof panels and trim, Single-ply flat roof membranes, clay/cement roof tiles, and more. Have questions about your roof? Call or email us to schedule your free consultation. State license: AWROORY931MW Contractor license: AWROORY931MW
Roof God
303 N 24th Ave, Yakima, Washington
5.0 from 1 review
Specializing in roofing, Single ply, tile, all types of shingles, metal, shakes. Helping you protect your most valuable investment, your home.
A-1 Construction of Yakima
(509) 248-7339 www.a-1construction.net
1901 E Mead Ave, Yakima, Washington
5.0 from 1 review
A-1 Construction provides reroofing services for homes, manufactured homes, condominiums, and apartments that have a pitched roof system. Our services include reroofing work, dry rot replacement, sheathing delamination replacement, insulation upgrades, restructure repair and replacement. A1 Construction is a locally owned roofing company. Our company has been providing services to families in Yakima and Yakima County since 1965. A-1 Construction specializes in installing composition roofing materials for pitched roofs; we feature GAF Roofing materials. We work closely with insurance companies to assist our clients with wind damage claims.
The Gutter Guys
(509) 930-7470 gutterguysofyakima.com
Serving
4.9 from 74 reviews
Since 2006, The Gutter Guys has been establishing itself as a premier gutter contractor for Yakima, Washington, and the surrounding areas. We specialize in gutter and leaf guard installations but also offer gutter cleaning services. For your peace of mind, The Gutter Guys are fully licensed, bonded, and insured. The Gutter Guys is a proud Central Washington Home Builders Association member. Call today with questions and to schedule your free estimate.
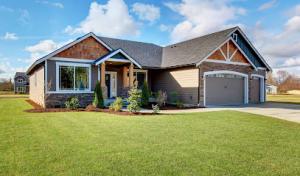
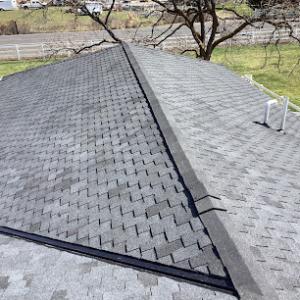
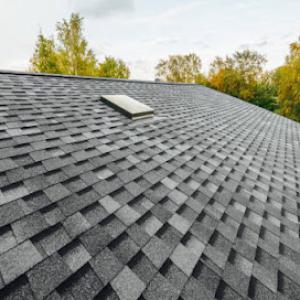
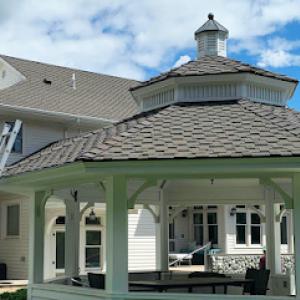
The Yakima Valley endures hot, arid summers paired with cold, wet winters and freeze-thaw cycles. This climate pushes roof systems to handle long sun exposure while resisting moisture-related wear in the shoulder seasons. When choosing a material, you're balancing sun fade and glare, edge warping or curling from heat, and the potential for ice damming or moisture infiltration in winter. Materials that perform well here avoid extreme thermal expansion and contraction, resist UV degradation, and shed moisture efficiently. The local market reflects a mix of asphalt shingles, metal roofing, clay and concrete tile, wood shingles or shakes, and synthetic or composite options, each with its own maintenance rhythm and lifetime pattern under these conditions.
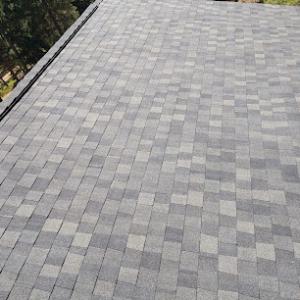
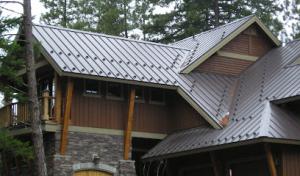
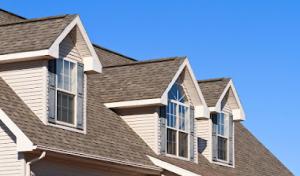
Asphalt shingles are ubiquitous for a reason: they're familiar to crews, affordable, and come in colors that reflect heat rather than absorb it. In the Yakima climate, asphalt can handle summer sun with proper underlayment and adequate attic ventilation, but the best results come from upgraded cap sheets and staggered installation that minimize heat transfer into the deck. Metal roofing offers outstanding heat reflectivity, fast shedding of snow, and resilience against wind-driven rain. It's a strong choice for homes facing heavy sun exposure, provided there's proper ventilation and an insulating layer beneath to manage interior thermal swings. Clay and concrete tiles bring durable, high-performance options that resist sun fading and temperature swings; they do, however, require a solid deck structure and accurate slope to avoid water infiltration. Wood shingles or shakes provide a traditional look with natural insulation but demand diligent maintenance to prevent weathering, rot, and insect pressure in winter moisture. Synthetic or composite shingles aim to blend the best of both worlds-lighter weight, decent UV resistance, and flexible installation-but require careful evaluation of long-term performance under freeze-thaw conditions. In all cases, a roof system in this region benefits from a breathable, moisture-tolerant underlayment and a ventilation strategy that keeps attic temperatures in check during Yakima's hot spells.
The presence of cedar shake and tile in the local market means some homes call for contractors who are comfortable with heavier or more specialty roof systems. Not every crew can handle an extra-deep rafter span, a higher load from tile, or the intricacies of cedar shake with weathered, live edges. If a home leans toward a tile or shake aesthetic, the replacement or reroof decision should involve structural assessment and a plan for matching transitional flashing, valley details, and edge protection. For those with mixed materials, careful integration at hips, valleys, and terminations becomes essential to prevent leaks where sun-drenched surfaces meet winter moisture pockets.
Because Yakima experiences both intense sun exposure and winter moisture, reroof timing should align with material-specific lifespans and seasonal maintenance windows. Asphalt and synthetic shingles often show wear patterns related to UV exposure and heat cycling, signaling when a refresh or tear-off is prudent. Metal roofs tend to age more gracefully in sun, but flashing and sealant joints need periodic checks after winter freeze-thaw cycles. Tile systems, while long-lasting, require periodic inspection of fasteners and movement joints to manage thermal expansion and potential cracking. A local contractor can tailor a reroof plan to your home's material mix, roof pitch, and attic ventilation, ensuring a confident transition from aging components to a durable, climate-appropriate cover.
The most popular roofing material in the US. Find pros who install, repair, and replace asphalt shingles.
Roof Maxx of Yakima, WA
(509) 895-4540 getroofmaxx.com
5901 Crestfields Rd, Yakima, Washington
5.0 from 50 reviews
State Wide Contracting
(509) 985-1339 www.waroofers.com
715 S 2nd St, Yakima, Washington
4.9 from 56 reviews
In Yakima, you'll see a clear ladder of cost when you look at material choices. Asphalt shingles run about $300 to $600 per square, a solid baseline for many homes with a relatively quick reroof. Metal roofing sits higher, generally $700 to $1300 per square, reflecting stronger panels and added underlayment or insulation options. Clay tile commands $1100 to $1900 per square, and concrete tile typically lands from $1000 to $1800 per square, both of which bring a distinctive look and long life but require careful installation and heavier roof assemblies. Wood shingles or shakes generally range $600 to $1000 per square, while synthetic or composite shingles sit around $500 to $900 per square. For cedar shake specifically, be prepared for costs to push toward the upper end when replacing, due to labor and specialty skills needed.
In Yakima, costs can rise when homeowners replace cedar shake, tile, or metal systems because those assemblies are less commodity-like than basic asphalt re-roofs and often require more specialized labor. The mix of sun exposure, heat, and winter moisture means roof assemblies must be installed with careful detailing-especially at penetrations, valleys, and edge details-to stand up to seasonal stress. Clay and concrete tiles add weight and may require structural assessment or reinforcement, which adds to labor and materials beyond the base tile price. Cedar shakes, while attractive and drought-tolerant, demand precise nailing patterns and moisture considerations to prevent warping or rot, driving up crew time.
Seasonal demand can affect Yakima pricing because the preferred late-spring through early-fall work window concentrates reroof scheduling into the drier part of the year, while permit fees also vary by project value and scope. If you're weighing replacement versus repair, plan for the drier months when crews are steadier and weather risk is lower. For timing or scope decisions, it helps to line up estimates from several local contractors who understand how sun exposure and freeze-thaw cycles impact each material, especially for cedar, tile, or metal systems, where labor intensity and material handling matter more.
Don't let upfront costs delay a critical repair - these contractors offer payment plans to fit your budget.
In the City of Yakima, a full roof replacement typically requires a permit through the local building department before work proceeds. This is not optional for most reroofs, and starting without a permit can lead to delays or fines that complicate a project timeline. The permit process is designed to ensure the roof installation meets current code requirements and local standards for Yakima's hot summers and cold, wet winters. Expect the building division to verify roof venting, ice and water shield placement, and the structural adequacy of any deck or sheathing changes.
Yakima plan review and inspection scheduling are handled through the city building division. After you submit the permit application, a reviewer will check plans for compliance with wind, fire-resistant, and moisture protection requirements that matter in this climate. A typical reroof involves at least one preliminary review and multiple inspections during the project, including an on-site inspection once the installation nears completion. The final inspection confirms that all components were installed in accordance with the approved plans and code requirements. Plan review timelines can vary with the season and department workload, so coordinate with your contractor to align roof milestones with inspection windows.
A final inspection is required when the reroof is complete. Schedule this step only after all roofing materials are installed and any interior or attic penetrations (vents, dormers, skylights) are sealed and flashing is in place. The inspector will verify proper underlayment, flashing details around chimneys and vents, and the integrity of drip edge installation. If anything does not meet code or the approved plan, a correction notice will be issued, and work must pause until adjustments are made and re-inspected. In a Yakima climate with high sun exposure and seasonal moisture, ensure that edge metal, drip caps, and valley details are fully completed and accessible for inspection.
Permit fees in Yakima vary with project value and scope, so homeowners should expect permit cost to be part of the replacement budget rather than assuming reroof work is permit-free. Plan for a realistic window between permit submission and final inspection, accounting for weather, material delivery, and contractor scheduling. Keep a complete set of project documents on hand for the building division, including any engineered trusses or wind uplift calculations if those are part of the plan.
After a severe weather event, you should brace for a measured, document-driven process. Here in Yakima, roof claims generally follow standard homeowners policy practices rather than a uniquely restricted local insurance market, but carriers still want clear proof of storm-related damage. When hail has fallen or winter moisture has worsened latent issues, the clock for your claim starts the moment the event ends, not when you notice the first stained ceiling. A delay in reporting can complicate documentation and later payment, so act promptly while the memory of the damage is fresh.
Insurers may request estimates, photos, and other damage documentation before approving replacement, especially when hail is involved. Expect an initial notice, then a request for supporting material. Here, adjusters rely on objective evidence: clear daylight photos of the rooftop surface, gutters, and any interior leaks, plus a written description of symptoms observed on the roof deck. The emphasis is on verifiable, storm-related damage rather than preexisting wear. Prepare to show impacts on flashing, valleys, and penetrations, which are common failure points after harsh sun and freeze-thaw cycles.
Documentation should start immediately after the event. Take wide and close-up shots from multiple angles, capturing hail hits, surface granule loss on shingles, and any exposed decking. Keep a running record of weather conditions, dates, and your observations. Mitigation items-tarps, temporary coverings, or minor repairs to prevent further damage-are often expected or requested by adjusters as part of the claim process. Consistent, dated records help avoid back-and-forth delays.
Adjusters commonly rely on contractor bids, so having detailed, independent estimates can streamline approval. In Yakima, you may encounter requests to address mitigation or code-related items as part of the claim. Start your documentation right away, and engage licensed contractors who can provide clear scope and photos of proposed work. Clear communication about the precise extent of storm-related damage keeps the claim moving and helps prevent disputes down the line.
Connect with contractors who help homeowners navigate the claims process from damage assessment to final approval.
State Wide Contracting
(509) 985-1339 www.waroofers.com
715 S 2nd St, Yakima, Washington
4.9 from 56 reviews
Willy's Roofing
(509) 584-3695 willysroofingllc.com
2318 S 1st St, Yakima, Washington
4.8 from 100 reviews
In Yakima, pitched residential roofs dominate the material landscape, but the contractor market still shows a meaningful low-slope segment. That means some homes and additions rely on flat-roof repair know-how as a practical reality, not a rare exception. If you're evaluating a retrofit or an add-on, recognize that flat or low-slope sections behave differently under sun and moisture cycles than the main roof plane. The decision to repair versus replace on these areas hinges on how well the membrane meets seasonal swings and how accessible the detailing around penetrations remains.
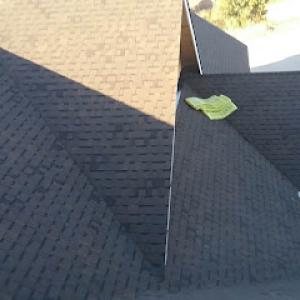
Skylights appear in the local market with enough frequency to matter for everyday durability. Leaks around these penetrations can be more elusive than a straightforward shingle replacement, especially when the surrounding field shingles remain dry for most of the year. The path of moisture often travels along flashing and sealant lines before it shows up inside, so tracing leaks requires a careful, methodical approach. When a skylight or other Penetration is involved, the assessment should extend to flashing integrity, curb details, and the compatibility of sealants with the prevailing sun exposure.
Yakima's wet winter and spring periods make flashing and penetration details especially important on roofs that otherwise spend most of the year in dry conditions. Poorly executed or aging flashing around vents, skylights, chimneys, and transitions can hide behind an otherwise clean ridge line until a melt or thaw stresses an outdoor seal. In practice, that means a careful inspection after the wet season is essential, and any suspected flashing issue should be addressed promptly to prevent moisture from migrating to the attic or interior spaces. Even small gaps or dry-rot at the edge of a flashing corner can become larger problems when freeze-thaw cycles return.
Find specialists in TPO, EPDM, and built-up flat roofing systems for residential and commercial properties.
Willy's Roofing
(509) 584-3695 willysroofingllc.com
2318 S 1st St, Yakima, Washington
4.8 from 100 reviews
Yakima Roofing & Remodeling
(509) 907-7206 www.yakimaroofingandremodeling.com
Serving
5.0 from 13 reviews
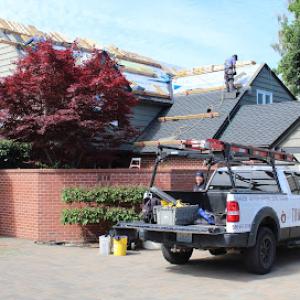
When evaluating contractors, look for proven tear-off and replacement work rather than new-construction specialization. Re-roof projects here demand careful removal of older layered assemblies and correct resealing against hot sun and winter moisture. Ask for recent jobs with similar roof types (asphalt, metal, cedar shake, or tile) and request references that can confirm clean removal without damaging underlying sheathing. A contractor with a track record across multiple roof systems will handle sun exposure and freeze-thaw cycles more confidently.
In this market, fast scheduling and a spotless finish matter just as much as the roof itself. Check how promptly the contractor returns calls, visits for inspection, and can set a start date. During the project, consider their commitment to cleanup: daily debris management, proper disposal of old material, and a final inspection to ensure nails and stray fasteners aren't left behind. A crew that can minimize home intrusion and keep pathways clear is especially important for properties with tight yards or close neighboring homes.
A long-established local presence often signals stable crews who understand local sun exposure, wind, and moisture patterns. Homeowners tend to favor contractors who offer reliable warranties, straightforward communication, and predictable scheduling over flashy marketing. While evaluating bids, weigh these relationships and demonstrated reliability against price tiers, and favor teams with documented, repeat work in the area.
Ask for a written project plan that outlines steps from tarp and protection to teardown, roof install, and final inspection. Confirm that the crew will coordinate with existing ventilation and attic insulation to maintain energy performance through scorcher summers and chilly winters. Check that the contractor provides a single point of contact for updates and problem-solving, so questions don't get lost in a busy crew schedule.
Ensure the contractor outlines safety protocols for workers and your property, including fall protection, ladder use, and material storage. Inquire about aftercare: how quickly issues are addressed if a shingle won't seat properly or flashing needs adjustment, and what the warranty covers for weather-related wear in both hot, dry summers and cold, wet winters. A dependable local team will stand behind workmanship and stay accessible as seasons change.