Last updated: Apr 19, 2026
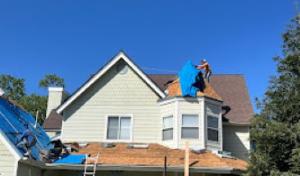
In this part of the Central Valley, scheduling a reroof is a practical dance with the calendar. The hot, dry summers bring heat that can slow a tear-off and installation, as crews contend with heat-sensitive materials and the risk of heat-related delays. Winters bring more frequent rain, and wetter periods can push work back and lengthen interior drying times if leaks have already found their way inside. The sweet spot for reroofing tends to be spring or fall, when the weather is milder and there's less pressure from extreme heat or heavy rain. Planning around these windows helps keep projects on track and minimizes the chance of weather-induced hold-ups.
During peak heat, a tear-off and replacement can be uncomfortable for workers and challenging for certain materials. In hotter days, shingles, underlayment, and sealants can behave differently, and crews may need longer breaks or more frequent shade breaks to maintain quality and safety. Scheduling work for early morning starts and aiming to finish by early afternoon helps, but the heat still narrows the window for efficient progress. If a roof is already showing signs of impending leaks or moisture intrusion, the urgency increases, but the decision to pull a full tear-off during the most intense heat should be weighed against the potential for heat-related delays. In homes with reflective or light-colored shingles, the extra radiant heat can also influence the aging of the roof deck and the way fasteners hold, so timing matters for a lasting job.
Wetter periods in the winter can complicate a reroof in two ways. First, rain can make temporary tarping and leak containment more critical, increasing the complexity of scheduling. Second, if leaks are active, interior drying times can extend the overall project duration, especially on days with predictably higher humidity or rain. Winter work also faces shorter daylight hours, which can slow progress on larger or multi-story homes. If a roof with active leaks is left exposed during winter storms, interior damage can become a secondary priority and force adjustments in sequencing. In practice, a careful winter plan often centers on ensuring dry conditions before covering and completing sections, so the interior remains protected even if the outside weather shifts.
Spring and fall emerge as the preferred reroof windows locally because they avoid both the worst summer heat and the more disruptive winter rain pattern. These seasons typically offer moderate temperatures, more predictable daily weather, and longer, workable daylight periods. A spring schedule allows a roof to be completed before the heat ramps up, while a fall window provides ample time to finish before winter rains reassert themselves. For homes with mixed roof types-tile, shingles, metal, or low-slope-the moderate conditions help crew members apply sealants and set fasteners with consistent results, and help ensure gutters and downspouts are functioning properly before the rainy season returns.
When you're lining up a reroof, start by surveying the roof's condition and identifying any signs of active leaks. If water intrusion is present, prioritize a dry period within the spring or fall window to minimize interior drying time and secondary damage. Check the roof deck for soft spots or deterioration that would benefit from additional prep work ahead of the replacement, and align the project with weather forecasts to avoid a late-season rain event creeping into the schedule. For homes with complex roof shapes, eave overhangs, or large attic spaces, coordinate with the crew to ensure shading and material handling are factored into the plan so that sensitive components stay within their recommended temperature ranges. Finally, set clear expectations about access, material staging, and the sequence of tear-off versus reinstallation to reduce on-site delays during the chosen season.
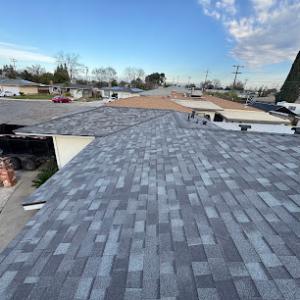
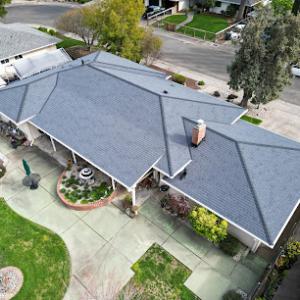
In this town, the roof landscape is a mix of asphalt shingles, metal roofing, clay tile, concrete tile, wood shingles or shakes, and EPDM on low-slope sections. Each material has its own rhythm with Central Valley heat and seasonal rains. Asphalt shingles are common for their affordability and straightforward repairs, but long summers can accelerate aging if ventilation isn't paired with a proper underlayment. Metal roofs shed heat well and can resist heavy sun exposure, yet they may require attention to edge detailing and ice-dam considerations if winter rain comes in. Clay and concrete tiles bring a traditional look and excellent durability, but their weight means structural checks and proper underlayment are critical-especially when the roof transitions to tile over older underlayment or decking. Wood shingles or shakes offer a rustic aesthetic, yet their vulnerability to sun and moisture means regular maintenance and potential fire-safety considerations. EPDM on low-slope areas provides a flexible, water-tight option, but heat exposure can impact its lifespan and coating compatibility. If your property blends several roof types, plan maintenance so that underlayment and flashing are compatible across materials to prevent inter-material failure at joints.
Tile is especially relevant in this area because Central California stock often uses clay or concrete profiles. The tiles themselves may endure decades, but attention to underlayment aging is essential before the tile fails. In practical terms, this means inspecting the roof deck for compromised plywood or sheathing behind the tile, plus ensuring the underlayment is compatible with tile systems and rated for high heat. When a tile roof is over an aging underlayment, you risk slow leaks and costly punt-on-repair scenarios. Regular checks after the rainy season help catch concerns early, and ensure the tile installation remains watertight as the underlayment continues to age in the Valley heat.
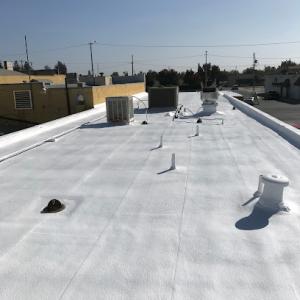
Low-slope sections often rely on EPDM or coating-compatible systems, which respond differently to heat exposure than steep-slope shingles or tile. EPDM can soften or flaw if exposed to high temperatures for extended periods and may require reflective coatings or a ventilated parapet area to manage heat buildup. Coating systems, while offering a repair-friendly option, depend on surface prep and proper curing conditions to avoid peeling or blistering when the sun is relentless. If your home uses EPDM, consider a periodic thermal review that checks seam integrity, edge detailing, and any flashings where the membrane ties into steeper roof sections. A well-chosen coating or membrane maintenance plan can extend the service life of a low-slope surface without disrupting the rest of the roof's configuration.
Reroofing in this climate calls for a plan that sidesteps the peak heat window and protects against the winter rains. The late spring to early fall period is ideal for most material installations, especially asphalt shingles and metal roofs, because higher daytime temperatures aid adhesive set and material handling, while cooler nights help with fasteners and sealants curing properly. For tile roofs, scheduling can hinge on ensuring the deck and underlayment have cooled enough to prevent warping or rapid drying of coatings. If winter rain is anticipated, staging the reroof to complete the critical openings before heavy wet months reduces the risk of water intrusion and minimizes exposure of vulnerable underlayment. For EPDM and low-slope projects, choose periods with predictable dry spells to allow proper sealant and coating application, then follow with a thorough inspection of all seams and flashings after the rain season arrives. The goal is to align material performance with Madera's drying-hot days and wet-season realities so that the chosen roof type delivers longevity without premature degradation.
Leak Busters Roofing
(559) 706-1925 leakbustersroofing.com
20567 Olympia Rd, Madera, California
5.0 from 5 reviews
Leak Busters Roofing is a family owned and family employed company that has been in business for 20 years. We specialize on sprayed polyurethane foam and coating systems as well as TPO/PVC roofing systems.
Darrell Herzog Roofing
(559) 307-4566 herzogroofing.net
14028 Skyview Rd, Madera, California
3.8 from 20 reviews
We perform roofing work on Commercial, and Residential projects. With over 20 years of experience We can help you choose the perfect system. We have had experience with multiple different kinds of roofing materials, and want to help you choose the right system.

Roof Maxx of N. Fresno, CA
Serving
5.0 from 64 reviews
Roof Maxx of North Fresno offers an affordable, eco-friendly roof rejuvenation solution that can extend the life of your asphalt roof by up to 15 years. Our plant-based formula restores the protective oils in shingles, providing five years of protection per treatment and saving you thousands compared to a traditional roof replacement. We proudly serve North Fresno and surrounding areas, offering various discounts and on-the-spot financing. Contact our team for a free inspection and estimate today!
The Roofing Crew
(559) 283-3020 theroofingcrewllc.com
Serving
5.0 from 70 reviews
The Roofing Crew is a reputable roofing contractor in Fresno, California, offering unparalleled service in all things roofing. With a commitment to excellence and affordability, The Roofing Crew's expertly skilled professionals ensure the highest quality of workmanship. Their dedication to providing long-lasting roofing solutions makes every home and business they touch a testament to their meticulous craftsmanship and superior customer service.
Best Choice Roofing
(559) 575-2734 californiabestchoiceroofing.com
Serving
4.9 from 152 reviews
Discover the ultimate roofing solution with Best Choice Roofing. Established since 2018, their experienced contractors are dedicated to ensuring your roof is in top condition. From intricate repairs to comprehensive replacements, their quality workmanship and dedication will bring your vision to life. Trust Best Choice Roofing for your property, and witness the transformation of your roof.
Grandmark Roofing
(559) 272-7495 www.grandmarkroofing.com
Serving
4.8 from 655 reviews
Established in 2014, Grandmark Roofing safeguards Fresno's homes and businesses with a complete range of roofing solutions. Their team of experts tackles repairs, replacements, and maintenance of metal, flat, tile, and shingle roofs. Grandmark prioritizes customer satisfaction by offering quality craftsmanship and thorough inspections to ensure your roof's longevity.
Roof Pros Roofing & General Construction
(559) 408-6506 www.roofprosroofing.com
Serving
5.0 from 148 reviews
At Roof Pros Roofing, we're your go-to roofing contractor in Fresno for all your residential and commercial roofing needs. Our team of experienced professionals specializes in roof repair and replacement, as well as a variety of roofing services, including metal, flat, tile, and shingle roofing. We also offer emergency roofing services to ensure that you're never left without a roof over your head. Our commitment to customer satisfaction means that we always provide high-quality workmanship, and we take the time to inspect and maintain your roof to ensure its longevity. In addition to roofing services, We are also a full service General Contractor. Contact us today for a free estimate."
Armament Coatings & Roofing
(559) 235-7770 armamentcoatingsandroofing.com
Serving
4.9 from 95 reviews
Armament Coatings & Roofing, Inc. is your trusted partner for the easiest roofing experience ever. Our story begins with a passion for delivering excellent roofing services, and today, we proudly serve the Central Valley. Our team consists of skilled experts who bring years of experience to every project. We get that your roof isn t just a cover; it s a vital part of your home and business, giving you shelter and style. What makes us special is our strong focus on quality and making you, the customer, happy. From the first time you talk to us until the last nail is in place, we put your needs first.
Abode Construction Design & Management
(559) 236-6574 gosmartabode.com
Serving
5.0 from 28 reviews
Licensed & Protected CSLB #1089380 (General Building B + C-39 Roofing classification) Bonded & Fully Insured At Abode Construction, we specialize in energy-efficient roofing and general contracting services throughout Fresno and the Central Valley. Our focus is on smarter, greener homes—using the most energy-conscious materials and industry-leading warranties to enhance your comfort, save on energy costs, and deliver lasting value.
High Impact Roofing
(559) 477-2671 highimpactroofingservices.com
Serving
5.0 from 63 reviews
High quality roofing services
Roofs 4 Less
Serving
5.0 from 10 reviews
Roofs 4 Less Fresno is a trusted roofing company based in Fresno, California, specializing in high-quality, affordable roofing solutions. We offer a wide range of services including roof repairs, installations, and replacements for both residential and commercial properties. With a focus on customer satisfaction, reliability, and efficiency, our expert team ensures durable, cost-effective results.
Cobex Construction Group
Serving
4.8 from 24 reviews
Cobex Construction Group: Built On Values Family is everything. Which is why Cobex Construction Group is dedicated to serving families across the Fresno region with exterior contracting services that protect, improve, and beautify homes. When it comes to serving your family, we don’t just provide quality workmanship—we also ensure your family is treated with the respect, consideration, and open communication you deserve. It’s just one of the ways our values drive our business. Discover the Cobex story and meet the team dedicated to providing you with the top-rated exterior construction services in the region.
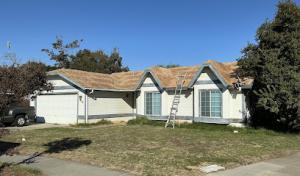
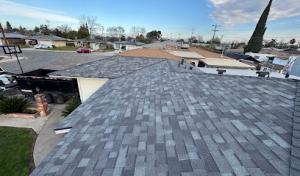
In the Central Valley heat, asphalt shingles pay a toll. Seasonal granule loss and weathering are a real concern for asphalt roofs exposed to long summer heat cycles. The sun's relentless bite can loosen asphalt granules, accelerating aging and dulling the roof surface long before the next big weather event. In practice, that means more granules in gutters and a roof surface that looks worn years sooner. Homeowners notice it as older shingles become brittle and curl at the edges, and the perceived life of the roof shortens. Plan for timely inspections after the peak heat period and before fall storms arrive, so smaller issues don't snowball into leaks or failed flashings.
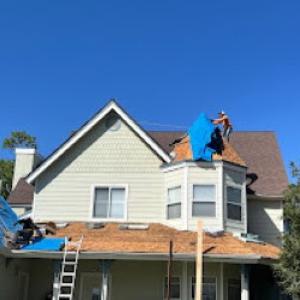
Spring wind events in the area can leave freshly installed roofing more exposed if projects are not dried-in quickly. A stubborn combination of gusts and persistent afternoon heat can push underlayment and deck drying into fragile timelines. If a roof is not dried in promptly, the underlayment may absorb moisture during the first spring storms, creating a window for slow leaks under tile, metal, or shingle assemblies. For homeowners, that translates to staying vigilant after a windy stretch: inspect fasteners, sealants, and edge flashing, and avoid heavy traffic on a roof during drying-in. Quick but careful follow-up matters more here than elsewhere.
Winter leak events in the area often become more disruptive because rain can continue while underlayment or decking is still drying. The valley's rain pattern can stretch a short storm into a longer drip cycle if backing material hasn't fully cured or dried. Underlayment aged in place may fail to shed water efficiently, letting dampness creep toward attic spaces or ceilings. The result is not only damp ceilings but accelerated deterioration of plywood or sheathing if water sits on a roof deck for days. For responsible owners, prioritizing rapid assessment after storms and coordinating timely interior water checks can prevent months of hidden damage.
The local climate rewards a conservative, proactive approach. When a reroof is scheduled in late spring or early fall, build in a buffer for heat and wind drying times and for unexpected rain. Choose components that tolerate dry heat with robust fasteners and watertight seals, and keep a close eye on those common failure nodes-valleys, penetrations, and edge details-where heat and moisture converge. A well-timed inspection habit can catch trouble before it becomes a costly repair, especially for aging homes or properties with mixed roof types.
Find local contractors experienced in assessing and restoring roofs after hail, wind, and severe weather events.

Armament Coatings & Roofing
(559) 235-7770 armamentcoatingsandroofing.com
Serving
4.9 from 95 reviews
In this market, asphalt shingles typically run about 350 to 650 USD per square, metal about 700 to 1100, clay tile about 900 to 1400, concrete tile about 800 to 1300, wood shingles or shakes about 700 to 1200, and EPDM about 4 to 8 USD per square foot. Those ranges reflect the mix of homes around the San Joaquin Valley: sun-baked summers, winter rain events, and a suburban-to-agricultural mix that keeps crews busy on a wide variety of roof shapes. For a practical planning number, you'll often start by comparing shingles and concrete or clay tile for long-term durability in Central Valley heat.
Costs in Madera can rise when older tile roofs need underlayment replacement or when heavy tile systems require more labor than standard shingle tear-offs. If your roof is a multi-layer job or you're switching from a flatter shingle to a full tile system, expect revised estimates that account for additional fasteners, underlayment, and potential deck repair. EPDM delivers a different value proposition in flat or low-slope sections, but even there, surface prep and flashing work can edge costs higher during wet seasons.
Project pricing in Madera is also affected by seasonal scheduling pressure, with spring and fall often in higher demand because homeowners try to avoid both peak summer heat and winter rain delays. If you can align your reroofing window to cooler stretches, you may secure a more favorable labor quote and reduced risk of weather-related delays. While it's tempting to pull the trigger when the first warm day arrives, the heat can shorten shingle life on installation and complicate insulation work on clay or concrete tile.
For a realistic, region-specific estimate, anchor your budget to the material you choose first, then add a contingency for underlayment replacement or heavier tile assemblies. Consider the long-term energy and durability benefits of tile or metal in this climate, but plan for spring or fall scheduling to avoid peak-season price spikes and weather delays.
Don't let upfront costs delay a critical repair - these contractors offer payment plans to fit your budget.

A full re-roof in Madera typically requires a permit filed through the City of Madera Building Department. The process is designed to keep work aligned with local safety standards, especially given the heat loads from the San Joaquin Valley and winter rainfall patterns. Before any tear-off begins, verify that your chosen contractor submits the permit application and that you have a clear timeline for inspections. Having the permit in hand helps prevent delays when the roof is ready for underlayment and final approval.
Madera inspections commonly occur after roof removal and underlayment installation, then again at final completion. The first check ensures the substrate is sound, fasteners and underlayment are correctly installed, and any ventilation needs are addressed. The final inspection verifies that flashing details, penetration seals, attic ventilation, and overall code compliance meet local standards before the reroof is signed off. Plan around these touchpoints so you don't encounter last-minute holds that complicate hot-weather schedules or winter rain windows.
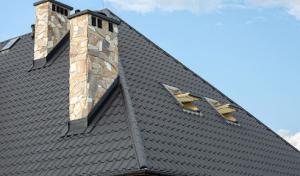
Local inspection focus includes flashing, ventilation, and overall code compliance before the reroof is signed off. In practical terms, that means your contractor should install drip edge, ensure roof-to-wall flashing integrates with existing parapets or chimneys, and maintain uninterrupted ventilation paths from soffits to ridge vents. Proper attic ventilation is crucial in this climate to prevent heat buildup and moisture-related issues after installation. During the inspection, expect the building inspector to look for clean, continuous flashing around skylights, vents, and roof penetrations, and to confirm that the roof assembly aligns with current code requirements for energy efficiency and fire safety.
Because Madera's seasons bring both extreme summer heat and winter rain, coordinate reroof timing to minimize exposure risk. Schedule the tear-off and installation when extended dry spells are forecast and avoid the peak heat window for tile or dark-shaded systems, which can suffer longer cure times and higher heat transfer. If winter rain is anticipated, ensure tarps and temporary protection are in place so underlayment stays dry during any unexpected precipitation. Clear communication with both the permit office and the contractor keeps inspections smooth and helps protect the investment through changing Central Valley weather.
Homeowners in Madera face the broader California insurance environment, where wildfire and hail underwriting has tightened and reroof documentation matters more. Insurers are scrutinizing roof conditions more closely, especially for older installations, and the way a roof is documented after a replacement can influence whether coverage binds, renews, or adjusts terms. In practical terms, that means your roofer's record-keeping-materials used, ventilation details, and a clear timeline of work-matters as much as the job itself.
Before binding a policy, renewing after a replacement, or adjusting coverage, expect questions about roof age, material type, and ventilation details. Providers may request documentation that shows the roof's expected service life, the presence of proper attic ventilation, and any upgrades that improve wind uplift or impact resistance. In a market where adjusters review claims more strictly, having ready, organized records can shorten the path from claim to settlement and reduce back-and-forth.
Claims and replacement timelines in this area can be slowed by stricter adjuster review and changing carrier appetite tied to regional California risk. Weather patterns-late-season storms, sudden cold snaps, or heat waves-can intersect with policy cycles, leading to longer processing times if the roof's condition is borderline or if documentation is incomplete. Being proactive about gathering invoices, inspection reports, and product specifications can help prevent delays when a claim is needed.
Begin with a written summary of the roof's components, including age, material type, and any ventilation upgrades. Store replacement invoices and warranty documents in a place you can access quickly if a claim arises. Consider coordinating with your installer to produce a straightforward, itemized recap of work performed and the dates of installation, so you have solid, claim-ready evidence should a carrier request it.
Connect with contractors who help homeowners navigate the claims process from damage assessment to final approval.
Armament Coatings & Roofing
(559) 235-7770 armamentcoatingsandroofing.com
Serving
4.9 from 95 reviews
Local contractor signals show that homeowners in this market encounter affordable, quick-response reroofing companies more often than highly specialized boutique firms. The typical team can mobilize fast, handle tear-off-heavy replacements, and keep disruption to a minimum on busy agricultural-and-suburban blocks. You'll often see crews that are comfortable juggling multiple roof types-from tile to low-slope systems-and that can shift gear if weather turns or a leak appears mid-project.
Cleanup is a repeated priority in the Madera market, suggesting homeowners care about debris control during tear-off-heavy replacement jobs. Expect crews to sweep work zones at day's end, haul away debris promptly, and place tarps or barricades to keep yards and driveways clear. Your best bet is to confirm a defined cleanup plan before work starts, including how nails or shingle fragments will be collected so no one's driveway or garden beds get nicked by fallen material.
Emergency repair, tile roofing, flat-roof work, free estimates, and warranties all appear with meaningful prevalence in the local contractor pool. Emergency crews tend to respond quickly to wind-blown shingles, fallen tiles, or sudden leaks, especially after a storm. For tile and flat roofs, look for specialists who understand the nuances of slope management, underlayment choices, and long-term waterproofing in afternoon heat. A straightforward warranty on both materials and labor helps guard against seasonal sun exposure and temperature swings.
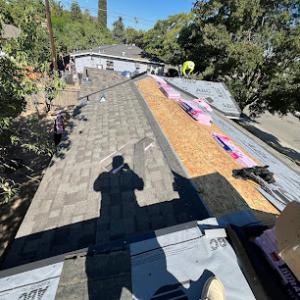
Reroofing teams plan around Central Valley heat windows and winter rain timing. In practice, you'll see work scheduled early mornings or late afternoons in peak summer, with weather-conscious crews pausing during the hottest hours. In winter, rain-ready crews maintain tarping and temporary protections, so a project can resume promptly after a shower. Ask for a concrete sequence: tear-off, deck inspection, underlayment, flashing, and final surface installation, with weather calls built in.
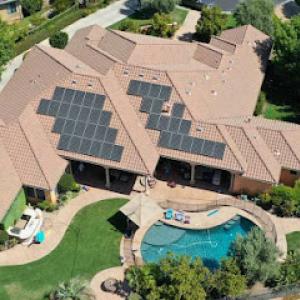
Solar-related roofing work is present in the local market, but it is less prevalent than core reroofing, tile, emergency repair, and flat-roof services. When planning solar installs or additions, keep in mind that Central Valley heat can accelerate aging of penetrations around mounting rails and conduit entries. In homes with clay or concrete tile, the installer must account for tile breaking risk and ensure that supports and flashing accommodate tile profiles without creating new leaks. For asphalt and metal roofs that see the hot valley sun, panel mounting hardware should be chosen for compatibility with the roof surface and anticipated thermal movement. The goal is a neat, weather-tight connection that won't rely on short-term patches after a few hot seasons.
Skylight-related roof work also appears in contractor signals, making penetration flashing a relevant issue on some local homes. The combination of heat cycles and winter rain requires flashing to seal properly around skylights, vents, and mounted equipment. In clay and concrete tile roofs, flashing around skylight curbs must be carefully integrated with the tile pattern to avoid lift and water ingress. On metal and low-slope roofs, the interface between flashing and the roof surface is critical to prevent leaks that travel along fasteners or underlapping seams. Contractors should verify that step flashing and counter-flashing around penetrations are continuous and that seals are compatible with local humidity and temperature swings.
On reroofs, penetrations deserve extra attention during final inspection because flashing and weatherproofing are part of local sign-off concerns. Ensure that all penetrations-whether for solar, skylights, vents, or conduit-receive properly lapped flashing, nail guards where appropriate, and sealants chosen for high heat. The surrounding roof material should show no signs of stress, cracking, or tile fracture near penetrations. A thorough check includes testing for wind-driven rain around each flashed opening and confirming that shingle or tile lines remain properly aligned and sealed around every penetration point.
Regular inspection after extreme heat periods and winter rains pays off. Look for loose flashing, degraded sealants, or displacement of mounting hardware near penetrations. Clean debris from around skylight hubs and solar rails to prevent moisture retention. If a leak is suspected around a penetration, trace it to its source rather than assuming a single component is to blame; in Madera's climate, the path often follows the most exposed courses along rafter tails and underlayment joints.
Find contractors who integrate solar panels or solar shingles into your roof for long-term energy savings.