Last updated: Apr 19, 2026
In this part of the valley, the roof basks in prolonged summer heat and dry conditions, which accelerates surface aging, granule loss on shingles, sealant fatigue around flashing and penetrations, and thermal movement across the roof plane. The dry environment means UV exposure dominates most of the year, while the winter wet season introduces moisture stress rather than a consistently humid climate. This combination creates a unique wear pattern: components dry out and age faster, yet meet seasonal moisture in a way that tests seals and underlayment during the shoulder seasons. When planning or evaluating a roof, you're weighing heat-driven degradation against how the system handles seasonal moisture swings rather than year-round humidity.
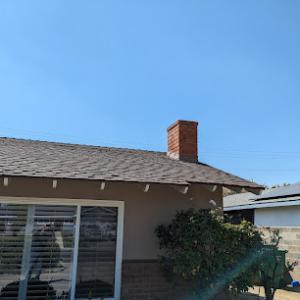
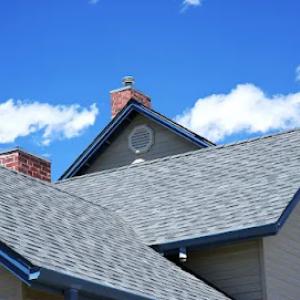
Asphalt shingles begin to show granule loss first, especially on the south-facing slopes and in areas with minimal shade. You'll notice a chalky feel on the surface and a gradual color fading that makes the roof look older than its actual age. Metal roofs expand and contract with daily heat extremes, which can loosen fasteners or cause tiny oil-canning distortions if panels aren't properly seated. Clay and concrete tiles resist thermal fatigue differently; clay tiles handle heat but are brittle when hit by sudden temperature shifts, while concrete tiles tolerate heat better but can weigh down underlayment if there's a weak underlayment installation. Wood shingles and shakes weather quickly in the heat, with faster edge cupping and curl if coatings aren't maintained. Synthetic or composite shingles tend to resist some heat-induced cracking but may suffer from UV chalking and edge wear if the polymer content degrades.
Spring winds in the area can lift edges, scatter debris, and expose weak fastening or underlayment details just before the first winter rains. This means roof edges, rake meets, and vent flashing require closer attention after windy periods. If your roof has flat or near-flat sections, wind uplift can be particularly aggressive and may reveal fastener looseness or missing sealant around penetrations. A quick post-wind visual check focuses on edge fasteners, crest lines, and the condition of valley linings. In shaded or solar-exposed areas, debris buildup can accelerate moisture retention and invite moss or mildew once winter rains arrive.
Begin with a seasonal walk-around each spring and fall. Look for loose granules in gutters and at roof corners, lifted shingles or tiles, and any missing or damaged sealant around penetrations and flashing. Pay special attention to valleys, ridge caps, and edge rows where heat cycling concentrates stress. Inspect flashing at chimneys and venting for hairline cracks or rust. If you own a metal roof, check for corrosion-prone seams and ensure fasteners are still properly seated with correct weather seals. For tile roofs, examine edge tiles for cracks and check underlayment exposure beneath any visible gaps. Wood shingles or shakes should be checked for curling, splitting, and coating wear. Where synthetic shingles show chalking or surface dulling, document whether edges remain firmly bonded to the substrate.
Keep the attic and soffit vents clear to help moderating heat buildup under the roof deck. Clean debris regularly to reduce wind-driven uplift risk and moisture retention. Address sealant wear promptly around any flashing or penetrations; reseal with a compatible, UV-stable sealant that matches the material type. Consider reinforcing vulnerable edge rows with proper fasteners and edge trim if wind events are frequent. For warranty-conscious homeowners, note areas that show accelerated aging due to heat and plan targeted maintenance or material refreshes before the next hot season, aligning with how the valley climate stresses your specific system. This practical, climate-aware approach helps your roof hold up through Shafter's hot summers and the seasonal shifts that follow.
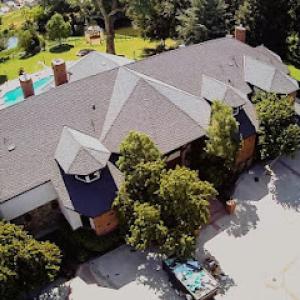
Shafter homeowners commonly choose among asphalt shingles, metal roofing, clay tile, concrete tile, wood shingles or shakes, and synthetic or composite shingles, so material comparison is central to any local roofing decision. The San Joaquin Valley heat wears roofs differently than cooler climates, and spring winds can lift poorly seated edges. The goal is to balance heat resistance, weight, durability, and long-term performance under intense sun exposure. In this setting, the roof choice often hinges on how a given system manages heat at the attic level, how it handles rapid temperature swings, and how it behaves during the hottest weeks of summer when the sun dominates the skyline.
Tile roofing aligns with the pitched roof profiles common across much of Kern County's suburban housing stock, but its weight and breakage risk make deck condition and underlayment quality especially important during replacement. Clay and concrete tiles shed heat reasonably well and can contribute to a cooler attic space if properly ventilated, yet their added mass requires a stronger structural frame and careful installation of fasteners, battens, and expansion joints. For homes with concrete or clay tile, roofers often emphasize precise underlayment selection and a well-sealed eave detail to minimize wind-driven moisture intrusion. If a tile roof is being planned for replacement, it pays to coordinate with the roofer on tile color and texture that reflect the sun while keeping glare manageable for nearby neighbors and public-facing elevations.
In hot conditions, asphalt systems can age faster than homeowners expect, particularly when attic ventilation is insufficient or insulation is compromised. The high daytime temperatures can accelerate granule loss, curling, and softening of the mat, which in turn shortens the roof's perceived lifespan. If asphalt is your choice, prioritizing a high-quality underlayment, a reflective shingle option, and a robust ventilation strategy becomes critical. A well-sealed, properly spaced attic plus intake-exhaust balance reduces heat buildup and helps the shingles resist heat-related distress. For many homes with limited roof pitch or visible sun exposure, asphalt remains an accessible, straightforward option, but its long-term performance hinges on a thoughtful thermal plan.
Metal systems typically excel in heat resilience, offering excellent reflectivity and fast installment timelines. In this climate, metal can stay cooler on the surface, potentially translating to less heat transfer into the attic if installed with proper venting and a breathable yet weather-tight underlayment. Panels and fasteners must be chosen with corrosion resistance in mind, given coastal influences can appear through dust and wind-blown grit that accumulates at eave lines. Roof details around penetrations-vent pipes, scuppers, and skylights-should emphasize weather-tight sealant choices and floating flashings to accommodate expansion from temperature cycles.
Concrete and clay tiles provide strong weather resistance and an up-front aesthetic suited to a broader residential look in the region. They demand careful structural assessment since weight is a major consideration. Wood shingles or shakes evoke a classic texture but can require extra maintenance to protect against solar degradation and wind-driven debris. For any wood products, choose treated or fire-resistant varieties and plan for periodic refinishing to preserve energy performance and curb appeal. Synthetic or composite shingles can blend the ease of maintenance with favorable heat performance, often delivering a middle ground between cost, weight, and longevity. When replacing a roof with any of these materials, ensure that the underlayment and deck are prepared for the selected product's weight and thermal behavior.
The best roof type for a given home depends on how the system handles heat while staying within structural allowances and weather exposure. Tile solutions pair well with the region's pitched roof movement, but weight and breakage risk require strong deck conditions and precise installation. Asphalt can be a practical option in hotter months if the attic is well-vented and a reflective shingle is used. Metal, clay, concrete, wood, and synthetic options each bring distinct heat-handling profiles and maintenance needs; the right choice aligns with the home's structure, sun exposure, and long-term maintenance plan. When planning, prioritize underlayment quality, ventilation strategy, and flashing details to optimize performance under Shafter's summer sun and spring winds.
Wilson Brothers Roofing
(661) 589-4297 www.wilsonbrosroofingca.com
Serving
4.7 from 85 reviews
Looking for expert roofing services in Bakersfield, CA? Look no further! At Wilson Brothers Roofing, our experienced contractors specialize in roof installation, roof repair and replacement, and roof maintenance, ensuring your property stays protected year-round. From commercial roof installations to residential roof repairs, our team delivers top-quality workmanship using premium products from industry leaders like Owens Corning, Malarkey Roofing, and Gaco Western. We pride ourselves on being family-owned, with excellent attention to detail, reliable service, and a commitment to customer satisfaction. Trust us to keep your home or business covered with our expert roofing solutions. Contact us today!
Kern County Roofing
(661) 282-0212 kernroofing.com
Serving
4.8 from 31 reviews
Complete Roofing Services- All Under One Roof!
A.R.S. Roofing
(619) 341-3578 www.arsroofingco.com
Serving
4.5 from 46 reviews
A.R.S. Roofing, Inc has more than 36 years of hands-on roofing experience. Our highly-trained roofers can repair and replace an array of different roofing materials. We also offer a 6-month preventive maintenance plan for commercial roofs. Get a top-quality roof over your home or office by calling 619-341-3578 for a free estimate. We’ll come out to your property to make expert recommendations for roof repairs and replacements.
Bear Mountain Roofing
(661) 436-4230 bearmountainroofing.com
Serving
4.9 from 54 reviews
Bear Mountain Roofing, a prominent name in roofing services for 15 years, serves Tehachapi, Arvin, Bakersfield, Shafter, Wasco, Delano, Taft, and Buttonwillow. Specializing in both residential and commercial roofing solutions, they expertly handle all aspects of roofing, from inspections to installations, repairs, and removal. Known for their commitment to quality and reliability, Bear Mountain Roofing ensures on-time, clean, and affordable services, taking pride in responsible workmanship.
Superior Roofing
(661) 679-6923 www.superiorroofingca.com
Serving
4.6 from 122 reviews
If you’re looking for exceptional quality roofing service, we at Superior Roofing will outperform any other roofing company in California. Our extensive experience gives us great confidence. We are knowledgeable in all types of roofing and construction solutions. We aim to provide great quality work and craftsmanship. Our Bakersfield roofers are all licensed, bonded, and insured. We focus on clients and projects with safety and integrity. We make sure your roof gets all the attention and necessary repairs that it needs. Our Bakersfield roofing contractors never leave a job without fixing all the problems. For inquiries, visit our website or call us at (661) 679-6923.
Roof On Brand
(661) 636-8844 www.roofonbrand.com
Serving
5.0 from 192 reviews
Roof On Brand is your trusted roofing contractor in Bakersfield, CA. Dedicated to providing top-notch roofing services. We specialize in residential and commercial roofing solutions, including roof repairs, replacements, and new installations. Our skilled team is committed to using high-quality materials and the latest techniques to ensure your roof is durable, weather-resistant, and aesthetically pleasing. We understand the importance of a reliable roof and offer personalized service to meet your unique needs. Whether it's a minor repair or a complete roof overhaul, Roof On Brand is here to protect your home or business with excellence and integrity. Contact us today for a free consultation and experience the Roof On Brand difference!
Rooftops Usa
(661) 565-2620 www.rooftopsusa.com
Serving
5.0 from 11 reviews
Looking for trusted roofers in Bakersfield? Locally based, we provide top-quality roofing services for both commercial and residential properties across Kern County. From roof repairs and new roof installations to thorough roof inspections and certifications, we’ve got you covered. We also offer flexible financing options to make your roofing project affordable and stress-free. As a reliable roofing contractor, we deliver durable solutions for all your roofing needs. CSLB#1085337
Bakersfield Roofing
(661) 384-2212 www.bakersfieldcaroofingservice.com
Serving
4.8 from 50 reviews
When you need a roofing contractor in Bakersfield look for a local roofing company that’s fully licensed and insured. You can count on Protec Roofing, Inc for our excellent customer service and high-quality work. We’re family owned and operated, and we strive to finish jobs on time and in budget. Our Bakersfield roofers are highly experienced and ready to handle projects of all sizes. We travel throughout the Greater Bakersfield and Kern County area, so call us today for your appointment.

Ed & J United Roofing
(661) 522-7151 www.edandjunitedroofing.com
Serving
4.9 from 207 reviews
Locally and family owned, Ed and J United Roofing proudly serves Bakersfield and surrounding communities. We handle all types of roofs, both residential and commercial. No roofing project is too big or too small from repairs to full replacements, we do it all. We pride ourselves on customer service and know you will be happy with the final product. Taking care of our customers is our number one priority. Call us today for your free estimate and get the exceptional service you deserve!
Magallon's Roofing
(661) 218-1998 magallonsroofing.com
Serving
5.0 from 18 reviews
Magallon's Roofing was founded in 1999 by the Magallon Family. Offering professional Residential and Commercial Roofing services from repair, maintenance and installation, we've got you covered. We offer free estimates and financing to help you with your roofing project.
Armstrong Pro Roofing
(661) 319-7566 armstrongproroofing.com
Serving
4.8 from 26 reviews
Residential Roofing & Repairs, Patios
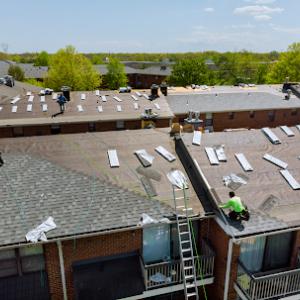
Spring in the southern San Joaquin Valley brings moderate daytime temperatures and longer days without the peak heat of summer. Replacement work is typically pushed toward this shoulder season because summer heat and long daylight exposure can slow crews and affect installation pacing. If you can align material deliveries, inspections, and tear-off windows to a narrow weather lull, you reduce heat-related stress on crews and on shingles, tiles, or metal sheets alike. Plan for crisp mornings and cooler afternoons, and set staging areas to avoid the late-in-the-day dust that builds as other neighbors start their projects.
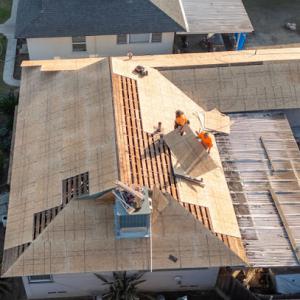
Summer heat is the primary challenge for Shafter roofs. The heat accelerates material expansion and can shorten the working window on hot days, making pacing critical. If summer is unavoidable, target early starts, with crews beginning before the sun climbs high and finishing before mid-afternoon. Schedule a full tear-off in the coolest consecutive days possible and prepare for additional cooling breaks. Have shade, water, and a clear plan for temporary ventilation to manage indoor temperatures as the roof deck warms. Expect slower progress than milder markets, and coordinate close to evenings when moisture migration at teardown is less aggressive.
Fall in the valley brings notable temperature swings between morning and afternoon, which can affect handling and installation conditions for roofing materials. Scheduling and staging become more important than in milder coastal California markets. Plan for variable days with potential wind shifts and dust episodes that can complicate nailing or alignment. If a tear-off is done in fall, ensure material acclimatization time and confirm substrate readiness after any late-season rain that might leave moisture pockets. Use a staged approach to keep crews productive during hot afternoons and protect newly installed surfaces from rapid cooling at night.
Winter rain and occasional storms in the area can delay tear-off schedules and create moisture-management concerns if a roof is opened at the wrong time. When possible, target dry spells and avoid prolonged open decking during expected storms. If a winter teardown is necessary, implement daily closeout routines to prevent moisture intrusion and recommend rapid re-sealing or protective coverings once the forecast calls for rain. Keep drainage paths clear to reduce runoff issues and plan for contingencies if a storm front moves through.
Coordinate a narrow installation window that minimizes heat exposure without leaving material on a scorching roof midday. Prioritize early starts in cooler weeks, and build in buffer days for weather or heat delays. Align staging with typical valley wind patterns to prevent dust and debris from complicating the work. Finally, set realistic expectations about pace and productivity, recognizing that climate-driven scheduling nuances are a normal part of re-roofing in this environment.
Typical local pricing ranges are about $350 to $650 per square for asphalt shingles. In Shafter, this remains the most common starting point for a practical, heat-tolerant roof. The heat of the San Joaquin Valley accelerates aging, so you'll want to consider higher-grade asphalt products with better UV resistance and dimensional stability. When budgeting, factor in additional underlayment and venting upgrades if your attic is particularly hot, since those choices can influence long-term performance and energy use.
Typical local pricing ranges are about $600 to $1100 per square for metal. Metal can shine in this climate, reflecting sun and resisting granule loss that shingles often suffer in extreme heat. In practice, you may see costs creep upward in Shafter when retrofits require careful insulation at eaves, upgraded fasteners, or thicker panels to combat wind and dust. If you're replacing a lighter roof with metal, expect some structural checks to ensure the deck and fascia can carry the load, and plan for fastener sealing in dusty seasons.
Typical local pricing ranges are about $1000 to $1800 per square for clay tile. In Shafter, tile systems can be appealing for their heat deflection and long life, but the price tag rises noticeably here because heavier tiles demand a structural review, more complex tear-offs, and robust underlayment work. Expect longer project timelines and higher labor intensity during the spring replacement window when contractors schedule is favorable but demand is strong.
Typical local pricing ranges are about $900 to $1600 per square for concrete tile. Concrete tiles perform well under intense sun and can resist wind-driven dust, yet they're heavy enough to trigger more expensive installation and deck reinforcement in this climate. In practice, Shafter homeowners often see cost bumps tied to removing existing materials and upgrading deck support, plus attention to underlayment that tolerates heat and occasional temperature swings.
Typical local pricing ranges are about $550 to $1200 per square for wood shingles or shakes. Wood remains a hot-weather choice, but in this valley, it's at a higher risk category for fire codes and insurance scrutiny. Expect modest to moderate cost variations depending on the thickness and treatment of the wood, and be prepared for more meticulous ventilation and moisture management to prevent warping in the dry heat.
Typical local pricing ranges are about $450 to $900 per square for synthetic or composite shingles. In Shafter, these can provide good heat resistance and a lighter installation profile relative to heavy tile options. They offer a middle ground for cost and performance, with the potential for faster tear-offs and less roof weight to manage during replacement windows that align with spring and fall schedules. Weather delays and summer production tempo can still tighten schedules and affect pricing.
A full roof replacement in Shafter generally requires a permit through the City of Shafter Building Department rather than being handled informally by the contractor alone. Relying on a quick, unpermitted tear-off can lead to work stoppages, rework, or penalties that complicate even a straightforward project. The permit process helps ensure the roof meets local wind, fire, and energy standards that matter in Kern County's wildfire-era insurance environment.
Homeowners should expect plan review as part of the process, with guidance focused on material choices and installation methods that withstand the San Joaquin Valley's heat and dust. The local department assesses roof height, venting, attic access, and drainage details, so having shop drawings and product spec sheets ready speeds things up. Turnaround for review depends on current workload, so anticipate some lag during peak season and after holidays. Delays are common if the plan lacks clarity or doesn't align with code requirements.
Inspection flow for reroof projects typically includes rough-in and final stages. Sequencing tear-off, dry-in, and completion work around inspector availability matters. Rough-in inspections verify underlayment, hardware, and flashing are correctly installed before the new surface goes on. The final inspection confirms the completed roof adheres to permit conditions, materials, and workmanship standards. An organized schedule that aligns with inspector slots reduces rework and keeps the project moving.
Coordinate tear-off, dry-in, and final-phase work around the inspector's calendar rather than relying on contractor timing alone. Local offices often publish tentative inspection windows, but actual times can shift with weather, holidays, and workload. If weather compresses or blindsides the timetable, plan for temporary tarping or protective measures to avoid weather-related setbacks between steps.
Submit complete documentation upfront, including product data, roof geometry, and any wildfire-related features. Keep a clear line of communication with the Building Department, and record all correspondence. Expect some back-and-forth, and build in buffer for sequencing around inspections to prevent delays creeping into the hot-season heat of the Valley.
In Kern County, including the inland stretch that feeds Shafter, the wildfire era has reshaped what insurers are willing to cover and how they price risk. The market in this part of California has tightened, and carriers look closely at roof systems that might be affected by heat, sun, and blowing dust. The decision on a replacement shingle or tile is not just about durability; it also affects insurability, claim handling, and future rate decisions. Homeowners should understand that what you choose for color, reflectivity, and installation standards can ripple into future coverage.
When a claim or reroof comes up, adjusters will often request thorough documentation. Date-stamped photos showing the roof at multiple angles, close-ups of decking and underlayment, plus contractor or engineering statements, can smooth the process. For Shafter homeowners, keeping a set of pre-loss condition records is a practical hedge: if the roof has signs of aging before an event, you want credible evidence of its state. High-quality records help prove whether a repair or replacement aligns with insurability expectations.
Material choice and underlayment compliance can influence coverage discussions. In this climate, where asphalt, metal, and clay or concrete tiles each age differently under relentless sun, the underlayment must meet both durability and fire-safety expectations. Local reroof decisions are often tied not just to long-term performance in the heat but also to how an insurer views the overall assembly. If a certain system is perceived as more resilient to windborne debris and heat exposure, that can impact underwriting in the years ahead.
Keep a detailed file of roof condition, maintenance, and upgrades. When planning repairs, hire a reputable local contractor who can provide stamped statements and, if needed, a qualified engineer's assessment. Before any replacement, discuss with your insurer how the chosen system and underlayment might affect future coverage. Being proactive with documentation and select materials that balance heat aging with insurability can save time and trouble when a claim question arises.
In this hot-dry climate, tile roofs can look solid from the street while the waterproofing layer beneath has already aged past its prime. The visible tile can continue to perform for years, but when the underlayment degrades or fails, your attic or ceiling may show signs long before the tiles themselves crack. You should focus on the condition of the waterproofing, not just the outer tile surface, because in practice the roof replacement decision frequently hinges on what's happening under the tiles.
Concrete and clay tiles are staple choices for the valley heat, yet they aren't flawless. Cracked field tiles, slipped pieces after wind events, and brittle flashings are all too frequent. Even when the roof looks serviceable from the curb, moisture can intrude through these weak points during winter rains. In short, a roof can appear sound while the interior layers have already compromised the assembly, so a careful moisture check is essential after wind storms or heavy rain.
Because the sun's intensity is relentless, valleys, penetrations, and transitions around vents and walls are often the first places where aging shows up. The harsh sun accelerates wear on sealants, flashing, and the edge details where tiles meet adjacent structures. You'll want to pay close attention to how these details hold up: look for hairline cracks in flashings, degrades in seal tapes, and loose or displaced tiles where two surfaces meet. Proactive inspections here can prevent moisture that silently travels into the attic.