Last updated: Apr 19, 2026
Rigby's cold winters with recurring snow accumulation make ice dams and freeze-thaw edge damage a primary roofing concern rather than a secondary seasonal issue. When storms pile up along the Upper Snake River Plain, snow sits on the roof and then refreezes at the eaves as temperatures swing. This creates a stubborn ice dam that backs water up under shingles and into the attic, often long before a visible leak appears inside. The result is hidden plywood moisture, warped fascia, and attic insulation compromised by repeated freeze-thaw cycles. Homes with lighter color or poorly vented roofs feel this impact sooner, since solar heat concentrates edge warming that drives uneven melt. If gutters clog or downspouts don't discharge freely, the risk compounds, and the next storm can push a small, localized leak into a major interior issue before a contractor can respond. The pattern is persistent: snow buildup, dam formation, interior dampness, repeated patchwork, and escalating repair necessity.
Heavy snow years in eastern Idaho increase the chance of repeat leak calls on the same roof because winter damage is often followed by spring moisture intrusion. As daytime temps rise, melting snow interacts with lingering ice at the eaves, expanding the damage already begun under shingles and flashing. Even roofs that looked sound after winter can reveal slow leaks when spring moisture meets aging underlayment or compromised deck boards. The timing matters: an early thaw can push water into attic spaces during a window when contractors are still catching up from winter calls, and a mid-spring deluge can saturate interiors before a proper roof repair can be scheduled. Vigilant inspection after each thaw is essential, because small breaches become larger through repeated rain and wind-driven spray. A proactive stance-testing attic condensation, inspecting flashing around chimneys, and checking vent boot seals-helps prevent interior rot and mold before summer storms hit.
Spring hail storms and thundershowers in the Rigby area can shift a homeowner from maintenance planning to urgent repair or full replacement within a single season. Hail damages shingles, granules, and edge details that may look minor at first glance but undermine roof longevity. Wind accompanying these storms can peel back edges, lift shingles, or compromise metal flashings, creating instantaneous pathways for water intrusion. The short roofing season means a damaged roof that isn't addressed promptly can quickly escalated into a larger project as moisture penetrates decking and insulation, and as summer heat accelerates deterioration. The consequence is a compression of scheduling options and a crowded repair calendar.
You need a rapid, targeted response plan that matches Rigby's timely, weather-driven cycle. Start with proactive edge protection: ensure ice dams are managed with proper insulation and ventilation, and keep eaves clear of icicles and debris. Schedule a spring inspection immediately after the first substantial thaw, focusing on flashing, underlayment, and attic ventilation. After any hail event, arrange a swift roof assessment within 24 to 48 hours if possible, concentrating on impact marks, granule loss, and hidden damage beneath hail-creased shingles. Maintain an emergency contingency for interior water intrusion-plastic sheeting and tarps can limit damage while awaiting repairs. Build a repair calendar that anticipates the busy window after winter and before summer storms, so urgent issues don't slip into full replacement territory.
The typical full roof replacement in this area runs from late spring through early fall. Snow, freezing conditions, and winter precipitation disrupt tear-off and installation quality, so contractors target the thawing months and avoid winter work. In a place where Upper Snake River Plain winters load roofs with snow and ice, it's common to see crews book solid as soon as conditions stay above freezing. That narrow window means planning ahead is essential, especially if a storm year pushes repairs into the busy weeks immediately following spring hail.
Warm, dry summers are favorable for installation, but the sun and heat still take a toll on aging asphalt roofs that have already endured winter stress. Asphalt shingles and other aging assemblies can lose granules and flexibility faster when exposed to high UV, so a replacement needs careful timing to maximize long-term performance. In regions with rapid spring moisture transitions, a careful teardown and re-installation sequence matters to avoid trapping moisture in the deck or underlayment.
Spring hail and wind events can trigger a surge of repair needs, and that surge often collides with the start of the replacement season. After a severe spring storm, contractor availability can tighten quickly as crews shift to urgent repairs and re-cover jobs. If a roof shows hail damage, the clock can start ticking on scheduling, and delays become more likely during peak weeks. Homeowners should have a readiness plan for quick contractor contact and flexible windows in late spring to early summer.
To maximize the chance of a smooth tear-off and install, align the project with multi-day stretches of dry weather in late spring to early fall. Check long-range forecasts and avoid imminent cold snaps that could stall progress. If a roof must be replaced after a damaging spring storm, prioritize securing a preferred contractor as soon as the weather allows, because a compressed calendar can push work into the hottest parts of summer, when crews are still inclined to finish before the first autumn winds return.
Different roofing materials respond differently to Rigby's climate during the renewal phase. Metal roofs can often install quickly in the same window as shingles, but steel or aluminum panels still benefit from dry, moderate conditions to seal flashings and seal penetrations properly. Clay and concrete tiles demand careful handling and longer cure times for underlayment, especially after a harsh winter. Wood shingles and synthetic/composite options follow similar seasonal logic: safe handling, proper drying of any deck moisture, and attention to UV exposure during the final phase of installation.
Ask for a clearly staged plan that maps tear-off days, delivery windows for materials, and back-to-back installation steps to minimize exposure of the deck. Confirm contingency plans for weather delays and how crews manage snow or ice if a late spring thaw occurs. Inquire about protection of surrounding landscaping and proper venting or ridge ventilation once the roof is replaced to ensure long-term performance through spring storms and summer heat. A concise schedule helps prevent the compressed spring timeline from turning into a rushed, lower-quality result.
Slade Roofing
100 S State St, Rigby, Idaho
5.0 from 490 reviews
We specialize in commercial & residential roofing solutions, including asphalt shingles, low-slope roofing, and synthetic wood shake. Founded by an insurance expert, our mission is to prevent unnecessary roof claims. With three licensed insurance agents & a licensed insurance adjuster with 50+ yrs of experience on our team, we are the #1 choice for handling roof claims. We help homeowners navigate the claims process seamlessly while delivering high-quality, warrantied roofing systems. Backed by a 25-year leak warranty and a 50-year product warranty, our fire, hail, and wind-resistant roofs are built to last. Most roofs are completed in one day! Discover why SLADE stands for Service, Longevity, Accountability, Durability, and Efficiency!!
Freedom roofing
(208) 419-1720 freedomroofinginc.com
5180 E 145 N, Rigby, Idaho
5.0 from 19 reviews
Roofing contractor
Briggs Roofing Company
(208) 745-9002 briggsroofing.com
435 N Yellowstone Hwy, Rigby, Idaho
4.3 from 96 reviews
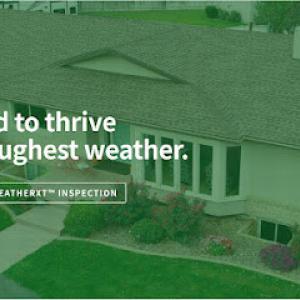
Briggs Roofing is a full service roofing company that specializes in shake, shingle, tile, metal, DaVinci, and slate roof replacements. We service both residential and commercial properties. The Briggs family has been roofing for 4 generations, serving East Idaho and surrounding areas for over 80 years. We have seen products come and go and install a proprietary roof system called the WeatherXT which was designed for the extreme weather we encounter in Idaho and the Northern Rocky Mountains to the Salt Lake area. We only install the best products backed by Manufacturers and Briggs Roofing holds many certifications. Our WeatherXT system goes above the manufacturers minimum requirements, because the areas extreme weather patterns demand more.

Strong Roofing
(208) 403-8718 astrongroof.com
3709 E 20 N, Rigby, Idaho
5.0 from 5 reviews
Strong Roofing is an Idaho founded, owned, and operated roofing company equipped for residential and commercial roofing inspections, installations, and supplies.
Smith Roofing
(208) 745-7588 www.smithroofingpros.com
253 N 4000 E, Rigby, Idaho
4.1 from 19 reviews
It's simple really, if you live anywhere around Pocatello, Idaho Falls, or Jackson Hole, or anywhere in between, we want to talk to you. If you visit our gallery, you will notice that we can handle jobs of all sizes and we are happy to provide you with an estimate on your job. So take a few minutes and look around our website, and when you are ready to take that next step, If you need roofing,siding,guttering or repairs done to your home,then contact us, and we'll help you get going. A good roof over your head is more than just a slogan, it gives you piece of mind.
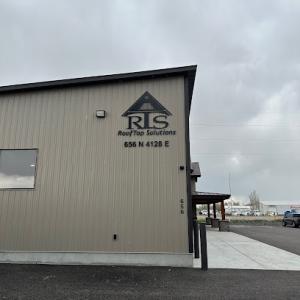
RoofTop Solutions
656 N 4128 E, Rigby, Idaho
3.9 from 27 reviews
RoofTop Solutions, Inc. is a roofing contractor based out of Rigby, ID. We remove and install all types of roofs including Asphalt Shingles, Metal, Wood Shakes, TPO, EPDM, Synthetic Shakes and more. We service areas in Island Park, Jackson Hole, South East Idaho and everywhere in between. Contact us today to find out how we can help you! 208-745-6860
Gibson Roofing
(208) 970-2640 www.facebook.com
Serving
5.0 from 24 reviews
For quality roofing services, call Gibson Roofing! We provide residential & commercial roof repair & installation services in Rigby, ID, Idaho Falls & the surrounding area!
Wright Roofing
(208) 522-4474 www.wrightroofinginc.com
Serving
4.8 from 104 reviews
At Wright Roofing, Inc , our goal is to handle anything in regards to roofing -- and we excel at that! Our full-service approach to roofing installation, roof repair, and much more, will ensure that you don't need to rely on any other contractors to your roofing requirements.
High Country Xteriors
(208) 776-1227 highcountrybuilds.com
Serving
5.0 from 56 reviews
At High Country Roofing, we’ve been remarked for being the best choice for both commercial and residential roofing in Rigby, Idaho. With over 10 years of industry experience, our commitment to excellence and quality craftsmanship has earned us countless positive reviews and a strong reputation in the community. Homeowners and business owners alike trust us to handle their roofing needs, from installation to maintenance and repairs. Our dedicated team ensures every project is completed to the highest standards, using top-quality materials for lasting durability. Don’t just take our word for it—our satisfied customers can attest to. Take a look at our website to see how we can bring you safety and conformity to your home today.

Jr Roofing
(208) 520-7970 jrroofingidaho.com
Serving
4.6 from 62 reviews
We specialize in roof replacement roof repair and new roof installation of both residential and commercial roofs in Idaho Falls & the surrounding areas. We have over 20 years of professional roofing experience.
Idaho Roofing
(208) 317-5571 idahoroofing.com
Serving
4.8 from 35 reviews
Idaho Roofing is a premier roofing contractor in Idaho Falls, ID. Since 1996, we have been serving Eastern Idaho. The professionals at Idaho Roofing help homeowners and businesses save money with professionally installed, energy-efficient roofing. Our roofs are built to last and provide years of protection and beauty to any residential or commercial structure. We offer roofing installation, residential and commercial roofing, complete roofing, and more. We specialize in all types of shingles. We're looking forward to partnering with eastern Idaho consumers. Call to schedule a free estimate today!

Premier Roofing & Restorations
(208) 351-5340 www.premierroofingservice.com
Serving
4.9 from 87 reviews
Premier Roofing & Restorations is a locally owned and operated Idaho Falls and Pocatello roofing company. We dedicate our efforts to providing residential and commercial roofing services for clients throughout Eastern Idaho. We install shingle roofs and flat roofs. We serve Idaho Falls, Pocatello, Rigby, Chubbuck, and the surrounding areas. We offer free roof evaluations and inspections. And now we are offering home inspections! Rest assured that we only suggest home improvements and roofing work that need to be done.
In this climate, asphalt shingles and metal roofing are the workhorses for Rigby homes. Asphalt shingles pair well with typical Rigby roof pitches and existing trusses, and they handle temperature swings without the weight or installation complexity of heavier options. Metal roofing stands out for snow shedding, hail resistance, and its durability through the freeze-thaw cycles that frequently stress roofs here. Contractors in the area often point to the combination of snow loads, spring wind events, and occasional hail as reasons metal roofs perform reliably over time. If a project needs quick installation with predictable performance, these two options cover the most common housing stock and weather demands you'll encounter.
Wood shingles and shakes remain a real niche in this market. They can deliver a classic look, but Rigby's freeze-thaw exposure and moisture retention can introduce maintenance needs that differ from climate zones with gentler winters. Wood roofs require careful ventilation and moisture management to minimize warping, cupping, or fungal growth after heavy snow loads. If choosing wood, consider western red cedar or other rot-resistant species, and plan for regular cleaning of debris and annual inspections after heavy snow years. Expect more attention to flashing detail around chimneys, skylights, and vents, since snow and ice can back up along the edges where water should drain. In the right home, wood shingles can be a beautiful, long-lived option when maintained, but they demand a proactive service mindset given Rigby's winter severity.
Clay and concrete tiles exist locally, but they are less central to the market. Tile systems bring a distinctive appearance and long lifespan, yet their weight, installation complexity, and vulnerability to freeze-thaw cracking in Rigby's climate mean they aren't the default choice for most houses. If considering clay or concrete, ensure the roof structure is engineered to carry the heavier load, and verify that appropriate underlayment and ice-dam safeguards are in place. Because spring hail and wind can threaten tiles differently than shingles or metal, a careful assessment of fasteners, batten spacing, and edge protection becomes essential. The decision should balance aesthetic goals with the practical realities of Rigby weather and the existing roof frame.
Across all material types, the central concern remains how snow, ice, and spring storms interact with roof design. Look for solid ice dam management, adequate insulation and ventilation to minimize condensation, and robust edge detailing to reduce wind-driven damage. In winter, snow load can accumulate in pockets; ensure your chosen roof system has appropriate nailing patterns, underlayment, and flashing to mitigate ice dam formation. Spring wind and hail can test any roof, so the alignment between material choice, local contractor expertise, and preventive maintenance matters more here than in milder climates. When planning, focus on how each option handles Rigby's typical sequence of heavy snow, potential ice dam formation, and rapid spring weather shifts.
Snow load and ice dam risk drive year-to-year costs in this area. A harsh winter leaves roofs loaded with snow and ice, followed by spring hail and wind that trigger additional repairs and insurance work. The workable season is short, and demand spikes into late spring and into summer, so prices can rise once the weather turns favorable for crews. Metal roofs are a notable local specialty, giving homeowners a practical comparison point against asphalt shingles if you're weighing availability, scheduling, and long-term value. Less common materials like clay tile, concrete tile, and some synthetic systems may have tighter installer pools in Rigby, which can push timing and pricing sideways from the more common options.
Asphalt shingles remain the most common, with a typical cost range of about 350 to 650 per square (a square equals 100 square feet). They are widely available and generally easier to schedule during a tight spring window, but you'll feel the seasonal surge if hail or winter damage hits your neighborhood hard. Metal roofing runs higher on a per-square basis, roughly 600 to 1,200, but it benefits from a broader local installer base that often translates to steadier scheduling during the late spring rush. If you're considering clay tile or concrete tile, plan for 900 to 2,100 or 800 to 1,500 per square respectively; these choices are lighter on some homes but heavier on logistics, as crews and materials are less common here and may slow or raise project timelines. Wood shingles or shakes sit in the 550 to 1,200 range and can be a good fit for historic or rustic looks, though they demand careful maintenance in freeze-thaw cycles. Synthetic or composite shingles run 500 to 900 and offer versatile aesthetics with generally easier logistics than tile options, but installer availability still tracks with the popularity of more conventional products.
When you're planning, target the shoulder months right before the expected spring punch and after peak winter damage claims start to ease. If hail or heavy wind events hit late in the season, expect crew backlogs that push project starts into mid-to-late summer. Build in a contingency for material price shifts driven by demand spikes, especially for metal and tile options. If timing is flexible, choose a material with a larger local installer pool to reduce the chance of delays during the short window where crews can work safely and effectively. In short, your best defense against price pressure and scheduling headaches is starting early, choosing a material with solid local availability, and balancing snow-load performance with spring storm resilience.
A full roof replacement in this part of the country hinges on proper permitting, and the timing matters. In Rigby, permits are typically obtained through the city or county building department before work begins, rather than after tear-off has started. If a contractor suggests delaying permits to save time, that shortcut can bite you when inspectors show up and door-knock you for corrections or fines. The peak cold-to-warm transitional period can sour quickly if a noncompliant start nudges you into rework. Make sure the project timeline aligns with a real permit plan, and avoid the pressure of "we'll catch up later."
Local inspections are scheduled at clear milestones and closed out with a final inspection that checks ventilation, underlayment, fasteners, and transition details. These checkpoints are not ornamental; they catch moisture paths, improper fastening, and flashing gaps before a small leak becomes a big repair. In Rigby's climate, where snow loads and spring storms strain every seam, a thorough inspection cadence saves disruption later in the season. Expect that each phase-framing, underlayment, shingles or panels, and finishes-will be reviewed, with a documented closeout once the final looks good and venting is verified.
Rigby-area homeowners should confirm that the roofing contractor, not the homeowner by default, is pulling the permit and providing any required license or registration documentation. Relying on the contractor to handle these steps protects you from accidental noncompliance and qualification gaps that can halt work or complicate future claims. If the contractor resists, ask for written confirmation of who is responsible for the permit, inspections, and the documentation trail. In practice, a smooth project runs on a clear authority line: permit handling and compliance stays with the licensed party, not the homeowner juggling a calendar.
Eastern Idaho storm and hail activity creates a regular roof-claim environment for Rigby homeowners, even though there is no broad statewide insurer pullback shaping the market. Storms arrive with snow loads in winter, then spring hail and wind that can trigger multiple repairs in a single season before the short replacement window closes. Understanding how this pattern manifests helps you navigate claims with less guesswork and more precision.
For a successful claim, photo documentation is non-negotiable. Take high-resolution photos from multiple angles after a storm, showing hail marks, dented fasteners, and edge damage along the eaves. Keep a dated record of weather events tied to the damage-localized reports or a simple note tying a storm date to visible evidence can cut ambiguity. Fire up a contemporary, itemized roof estimate from a licensed contractor that breaks out shingle replacement, underlayment, and flashing repairs. Bring these to the adjuster visit, because adjusters often inspect roofs in person and rely on those visuals to validate the claim.
Claims in this area typically hinge on weather-related damage evidence rather than aging alone. The adjuster will compare pre-storm condition notes with post-storm findings. If winter snow loads left sagging or ice dam issues, separate those from spring hail impacts in your documentation. The goal is to show a clear line from the event to the observed damage, not from wear and tear alone.
Because insurers may separate storm damage from pre-existing wear, homeowners with older roofs need documentation that distinguishes fresh hail or wind impacts from long-term aging. Capture close-ups of new impact sites and note any corresponding interior signs, like water intrusion spots near attic vents or along rafters. Provide a succinct history of prior repairs to help the adjuster see where new damage sits atop old material.
Connect with contractors who help homeowners navigate the claims process from damage assessment to final approval.


Premier Roofing & Restorations
(208) 351-5340 www.premierroofingservice.com
Serving
4.9 from 87 reviews
In Rigby, inspectors and repair crews pay close attention to ventilation and underlayment because winter moisture and freeze-thaw conditions can turn small assembly weaknesses into recurring leaks. When snow sits on a roof and nights dip below freezing, condensation rises into decking and rafters, then thaw cycles create microscopic gaps that widen over time. If soffit vents, ridge vents, or baffles aren't properly positioned, attic temperatures swing wildly, moisture condensates on sheathing, and leaks propagate toward ceilings with little warning. A neglected underlayment layer invites wind-driven water to seek its path, especially around penetrations where nail heads, vent collars, or flashing sit.
Roof edges and transitions are especially important in this region because ice damming and snowmelt can exploit flashing and detail errors during late winter and early spring. Ice tends to back up at eaves, gutters, and valleys, lifting shingles and loosening sealants. In the field, look for loose or missing step flashing along chimneys, vent pipes, and dormers, plus degraded edge metal where gutters push against shingles. When spring warmth returns, melted snow pushes into seams you might have overlooked, revealing hidden rust, corrosion, or bridging gaps that invite slow leaks long after the snow has melted.
Fall winds combined with leaf buildup before winter can add stress to already weathered roofing systems in this area, especially when spring hail damage was never fully repaired. Debris on the roof traps moisture and amplifies wind exposure, bending underlayment fibers and loosening fasteners. If previous hail repairs were partial or hurried, flashing may not seal correctly at transitions, creating ready-made leak paths once spring storms arrive. Vigilant inspection of these zones after heavy winds or hail helps catch problems before they cascade into interior damage.
Find contractors experienced in skylight installation, flashing, and leak repairs to bring natural light into your home.