Last updated: Apr 19, 2026
In this area, roofs face a relentless two-season cycle: heavy winter snow loading followed by spring hail activity. That combination creates a constant stress on shingles, flashing, and gutter systems. By the time spring arrives, what looked minor after winter can reveal itself as active leaks once daytime melt touches overnight refreeze. The result is a pattern of sudden leaks and hidden damage that sneaks up when you least expect it. If your roof hasn't been inspected since last winter, assume there's worthiness to a thorough look, especially after big snowfalls or violent spring hail storms. An inspection isn't a convenience here-it's a safeguard against progressive interior damage and costly emergency repairs.
Eastern Idaho sees frequent freeze-thaw cycling that makes even small flashing or shingle imperfections behave like tactical weak points. A single warm day can soften sealants, while a below-freezing night refreezes moisture at the seams, driving water deeper into the roof deck. This is how a minor flashing lift or a loose shingle edge escalates into active leaks. In practical terms, look for darkened stains on ceilings under exterior walls, hydrated ridge vents that feel loose, or granular loss along the lower edges of shingles. If you notice moisture on ceilings after a thaw episode or a sudden warm spell, your roof deserves a careful, staged assessment rather than a quick patch. Target the attic ventilation as well-poor airflow compounds condensation and can accelerate rot behind the scenes.
Autumn wind events on the open Upper Snake River Plain can loosen edges and push debris into gutters and valleys before winter snow arrives. This debris traps moisture, creates micro-dams at the eaves, and undermines edge protection. A wind-driven bark or shingle edge that feels loose is not just a cosmetic issue-it's a wind-borne risk that can peel back protective layers when snow piles up. Before the first heavy snows, clear debris from valleys, channels, and roof edges. Check hip and ridge lines for any movement, and ensure overflow paths in gutters stay clear. If leaves or branches are wedging behind vent flashing, that's an early warning sign of potential ice dam formation once temperatures swing.
A small attic moisture spot that wasn't there last season, persistent frost at eaves during thaw cycles, or a newly visible ridge cap lift all signal the need for professional eyes. Probing shallowly at pipe and chimney flashing can reveal if there's shifting sealant or torn boot flashing. Don't ignore granule loss on the lower shingles, which indicates wear that can accelerate under freeze-thaw stress. If you've had recent hail, treat roof surface and gutters as high-risk zones; dents on metal components and dented flashing around vents can be precursors to leaks that become active during melt cycles.
Document visible damage with photos from multiple angles-edges, valleys, and around roof penetrations. Schedule a rodding or flashlight inspection in the attic to identify hidden leaks, then address drainage blockages and compromised edge protection first. If damaged components show signs of movement or water intrusion, don't delay a professional assessment. An expedited evaluation can prevent moisture from penetrating the attic floor and reaching insulation or interior finishes, which often translates into more extensive repair work later. In short, early detection paired with prompt, targeted repairs keeps the worst of Idaho's spring and winter cycles from dictating the cost of your roof.
EZ Exteriors
(208) 521-1088 www.ezexteriorsllc.com
1335 Enterprise St, Idaho Falls, Idaho
5.0 from 97 reviews
About EZ Exteriors, LLC. EZ Exteriors is proud to provide quality roofing and siding installations in the South Eastern Idaho region. You can trust that your exterior is in good hands when our team takes on your project. Whether you are in need of a repair, or need an entirely new installation, we are your one stop shop for all of your exterior needs. We take pride in the fact that we have a strong history of ensuring that you have a choice experience when working with us.
High Country Xteriors
(208) 776-1227 highcountrybuilds.com
964 E Lincoln Rd, Idaho Falls, Idaho
5.0 from 56 reviews
At High Country Roofing, we’ve been remarked for being the best choice for both commercial and residential roofing in Rigby, Idaho. With over 10 years of industry experience, our commitment to excellence and quality craftsmanship has earned us countless positive reviews and a strong reputation in the community. Homeowners and business owners alike trust us to handle their roofing needs, from installation to maintenance and repairs. Our dedicated team ensures every project is completed to the highest standards, using top-quality materials for lasting durability. Don’t just take our word for it—our satisfied customers can attest to. Take a look at our website to see how we can bring you safety and conformity to your home today.
Premier Roofing & Restorations
(208) 351-5340 www.premierroofingservice.com
1920 E 17th St Suite 203, Idaho Falls, Idaho
4.9 from 87 reviews
Premier Roofing & Restorations is a locally owned and operated Idaho Falls and Pocatello roofing company. We dedicate our efforts to providing residential and commercial roofing services for clients throughout Eastern Idaho. We install shingle roofs and flat roofs. We serve Idaho Falls, Pocatello, Rigby, Chubbuck, and the surrounding areas. We offer free roof evaluations and inspections. And now we are offering home inspections! Rest assured that we only suggest home improvements and roofing work that need to be done.
Roof Rescue
(208) 932-8178 roofrescueusa.com
496 W 15th St, Idaho Falls, Idaho
4.8 from 420 reviews
Roof Rescue is a trusted roofing contractor serving Idaho, Utah, Wyoming, and Montana. With offices in Idaho Falls, Twin Falls, and Logan, we specialize in residential and commercial roofing, including inspections, repairs, installations, gutter services, asphalt roofing, and skylight installation. Our licensed and insured team uses advanced tools and top-quality materials to deliver durable, professional results. We proudly offer discounts for seniors, military, teachers, and first responders, along with free consultations and estimates. As an Owens Corning Platinum Preferred Contractor and Velux Certified Installer, we're committed to craftsmanship, reliability, and customer satisfaction.
Wright Roofing
(208) 522-4474 www.wrightroofinginc.com
2843 25th E, Idaho Falls, Idaho
4.8 from 104 reviews
At Wright Roofing, Inc , our goal is to handle anything in regards to roofing -- and we excel at that! Our full-service approach to roofing installation, roof repair, and much more, will ensure that you don't need to rely on any other contractors to your roofing requirements.
Gibson Roofing
(208) 970-2640 www.facebook.com
13232 N 65th E, Idaho Falls, Idaho
5.0 from 24 reviews
For quality roofing services, call Gibson Roofing! We provide residential & commercial roof repair & installation services in Rigby, ID, Idaho Falls & the surrounding area!
Idaho Roofing
(208) 317-5571 idahoroofing.com
3755 N 15th E, Idaho Falls, Idaho
4.8 from 35 reviews
Idaho Roofing is a premier roofing contractor in Idaho Falls, ID. Since 1996, we have been serving Eastern Idaho. The professionals at Idaho Roofing help homeowners and businesses save money with professionally installed, energy-efficient roofing. Our roofs are built to last and provide years of protection and beauty to any residential or commercial structure. We offer roofing installation, residential and commercial roofing, complete roofing, and more. We specialize in all types of shingles. We're looking forward to partnering with eastern Idaho consumers. Call to schedule a free estimate today!

Jr Roofing
(208) 520-7970 jrroofingidaho.com
2850 Teal Blue Dr, Idaho Falls, Idaho
4.6 from 62 reviews
We specialize in roof replacement roof repair and new roof installation of both residential and commercial roofs in Idaho Falls & the surrounding areas. We have over 20 years of professional roofing experience.
Ashco Roofing Experts
(208) 486-0066 ashcoroofingexperts.com
550 2nd St Suite 281, Idaho Falls, Idaho
5.0 from 14 reviews
Ashco Roofing Experts is home to the best roofers in Idaho Falls and its environs. Our company has years of experience in roof inspection, repair, and replacement, especially after hail damage. We follow a systematic approach that allows us to assess your needs, give you a precise quote, and deliver results that suit your needs. Our team also prioritizes punctuality by getting to your location as scheduled and walking the extra yard to finish the job within the set timeframe. Our Idaho Falls team will also file your insurance claims in case of weather damage to get the compensation you deserve. In addition, we provide financing options to make your project as affordable as possible.
Blue Buffalo Roofing
(208) 980-7663 www.bbroofs.com
550 2nd St Suite 294, Idaho Falls, Idaho
5.0 from 9 reviews
Good Roofs, Great Prices. Blue Buffalo Roofing has become a trusted name in east Idaho roofing. Their commitment to quality craftsmanship and exceptional service ensures every project, from minor repairs to full installations, is completed with the utmost care. Leveraging innovative instant quote technology, they provide a seamless and efficient experience for all your residential and commercial roofing needs. Blue Buffalo Roofing stands as a pillar of reliability and excellence in the community.
Lobo Construction
(208) 516-6008 www.loboconstructionllc.net
1670 W Broadway St, Idaho Falls, Idaho
4.4 from 20 reviews
We are a small and local Construction Company in Idaho Falls, ID. Our focus on Roofing and the recent Hail Damage has allowed us to grow by leaps and bounds! Specializing in all aspects of home building, Lobo Construction also provides roofing services from new construction to hail damage repair.
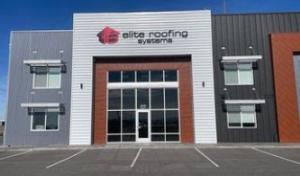
Elite Roofing Systems
(208) 228-5834 www.eliteroofingsys.com
2019 Endeavor St Suite A, Idaho Falls, Idaho
4.2 from 31 reviews
Idaho’s Elite Roofing Systems is your trusted local roofing contractor serving Eastern Idaho, Western Wyoming, and West Yellowstone, MT. With over 20 years of experience, we specialize in residential and commercial roofing, including roof repairs, replacements, metal roofs, flat roofing, and storm damage restoration. As a certified GAF GoldElite™ Contractor, we deliver high-quality craftsmanship and offer manufacturer extended warranties for peace of mind. Our team also handles seamless gutter installations and snow removal services. Proudly serving Idaho Falls, Ammon, Shelley, Rigby, Rexburg, Jackson, WY, Alpine, Afton, and West Yellowstone.
In Idaho Falls, the mix of long snow seasons, freeze-thaw cycles, and a hail- and wind-prone insurance environment shapes what roof types work best. The choices below reflect practical, locally relevant tradeoffs you'll actually feel when winter comes and spring storms roll through. As a rule, keep snow shedding, wind uplift resistance, and hail durability high on your checklist.
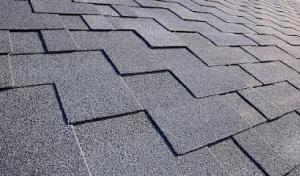
Asphalt shingles are common locally. They're familiar, easy to install, and can be a solid value for steady protection. The big caveat: asphalt shingles are vulnerable to hail bruising, wind uplift, and summer heat movement followed by winter contraction. In a setting with serious freeze-thaw cycles, that movement can loosen fasteners and shorten service life if the attic is not well-vented and the underlayment isn't up to the task. When considering asphalt, prioritize impact-resistant or Class 4 options if hail is a regular concern, and pair any choice with a well-sealed drip edge and upgraded underlayment to improve wind resistance. Regular inspection after storms helps catch bruising or micro-damage before leaks appear, especially along eave lines and near flashing.
Metal roofing has strong local relevance because snow shedding, wind resistance, and long-term performance matter in this climate. Snow slides off metal more predictably than other materials, reducing the weight load on any single point and lowering the risk of ice dams in tight eaves. Metal also handles wind well when installed with proper fasteners and integrated sealing. For Idaho Falls winters, dynamic wind events and rapid temperature swings can stress sealants; look for fastener patterns that minimize exposed edges and for concealed or standing-seam options that reduce sealant joints. Metal is a sensible choice if you're prioritizing durability through repeated freeze-thaw cycles and want a roof that keeps snow off critical valleys and attic vents with fewer maintenance surprises.
Tile and slate options exist in this market, but their added weight makes roof structure and snow-load compatibility more important in eastern Idaho than in milder regions. If you're contemplating tile or slate, start with a structural assessment to confirm the roof framing and decking carry the extra load without sag. In snow-rich winters, the extra weight compounds the need for proper bracing and snow-load calculations. If the existing structure is marginal, these materials can end up costing more in structural reinforcement than in material expense. For retrofits, slate or concrete tiles demand careful attention to flashing around chimneys, valleys, and vents, where snow buildup and ice can intensify leaks if water paths are not well managed.
When evaluating options, align material choice with expected storm damage patterns and your roof's existing condition. If a hail event scars shingles or tears sheathing, a reroof decision will be driven by your insurer's assessment and your home's current structural integrity. Snow-load considerations should guide whether a lightweight synthetic or a heavier tile/slate option is feasible without extensive reinforcement. In a climate like this, proactive maintenance beats reactive repair: keep gutters clean, ensure attic insulation and ventilation are balanced to minimize ice dam risk, and schedule inspections after major hail or wind events. If a reroof is on the horizon due to damage or insurance evaluation, prioritize products with proven hail and wind performance in this market, and verify installation details that support reliable snow shedding and edge protection.
Local reroof pricing is affected by winter access limits and storm-season demand spikes after hail and wind events in eastern Idaho. In this area, crews face limited daylight and compacted snow during late fall and early spring, which can push project timelines and staging costs higher than you'd see in milder parts of the state. When a hail event hits, you'll notice a quick surge in material options favored by insurers, and a rush of work that can tighten crew calendars for several weeks.
Asphalt shingles sit at the low end of the common reroofing spectrum, with typical cost ranges from 300 to 550 USD per square for a standard 100-square roofing job. In practice, many homeowners in snow country pair asphalt with upgraded underlayments or starter courses to handle freeze-thaw cycles. Steeper residential rooflines common in this area can push labor time up, even if the material itself remains economical. If insurer scrutiny after a storm favors familiar, cost-effective options, asphalt remains the go-to for many homeowners, especially when budget predictability matters.
Metal roofs run higher, roughly 650 to 1,100 USD per square, but they're known for shedding snow efficiently and resisting hail-damage concerns that irritate some insurers after severe seasons. In eastern Idaho, metal can translate to fewer tear-off complications in winter and quicker reseaming of attic ventilation. Homeowners weighing metal versus asphalt after repeated weather exposure will notice metal's longer-term value in a climate with heavy snow load and freeze-thaw cycles. The initial investment is higher, but your annual maintenance window and potential insurance savings can balance the math over time.
Clay tile sits around 900 to 1,500 USD per square, while concrete tile ranges from 800 to 1,400 USD per square. Both offer strong wind and hail resistance when properly installed, yet the steeper pitches and complex staging common to Idaho Falls homes can amplify installation costs. If a hail-focused insurance claim pushes toward higher-resilience materials, tile can be appealing, but expect longer tear-off and more intricate scaffolding requirements in homes with challenging roof geometry.
Synthetic or composite shingles typically range from 500 to 900 USD per square, providing a compromise between cost and hail resistance. Slate, while premium at 1,200 to 2,400 USD per square, is less common for single-level residences because of weight and installation complexity, which also interact with winter access windows and the need for careful staging.
Material choice in Idaho Falls is often influenced by insurer scrutiny on older roofs and by homeowners weighing metal versus asphalt after repeated weather exposure. In a town where storm damage prompts rapid assessments, you may see insurers favoring more resilient options promptly after events, which can affect timing and budgeting. When you're planning, consider not just the sticker price per square but also how the roof's weight, wind uplift resistance, and snow-shedding performance interact with your home's structure and long-term claims history.
Get a clear picture of your project costs upfront - no commitment required.
A full reroof in Idaho Falls typically requires a permit through the City of Idaho Falls Building Department. The process is not just a formality; it ensures the roof system is designed and installed to withstand long winters, freeze-thaw cycles, and the dynamic wind and hail conditions that can stress a roof over years. Before any shingle granules start collecting in the gutters, you should check with the building department about required plans, inspections, and any neighborhood or HOA rules that might apply. If the project is tied to an insurance claim, make sure the permit path is clear with both the insurer and the contractor to avoid delays at punch-list time.
A final inspection is required after completion, with inspectors checking underlayment, fasteners, flashing, and venting. In this climate, underlayment quality and proper fastener depth are critical because snow load and rapid temperature changes can expose weaknesses quickly. Flashing around chimneys, skylights, and transitions must be continuous and properly sealed to resist wind-driven moisture. Venting isn't merely about keeping attic temps comfortable; it's about preventing condensation that accelerates ice dam formation and moisture intrusion, which Idaho Falls winters can amplify. The inspector will verify that the roofing system is integrated with existing attic ventilation and ridge or soffit vents as designed.
Local permit closeout can involve a punch-list, and some materials may need to satisfy wind-resistance expectations before final approval. That means it is not unusual to have small remedial items appear after the initial inspection-things like resealing a seam, adjusting a ridge vent, or re-fastening a loose starter strip. The wind-prone seasons of the region can put extra emphasis on edge protection and securement. Your contractor should be prepared to address any culprits identified in the punch-list promptly, or risk delaying the formal closeout and any final documentation you need for insurance or resale.
Communicate early with the Building Department about any unusual roof configurations, venting plans, or structural additions. Document all communication and maintain clear receipts for material and workmanship changes. Schedule inspections with realistic timeframes, accounting for potential weather holds that are common during Idaho Falls winters. If a storm-damaged roof is your trigger, ensure the permit and inspection path aligns with the insurer's requirements so that the project remains compliant through completion and into the long-term performance of the new roof.
Eastern Idaho hail and wind events create recurring roof claim activity, so insurers often want clear documentation of roof age, material, and damage photos. In practical terms, you should expect an adjuster to request a straightforward timeline: when the roof was installed, the exact shingle or panel type, and a sequence of storm events that may have contributed to damage. Photographs taken after a storm-especially close-ups of granule loss, dented vents, and lifted edges-can make the difference between a straightforward repair and a rejected claim. Long winter seasons with heavy snow also place a quiet but persistent strain on seals, flashing, and ridge lines, which affects how damage is evaluated later.
Some carriers have tightened underwriting for older roofs in this region, which can affect whether homeowners repair, replace, or upgrade materials. If the roof has endured multiple freeze-thaw cycles and sun exposure over the years, the insurer may view it as a higher-risk asset even when a newer hail hit occurs. That means the decision on repair versus full replacement can hinge on demonstrating the roof's remaining life and the likelihood of continued performance. A cautious homeowner collects maintenance records, recent inspections, and any prior claim notes to present a clear history rather than leaving gaps that can be exploited in underwriting.
Claim outcomes in Idaho Falls can depend on documenting both storm damage and pre-existing wear from snow, sun, and freeze-thaw exposure. A practical approach is to pair storm-related photos with evidence of ongoing wear: granule loss across shingles, flashing corrosion, or sagging sections that predate a single storm event. Work with a trusted roofing professional who can provide a dated evaluation and an itemized report of materials and condition. That expertise helps anchors your claim in observable facts rather than vague impressions. If a claim seems to span multiple concerns, request a reinspection or an independent adjuster review to ensure that both acute damage and chronic deterioration are weighed appropriately. This reduces the chance that a future event is treated as an isolated incident rather than part of the roof's overall exposure.
Connect with contractors who help homeowners navigate the claims process from damage assessment to final approval.
Premier Roofing & Restorations
(208) 351-5340 www.premierroofingservice.com
1920 E 17th St Suite 203, Idaho Falls, Idaho
4.9 from 87 reviews

Jr Roofing
(208) 520-7970 jrroofingidaho.com
2850 Teal Blue Dr, Idaho Falls, Idaho
4.6 from 62 reviews
Ashco Roofing Experts
(208) 486-0066 ashcoroofingexperts.com
550 2nd St Suite 281, Idaho Falls, Idaho
5.0 from 14 reviews
In this high-mair snow region, attic airflow plays a pivotal role in winter roof performance. Idaho Falls inspectors specifically review venting on reroof projects, reflecting how attic airflow affects heat loss and snow melt dynamics. When soffits, ridge vents, and attic baffles aren't coordinating, warm attic air can melt snow near the eaves while still leaving frozen edges, creating ice dam stress that threatens shingles, flashing, and gutters. Ensuring balanced intake and exhaust ventilation helps keep the roof deck closer to outdoor temperatures, reducing the likelihood of those stubborn ice dams forming along the eaves after a sunny day followed by a cold snap.
Eastern Idaho sees snow cover that often melts during daylight and refreezes overnight. That cycle concentrates meltwater at the eaves where it can refreeze into ice dams if attic ventilation and insulation aren't doing their job. The result is increased weight on roof edges, potential gutter damage, and compromised attic-to-roof thermal boundaries. The practical takeaway is to pair ventilation improvements with insulation upgrades to minimize warm roof areas that create uneven melting. Your goal is to keep roof deck temperatures as uniform as possible, so melt water drains smoothly toward the gutters instead of backing up under shingles.
Underlayment quality matters more in this climate because repeated freeze-thaw exposure can exploit small installation errors. A durable, properly installed underlayment acts as a secondary barrier against moisture that finds its way under shingles during rapid temperature swings. Pay attention to seams, nail patterns, and corner detailing, especially around hips and valleys where ice dams are more likely to form. When installing or reroofing, insist on careful layering and secure fastenings to prevent wind-driven lift and to maintain a consistent barrier against moisture ingress during freeze-thaw cycles.
Evaluate attic ventilation for balance: ensure the intake near soffits is not obstructed by insulation, and verify that ridge or high-side exhaust vents are unobstructed and evenly spaced. Check insulation depth at the eaves versus the rest of the attic; upgrading insulation here can dramatically reduce heat transfer to the roof edges. If a reroof is on the horizon, plan for a comprehensive venting assessment and a high-quality underlayment system that can endure Idaho's winter weather. These measures work together to minimize ice dam risk and prolong roof performance through the region's distinctive freeze-thaw rhythm.
Even in a market dominated by pitched residential roofs, Idaho Falls contractors still advertise low-slope and skylight repair often enough to signal recurring leak points. In practice, those small flat or near-flat areas adjacent to main roof planes tend to collect moisture first during melt-and-freeze cycles, so inspecting these spots after a big storm or rapid thaw is time well spent.
Snow retention around skylight curbs and transitions can make flashing details more failure-prone during freeze-thaw periods. Look for ice dams forming at the curb edges, and check that the curb flashing has a continuous seal from skylight base to roof deck. If you notice white, crusty ice buildup along the flashing, plan for targeted remediation rather than waiting for a full roof replacement. Keep gutters and scuppers clear to reduce melt water backing up against skylight transitions.
Low-slope sections on additions, porches, and mixed-roof homes can hold snow and slow drainage longer than the main roof planes. In Idaho Falls, those micro-slopes often act as the first splash zones for leaks during heavy snow years. Regularly clear snow from these areas after storms, paying special attention where the low-slope deck meets the main roof. Improve drainage by verifying that any added or altered sections maintain a proper fall toward eaves or drains, and reseal joints where water can pool.
Where flashing meets skylights or low-slope transitions, the first failure point is often the sealant or fastener pattern. If you see dark staining, peeling sealant, or slight movement of flashing corners, address it promptly. Re-secure errant fasteners, clean old sealant, and reseal with a product compatible with the underlying material. In cold months, choose a sealant that remains elastomeric at low temperatures to preserve a watertight boundary through seasonal freeze-thaws.
Find specialists in TPO, EPDM, and built-up flat roofing systems for residential and commercial properties.
Premier Roofing & Restorations
(208) 351-5340 www.premierroofingservice.com
1920 E 17th St Suite 203, Idaho Falls, Idaho
4.9 from 87 reviews
Elite Roofing Systems
(208) 228-5834 www.eliteroofingsys.com
2019 Endeavor St Suite A, Idaho Falls, Idaho
4.2 from 31 reviews
In a market where storm-driven replacement cycles drive many reroofs, you want a crew with proven steep-slope residential experience and snow-country detailing. Confirm that the crews are comfortable with ice dams, venting for heavy snow seasons, and flashings designed for wind and hail exposure that are common here. Ask for recent project references within similar climates and a quick walk-through of two or three neighborhoods with comparable homes.
The local market strongly emphasizes reroofing, quick response, and cleanup. When you call for an estimate, note how soon the contractor can start and how they handle debris removal, material protection and site tidiness on windy days. A responsive company should provide a realistic timeline and a firm plan for protecting landscaping, driveways, and gutters during a storm-prone month.
Snow-country roofing means weather delays are part of the deal. Check how the contractor communicates weather-related shifts and how often they update you if a window slides. Ask what happens if a critical bad storm interrupts work and how temporary coverings or interim protection are managed to limit interior risk.
Since many contractors here also handle commercial work, verify the crew's experience with residential systems and snow load considerations. Confirm the contractor carries proper liability and workers' compensation, and that subs, if any, are clearly identified and insured. Safety on steep pitches matters in this market, so ask about fall protection protocols and ladder safety.
Before signing, ensure the scope includes roof deck inspection, flashing details, ventilation checks, and a written cleanup plan. Get a clear, itemized project calendar, including anticipated weather delays, and a signed agreement that reflects the agreed-upon milestones.