Last updated: Apr 19, 2026
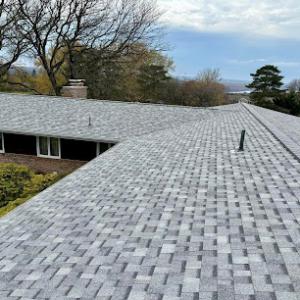
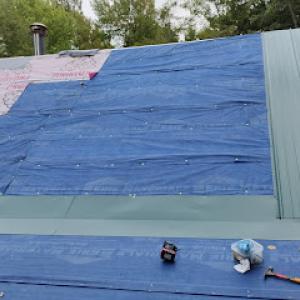
Watertown sits in the eastern Lake Ontario snowbelt, where lake-effect snow can create repeated roof loading events through winter. That means your roof is not just bearing a snow blanket once-it's constantly receiving new layers as lake-flavored snow bands drift over the city. The risk isn't only about a heavy base load; it's about rapid changes in weight as snow compacts, then softens with sun, then refreezes at night. This back-and-forth stress concentrates at edges, along eaves, in valleys, and where gutters sit. If the roof system isn't prepared for this pattern, you can end up with sagging edges, failed flashing, and sudden leaks once meltwater refreezes in ways that bite into shingles and underlayment.
The city's long cold season and frequent freeze-thaw swings make ice dam formation a primary roofing concern for eaves, valleys, and gutter lines. When heat leaks from the attic, snow near the interior melts and runs to the colder edges. It freezes at the rakes and overhangs, forming ice dams that back up meltwater under shingles. That water intrusion can travel sideways, compromising decking, insulation, and interior ceilings. In Watertown, the threat isn't hypothetical-it's a recurring winter stressor that your roof must be engineered to handle, not just withstand occasionally. The smarter approach is to design and retrofit for controlled melt pathways, continuous attic ventilation, and proper insulation so that heat loss is minimized and ice dams are less likely to form or cause interior damage.
Homeowners often face roof decisions based less on summer heat aging and more on winter snow retention, attic heat loss, and melt-refreeze patterns. In practical terms, that means prioritizing features that perform under snow load and freeze-thaw cycles: robust attic insulation, airtight ceiling planes, and ventilation that keeps roof decks cold while still allowing moisture to escape. This translates into choosing underlayment and flashing that won't degrade when ice dam pressure presses against gutter lines, and into ensuring valley metal and ridge line details are capable of shedding snow without creating concentrated ice pockets. The goal is to keep the roof deck closer to outside temperatures so meltwater doesn't travel uphill into the attic.
A proven Watertown approach emphasizes attic ventilation as a frontline defense. Sufficient soffit intake paired with ridge or qualified alternative exhaust prevents heat buildup that accelerates snowmelt at the top while leaving the lower eaves colder and less prone to dam formation. Combine this with a tight, well-sealed ceiling and adequate insulation to minimize heat transfer into the roof assembly. When the interior stays closer to outdoor temperatures, ice dam risk drops because the meltwater won't be forced toward the eaves with such vigor. Your deck and underlayment stay drier, reducing the chances of warped boards and compromised roofing felt or membrane that can worsen leaks.
Snow retention strategies can influence ice dam risk as much as heat management. If the roof uses overhangs or features that invite wind-driven snow to accumulate against the fascia or gutters, those areas become hot spots for dam development when meltwater refreezes. Look for edge detailing that guides water toward unobstructed drainage paths and away from vulnerable joints. Valley and flashing integrity is non-negotiable in this climate; any compromise here can become a fast-track to interior water intrusion after a thaw. Regular, seasonally timed inspections focusing on eaves, gutters, and flashing connections are essential, especially after heavy snow events or rapid temperature swings.
In this climate, proactive monitoring beats reactive fixes. Keep a close eye on insulation gaps in the attic, seal any air leaks around penetrations, and ensure ventilation pathways aren't blocked by insulation or debris. When ice dams form, address the damage quickly-improperly removed ice can tear shingles and lift flashing, creating new leaks. If you notice recurring ice dam issues, it's a sign that the roof system or attic setup needs targeted improvements to minimize heat loss, improve drainage, and reduce the snow-retention tendencies that fuel melt-refreeze cycles.
Reroofing activity in this area runs mainly from late spring through early fall. Winter snow, ice, and cold-weather handling risks make scheduling impractical or unsafe, so projects bunch into the warmer months when equipment and crews can move efficiently. If a project stretches into late fall, the window narrows quickly as freeze-thaw cycles return and days shorten. Planning around that shorter late-season pace is essential to minimize weather-related delays and to protect a fresh roof through the coming winter.
Spring brings its own set of challenges. The north-country thaw can reveal leaks that were buried under snow, making inspection more urgent. On the flip side, wet conditions-rising groundwater, sleet, and frequent rain-can slow tear-offs and dry-in work. If shingles or underlayment show moisture signs during thaw, address them promptly, but don't rush while a steady downpour is underway. Prioritize leak containment and temporary protection so water intrusion doesn't compound interior damage as frost pockets thaw. Expect a few weather-induced pauses, and build contingency time into the schedule for delayed dry-in if early-season storms persist.
When the ground dries and crews can haul material without tracking mud into living spaces, a clear sequence matters: remove the old roof, inspect the deck and ventilation, install underlayment, and finish with proper flashing and vented soffits. In Watertown, the once-per-year warmth spike brings efficient daylight and longer work windows, but wind-driven storms can interrupt even then. Align material deliveries to dry, low-wind days and set buffer days for potential reseaming or re-nailing after a cold-night snap. This is also the period to verify attic ventilation is adequate before the new roof goes on-without enough air movement, heat and moisture can stall a durable seal.
Fall projects require a tighter schedule because sustained freezing conditions will arrive sooner than expected. Wind events and leaf debris add layers of complexity: loose debris can damage exposed edge metal and shingles during storm bouts, and leaves can clog shingles and gutters if not cleared promptly. The objective is to finish weather-tight work before cold weather sets in, so plan for a definitive finish date and a thorough wind-driven test of roofing and flashing. If a storm is forecast near the end of the work window, prioritize sealing the perimeter first and scheduling a follow-up inspection to verify that seals hold under typical late-autumn wind loads.
On a practical level, start by establishing a target dry-in date that precedes the peak of warm-season storms. Build in buffer days for material delivery delays, equipment setup, and potential wind pauses. Coordinate with the crew to ensure attic venting and soffit intake are prepared before removing decking. Weather monitoring matters-watch for warm days that follow cold nights, which can push nails or sealants improperly if not timed correctly. Finally, ensure temporary protective measures are in place for any lingering interior moisture during shoulder-season undertakings, so a late surge of cold air doesn't compromise newly installed layers.
Throughout the season, emphasize weather-conscious workmanship. A windy afternoon is not ideal for installing long runs of metal flashing or for sealing long roof edges. Snow load, once a risk again in late fall, underscores the importance of a solid, watertight finish. Communication with neighbors about anticipated storm windows can reduce disruption and keep access clear for emergency routing if a late-season weather event hits. A well-timed, methodical approach aligned with Watertown's spring-through-fall rhythm yields a roof that stands up to lake-effect snow, ice dams, and freeze-thaw stress better than rushing through the short window.
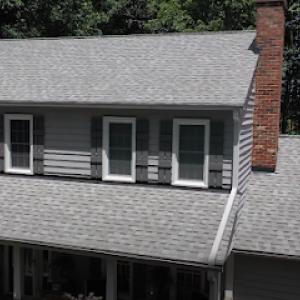
Asphalt shingles remain common, and for many homeowners they're the easiest choice to get a solid roof up quickly. In this climate, freeze-thaw cycling can accelerate granule loss, seal-strip issues, and damage at eaves where ice backs up. Your shingles may show accelerated granule shedding after a single season of rapid temperature swings, and damaged granules reduce UV protection and shorten life. If you already have asphalt, consider regular inspections after heavy thaws and mid-winter thaws, focusing on unprotected eaves and valleys where ice damming concentrates. Enhancing attic ventilation and ensuring a robust drip edge helps protect the underlayment and keeps the shingle surface drier during melt events. Modern architectural or heavier-duty shingle profiles can improve wind resistance and shedding, but they won't by themselves solve ice dam concerns without a comprehensive ice-and-water shield approach at the eaves and verges.
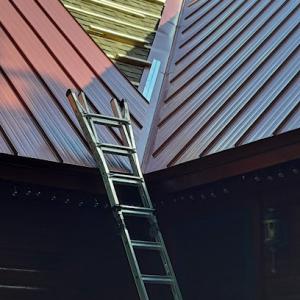
Metal is especially relevant in this market because snow shedding can reduce standing snow loads, which helps limit roof strain during heavy storms. A well-installed metal roof can feel dramatically different during a whiteout-the snow tends to slide, and that lowers the vertical load you're carrying. Snow guards become important, particularly near roof edges and near entryways, to keep sliding snow from creating dangerous drops or shifting debris onto walkways. Metal also dries quickly after storms, which helps mitigate ice formation along eaves when there's a warm spell followed by a deep freeze. The trade-off is you need precise flashing, solid fastening, and careful attention to the joints to prevent ice dams condensating behind panel joints. When paired with proper insulation and ventilation, metal can deliver long-term resilience in a snowy, cold climate.
Clay and concrete tile show up in the market data, but their weight and cold-climate performance demand closer scrutiny here. Tiles add a distinctive look and can be durable, but they are heavier and require a reinforced structure to handle the load-especially in a snowbelt environment where ice buildup and freeze-thaw can stress joints and fasteners. Tile performs best on roofs with solid support and a careful layout to minimize trapped moisture. In areas prone to heavy ice damming, a high-quality underlayment and continuous insulation become critical to prevent heat from escaping into the roof plane where it can refreeze at the eaves. If considering tile, verify the roof deck strength and the drainage plan, and discuss with an installer who has experience in cold climates and snow management.
Regardless of material, the aim is to reduce ice dam potential and keep the roof system dry through long winters. Ensure an airtight ceiling with adequate attic ventilation, and install an ice-and-water shield along eaves and in valleys. Regular inspections after major thaws and periodic cleanouts of gutters help maintain proper drainage. In this area, the right combination of material, installation, and ventilation can mean fewer ice dams, less snow buildup against walls, and a roof that holds up through the toughest winter stretches.
SOS Roofing NY Watertown
(315) 748-0623 sosroofingny.com
18564 US-11 Suite 6 R-4, Watertown, New York
4.6 from 20 reviews
Top-Rated Roofing, Siding & Gutter Company in Upstate NY – Reliable, Affordable, Trusted SOS Roofing is Upstate New York’s most trusted full-service roofing, siding, and gutter contractor proudly serving Syracuse, Rochester, Ithaca, Watertown, Buffalo, and surrounding areas. Family-owned and operated, we bring over a decade of experience delivering high-quality exterior home improvement solutions that protect, enhance, and add value to your home or business. We specialize in roof replacement, roof repair, siding installation, seamless gutters, and complete residential exterior renovations. Whether you’re dealing with storm damage, aging shingles, or outdated siding, our licensed and insured team is here to deliver fast, professional, and
Warner Roofing
594 W Main St, Watertown, New York
4.7 from 12 reviews
For over two decades, Warner Roofing has provided professional and trusted roofing services, earning an impeccable reputation as a reliable choice for your home's protective covering. Their skilled roofers are dedicated to offering exceptional workmanship on every residential and commercial project, ensuring superior quality that will last.
Dewitt Construction - Roofing Contractors Watertown NY
(844) 958-1235 www.dewittconstructionllc.com
Serving
5.0 from 26 reviews
Dewitt Construction - Roofing Contractors Watertown NY, a trusted name in the industry, offers a wide range of services including new construction, renovation, and remodeling. Specializing in roofing, our expertise extends to exterior solutions, septic system services, and garage building. With a legacy built on decades of experience, our family-owned business thrives on craftsmanship, integrity, and customer satisfaction. Founded by John Dewitt, a farmer turned builder, our projects range from Victorian houses to large dairy barns. Serving Watertown, NY, we are committed to delivering exceptional results for every project, big or small.
R & J Construction
Serving
3.8 from 4 reviews
We do fast quality work extremely flexible with homeowners we do roof repairs siding repairs we also do roofing siding windows doors decks kitchen and bathroom remodels and much more
Uncle Luke's Roofing
Serving
2.3 from 6 reviews
We do it all from top to bottom. Fully insured. 100 percent guaranteed quality work and all our work is warrantied for years. Customer
ProTek Roofing
(315) 350-0359 www.protekroofingllc.com
Serving
Upstate New York's Premier Roofing Contractor. No matter the size of your repair or replacement, ProTek Roofing guarantees quality materials and quality workmanship at a competitive price.
In The hands of the lord
325 Coffeen St, Watertown, New York
We are a small construction company In the hands of the Lord inc. We mainly customizing all metal roofing standing seam, imperial rib ,till core. Our company has been established since 2020 it's slowly growing and we're trying to get bigger.
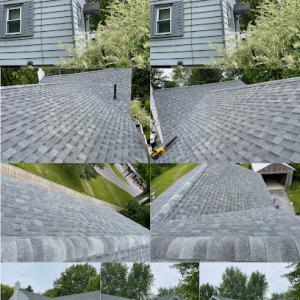
In Watertown, recurring trouble spots are typically eaves, valleys, roof-to-wall transitions, and attic bypasses that contribute to uneven snow melt. Eave regions collect the heaviest ice and slush as snow from above melts and refreezes, forming ice dams that back up water under shingles. When flashing along the eave isn't paired with a solid edge venting plan, heat loss from the attic concentrates at the lower edge of the roof, accelerating shingle deterioration and increasing the chance of leaks. Signs to watch for include ridges of dark staining near the edge, damp ceiling spots beneath, and wind-driven icicles that yank at the gutter line. The consequence is not just a leak, but repeated freeze-thaw cycles that degrade underlayment and weak flashing fasteners over several seasons.
Valleys are notorious weak points in this region's snow-lall_masked roofs. Meltwater funnels through valley joints, testing valley flashing and causing subtle but persistent leaks that expand with repeated freeze-thaw cycles. Roof-to-wall transitions-where the roof meets siding or brick-often hide bulky joints, missing step flashings, or improper sealing. In Watertown, long winters push water into these fabric points, and poor detailing shows up as dark stains along the ceiling line or shingles that curl or lift at the transition. If flashing there is compromised or not adequately integrated with the attic ventilation strategy, water finds a way in even when the rest of the roof appears sound from ground level.
Attic bypasses that channel warm, humid air into the attic create localized heat pockets that dry winter snow too slowly. Over time, this accelerates saturated underlayment and degrades flashing at roof penetrations. Snow may melt unevenly, leaving sunken patches and granule loss that looks minor from ground level but invites leaks after a heavy thaw. Proper insulation, air sealing, and vent placement help limit the stress on the roof's interior layers, reducing the chance of hidden water damage that only becomes visible after a spring thaw.
Periodic summer storms and fall winds in the Watertown area can turn already winter-weakened shingles into visible blow-offs or lifted tabs. Shingle edges may lift where nails have aged or where previous repairs created mismatched seals. Wind-driven debris can pry at ridge caps and valley joints, exposing underlying decking to moisture intrusion. The result is accelerated aging, higher maintenance needs, and the potential for sudden leaks after a storm. Regular inspection after summer storms and before seasonal transitions helps catch these weaknesses before they become costly failures.
Provided average costs per square are: Asphalt Shingles 350 to 650, Metal Roofing 700 to 1200, Clay Tile 1100 to 2000, Concrete Tile 900 to 1500, Wood Shingles/Shakes 700 to 1100, and Synthetic/Composite Shingles 400 to 800. In practice, Watertown homeowners see these ranges drift toward the higher end when a project includes more than a straightforward replacement. Asphalt remains the most budget-friendly option, but snow load, ice dam risk, and the need for robust attic ventilation can push the total toward the top of the range. Heavier systems like tile or metal, while pricier per square, may offer longer life in the harsh winter cycle and better shedding, which matters after a heavy snow year.
In Watertown, pricing is strongly shaped by the short productive roofing season, which compresses demand into late spring through early fall. If a contractor is juggling multiple projects in a tight window, you may see limited availability and higher scheduling premiums. On the flip side, a well-planned start in early spring can help avoid the peak rush and reduce the chance of weather-driven delays that drive labor and material costs upward. If your roof is marginal but intact, delaying a minor repair until late spring can save on fees tied to expedited service during peak season.
Steeper roof designs suited to snow shedding, added ice-and-water protection strategies, and repair of winter-damaged decking can all push Watertown projects toward the higher end of the range. A roof that slopes sharply to handle heavy lake-effect snow requires more ladder work, longer installation times, and additional edge flashing and ventilation protection. Ice dam prevention often means upgrading to a stronger underlayment and more robust attic baffles or venting, which adds to material and labor costs. Expect the upgrade to underlayment, more precise installation, and potential decking repairs to appear in the total.
Begin with a candid assessment of snow load risk and existing ventilation. If ice dams have appeared or attic temperatures fluctuate widely, target a plan that prioritizes drainage and ventilation improvements alongside the replacement. When choosing materials, weigh long-term performance against upfront cost; metal or tile may carry higher initial outlay but can reduce maintenance and ice-dam risk over time. Finally, obtain several written bids that itemize underlayment, flashing, insulation, and deck work to avoid hidden charges during the short Watertown window.
A full roof replacement is handled as a permit-driven project rather than a no-paperwork maintenance item. The local authority expects a formal application when the scope is for a complete teardown and rebuild, especially to address the structure, ventilation, and drainage details that impact a long stretch of the roof line. Because the climate here includes lake-effect snow and pronounced freeze-thaw cycles, the permit process ensures that the new roof will be designed to withstand heavy snow loads and reduce ice dam formation. The contractor should not start work until the permit is in place and the address is clearly identified on the documentation.
Typically, the contractor submits the permit application with the property address and the scope of work before any replacement begins. This submission often includes a brief plan for venting, underlayment, insulation, and the chosen roofing system, all of which influence performance through harsh winters. As a homeowner, expect a back-and-forth with the building department if plans need clarification or if access issues arise, such as alley parking or neighbor-facing work areas. Having a prepared site plan and material selections ready speeds up the review and reduces the chance of weather-related delays that can compound freeze-thaw stress on a half-installed roof.
Inspections are conducted during and after installation to verify code compliance, making scheduling with the local building department part of the project timeline. Mid-project inspections typically confirm that underlayment, flashing, ventilation, and snow-load considerations meet code, while final inspections verify that the roof is sealed and tied into proper drainage. In Watertown's climate, coordinating these inspections around forecasted snowfall windows helps prevent material damage and ensures the roof, once complete, performs under heavy snow, ice, and temperature swings. Ensure the contractor communicates the inspection schedule in advance and that access needs, such as ladders or crane permissions, are arranged so there is minimal disruption to the project flow.
In Watertown, roof claim activity is tied more to winter storms and wind events than to hail-driven loss patterns common in other regions. Snow loads, wind gusts, and ice buildup can stress fasteners and vents long before a visible leak appears, so the pattern is often slow-to-appear but high-consequence. A homeowner might see missing shingles or displaced flashings after a Nor'easter, followed by weeks or months of gradual interior signs as melting cycles repeatedly test the roofline. Expect insurers to scrutinize how a storm sequence translated into damage, not just a single event, and to weigh the roof's condition from multiple seasons.
New York insurer practices can affect reroofing decisions here, with carriers sometimes requesting pre-authorization, photos, roof age records, and condition documentation before making coverage decisions. If a claim is filed after a winter wind event, prepare to provide a concise timeline of storms, visible changes, and any prior maintenance. Photos from different angles, close-ups of flashings, and a dated record of existing attic venting can help illustrate preexisting conditions versus new damage. Understanding that appetite for coverage can hinge on documentation helps prevent surprises when a claim moves through review.
Because snow and ice damage may appear gradually in Watertown, homeowners benefit from documenting interior staining, attic frost or moisture signs, and exterior changes as soon as thaw conditions allow inspection. A stained ceiling corner, damp insulation, or frost on attic rafter bays can signal ongoing moisture ingress long before a roof deck shows obvious dark spots from leakage. Keep a simple diary of thaw-period observations, and coordinate a careful exterior check after a heavy melt or wind event to catch where the roof's defenses may have failed.
In Watertown's snowbelt climate, attic ventilation is not just a comfort issue; it directly affects snow melt patterns that contribute to ice dams. Cold roof decks stay colder with proper intake and exhaust, which helps control where meltwater refreezes at the eaves. During long heating seasons, moisture builds up in attics, and balanced ventilation becomes crucial to prevent condensation, mold, and woodwork rot that can undermine roofing systems after a harsh winter.
Start with a quick walk-through during a dry day to see if soffit vents are clear of insulation and if baffles are in place above the soffits. In Watertown, long cycles of heat escaping into the attic can push warm, moisture-laden air toward the roof sheathing, accelerating ice dam formation once temperatures dip. Check the ridge line or hip vents for obstruction and verify that there is a continuous path from intake to exhaust. If you notice one area of the attic consistently damp or warm, that signals an imbalance to address before the next reroof.
When reroofing, plan for a balanced system that pairs generous soffit or continuous intake with ridge or exhaust ventilation. In snow-heavy winters, a slightly higher intake area helps maintain a cool roof surface even when the attic is under load from insulation and storage. Consider upgrading to vent openings that resist snow blockage and maintain airflow down to the eave line. If gable vents are present, ensure they don't create short-circuiting of air that bypasses the ridge. The goal is a steady convection loop that stays open through mid-winter cold snaps.
Balanced ventilation means equalizing intake openings with exhaust paths so air moves steadily across the attic space. Avoid creating pockets of stagnant air by staggering vent locations and ensuring insulation near vents does not seal them off. In Watertown, effectively managed ventilation pairs with proper air-sealing to reduce heat escape into the attic, which helps keep the roof deck cooler as snow comes and goes, limiting ice dam risk down the line.