Last updated: Apr 19, 2026
Webster sits on the south shore of Lake Ontario, so lake-effect snow and wind exposure are a defining roof stressor compared with inland Monroe County locations. That exposure means more frequent edge loading, heavier drift buildup, and higher wind-driven shingle lift during every snowstorm. When a storm rolls in from the lake, a shallow roof becomes a prelude to ice damming and accelerated wear on flashing and fasteners. The result is not just a leak, but a cascade of failures that can pop up after a few freezing cycles and a thump of freezing rain.
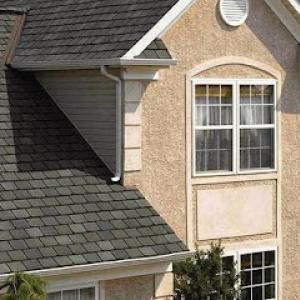
Upstate New York freeze-thaw cycles are a major local failure driver, stressing shingles, flashing, fasteners, and roof decking over repeated winter temperature swings. The process is simple but brutal: daytime heat softens material slightly, nighttime freeze locks it in, and repeated cycles loosen edges, lift tabs, and fatigue underlayment. In practice, that means more loose granules in gutters, more hairline cracks along shingle seams, and more vulnerable valleys and exhaust vents. In short, the roof's skin gets battered from every direction-uphill from the attic, downhill at the eaves, and lateral where wind hammers the ridges.
Ice dams don't just form on the ridge and gutters; they force water under shingles and behind flashing. In a shoreline climate like this, the dam grows fast, especially where snow load sits against soffits and vented areas. You'll notice buckling shingles, staining on interior ceilings, and a musty, damp attic scent after a mid-winter thaw. The telltale danger is not only the visible ice. It's the water trapped behind it that sneaks under underlayment and decking, promoting rot and mold. Prevention hinges on proper attic ventilation, continuous underlayment behind every full roof, and prompt attention to any prior ice dam staining.
First, inspect attic ventilation: ensure soffit vents are clear, ridges are open, and there is a balanced airflow from soffit to ridge. If any insulation is blocking vents, reconfigure now to avoid heat buildup that feeds ice dam formation. Second, verify the underlayment runs continuously around the entire perimeter and over any penetrations; gaps here create the weak points where ice and water intrude. Third, address flashing at chimney chases, dormers, and valleys with corrosion-resistant, continuous metal detailing and secure fasteners every few inches. Fourth, keep roof debris cleared after storms-drifted snow can hide weak spots and raise dam formation risk. Finally, plan for snow management: controlled removal by a qualified pro when accumulation exceeds a safe threshold reduces load and minimizes edge damage.
If you notice curling shingles, exposed fasteners, or recurring interior staining during or after freeze-thaw cycles, treat it as an emergency sign. Damaged flashing or lifted shingle tabs compounds ice dam risk, and delaying repairs accelerates deterioration. A proactive, full-roof assessment after a severe winter storm can pinpoint where ventilation, underlayment, and edge detailing need fortification to avert repeat failures in the next season.
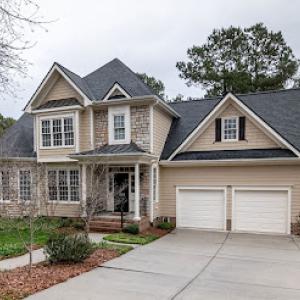
Asphalt shingles and metal roofing are the most locally prevalent practical choices in Webster, while tile and wood products are less common and need closer structural and maintenance scrutiny in this climate. The snow belt exposure from Lake Ontario means roofs face heavy loading, freeze-thaw cycles, and sharp temperature swings. Asphalt offers straightforward installation and easier repairs, but granule loss and cracking can accelerate under repeated freeze-thaw stress. Metal provides solid snow shedding and durability, but must be paired with correct attic ventilation and a solid underlayment to prevent ice dam formation along the eaves. In areas with significant snowfall, the choice should align with the house's attic insulation, ventilation, and existing structural supports.
Cold, snowy winters in this part of New York shorten roof life differently by material: asphalt is vulnerable to granule loss and cracking, while metal is often chosen for snow shedding and durability. If you live on a slope with persistent lake effect snow, a metal roof can minimize snow buildup and reduce roof-edge ice dams, provided the roof deck and underlayment are installed with proper attention to ventilation. Asphalt systems rely more on tight seals and clean drainage; any ice dam risk increases when underlayment and flashing aren't correctly integrated with the attic space. Regardless of material, a well-ventilated attic and a continuous ice-and-water shield at the eaves can greatly reduce freeze-thaw damage.
In Webster, the weather pattern calls for proactive maintenance before and after heavy snow periods. Ensure fascia and gutters are clear so meltwater can flow away from the roof edge. For asphalt, watch for granule loss after the first big thaw and inspect for hairline cracks near transitions to metal flashings. For metal, inspect for panel edge wear and any panel-fastener issues after periods of rapid temperature change or ice buildup. A dedicated ice dam mitigation plan-such as insulating the attic properly, sealing penetrations, and using a high-quality underlayment-helps both materials perform through winter. Regular mid-winter inspections of the eaves, gutter connections, and dormer intersections catch problems before they propagate.
Replacement work in Webster is generally pushed into late spring through early fall because winter conditions and summer heat both affect installation quality and scheduling. When planning a full roof replacement, coordinate with a contractor who understands how Lake Ontario exposure shapes installation details, including underlayment choices, ventilation strategy, and flashing integration. The goal is a system that remains robust through repeated freeze-thaw cycles and the capstone of a long-lasting, leak-free roof under those harsh winters.
Daniel Roofing
537 Deer Haven Dr, Webster, New York
5.0 from 180 reviews
We are one of Rochester's "roofing exclusive" companies, focusing our experience on everything roof related. No matter your roofing needs, we've got your back, including new construction, complete re-roof, repairs, and roof-overs. From small jobs such as sheds and garages, to large homes and commercial buildings, we can handle it all. With most jobs done in a day or two, our team provides exceptional and speedy service, so that we can get out of your hair and you can get back to your daily routine as quickly as possible. We know that a job like this can be overwhelming, and our team is here to help. Call Daniel Roofing today and we'll help you get your roof done right.
Oaks Roofing & Siding
(585) 247-6257 oaksroofingandsiding.com
1349 Fairport Nine Mile Point Rd, Webster, New York
4.9 from 60 reviews
Kris Oaks founded Oaks Roofing and Siding, formerly Oaks Construction, in 2003 with the goal of providing superior construction services to homeowners throughout Rochester, NY, and the surrounding communities. For over 20 years, our family-owned and operated construction company has helped hundreds of customers achieve the home improvements of their dreams.
Rooferdave Roof Cleaning
(585) 414-6267 paintyourroof.com
792 Patty Ln, Webster, New York
5.0 from 28 reviews
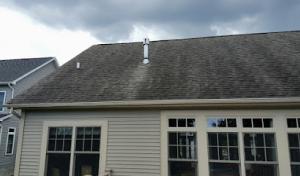
My Name is Dave Parker. I have been a roofer for 32 years. After learning the roofing trade I became the owner of Homefix. RooferDave replaced Homefix after some time. I have installed hundreds of commercial and high end roofs for many top contractors in our area. These roofs were new construction and tear-offs with many re-roofs in between. So, after 30 years I noticed the horrible black algae stains on everyone’s roofs. Some time went by and I came across an article from IKO, a shingle manufacturer, that recommended a way to remove these nasty stains from their shingle products. That’s when I chose to transition into roof cleaning, washing, and painting. And oh yes you can paint your roof, (BEHR paint) with many colors to choose from.

The Metal Roof Outlet
1513 Empire Blvd, Webster, New York
4.9 from 28 reviews
The Metal Roof Outlet is changing the way homeowner's purchase a roof! Our conveniently located showroom offers consumers the opportunity to shop for their new metal roof on their own time. View your roof in our showroom using Pictometry. See multiple metal roof styles and colors on display and speak with our courteous, knowledgeable, non-commissioned staff. Financing is Available! Member of The Better Contractor's Bureau, Webster Chamber of Commerce, Rochester Home Builders Association, The Metal Roofing Alliance
Apollo Roofing
(585) 671-4690 apolloroofers.com
777 Hawthorne Pl, Webster, New York
4.3 from 10 reviews
Apollo Roofing in Webster NY is family-owned and operated. Serving the community for over 20 years, we take huge pride in our work. That’s why owner, Rick, is on every job. That’s also why he works with the people he can trust the most, his sons. Together this team treat each job with professionalism and dedication. This uncompromising approach is clear from their A+ rating from the Better Business Bureau. As fully insured roofers, Apollo Roofing offers peace of mind that the job will be done right. Moreover, as a GAF Certified Roofing Contractor their installations conform to manufacturer’s warranty terms. With competitive rates for residential and commercial customers, we offer the full range of roofing services.
Roof Rangers
(585) 434-5489 theroofrangers.com
Serving
4.7 from 207 reviews
At The Roof Rangers, we’re proud to be your trusted roofing contractor in Penfield, NY, delivering reliable solutions for both residential and commercial properties. As local roofing experts, we specialize in roof replacement, roof repair, and roof installation, as well as gutter and solar services. Our experienced team uses top-quality materials from brands like Owens Corning and GAF to ensure long-lasting results. Whether you're missing shingles or exploring financing options, we’re here to help. Let us handle your roofing needs with the care and professionalism you deserve!
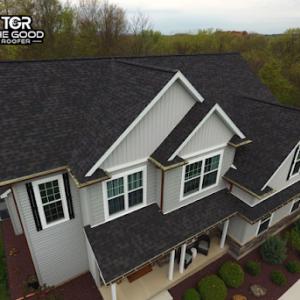
The Good Roofer in Webster
Serving
5.0 from 21 reviews
Trusted roofer in Rochester, NY, proudly serving Webster and nearby areas. Our local roofing company offers expert roof repairs, replacements, and inspections using top-quality materials. With skilled roof contractors and a stress-free process, we ensure durable, reliable roofing solutions. Choose *The Good Roofer* for experience and excellence.
Skyways Contracting
Serving
5.0 from 59 reviews
At Skyways Contracting, based in Rochester, NY, we’ve been delivering high-quality roofing and exterior renovation services since 2019. Fully insured and locally operated, we treat every project like it’s our own home. We specialize in residential and commercial roof replacements, storm damage repairs, and preventative maintenance. Our team offers free inspections, drone assessments, and strong warranties for your peace of mind, you work directly with us from start to finish. We take pride in honest communication, hands-on service, and results that last.
Rochester Premier Roofing
(585) 233-4576 www.rochester-premier.com
Serving
4.9 from 57 reviews
Owens Corning Platinum roofers, over 15 years of experience in the roofing industry and a 10-year warranty for our work makes Rochester Premier Roofing, one of the leading roofing contractors in Rochester, NY. From roof-repair, re-roofing to new roof installation we are able to do it all. We also offer gutter & siding installation. For a free estimate contact us today!
Giordano Roof Replacement & Roof Restoration
(585) 467-6767 www.bestroofingcompanyofrochester.com
Serving
4.9 from 311 reviews
At Giordano Roof Replacement & Roof Restoration, our experienced roofing contractors in Rochester NY can handle your roofing needs. Whether you need a roof replacement, repairs, insulation, ventilation, emergency roof repairs, metal roofing or gutter installation, we have got you covered! From Slate, Clay, Terracotta, Concrete Tile to Metal Roofs we can repair all types of roof your home has. Serving in Rochester, Victor, Pittsford, Mendon NY.
Ron Ferris & Son Roofing
(585) 288-0895 www.ronferrisandsonroofing.com
Serving
4.9 from 40 reviews
Replacing the asphalt roofing shingles on your home is a major expense and something you want to be done right the first time! When it comes time for a roof repair or roof replacement in Rochester NY you can put your trust in residential roofing specialist Ron Ferris and Son Roofing. For more details Call Us Today!
Graves Brothers Home Improvement
Serving
4.7 from 918 reviews
Graves Brothers Home Improvement has been locally-owned and operated in Upstate N.Y. since 1977. As one of the fastest growing businesses in the region, they offer their residential and commercial clients Roofing, Siding, Windows, and other Home Improvement services. Graves is a nationally-recognized contractor that has been repeatedly named a Top 100 company in the region as well as one of the top 500 home improvement companies in the United States, annual Angie’s List certification holder, countless product certifications, and more. Graves Brothers services Upstate and Western New York, the Finger Lakes Region and the Capital District from their facilities in Rochester, Buffalo, Albany and Syracuse.
Spring storms and hail are identified local seasonal risks, creating both roof damage and contractor scheduling delays in Webster. After a harsh winter, shingles can be cracked or blown loose, gutters can clog, and ice dam remnants may reveal themselves as meltwater pours into soffits or into attic spaces. When hail hits lake-exposed neighborhoods, the damage tends to be uneven-windward slopes may show bruising and granule loss, while sheltered areas hide smaller dents. The result is not just a single blown shingle, but a cascade of flashing, vent seals, and underlayment vulnerabilities that require a careful, staged repair plan. The cadence of cloudbursts and thaw cycles means contractors often swing from urgent emergency fixes to longer-term restoration, stretching schedules beyond the initial calm of early spring.
In Upstate New York, roof claims are common enough that insurers often want stronger documentation, especially on older roofs or homes with prior damage history. The combination of freeze-thaw cycles and Lake Ontario exposure means carriers scrutinize claims more closely than in milder climates. Relying on memory for what happened during a storm is risky; the insurer will look for a clear timeline and visible evidence. Photos dated at the time of the event, paired with contemporaneous contractor notes, carry real weight. When a paper trail is thin, a claim can drag on or be challenged, delaying essential repairs and leaving vulnerable roof areas exposed to further weather damage.
Webster homeowners should expect claim files to rely heavily on date-stamped photos and contractor estimates because carriers in this region often review roof-loss documentation closely. Focus on capturing edge damage, flashing around chimneys and vents, vent pipe seals, and any interior signs of moisture intrusion that align with external findings. Keep a log of weather events and any interim protective measures taken, such as tarping or temporary patches. The more precise the record, the smoother the review process becomes, reducing the chance of setbacks while waiting for repair windows to open.
After a storm, conduct a careful walk around the perimeter of the roof and note any new problems, then start gathering the documentary package: timestamped photos from multiple angles, a simple diagram marking damaged areas, and a written note describing what preceded the event. If a contractor is called, request a thorough assessment that includes potential underlayment or ventilation impacts, since those factors influence long-term performance in Webster's climate. With weather shifts continuing into spring, securing timely, accurate documentation helps shift the timeline from denial to restoration, limiting the window during which secondary leaks can worsen.
Find local contractors experienced in assessing and restoring roofs after hail, wind, and severe weather events.

Daniel Roofing
537 Deer Haven Dr, Webster, New York
5.0 from 180 reviews
City Wide Roofing & Siding Rochester
(585) 318-0948 citywideroofingrochester.com
1579 Hermance Rd, Webster, New York
4.8 from 21 reviews
A full re-roof in Webster typically requires a permit through the Town of Webster Building Department. Before any shingle nails go in, verify you have the correct permit paperwork filed, and that the project scope matches what the department expects for a full roof replacement. This keeps you aligned with the Town's expectations about ventilation, underlayment, and attic access. The process is designed to ensure the structure can handle the load and that the roof will perform during Lake Ontario's stormy winters.
After the roof is installed, an inspection is scheduled as part of the permit closure. Inspectors are known to check underlayment and ventilation for code compliance. That means the attic air intake and exhaust pathways should be unobstructed, soffit vents clear, and roof decking appropriately supported with a continuous underlayment. If your contractor uses rigid insulation or other venting strategies, be sure the installation aligns with the local code expectations the inspector will verify. Plan for this final review to coincide with the typical work completion window so you aren't juggling permits and access attempts.
Processing times in Webster vary with department workload, so project timing can shift during busy seasonal replacement periods. In peak seasons, or during snow and cold snaps, permit reviews may take longer and inspections may be scheduled further out. Build a realistic timeline that accounts for potential weather delays and, on the front end, request a milestone schedule from the contractor that includes permit pickup, material delivery, teardown, and the post-install inspection. The Town's calendar and field staff availability can influence start dates, especially after heavy snow events.
Ensure the permit application includes a complete project description, contractor contact information, and proof of liability insurance. Have product specifications on hand for the chosen underlayment and ventilation strategy, since inspectors may reference these during the post-install check. If any changes occur during the job-such as a material switch or a revised vent layout-update the permit and notify the Building Department to avoid delays at inspection time.
Coordinate with the roofing crew to respect local quiet hours and driveways, which helps keep the schedule predictable around Lake Ontario's variable weather. Provide access to an interior attic space if the inspector needs to verify ventilation channels or insulation. Clear debris and protect nearby landscaping so the inspection window proceeds smoothly and without need for rework after the fact.
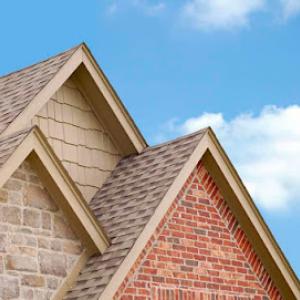
Asphalt shingles run roughly from 350 to 750 USD per square, a range you'll see emphasized when rain-drenched spring weather stretches into the early weeks of summer. Metal roofing tends to be 600 to 1100 per square, offering longer life and better resistance to lake-effect snows, but it costs more up front. Clay tile clocks in from 1100 to 2300 per square, and concrete tile sits around 900 to 1800 per square, both increasing for heavier, more storm-tolerant systems. Wood shingles or shakes typically fall between 800 and 1500 per square, with synthetic or composite shingles in the 600 to 1200 range. These bands reflect the trade-off between initial price, long-term durability, and the extra weight or wind resistance required by the local climate.
In Webster, costs can rise during the late spring to early fall replacement window because that is when most full roof work is concentrated after winter. The scheduling pressure is real: contractors juggle weather windows, crews, and material deliveries, which can push bids upward and extend project timelines. If you're aiming for a summer installation, expect tighter calendars and potentially higher day-rate charges for peak demand periods. Conversely, a fall kickoff may bring more stable availability, but keep in mind the approaching winter can compress the work window.
Lake-effect winter wear and storm-related demand spikes add a practical premium to projects here. Ice dam risk, freeze-thaw cycles, and the need for enhanced ventilation or underlayment corrections discovered during re-roofing can push local totals upward. A re-roof that arrives with a neglected attic ventilation plan or insufficient underlayment may require corrective steps, adding cost and time. When you consider your option set, expect the profile that emphasizes proper venting, insulation, and moisture control to influence the final price alongside material choice.
Start with three detailed bids that itemize decking, underlayment, ventilation, and flashing work, then compare not just price but warranty terms and crew experience with local conditions. Prioritize bids that address ice dam mitigation and attic ventilation as part of the replacement plan. Build in a contingency for weather-driven delays and late-season scheduling spikes, and consider how adding an upgraded underlayment or vapor barrier could affect long-term performance in lake-adjacent exposure. If the project includes a heavier tile or metal option, plan for structural checks and potential roof deck reinforcement where needed.
Don't let upfront costs delay a critical repair - these contractors offer payment plans to fit your budget.
The Upstate New York environment tends to stay steady rather than chaotic, but roof claims near Lake Ontario still face careful scrutiny-especially when a roof is aging or carries a history of prior damage. In Webster, carriers look closely at whether the damage aligns with a concrete event or reflects long-term wear from freeze-thaw cycles and heavy snow. Plan for a slower, methodical review process that can stretch beyond a single billing cycle.
Because winter damage can develop gradually, your photo records need to clearly distinguish a single storm event from ongoing deterioration. Start with clear shots of the entire roof from ground level and from multiple angles, then zoom in on problem areas: ice dams, curling shingles, or flashing gaps. Date stamps help, but so do notes that map when you first noticed changes and how they progressed over consecutive seasons. Webster homes often feature mid-sized eaves and soffits; documenting entrances, gutters, and underlayment edges is particularly valuable.
Contractor estimates and inspection photos matter locally because carriers commonly request detailed documentation before approving payouts. Ensure contractor reports include a stamped signature, a description of observed conditions, any temporary measures taken, and a recommended remediation plan. If a prior repair exists, request a side-by-side comparison showing what was fixed and what remains at risk. Keep a tidy bundle of all contractor correspondence, before-and-after photos, and any test results from attic ventilation checks that relate to ice dam risk.
Photographs tied to specific weather events-ice dam formation, thaw cycles, and wind-driven snow impact-are especially persuasive in Webster's climate. Store copies digitally and in a separate location from your file cabinet, and maintain a simple, dated ledger noting when major weather events occurred and what visible damage followed. This discipline reduces ambiguity when the insurer reviews a claim.
Connect with contractors who help homeowners navigate the claims process from damage assessment to final approval.
Chimney-related roof work is notably common in this market, reflecting how flashing and masonry intersections become trouble spots after winter weather. In practice, water finds its way where slate of flashing meets brick or stone, especially after freeze-thaw cycles that push and pull at mortar. If your chimney skirt or cricket isn't integrated smoothly with the roof plane, you'll see cracked sealant, rusting metal step-flashing, or mortar deterioration. Your inspection routine should include a close look at sealant beds around the flashing line, any loose or chipped mortar joints, and the alignment of shingles next to the chimney sidewall. Plan proactive resealing and re-flashing as part of a re-roof or major repair, paying particular attention to sections where ice dam buildup tends to pool near the chimney apron. In the Webster climate, timely attention here keeps attic ventilation from being overwhelmed by moisture traveling down masonry walls.
Skylight service is a meaningful specialty among local contractors, making penetrations and flashing details a real homeowner concern rather than a niche topic. Where a skylight meets the roof deck, the flashing should form a continuous, clean seal that never relies on a single sealant bead. Look for signs of dried or cracked flashing, compromised curb mounting, or condensation between panes indicating poor seals. Installation and replacement should emphasize step and counter-flashing integration with nearby shingles to resist wind-driven rain and lake-facilitated moisture. If a skylight is aging, consider upgrading to a low-profile unit with improved flashing geometry, and ensure a proper vented flashing transition to keep soffits clear and ventilation effective year-round.
Fall leaf litter and moisture are identified local seasonal risks because they can trap moisture at roof edges and affect ventilation-related inspection outcomes. Leaves accumulating near eaves and in gutters inhibit proper drainage, which raises ice dam risk during thaws. As seasonal debris builds, ensure gutters and downspouts are clear and that eave vents remain free of obstruction to maintain calms of airflow above the attic. Pay attention to soffit and ridge ventilation during inspections, because blocked intakes or exhausted air can mask underlying ventilation problems that contribute to condensation and wood decay. Regular sweeps and seasonal maintenance help prevent moisture from lingering and compounding winter stress on joints, flashing, and roof edges.
Find contractors experienced in skylight installation, flashing, and leak repairs to bring natural light into your home.
Rooferdave Roof Cleaning
(585) 414-6267 paintyourroof.com
792 Patty Ln, Webster, New York
5.0 from 28 reviews