Last updated: Apr 19, 2026
Ormond Beach sits on the Atlantic side of Volusia County, so roofs are exposed to tropical systems and summer thunderstorm patterns that can create sudden wind-driven leaks and claim activity. The coastal breeze, salt exposure, and frequent squalls mean that a small breach can escalate quickly if left untreated. When a storm rolls in, the clock on damage starts ticking: tarping and temporary protection should happen within hours, not days, and repairs should move as fast as weather allows. The target window from June through November is a high-stakes period where damage frequency spikes and scheduling becomes crowded, so readiness is a must.
Immediate actions after a storm are critical to minimize further leaks and wind uplift. If shingles are lifted, flashing is distorted, or there are visible leaks inside, you need to protect the interior first and contact a local roofing professional without delay. In a coastal market, crews may have weather windows to work between bands of rain, so securing a temporary cover is a proven safeguard against escalating damage. Do not wait for clear skies to begin protection; the first 24 to 48 hours are often the most dangerous for a roof that's just been stressed by wind and salt spray. Keep a careful eye on attic ventilation and any signs of damp insulation, which can indicate hidden leaks that can undermine structural integrity if neglected.
Documentation is the backbone of any claim in this market. Florida insurers commonly ask for photos, roof age, and wind-mitigation details after storms, which is especially relevant in this high wind-risk coastal environment. Begin a photo log immediately: wide shots of the whole roof, close-ups of damaged shingles, flashing, and any hail or wind-driven damage patterns. Photograph the attic from multiple angles, noting visible water intrusion, ceiling stains, or mold growth. Record the roof age if known and any previous repairs that might affect the claim. Wind-mitigation details matter greatly because they can influence outcome and coverage, so gather any documentation you have on retrofits, impact-resistant shingles, or upgraded fasteners. If a roofer recommends a temporary tarp, request written confirmation that a tarp will be applied and specify limits on wind exposure for the covering. Insurance adjusters will rely on these records to assess cause and extent of damage, so completeness speeds the process.
When filing a claim, act promptly and maintain a steady line of communication with both the insurer and the chosen contractor. Schedule an inspection as soon as conditions permit after the storm, but ensure you have a clear path to access the roof and a plan for debris removal. Keep a log of all communications, including dates, times, and the names of representatives spoken with. If the insurer assigns an adjuster, review the scope of the assessment for wind-driven vs. incidental damage and compare it with the contractor's findings. In a storm-driven event, a prompt, well-documented claim can help secure temporary repairs and a timely path to replacement if needed. It's essential to coordinate with the roofing professional to align mitigation actions with the claims timeline, so temporary protection and permanent repairs fit within the insurer's review cycle without gaps.
For long-term resilience, balance speed with quality. Coastal Florida heat, salt air, and hurricane-season pressure can strain even durable systems. Prioritize durable, wind-resilient materials and proven installation methods that withstand salt-laden winds and driving rain. After repairs, ensure the roof flashing, underlayment, and ventilation are properly restored to prevent recurrence of leaks during the next storm cycle. Keeping the home's exterior envelope tight-especially around complex penetrations and transitions-reduces the likelihood of future claims and preserves interior livability when the next tropical system threatens.
Roberson Roofing
(386) 677-2211 www.robersonroofinginc.com
229 N Orchard St, Ormond Beach, Florida
4.8 from 493 reviews
Welcome to Roberson Roofing, Inc., a family owned and operated roofing contractor now into our third generation. Here in Florida, we know from experience how hard the elements can be on our roofs. We also know that buying a new roof is an important investment and, after 50 years in business, our knowledge of the roofing industry is almost unrivalled. Whether it is for your business or your home, Roberson Roofing can install high-quality roofing systems to protect your most valuable assets.
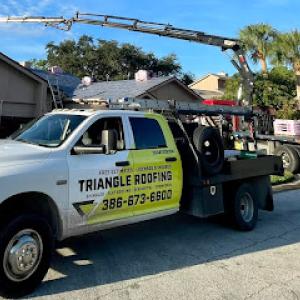
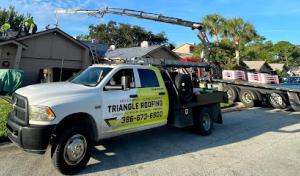
Triangle Roofing
(386) 673-6600 triangleroofingusa.com
200 Palmetto Pines Rd, Ormond Beach, Florida
5.0 from 23 reviews
Triangle Roofing USA is a father and son owned roofing company based in Ormond Beach, Florida. With over 30 years of hands-on experience, we provide high-quality residential and commercial roofing services throughout Volusia County, Flagler County, and St. Johns County. Our father and son team specializes in shingle roofing, metal roofs, flat roofing systems, skylights, and roof repairs. We’re known for our honesty, craftsmanship, and dedication to keeping your property safe, dry, and protected year-round. We follow the highest industry standards and pride ourselves on being one of the most dependable roofing contractors in the region. Whether you need a full roof replacement or a quick repair after a storm, we’ve got you covered.
Lewis Roofing
(386) 626-3024 lewisroofingfl.com
100 E Granada Blvd Suite 214 C, Ormond Beach, Florida
4.8 from 17 reviews
Licensed Florida Roofing Contractor Specializing in Roof Replacements. We also work with all insurance companies.
Roofing Help Now
1100 Ocean Shore Blvd Suite 8, Ormond Beach, Florida
5.0 from 7 reviews
Full Service Roofing & General Contractor Replacements & Repairs All Insurance Carriers Accepted
Roofing Help Now
(386) 281-8831 www.roofhelpnow.com
1281 US-1, Ormond Beach, Florida
5.0 from 5 reviews
Making roofing easy and understandable with honesty and integrity. The only roofing company offering a 10 year unlimited wind warranty including hurricanes in Volusia County
Ortiz Roofing Contractor
(386) 313-6055 ortizcontractingservices.com
Ormond Beach, Florida
4.5 from 8 reviews
Licensed Roofing Contractor company with master roofers available for your roofing needs that gives a guaranteed warranty in writing with excellent customer service.
J. R. Correia Construction
857 Quail Run, Ormond Beach, Florida
5.0 from 3 reviews
Florida Certified Roofing Contractor. Silicone Spray Specialist Commercial roofing options. We travel throughout Florida
Strickland Roofing & Home Services
(386) 986-0529 www.stricklandroofingob.com
100 E Granada Blvd, Ormond Beach, Florida
3.8 from 9 reviews
For more than 25 years, we have been renovating, repairing and replacing parts of homes people just don’t like or that dearly needed it. Strickland Roofing & Home Services has completed projects of all sizes, for a wide range of residential clients. We love what we do, and we’re only satisfied when you are too. Home Improvement is our passion, and our business. Located in the Ormond Beach area we are a local business you can support and trust.
Thomas Roofing & Repair
(386) 204-7175 thomasroofingandrepair.com
Serving
4.8 from 46 reviews
Thomas Roofing & Repair is a dependable roofing contractor serving Volusia County homeowners with a lifetime of experience in quality roofing and storm repairs. We pledge to deliver honesty, expert craftsmanship, and fair pricing to our customers, earning their trust and loyalty. Concentrating on Central Florida, we have built a solid reputation and enduring relationships with our neighbors. With Thomas Roofing & Repair, homeowners can rest assured of reliable and skilled roofing solutions.
APC Roofing
(386) 433-8730 www.apcroofing.com
Serving
4.8 from 64 reviews
First-Class Roofing Solutions for Residential and Commercial Properties. APC Roofing is the premier Roofing Contractor in Central Florida providing First-Class Roofing Solutions that you can trust for residential and commercial properties. Whether you’re a homeowner, business owner, property manager, or HOA representative, APC Roofing has the knowledge and experience to handle your next project. Call us today and learn how you can save money protecting your Investment!

Trinity Restoration & Roofing Daytona
(386) 262-3936 trinityrestoration.com
Serving
5.0 from 115 reviews
Trinity Restoration & Roofing offers residents and businesses in Daytona Beach, Ormond Beach, and Palm Coast, Florida peace of mind with long-lasting, high-quality roofing systems. Backed by Owens Corning's Platinum Preferred Contractor designation, they ensure a reliable and professional roofing experience.
Rescue Roofing
(386) 793-7663 www.rescueroofing.com
Serving
5.0 from 14 reviews
Experts in the art of ROOFING. Specialist in hard to diagnose leaks. We offer installations of many variations of Tile Roofing, Asphalt Shingle Roofing and Metal Roofing. Give us a call today to begin your new roof experience with RESCUE ROOFING.
You're dealing with a unique mix of salt air, humidity, and frequent summer storms here, so your roofing decisions have to balance storm resilience with corrosion resistance. In this coastal climate, Ormond Beach's exposure accelerates corrosion on metal components, fasteners, flashings, and accessories compared with inland parts of Central Florida. That means every choice from fasteners to edge details matters as much for longevity as for weather resistance.
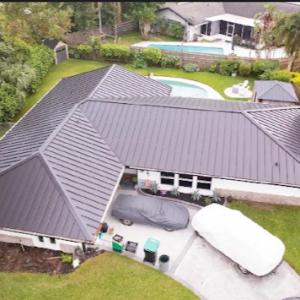
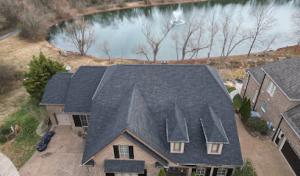
The local material mix includes asphalt shingles, metal, clay tile, concrete tile, wood shingles or shakes, and synthetic or composite shingles. When you're choosing, think beyond curb appeal and choose for wind load tolerance, salt-spray resilience, and long-term performance under humid heat. Asphalt shingles can ride out coastal storms with proper underlayment and edge detailing, but they're more vulnerable to wind-driven blow-off without correct fasteners and sealant choices. Metal roofing offers excellent wind resistance and a longer service life if it's designed to resist salt-induced corrosion, including coatings and sealants compatible with salt spray. Clay and concrete tiles provide heavy, durable options, yet installation must address wind uplift and proper underlayment to prevent cracks from thermal cycling and storm impacts. Wood shingles or shakes bring a natural look, but they require rigorous maintenance in salty air to prevent rot and moisture ingress. Synthetic or composite shingles can blend the best of both worlds-lower weight than tile, decent wind performance, and better resistance to salt-related wear if chosen with corrosion-resistant core and coatings.
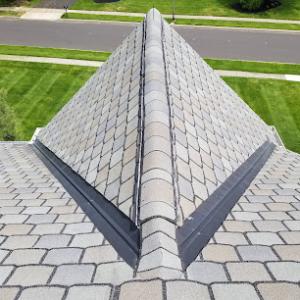
Because coastal salt accelerates corrosion, you should scrutinize every metal component: drip edges, flashings, netting, rafter-vent connections, and fasteners. Stainless steel and hot-dipped galvanized options perform better than bare aluminum or untreated steel in this environment, but not all products are equal. Look for coatings specifically rated for salt spray and confirm compatibility with the roof surface you're selecting. Flashings should be blocked or counter-flashed with corrosion-resistant metals and sealed with high-performance sealants that tolerate heat and salt exposure. Downspouts, screws, and trim must be harmonized to avoid galvanic reactions that can happen when different metals touch in a salty, humid microclimate. For clay and concrete tiles, ensure fasteners are corrosion-resistant and that the substrate can dampen impact stresses from storms without compromising tile integrity. If you lean toward wood, treatings and coatings must be maintained aggressively to resist salt-induced drying and rot.
Storm performance here hinges on a roof assembly designed for high wind and salt exposure. Ensure the underlayment is rated for coastal conditions, and that roof penetrations (vents, gas lines, satellite dishes) are sealed with materials compatible with the chosen roof type. Consider edge-to-edge coverage and continuous eave details to minimize wind entry points. Maintenance should be proactive: after major storms, inspect for loose fasteners, damaged flashings, and any signs of corrosion around metal accessories. Clean debris that collects salt-laden dust in the spring and after storms to reduce moisture retention on surfaces. Schedule routine checks of the attic ventilation to minimize temperature extremes that can accelerate wear of roofing components and fasteners in humid heat.
Start with evaluating wind resistance score and corrosion resistance for each candidate roof type, focusing on how the accessory set (drip edges, flashings, fasteners) will hold up in salt spray. Favor systems with corrosion-resistant metal components and coatings designed for coastal environments. If choosing metal, pair with compatible sealants and coatings to extend life in salt air. For tile and shingle options, confirm that the installation includes coastal-grade underlayment and proper fastening patterns to withstand wind loads. In all cases, plan for a dedicated maintenance cadence to monitor salt-related wear and address issues before they propagate into leaks or structural concerns.
Dry-season windows align with a stretch when the Atlantic trades a bit steadier, and the daily rain breaks are less frequent. In this coastal corner of Volusia County, many roof replacements are intentionally scheduled for the drier part of the year to reduce weather delays from the area's frequent summer storms. That means you'll often see crews targeting late fall through early spring, when gusty spring squalls have cooled off and hurricane season is definitively behind you. Planning with this rhythm helps minimize on-roof moisture buildup and protects vulnerable decking from long wet spells that can complicate installation.
Hot, humid summers in this part of coastal Florida can slow installation pace and affect material handling on the roof deck. Shingle bundles and underlayment tend to creep in temperature-sensitive ways, so expect crews to work in cooler morning hours and pause for afternoon heat. If your project runs into the late spring, you'll notice crews loading more breaks into the day to keep adhesives and sealants performing as designed. When heat is stubborn, ventilation becomes a practical concern on taller homes, and temporary shade or reflective covers can keep crews productive without sacrificing product performance.
Peak storm season can also create permit, inspection, and contractor scheduling bottlenecks in the local market. Even with a planned dry-season push, a sudden squall line or a tropical disturbance can shift timelines by a few days or a week. Build a realistic buffer into your schedule for possible weather-day delays, and coordinate with the contractor to identify a fallback window that preserves the dry-season objective. Communication matters: confirm preferred start dates, backup dates, and who will cover tarping, debris containment, and temporary weather protection if a storm sneaks in. If you have a tight occupancy or a previous leak history, flag that early so the crew can prioritize weather-safe execution and minimize exposure of interior spaces.
Set expectations with your contractor for a dry-season launch, including a target week for material delivery, scaffold setup, and a contingency plan for rain events. Have a clear plan for access, particularly if your driveway or landscaping needs protection from heavy equipment or plywood staging. Talk through sequencing: roof deck prep, underlayment, and shingle or tile layout should proceed in a weather-stable arc, not a race against a thunderstorm. Finally, keep a simple, shared calendar marking forecasted dry days and potential window openings, so you can adjust together without missing critical work days.
Get a clear picture of your project costs upfront - no commitment required.
Trinity Restoration & Roofing Daytona
(386) 262-3936 trinityrestoration.com
Serving
5.0 from 115 reviews
You're looking at a local pricing range that reflects coastal exposure and Florida's weather pattern. Asphalt shingles generally run about 350 to 650 dollars per square, with metal roofs often landing between 600 and 1100 dollars per square. Clay tile projects commonly sit from 900 to 1800 dollars per square, while concrete tile tends to be 800 to 1400 dollars per square. Wood shingles or shakes are usually 600 to 1200 dollars per square, and synthetic or composite shingles come in around 450 to 900 dollars per square. These figures reflect the salt air, wind, and storm cycles that shape every roof replacement in this area.
Coastal corrosion isn't cosmetic here. In Ormond Beach, expect higher costs for upgraded fasteners, flashings, and other metal accessories to better handle salt exposure and humidity. You'll likely see better long-term performance from stainless or coated steel fasteners, enhanced corrosion-resistant flashing, and carefully matched sealants. If a roof has a lot of metal adaptions or rainwater drainage details near the shore, plan for these added components in your budget. The overall choice of roofing material will still drive most of the price, but the premium for salt-ready hardware can push the tally upward, especially on larger or multi-level homes.
Storm-driven demand spikes are common, and Volusia County permit and inspection scheduling constraints can push project timelines and pricing higher during busy periods. If you're replacing after a major storm or during peak season, you may encounter longer lead times for materials and crew availability. Build in a little extra time for ordering and delivery of specialty fasteners or tiles, and expect some fluctuation in daily rates if crews are juggling multiple coastal jobs. Having a clear replacement plan, with preferred start dates and backup options, helps keep the project on track when weather and demand tighten up.
In this coastal area, a full roof replacement in Ormond Beach or unincorporated Volusia County requires a building permit. The city relies on a permit to verify that the project meets wind-rated construction standards, flood considerations, and the storm-ready details that Florida homeowners count on. Before any tear-off begins, your contractor should confirm that a permit is active and that the project scope aligns with local code requirements, including the approved roof assembly, ventilation, and any modifications to attic access or insulation.
Contractors typically submit a permit package that includes the scope of work and a roof plan for review by the local building department. The roof plan is more than a drawing-it's a snapshot of how the new system will resist wind pressures and how flashing around chimneys, vents, and skylights will be integrated with existing materials. In Ormond Beach, the plan-check process can surface questions about material compatibility with salt exposure and how underlayment and fasteners are specified to meet current wind-load criteria. Your contractor should prepare for this review with documentation on product certifications, installation manuals, and any alternates that may be proposed to address unique roof geometries or coastal setbacks.
Inspections commonly occur after tear-off, after underlayment, and at final completion. This sequencing ensures that the roof deck is sound, the underlayment is properly installed, and the final roof assembly has the correct configuration for water shedding and wind resistance. Local plan-check and scheduling constraints can become more noticeable during peak roofing season, particularly after storms when the department schedules backlog may affect timing. Plan ahead by coordinating the permit timeline with anticipated weather windows and by having all manufacturer installation details organized for the inspector.
You should ensure the contractor is clearly communicating the permit number, addressed scope, and the expected inspection dates to you in writing. Keep copies of the permit card and any inspection notices handy at the job site. If a plan-review item arises, respond promptly with requested drawings or specifications to minimize delays. Given the Florida climate, it's wise to confirm that the chosen roof system is aligned with wind mitigation expectations and that any coastal-specific requirements-such as enhanced fastener patterns or moisture barriers-are reflected in the permit package.
You live in a market where Atlantic exposure and frequent summer storms demand steady vigilance. The roof you rely on not only keeps weather out, it can influence how long an insurer will stand by you after a strike or a hail event. If the roof shows advanced wear or mismatched repairs, eligibility and deductible implications can follow you into renewal or a new policy. In practical terms, a well-maintained surface often translates to fewer questions and smoother coverage decisions when storms arrive.
Recent insurer tightening in Florida makes the age and type of your roof, plus the quality of its documentation, more than just a courtesy. Keep a running file of materials used, installer notes, and any upgrades that improve performance against wind and impact. Before a renewal or claim, you want a clear narrative: what was replaced, when, and with what product. A simple binder with dates and names, plus labeled photos, can save days of back-and-forth and reduce the risk of coverage gaps during a dispute.
This is a coastal storm market, where weather swings can expose latent issues quickly. Dated photos before and after major events tell a story insurers understand. Record every mitigation step you take-bars, shutters, securement of attic spaces, and any temporary tarping after a storm. When storms loom or pass, your documentation should show a proactive approach rather than a reactive one. If you must navigate a claim, the clearer your documentation, the more your case can stay on track.
Think of your roof as a living part of your home's credibility with the industry. When the weather turns fierce, the edge you gain is in consistent, organized records and timely maintenance. You'll sleep easier knowing a well-documented roof stands up to scrutiny and stands stronger against the next wind-driven challenge.
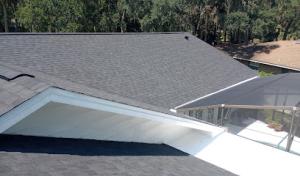
In a climate with frequent summer downpours and wind-driven rain, the most vulnerable roof areas are transitions, penetrations, and low-slope drainage details. The local contractor market shows meaningful demand for flat or low-slope roofing work and skylight-related roof solutions, so it's common to see multiple projects within a single season after a storm. Homeowners should recognize that even small gaps at edge details or around skylights can translate into rapid interior water intrusion when sudden downpours hit hard and winds push rain sideways. The consequences aren't just cosmetic stains-they can lead to mold, drywall damage, and accelerated roof deck wear if left unchecked.
Low-slope sections rely on careful roofing fabric, proper slope transitions, and precise drainage. In this area, flashing around skylights, vent penetrations, and edge curbs often bears the brunt of storm-driven rain. Worn or poorly sealed seals around skylights are a frequent source of leaks after a heavy rain event, especially when wind gusts push water toward the joints. Transitions where sections meet a higher-pitched area, or where updated materials meet older layers, are notorious for slow seepage that only becomes obvious after a storm passes. The result is often a hidden leak that manifests days later, making quick response essential to prevent interior damage from spreading.
Because storm interruptions can leave homes exposed while full replacement scheduling plays out, having a plan for rapid leak response makes a real difference. Identify at least one local contractor who can prioritize emergency calls for flat or low-slope roofing and skylight work, and keep clear notes of all affected areas after a storm (including photographs of flashing and transitions). Routine inspections should pay special attention to skylight flashing, parapet connections, and drainage outlets, especially after seasonal storms. When leaks are detected, it's prudent to address the highest-risk points first, so moisture intrusion doesn't cascade into attic spaces or ceilings during the next front.
Find specialists in TPO, EPDM, and built-up flat roofing systems for residential and commercial properties.
Triangle Roofing
(386) 673-6600 triangleroofingusa.com
200 Palmetto Pines Rd, Ormond Beach, Florida
5.0 from 23 reviews
The Ormond Beach market leans heavily toward re-roofing rather than only new construction, so you'll first want to focus on contractors who regularly handle full replacements and tear-offs. Look for crews that can demonstrate completed replacement projects in your neighborhood within the last few years, with evidence of handling wind-driven damage and interior impact from storms. Ask for a project timeline that aligns with your needs, especially after a storm event when scheduling can be tight.
In this coastal area, cleanup efficiency and quick response show up strongly in the local contractor landscape. A practical approach is to request a written plan detailing debris removal, tarping if needed, and a defined daily cleanup routine. Check how the crew handles shingle or tile disposal, stray debris containment, and wind-driven mess from temporary repairs. If a storm hits, verify how the contractor communicates updates, adjusts schedules, and coordinates with insurance adjusters during the tear-off and replacement phases.
Long-established and family-owned firms are visible in the local market, and that matters for warranty follow-through. Seek a contractor with clear, transferable warranty terms and a plan for post-storm service calls. Clarify who in the company will be the point of contact after installation and how long response times are expected for non-emergency vs. urgent leaks. This is especially important in a Florida roofing environment where steady post-storm availability matters as much as the initial install.
Prioritize contractors who provide concrete examples of weather-resilient installations, documented leak-testing results, and references from similarly sized homes. Confirm that the crew can manage your chosen roofing material and color with a schedule that minimizes exposure windows. In practice, select a roofer who combines replacement expertise, reliable cleanup, and dependable post-install support to navigate Florida's storm events with confidence.