Last updated: Apr 19, 2026
Daytona's position on Florida's Atlantic coastline means roof damage is driven by tropical storms, hurricane-force winds, and wind-driven rain, not just typical seasonal weather. In practice, that means a half-inch of uplift or a few wind-driven leaks can escalate quickly. When a storm warning hits, treat your roof as a vulnerability you must protect first and document second. If you hear sustained gusts or see debris gusting across your yard, plan for rapid action: tarping exposed sections, removing loose debris, and coordinating emergency repairs to limit interior damage. The local market has a steady drumbeat of storm damage and emergency repairs, so recognizing the signs early-shingle edges curled, flashing loose, or sudden indoor moisture-helps you avoid bigger claims complications down the line.
After a storm, consider roof concerns top priority. Look for new dark stains on ceilings, cracked paint, or damp insulation in attic spaces. If you detect a leak, avoid dry-rot delay by placing a temporary tarp or waterproof barrier over the affected area and scheduling a reputable roofer with storm experience within 24 to 48 hours if possible. In this market, response speed matters for claim timing and mitigation of further water intrusion. Keep a log of the date, time, and observed wind direction, plus any accompanying rainfall amounts if you can estimate them. This information helps a contractor assess uplift risk and priority repairs, and it helps an insurer understand how exposure shifted during the event.
Volusia County sits inside a high-risk coastal insurance environment, and roof age plus wind-mitigation documentation can materially affect claim handling after storms. Start with clear, dated photos from multiple angles: the entire roof line, any damaged flashing, vents, hips, and eaves; interior water intrusion points; and attic or crawlspace signs of moisture. Save all contractor notes, inspection reports, and any temporary repair receipts. If a wind mitigation or roof certification exists, pull it together; insurers often request recent documentation to validate uplift risk and repair scope. Consider having a local, storm-focused inspector perform a preliminary wind uplift assessment after a storm to establish a baseline for any claim you file.
The Daytona market leans heavily toward storm damage expertise, emergency repair know-how, and insurance claim familiarity. When selecting a roofer, prioritize firms with proven experience handling hurricane-related damage in this exact coastal climate. Ask for references from recent storm work, proof of proper licensing, and evidence of coordinated insurance claim support. A trusted contractor will not only patch the most urgent leaks but also help you assemble the documentation insurers expect-photos, diagrams, and a clear description of the wind-driven failure mode. Ensure the chosen contractor documents temporary repairs with time-stamped photos and a written scope of work that aligns with your anticipated claim needs.
Because roof age and wind-mitigation factors influence claims, keep a proactive stance on maintenance. If your roof is approaching a renewal or you've done upgrades, gather certificates that demonstrate shingle or panel wind ratings, installation methods, and any retrofits such as reinforced skylight connections or upgraded fasteners. After a major storm, insurers in this market scrutinize how well a roof held up against wind pressures and how mitigation measures performed. By presenting organized, professional documentation, you improve the odds of a smoother claim process and a repair that addresses both immediate damage and long-term resilience.
Storm season preparation in this coastal area should feel like a routine ritual: pre-storm inspections, secure fasteners, and a clear plan for rapid access to a trusted storm-focused contractor. Build a simple, repeatable system for documenting your roof's condition twice a year and after every significant event. The faster you assemble accurate, complete records, the faster a claim can move from assessment to repair, reducing the risk of lingering leaks and interior damage. In this market, timing and thorough documentation are as critical as the repairs themselves.
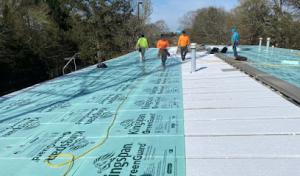
In this part of Florida, dry, cool days from December through February create the most reliable window for a re-roof project. Your crew can move through tear-off, decking inspection, and the dry-in phase with fewer weather-induced interruptions. With less humidity in the air, shingles or tiles set more consistently, and rapid roof-ventilation checks stay on track. That predictable rhythm helps you line up material deliveries, coordinate licensed labor, and minimize the risk of moisture infiltration while the roof is open.
Hurricane season-June through November-dramatically alters pacing. Expect weather delays, emergency demand spikes, and longer wait times for full replacements when a named storm threatens the coast. If a storm passes nearby, utilities can be disrupted, access to the job site can close temporarily, and crews may shift to urgent repairs for other homes. Plan for a contingency so the project can resume quickly after a weather window opens, rather than pushing into peak season scarcity. The goal is to secure a solid schedule that can absorb short-notice changes without forcing a rush on critical tasks.
Spring in this coastal climate brings heavier intermittent showers, and summer afternoons can spark brief but intense thunderstorms. Coastal humidity lingers, complicating tear-off and drying-in. Materials may need extra protection during transport and staging, and crews might run longer days to compensate for weather holds. If you're coordinating a re-roof, build in buffer days specifically for weather-induced delays and ensure the contractor lays out a plan for rapid tarping and leak-scouting during any sudden showers.
Coastal humidity and salt-laden air can affect certain roof systems more than others. Heavy, wet conditions slow down off-loading and staging, especially for tile or metal options that require careful handling. When choosing a start date, consider a block of consistently dry days within the dry winter window or a gap between late spring rains and the peak storm corridor. Have a backup plan for securing materials indoors or under covered space if a threat of high winds or heavy rain arises close to planned delivery.
A quick-response plan matters here. Keep debris containment and temporary waterproofing ready so a sudden shower won't escalate minor leaks into major interior damage. Coordinate with your contractor to stage tarps and temporary flashings that can be deployed within hours if a surprise storm arises. In practice, that readiness translates to shorter delays, less interior disruption, and a smoother transition from tear-off to dry-in when weather windows open.
Schedule decking inspection, roof deck repair, underlayment installation, and final leak-tests during windows with the least risk of wind-driven rain. Early-season cold snaps are rare here, but a few cool fronts can slip in during winter-use these days for precision work that benefits from stable temperatures. Clear communication with your contractor about expected weather patterns helps keep milestones aligned with the realities of a coastal, hurricane-exposed climate.

Trinity Restoration & Roofing Daytona
(386) 262-3936 trinityrestoration.com
120 Integra Breeze Ln, Daytona Beach, Florida
5.0 from 115 reviews
Trinity Restoration & Roofing offers residents and businesses in Daytona Beach, Ormond Beach, and Palm Coast, Florida peace of mind with long-lasting, high-quality roofing systems. Backed by Owens Corning's Platinum Preferred Contractor designation, they ensure a reliable and professional roofing experience.
Volusia-Flagler Roofing
(386) 523-7663 volusiaflaglerroofing.com
825 Mason Ave, Daytona Beach, Florida
5.0 from 70 reviews
Local roofing company serving commercial and residential customers in the Volusia and Flagler county areas. we provide free inspections and full roof replacements, as well as roof repairs.
Mr. Roofr
(386) 281-8831 www.mrroofr.com
420 Mobile Ave, Daytona Beach, Florida
5.0 from 33 reviews
At Mr. Roofr in Daytona Beach, FL, we provide expert roofing solutions, including roof replacement, new roof installation, and emergency roof repair. Our experienced team handles both commercial and residential roofing projects, offering services such as shingle roof repair, metal roofing installation, flat roof installation, and TPO roofing. We specialize in roof inspections, roof leak repair & flat roof repair, ensuring long-lasting protection. We also offer storm damage roof repair, tile roofing, clay tile roofing, euroshield rubber roofing, and concrete tile roofing. Our roof coatings and residential roof replacement services guarantee your property’s safety and security. Trust Mr. Roofr for all your roofing needs in Daytona Beach, FL.

Elite Daytona Beach Roofing
(386) 229-4088 elitedaytonabeachroofingco.com
1645 Illinois St, Daytona Beach, Florida
5.0 from 24 reviews
Elite Daytona Beach Roofing delivers dependable, 7-day roofing services throughout Daytona Beach, FL. We specialize in roof repairs, full roof replacements, new roof installations, leak detection, storm-damage restoration, roof inspections, and ongoing maintenance for both homes and businesses. Our team is known for fast response times, quality workmanship, and durable results designed for Florida’s coastal climate. If you need a trusted roofing contractor in Daytona Beach, Elite Daytona Beach Roofing is committed to keeping your property protected year-round.
Daytona Roofing Services
(203) 660-2074 daytona-roofing-services.ueniweb.com
364 N Nova Rd, Daytona Beach, Florida
5.0 from 20 reviews
Daytona Roofing Services offers high-quality roofing design and services in Daytona Beach. We are seasoned roofers who deliver top quality and budget-friendly roofing services. Get in touch with us on +12036602074.
Action Roofing
(415) 349-5506 action-roofing.ueniweb.com
772 Georgia St, Daytona Beach, Florida
5.0 from 19 reviews
Action Roofing offers high-quality roofing design and services in Daytona Beach. We are seasoned roofers who deliver top quality and budget-friendly roofing services. Get in touch with us on +14153495506. When you hire us, you know you’re getting skilled, passionate technicians you can trust to do the best job possible. And, as a bonus, we always feature competitive pricing on our services.
A.I.B. Roofing & Construction
340 S Beach St Unit 209, Daytona Beach, Florida
4.8 from 38 reviews
AIB Roofing is more than just a roofing company, we are your trusted roofing partner. Our highly skilled professionals pride themselves on delivering the highest-quality materials, and our commitment to safety is unparalleled. Whether you need roof repairs, roof maintenance, or a full roof replacement, you can count on AIB Roofing to deliver a durable, long-lasting product that will stand the test of time.
Daytona Beach Roofing Pros
(386) 269-6239 roofing-daytonabeach.com
810 Carswell Ave, Daytona Beach, Florida
4.8 from 16 reviews
Dreaming of a beautiful, secure roof over your head? Daytona Beach Roofing Pros is located in Daytona Beach Florida, is your trusted local roofing contractor, dedicated to providing quality craftsmanship and reliable service. We specialize in protecting your home with durable roofing solutions, ensuring peace of mind for years to come. Let us help you enhance your property's value and safeguard your investment with expert roofing services. We offer some of the best roofing warranties in Daytona Beach because we stand behind the quality of our work. In the unlikely event that you need to utilize your roof’s warranty, you can rest easy knowing we’ve been in business for over 25 years, so we will still be around to honor your roof warranty.
Bert Faircloth Roofing
(386) 238-6220 www.bertfairclothroofing.com
1016 6th St, Daytona Beach, Florida
4.2 from 49 reviews
We offer residential & commercial roofing for houses, businesses, mobile homes, condos, duplexes and more. We offer FREE estimates for all roofing types including shingle roofing, metal and tile roofing. Our skilled roofing specialists are extremely efficient and will ensure your new roof will be installed quickly and correctly without any problems. There are a lot of companies out there offering great roofing deals -- Make sure you pick the right one!! Faircloth Roofing is a family owned and operated local business with over 55 years’ experience in the Volusia County area.
Daytona Beach Roofing
(386) 564-6700 daytonabeach-roofing.com
132 W International Speedway Blvd Suite 7, Daytona Beach, Florida
4.3 from 16 reviews
Daytona Beach Roofing is a licensed and insured roofing and junk removal company serving Central and North Florida with 24/7 emergency service. We specialize in roof replacement, roof repair, emergency tarping, insurance claim assistance, solar panel installation, and gutter replacement. We also provide full-service junk removal including appliance hauling, furniture removal, property cleanouts, construction debris, storm cleanup, and yard waste removal. Our team handles hail, wind, hurricane, and tornado damage, working directly with insurance companies. Backed by premium Owens Corning materials and workmanship guarantees. Free inspections and estimates.
Affordable Roofing & Construction
(386) 316-1047 www.affordableroofingdaytonabeach.com
Daytona Beach, Florida
4.5 from 8 reviews
Affordable Roofing & Construction is the New Roof and Roofing Specialists for Daytona Beach, Port Orange and Ormond Beach, FL. Highly Respected Roofing Contractor Specializing in New Roofs. We have the Best Deals on New Roofs and we are a General Contractor - We Do It ALL! We are Licensed & Insured! Roofing Contractor# CCC1327602 General Contractor# CGC1509344 We install Shingle Roofs, New Roofs, Metal Roofs, Flat roof, Replace Roof, New Roof Replacement, Remodeling - Home & Commercial Roof Coating Systems, New Home Construction and Additions. Call us today for a FREE Quote on a new roof!

Hippo Roofing
128 Orange Ave, Daytona Beach, Florida
4.8 from 5 reviews
Excellence Since 2008 Since its first job in 2008, Hippo Roofing has amassed thousands of successful projects and a solid reputation for excellence. With roots extending back over a decade before their first job, they're nearing a quarter-century of experience, positioning them as a top choice for roofing services. This veteran-owned company prides itself on using high-quality materials from reputable brands and employing skilled professionals capable of handling complex projects.
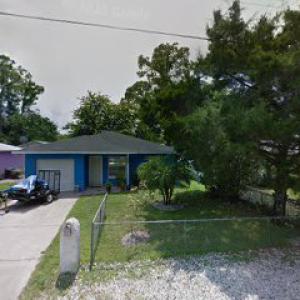
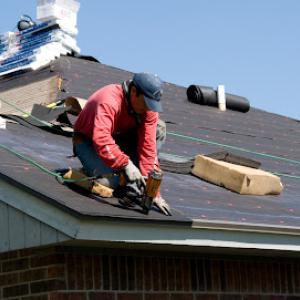
The housing stock in this coastal area features a broad spectrum of options- Asphalt Shingles, Metal Roofing, Clay Tile, Concrete Tile, Wood Shingles or Shakes, and Synthetic or Composite Shingles all appear across the mix. This is not a uniform skyline; it's a list of practical choices that have proven durable under Daytona Beach's exposure to salt air and hurricane-driven weather. Each material brings its own balance of weight, texture, and installation considerations, so understanding what performs best for a given roof type helps prioritize durability and long-term resilience in a market that frequently encounters high-wumidity conditions and gusty winds.
Salt-laden air accelerates corrosion on metal components, fasteners, and any exposed metal trim, so corrosion resistance matters more here than in inland markets. Moisture management through reliable underlayment, proper ventilation, and sealant performance becomes a matter of daily comfort and long-term leak avoidance. Fasteners must be chosen with coatings that resist salt spray and humidity over decades, and flashing should be high-grade and corrosion-resistant. The combination of year-round humidity and coastal air can also affect shingles and tiles differently: some products swell or shrink with moisture cycles, while others hold tight. The best practice is to align material choice with a roof's exposure level-coastal edge locations, for example, may benefit from products with proven salt-spray resistance and compatible fasteners that maintain airtight seals in humid conditions.
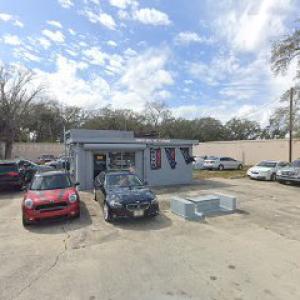
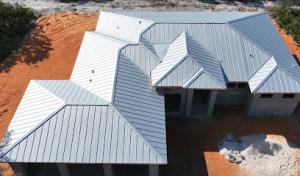
Daytona Beach shows a notable presence of pitched residential roofs alongside a meaningful number of low-slope commercial roofs. This dual market shapes local demand for metal, tile, and flat-roof specialists who can handle the nuances of each system. Metal roofs, when properly installed with corrosion-resistant systems and sealed fasteners, offer excellent wind performance and extended service life in both residential and commercial settings. Clay and Concrete Tile deliver distinctive aesthetics and durability but require careful substrate and underlayment preparation to handle movement and moisture without compromising tile integrity. Wood shingles or shakes bring a traditional look but demand meticulous maintenance in a salty climate to prevent insect damage and moisture-related decay. Synthetic or Composite Shingles provide a versatile, lower-maintenance option that still aims to mimic the appeal of natural materials.
Because salt air compounds the challenges of fastener performance and moisture migration, the installation sequence benefits from meticulous attention to substrate framing, underlayment choices, and flashing transitions around penetrations and roof intersections. In this coastal context, your crew should prioritize corrosion-resistant fasteners, compatible sealants, and correct attic ventilation to minimize condensation risks. Inspections after major storm events focus on checking for wind-driven debris impacts, lifted edges, loose flashing, and any signs of moisture intrusion through seams and joints. A proactive stance-addressing small signs of wear before they become leaks-helps maintain roof integrity across the city's varied roof stock.
Material choice should balance local exposure, roof slope, and long-term performance expectations. For pitched roofs, asphalt shingles and synthetic options offer flexible performance with easier maintenance, while metal roofing delivers robust wind resistance and fastener longevity when installed with appropriate coatings. Tile options-clay or concrete-provide exceptional durability but require precise installation and ongoing attention to substrate compatibility in humid climates. For low-slope commercial roofs, consider flat-roof systems with corrosion-resistant coatings and dependable drainage details to mitigate moisture buildup in year-round humidity. The goal is to align the material's inherent strengths with Daytona Beach's distinctive coastal conditions to sustain a durable, leak-resistant roof over time.
Provided local cost ranges per square are $350 to $700 for asphalt shingles, $600 to $1100 for metal, $900 to $1700 for clay tile, $800 to $1500 for concrete tile, $500 to $900 for wood shingles or shakes, and $400 to $800 for synthetic or composite shingles. These figures reflect what you can expect when the market isn't slammed, and they map to typical homes across beachside and inland blocks. When you're budgeting, keep in mind that a "square" in roofing terms is 100 square feet, so multiply the per-square range accordingly for your roof size. If a roof is larger or has unusual framing, costs can drift by a few hundred dollars per square, but these ranges are your starting point.
In Daytona Beach, costs can rise after tropical weather because storm-driven demand surges strain scheduling and labor availability across Volusia County. When a system brushes ashore and triggers roof claims, you'll see material deliveries and crews booked up weeks longer than normal. That can drive labor surcharges or fee-based emergency response adds, especially for quick-leak fixes or post-storm tarping. If your project timeline aligns with post-storm lull periods, you may see relief in both scheduling and price, but outages and repairs stay a factor for weeks after a major event.
Material choice matters more in this coastal market because heavier tile systems, corrosion-conscious metal details, and moisture-sensitive installation timing can all change labor intensity. Clay and concrete tiles offer durability against wind-driven debris but require careful roof framing and flashing details, which can raise per-square costs compared with asphalt. Metal roofs resist corrosion and can lead to quicker installs, yet coastal fasteners and coatings must be specified to prevent rust and fastener failures, adding cost. Synthetic or composite shingles slide into the lower-to-mid range and can be a practical compromise if weight, wind rating, and longevity balance out for your home. Timing matters as much as material: hot, humid days and sea-salt air require crews who protect interior spaces during install and who manage moisture and ventilation for long-term performance. In a high-claim market, choose a contractor who documents existing conditions, notes wind and hail considerations, and can clearly justify any premium tied to storm readiness.
Don't let upfront costs delay a critical repair - these contractors offer payment plans to fit your budget.
A.I.B. Roofing & Construction
340 S Beach St Unit 209, Daytona Beach, Florida
4.8 from 38 reviews
A full re-roof in this jurisdiction typically requires a permit. Missing or late permits can trigger rework, stop-work orders, and costly delays that disrupt access to your home during a critical hurricane season. The permit process also creates a documented trail that can help when insurance questions arise after a storm. Taking the time to secure approvals up front reduces the risk of investigations, fines, or forced uncovering of a roof later on.
Contractors generally submit the permit package to the City of Daytona Beach Building Department rather than handling it through a separate county roofing office for city jobs. That means you'll be dealing with a city-specific workflow, timelines, and staff. Confirm with your contractor that the submission includes all required forms, contractor licenses, and project details. If any item is missing, the process stalls and your project can face avoidable postponements.
The local process commonly includes rough-in and final inspections. Rough-in inspections verify structural components and underlayment compatibility before the final surface is installed, which helps catch mismatches early. The final inspection confirms that the roof installation meets code, drainage, and flashing requirements. Expect the inspector to check attic openings, venting, and any coastal engineering provisions that may apply. Scheduling ahead and having ready access for inspectors can prevent delays that push projects into peak storm seasons when inspections become harder to secure.
Wind mitigation documentation may be requested for coastal properties. If your home is within this coastal context, your contractor should anticipate gathering documentation such as roof deck attachment details, roof-to-wall connections, and applicable shingles or tile wind ratings. Having these items prepared can smooth the inspection path and support potential insurance considerations after installation. It's prudent to discuss wind-related code requirements early in the planning phase so the chosen roofing system aligns with local expectations and the city's inspection criteria.
Keep a copy of every permit-related document and tracking numbers from the Building Department. Schedule inspections with ample lead time and confirm access needs, including attic spaces and exterior elevations. If an inspector notes deficiencies, address them promptly and document the corrective actions. In coastal property scenarios, anticipate possible wind mitigation requests and coordinate with the contractor to provide the required evidence, avoiding last-minute scrambles and weather-driven delays.
Daytona Beach sits in a Florida coastal insurance market where hurricane-related wind claims are common and carrier appetite can change quickly. A roof that has weathered recent storms may be looked at more skeptically than a newer or better-maintained one, especially if the property sits closer to the Atlantic or shows older venting and fasteners. Carriers occasionally reprice or shutter coverage in higher-risk coastal neighborhoods, so the year-by-year decision to insure or renew can hinge on closely watched weather patterns and statewide loss performance.
Some insurers have reduced exposure in high-risk coastal counties, making roof age, condition, and documentation especially important for homeowners shopping or renewing coverage. If a roof is approaching the 15- to 20-year range on slate-style or tile systems, a detailed maintenance log, recent inspections, and any retrofit work become leverage in underwriting discussions. On a practical note, a visibly aging or poorly vented roof can translate into higher deductibles, steeper premiums, or even loss of coverage after a major event if preexisting damage is found.
Wind mitigation credits and well-documented post-storm photos, inspection notes, and repair records can influence both claim outcomes and ongoing insurability in this region. Start a storm file that includes dated photos from before and after any significant wind event, along with receipts for repairs and shutter or roof-fastener upgrades. When a claim is filed, that dossier helps establish a timeline, the extent of wind damage, and the efficacy of prior mitigation measures. In a market where insurers can adjust risk appetite quickly, having solid, organized documentation protects you both during a claim and in renewal conversations.
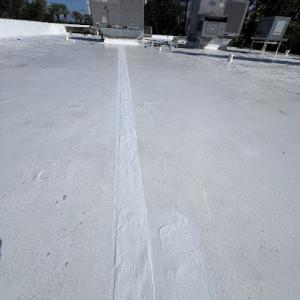
Flat-roof specialization is meaningfully present in the Daytona Beach market, indicating a notable share of low-slope roof work alongside standard residential re-roofing. The coastline exposure means flat or near-flat decks endure more wind-driven spray, faster corrosion, and more frequent tropical downpours. This isn't a generic flat-roof scenario; it's a coastal, hurricane-prone environment where ponding and edge flashing choices drive long-term performance. Knowing this sets expectations for maintenance cycles and replacement planning.
Low-slope roofs near the coast face repeated ponding from frequent rain events, compounded by wind-driven water during tropical weather. Regularly inspect for pooled water after storms and after heavy rains, paying attention to any signs of membrane wear, blisters, or seam splitting. If you see standing water persisting beyond 48 hours, flag it for immediate service. In Florida's heat and salt air, membranes age unevenly, so plan for targeted resealing and flashing checks around penetrations, curbs, and edge details. Avoid high-pressure cleaning that can thin out delicate coatings and accelerate failure.
Beachside and commercial roof owners in Daytona Beach often need maintenance planning that differs from steep-slope shingle or tile homes on the mainland. Establish a practical annual cadence: visual inspection after hurricane season, a mid-year drainage check, and targeted repairs before the peak wet season. Prioritize sealant longevity around HVAC curb penetrations, skylights, and parapet walls, which routinely suffer salt-laden exposure. Keep a small, dedicated maintenance log and use it to coordinate timely sealant reapplications and membrane patching before minor issues become leaks during a tropical squall.
When a leak shows during a storm, act fast: locate the highest point where water enters, protect contents, and call for a prompt on-roof assessment to confirm membrane integrity or flashing failure. For insurance readiness, document the scene with dated photos showing damage, note timestamps, and log any prior repairs. This local approach-short-response drills, clear evidence trails, and pre-arranged contractor contacts-helps streamline claims and reduces downtime for flat-roof occupants.
Extend the life of your existing roof with reflective or waterproof coatings that protect against UV and moisture.
Affordable Roofing & Construction
(386) 316-1047 www.affordableroofingdaytonabeach.com
Daytona Beach, Florida
4.5 from 8 reviews
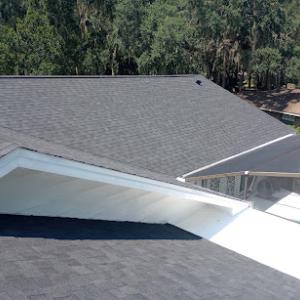
Skylight service appears often enough in the Daytona Beach contractor market to merit dedicated attention as a recurring leak point. The ocean air carries salt that accelerates corrosion on flashing, seals, and fasteners. Wind-driven rain pushes water around joints in ways that dry-season roofers don't see, so flashing around skylights and other penetrations tends to fail sooner than on inland roofs. In this coastal climate, frequent rain and wind-driven water make flashing details around skylights more failure-prone than in drier regions. Understanding these patterns helps you spot trouble before it becomes a bigger leak.
Leak diagnosis often needs to distinguish between storm-created openings and moisture intrusion worsened by prolonged humidity. Start by tracing water marks on the ceiling back toward the exterior roof line, but don't assume the entry point is directly above the stain. Check skylight seals, curb flashing, and surrounding shingles or tiles for cracks, gaps, or corrosion from salt air. If you've had a recent storm, inspect after the rain stops and again after 24 hours of dry weather, since humidity can keep the interior damp even after the leak appears sealed. Remember that a seemingly minor crack around a skylight can widen with the next wind-driven downpour.
Regular maintenance is key in this coastward setting. Clean debris from around the skylight, inspect sealant for cracking, and verify flashing continues to sit flush against the roof deck. Treat metal flashing with a corrosion-inhibiting coating as needed, especially where salt spray reaches the joints. Consider upgrading to flashing with reinforced, corrosion-resistant materials if you notice recurring seepage at the same point after storms.
If you notice recurring leaks after storms or if water shows up around the skylight's curb after a heavy rain, call a roofing professional promptly. In this market, experienced crews can both reseal and, when needed, replace failing flashing with hardware and materials designed for salt-laden environments. A timely assessment helps prevent interior damage as humidity levels rise.
Find contractors experienced in skylight installation, flashing, and leak repairs to bring natural light into your home.

Daytona Roofing Services
(203) 660-2074 daytona-roofing-services.ueniweb.com
364 N Nova Rd, Daytona Beach, Florida
5.0 from 20 reviews

Action Roofing
(415) 349-5506 action-roofing.ueniweb.com
772 Georgia St, Daytona Beach, Florida
5.0 from 19 reviews
A.I.B. Roofing & Construction
340 S Beach St Unit 209, Daytona Beach, Florida
4.8 from 38 reviews
In coastal climate, solar planning sits behind hurricane resilience. Solar roofing is present but not dominant in the Daytona Beach contractor market, so it belongs as a secondary planning topic rather than a lead section. When evaluating solar readiness, assess the roof age, the condition of underlayment, and whether the existing system has reached the end of its life. A roof that's nearing or past its peak life should be considered for replacement before panels go on, because a retrofit after solar installation can complicate warranties and performance.
Wind uplift, salt air, and humidity shape how panels are mounted and how fast flashing materials age. For homes with low-slope commercial roofs or older shingle and tile assemblies, ensure the attachment method is rated for coastal wind speeds and that the roof deck is solid enough to bear additional weight. In such environments, panel placement should avoid perennial shading from tall palms or nearby structures that can create microclimates with faster wear on one section of the roof.
Coastal permitting and insurance considerations make documentation of attachments and roof condition especially important when combining roofing and solar work. Keep a detailed site map of all hardware, rafter or truss connections, and any existing penetrations. Photograph roof segments before and after installation, and verify the solar vendor provides a stamped plan that aligns with the roof's structural realities. If a hail risk or hurricane event occurs, concise records simplify claims and support a faster, clearer recovery path.
Even with solar, routine roof inspections every year after hurricane season help catch compromised shingles, lifted tiles, or flashing gaps before leaks appear. Use a local installer who can coordinate solar work with any future roof repairs to maintain overall system integrity. A well-planned approach minimizes downtime and keeps your coastal home protected while expanding clean energy capacity.
Find contractors who integrate solar panels or solar shingles into your roof for long-term energy savings.
Volusia-Flagler Roofing
(386) 523-7663 volusiaflaglerroofing.com
825 Mason Ave, Daytona Beach, Florida
5.0 from 70 reviews

Daytona Beach Roofing
(386) 564-6700 daytonabeach-roofing.com
132 W International Speedway Blvd Suite 7, Daytona Beach, Florida
4.3 from 16 reviews
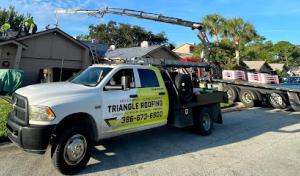
In Daytona Beach, the roofing market includes many long-established, family-owned firms that offer quick response after storms. Those crews tend to have deep local roots, understand coastal wear, and know how to prioritize fast tarp-ups and safe access to storm-damaged roofs. When a bid comes in, you'll notice several options from these familiar names, with a track record of showing up promptly, communicating clearly, and following through on cleanups.
Cleanup is a common local expectation, reflecting the practical realities of tear-offs and storm-related roofing work. A bid that lists debris removal, disposal, and final clean-up as part of the contract should be weighed against one that leaves that work as a separate line item or as a post-work add-on. Look for clear language about roof tear-off procedures, protection of landscaping and driveways, and a documented plan for storm debris disposal. For workmanship promises, prioritize bids that separate manufacturer-backed coverage from contractor warranties. Manufacturer warranties often cover the product only, while a trustworthy local crew will back their own labor, procedures, and any necessary resealing or re-fastening after seasonal wind events.
Contractors who offer warranties in this market may be present, but they are not the majority. Your due diligence should include confirming who is responsible for workmanship during the warranty period, what conditions void coverage (for example, improper installation or storm damage not attributable to workmanship), and how service calls are handled after a storm. Ask for written timeframes for inspection after installation and for any re-work that might be required if wind-driven debris caused later issues. In practice, a Daytona-area job is most robust when the contractor documents the exact installation steps, provides a contact for follow-up, and offers a clear process for addressing leaks or shingle lift, should they occur under common coastal conditions.
When selecting a crew, prioritize those with a visible pattern of prompt after-storm availability, transparent cleanup commitments, and a straightforward path to service if problems arise. Request a written schedule that includes cleanup checkpoints and a post-installation inspection window. Keep a binder of all communications, purchase orders, and warranty documents, noting any on-site notes about coastal exposure and salt-laden air. If a claim pits manufacturer coverage against workmanship promises, know which party is responsible for the leak resolution timeline and who coordinates any required rework. This clarity helps you move quickly when rapid leak response is needed in a high-claim market.