Last updated: Apr 19, 2026
From June through November, Edgewater experiences the highest roofing disruption due to hurricane-season wind exposure and tropical systems. The pattern here is aggressive: bursts of wind-driven rain, sudden squalls, and power outages that ripple into job sites. When a storm system approaches, crews often suspend tear-off and dry-in work to safeguard your home and their crews. The effect is not abstract-exposed decking and weakened underlayment can quickly become a painful setback if a project stalls in the middle of a weather event. You should be prepared for tightened schedules and potential shifts in timing as storms form and track through the Atlantic.
Edgewater's hot, humid days come with frequent afternoon downpours even outside hurricane events. That means a high likelihood that non-hurricane summer projects become interrupted. Roofing tasks that rely on precise sequencing-underlayment, flashings, and venting-can be compromised when sudden rain interrupts the dry-in phase. Drying times extend, and a mis-timed shower can push project phases back by hours or days. In practice, a typical summer re-roof can drift into delayed starts or mid-project standstills if crews are chasing perfect weather windows. The takeaway is simple: even routine projects must be planned with rain contingencies and flexible scheduling, because you're not waiting for ideal weather so much as tolerating recurring interruptions.
Because replacement demand spikes after regional storms, many Edgewater projects cluster into the drier months when contractors can reliably move through underlayment and final roofing stages. That seasonal clustering creates a practical reality: if a storm hits mid-summer, a homeowner may find a longer-than-expected wait for a scheduled replacement window as crews re-prioritize and push back other job starts. Knowing this helps you set expectations and prepare for a possible compressed schedule later in the year once conditions stabilize.
Start with a mutual plan with your contractor for tight storm-season communication. When a tropical system forms nearby, establish a trigger to confirm whether your project should advance or pause, and what protective measures you'll need if winds rise. Protect your interior by ensuring your attic ventilation remains clear and that temporary coverings, if used, are secured to minimize wind uplift risk. Have a clear sequence mapped out for tear-off, deck inspection, underlayment, and final roofing stages so you're not scrambling after a storm passes. If a storm threatens, review tarping options and access points for continued weather protection without compromising structure or interior finishes. Think through access to supplies and staging areas-edge-of-yard setup, material storage, and debris containment-to prevent damage during sudden weather shifts.
In practice, expect a two-step rhythm: prepare while conditions are favorable, then execute during defined dry windows. Your goal is to minimize open decking exposure during active hurricane watch periods and to align tear-off with periods when the forecast shows a sustained stretch of dry weather. When a major storm system approaches, you're not choosing between progress and risk-you're choosing the safest path to keep the roof replacement on track once the atmosphere clears. Consider building a preferred couple of months into your plan for a final, high-integrity roof installation, so the project can ride out the storm season and land in a window where underlayment and final roofing can proceed without interruption.
In this city, asphalt shingles typically run about 350 to 700 USD per square, metal about 750 to 1700, clay tile about 900 to 3800, concrete tile about 800 to 1900, wood shingles or shakes about 1000 to 2800, and synthetic or composite shingles about 700 to 1500. These numbers reflect what you'll often encounter from local crews who service the coastal weather and heavy rain patterns. When storm season is quiet, scheduling tends to stay smoother, but after a hurricane or tropical-system event, prices can shift quickly as crews get squeezed and materials move faster than usual.
Local pricing can rise after hurricane activity because storm-driven demand compresses scheduling and increases competition for crews during the same periods many homeowners need emergency dry-in work. If a storm season hits and you're competing for the same handful of qualified crews, you'll see shorter windows for inspections, faster project start times, and higher labor surcharges in some cases. Planning ahead for post-storm work can help manage some of this variability.
Costs in Edgewater are also affected by Florida code-driven fastening, underlayment, and inspection requirements for re-roofing, especially on homes upgrading from older roof systems to meet current wind expectations. Clay and concrete tiles bring higher material and installation budgets, but they offer long-term durability against salt spray and wind-driven debris when installed properly. Asphalt remains the most budget-friendly entry point, yet it can require more frequent maintenance in coastal exposure. Metal roofing sits toward the upper mid-range, delivering strong wind resistance and a lighter roof assembly, which can influence installation approach and total cost. Synthetic or composite shingles balance durability with cost, often appealing for homes facing rapid seasonal weather shifts.
If a storm is forecast, set aside a contingency for a faster dry-in window and potential temporary protection (tarps, safe access). When you're evaluating bids, ask each contractor to itemize underlayment, fasteners, and any wind-force specifications they'll meet to align with Florida expectations. For homes upgrading from older systems, anticipate a premium for upgraded fasteners and a more robust attachment method. Finally, consider the seasonal rhythm: summer downpours and hurricane-season winds make dry-in and weather-tight guarantees harder to lock in, so budgeting a cushion of 10-20% for contingencies isn't unusual.

Ellis Roofing & sheet metal
(386) 314-3142 ellisroofing386.com
1947 Guava Dr, Edgewater, Florida
5.0 from 67 reviews
We specialize in metal, shingle, and flat roofs. We offer free estimates and no job is too small. We also offer a 5 year workmanship warranty on all our new roofs.

G&W Roofing
(386) 749-8287 www.gwroofing.com
129 W Marion Ave, Edgewater, Florida
4.6 from 343 reviews
G&W Roofing has been proudly serving homeowners throughout the greater Edgewater area for more than 35 years. As a family-owned and locally operated business, we specialize in roof repairs and replacements, delivering dependable workmanship backed by our 25-Year Craftsmanship Warranty on every new roof. But what truly sets us apart isn’t just the quality of our roofs—it’s the experience we provide. From the first call to the final inspection, we prioritize clear communication, careful attention, and reliable follow-through, creating what we call The G&W Roofing Experience. Trusted by thousands in Edgewater, we’re dedicated to protecting your home and your peace of mind. Contact us today to schedule your free estimate.
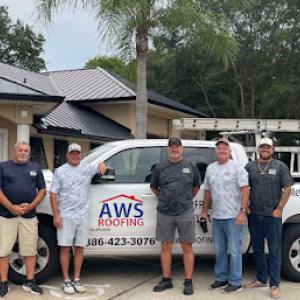
AWS Roofing Services
(386) 423-3076 www.awsroofing.com
875 W Park Ave, Edgewater, Florida
4.4 from 83 reviews
AWS Roofing is a family owned and operated roofing business located in Edgewater, Florida serving both residential and commercial clients. We are committed to providing superior services and products with a proven track record of serving our clients with integrity since 1987. AWS Roofing is state-licensed, fully insured and bonded. We offer a state-of-the-art custom computer sheet metal shop for all types of flashing and custom coping.
Tim's Emergency Roofing Repairs
(850) 613-8025 tim-s-emergency-roofing-repairs.ueniweb.com
Edgewater, Florida
4.8 from 18 reviews
Tim's Emergency Roofing Repairs offers high-quality roofing design and services in Edgewater. We are seasoned roofers who deliver top quality and budget-friendly roofing services. Get in touch with us on +18506138025. When you hire us, you know you’re getting skilled, passionate technicians you can trust to do the best job possible. And, as a bonus, we always feature competitive pricing on our services.
Professional Choice Roofing Deland
2723 Palmbrooke Wy, Edgewater, Florida
3.6 from 7 reviews
At Pro Choice Roofing Deland, you can count on us to consistently provide high quality services for your home, regardless of the size or scale of your roof! Our company was founded on the principle of truly 'serving' our customers, we are in business to exceed your every expectation. Our core roofing services include full roof replacements of asphalt shingles, metal, slate, tile, flat and commercial roofing! We take pride in our reputation as one of Deland's most trusted, and qualified roofing professionals in the area. When you're looking for the best for your home, the decision is easy with Pro Choice!
Riverview Roofing
(386) 314-9377 www.riverviewroofingnsb.com
Serving
4.9 from 40 reviews
Riverview Roofing is your metal roof installation experts of New Smyrna Beach, Edgewater, Port Orange, and surrounding Volusia County areas since 1985. Owned by industry veteran Louis Muni, we bring four decades of roofing experience to every project. As a Florida Certified Roofing Contractor with an active license and an A+ Better Business Bureau rating, we specialize in new roof installations, replacements, seamless additions, maintenance, and emergency services. Our skilled team handles metal and shingle roofs, promoting energy efficiency and environmental responsibility. We pride ourselves on quality, professionalism, and customer satisfaction, fostering lasting relationships with our clients. Contact Riverview Roofing for Estimates
Sun Coast Roofing & Solar
(386) 423-0656 www.suncoastroofing.com
Serving
4.5 from 224 reviews
Sun Coast Roofing & Solar is your Florida based full-service Residential & Commercial Roofing Contractor. Specializing in re-roofs, repairs, storm damage and insurance claims! Experienced in all types of roofing from tile, slate, shake, specialty & custom metals to shingles and we now proudly offer our customers the option to go solar. Family-owned and operated with over 10 years of experience. Local, Licensed & Insured. Give us a call to set-up an appointment for a FREE estimate! The Last Roof You'll Ever Need!
Affordable Roofing & Construction
(386) 314-7108 roofingnewsmyrnabeach.com
Serving
5.0 from 3 reviews
We are the foremost experts in roofing services and roof repair in New Smyrna Beach. We have been providing roof repair solutions to our customers since 1974 and we handle all aspects of roofing work in New Smyrna Beach, for both commercial and residential buildings, including shingles, tiles, sheet metal matching and any necessary roofing structural work. Having good roofing is important for every home and business, because poor roofing can lead to leaks and damage that may devalue your property. For this reason, any roofing problems or roof repair work should be handled as soon as possible by an expert. Because of the dangerous nature of this work, you should not attempt any roofing work on your own. Call us for an estimate today!

Florida Blue Roofing
(407) 901-1343 floridablueroofing.com
Serving
4.9 from 33 reviews
At Florida Blue Roofing, we take a customer-centric approach to everything we do. We believe in listening to our customers' needs and tailoring our services to meet those needs. Our goal is to build long-lasting relationships with our customers by providing exceptional service and quality workmanship.
J&M Roofing Services
(386) 777-1122 www.jandmroof.com
Serving
4.7 from 15 reviews
J&M Roofing Services offers roof inspections, roof repairs, and roof replacements. Call us today for a free same day roof inspection. Financing Available!
Bob's Roofing & Gutters
(833) 462-6271 bobsroofingandgutters.com
Serving
5.0 from 92 reviews
Bob's Roofing and Gutters, based in Port Orange and Umatilla, Florida, brings decades of expertise in roof replacements and repairs. Our dedicated team prioritizes customer satisfaction, guiding clients through every step to ensure a smooth, stress-free experience. We promise 'Quality Through the Roof' service, using top-tier materials and skilled professionals for outstanding results. Additionally, we offer expert gutter installations and maintenance, protecting your home from water damage. Choose Bob's Roofing and Gutters for reliable, quality service that enhances your home's value and beauty.

Astro Roofing
(386) 760-8933 astroroofinginc.com
Serving
4.9 from 238 reviews
Astro Roofing is a family owned and operated roofing company established in 1986. Residential/Commercial. Shingle, Metal, Flat roofing experts. Every job is owner supervised to ensure top quality. All work done in accordance to Florida Building Code standards, as well as our own professional standards.
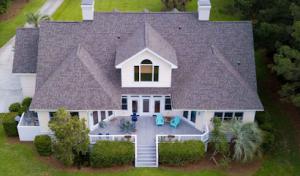
Edgewater's Indian River-side exposure, hot humidity, and frequent summer downpours push roof performance beyond cosmetic appeal. Humidity accelerates material aging, while wind-driven rain during hurricane season tests seams, fasteners, and underlayments. In this neighborhood, a roof system isn't just about shedding rain; it's about resisting salt-laced air, heat load, and the gusts that arrive with storms. When evaluating options, you'll want roofing that stays watertight under heavy rain and holds up to repeated heat exposure without cracking or warping. In practice, this means prioritizing materials with durable, corrosion-resistant components, robust underlayment compatibility, and proven performance in coastal, hot-humid conditions.
Asphalt shingles offer quick, familiar installation and a broad service life under normal Florida conditions, but they can be stressed by prolonged heat and wind-driven rain if quality components and proper nailing patterns aren't used. Metal roofing stands out for impact resistance and longevity in wind events, with panels that shed water quickly and resist punctures. Clay and concrete tiles bring superb thermal mass and a classic coastal look, yet require solid roof decking and precise installation to avoid micro-cracks and water intrusion in surge storms. Wood shingles or shakes provide aesthetic appeal but demand careful maintenance to prevent rot in high-humidity air. Synthetic or composite shingles aim to marry resilience with lower weight and better wind performance, though durability varies by brand and composition. Edgewater homeowners often balance appearance, weight on existing structures, and long-term performance when picking among these choices.
In hot, humid climates, materials that tolerate moisture without deforming or delaminating tend to age better. Metal roofs typically handle humidity well and resist wind uplift when fasteners and flashing are correctly installed. Tile options (clay or concrete) offer excellent puncture resistance and heat reflection, but require a sturdy deck and proper underlayment to manage moisture. Asphalt remains a common, lower-entry option with quick repair pathways, yet it benefits from a high-quality underlayment and wind-rated installation to mitigate edge lift during storms. For those aiming to preserve curb appeal with coastal durability, synthetic shingles can deliver a favorable balance, provided the product line is rated for wind and moisture exposure.
After a hurricane-season event, focus on a rapid, thorough inspection for wind uplift damage, flashing integrity, and signs of moisture intrusion. Prioritize replacement or repair decisions based on the extent of damage, roof deck condition, and the material's proven resilience in Edgewater's climate. A system with excellent wind performance and robust moisture resistance often buys extra time between replacements, but any hidden deck rot or compromised underlayment should trigger timely action. When weather windows open after a storm, planning a targeted replacement or reinforcement that aligns with your chosen material's installation requirements helps minimize exposure and keeps your home safer during the peak of hurricane season.
A full re-roof in Edgewater requires a building permit through the City of Edgewater Building Department. The process is not treated as mere maintenance; a new roof triggers regulatory oversight to ensure structural integrity, wind resistance, and adherence to local amendments to the Florida Building Code. Before any shingles come off or new layers go on, confirm that the project scope is labeled a full roof replacement and not a minor repair. This sets the correct expectations with the permitting office and lays the groundwork for a smooth inspection path.
The local process includes plan review before permit issuance. You need to submit roof plans that show key details: roof slope, attic ventilation approach, underlayment type, nailing schedule, and the chosen roofing system. In Edgewater's coastal climate, plan reviewers will look closely at wind-load calculations, fastening patterns, and moisture management strategies to handle summer downpours and hurricane-season stress. Work with your contractor to prepare a concise set of plans that aligns with Florida Building Code requirements and any city amendments. Do not treat this as a back-pocket form; a thorough submission can prevent back-and-forth delays.
Inspections occur in stages, starting with a rough-in inspection for underlayment and nailing. This check verifies that underlayment orientation, fastener spacing, and the overall deck preparation meet code and local expectations before you proceed with any cover materials. After rough-in, the project advances to a final inspection that confirms full compliance with the Florida Building Code and the city's amendments. The final inspection is your last hurdle to obtain an occupancy or completion confirmation, so coordinate timing with the inspector and your installation schedule. If any deviations are found during rough-in, address them promptly to avoid re-inspection delays that can stretch into the peak storm season.
In a coastal municipality, timing can matter as summer downpours compress work windows and hurricane-season considerations push many homeowners toward seasonal re-roof activity. Secure all required city documents early, track permit numbers, and maintain a clear file of plan revisions and inspection appointments. When arranging inspections, ensure access for the building official and provide any requested samples or test results for underlayment and nailing methods. If weather disrupts a stage, consult with the permit office and your contractor promptly to reschedule without compromising compliance. The goal is a clean, code-compliant installation documented through the staged inspections, ready for the final sign-off.
Edgewater's exposure to coastal winds means insurers scrutinize more than just what's visible on a roof during a quick walk-around. The decision to cover a damaged roof, and at what level, hinges on the quality of your documentation, the age and condition of the roof, and how well the entire assembly supports wind-mitigation reporting. In practice, that means a comprehensive record package from the outset saves headaches after a storm: up-to-date photo timelines, measurements, details about underlayment, fasteners, attic ventilation, and any upgrades that reduce wind vulnerability. If you have a roof that's approaching the mid-point of its expected life or shows signs of age-related wear, plan to amplify your documentation well before storm season.
In this market, insurers have tightened coverages and adjusted pricing in recent years, and that trend continues as local conditions intensify. The way a roof is described during underwriting or renewal can tilt decisions about coverage levels, depreciation, and deductibles. For Edgewater, a well-documented wind-mitigation strategy-proper nailing patterns, reinforced rafter connections, and tested roof-to-wall connections-can meaningfully influence how a policy reacts to a claim. If a roof has had recent upgrades, especially those that address wind resistance, having certified reports or contractor statements that corroborate the improvements can smooth the path through underwriting.
When a storm impact hits, an adjuster's review in this market often relies on evidence beyond a basic damage description. Photo documentation from multiple angles, timestamps, and a clear narrative of what failed and why the failure occurred are essential. Wind-related claims benefit from showing the roof's construction details: fastener types, sealants, edge-clip installations, and how the eaves and hips were tied into the structure. If the roof has undergone any repairs or partial replacements, matching manufacturer specifications and installation standards that align with wind-mitigation guidelines can prevent disputes about coverage scope. In Edgewater, presenting a coherent, photo-backed story of what the roof endured and what was done to upgrade or restore it can reduce ambiguity during settlement discussions.
Keep a current, labeled photo log of key roof components: ridge lines, flashing, hip and valley areas, and attic ventilation. When storms threaten, have a concise summary ready that ties observed conditions to wind-mitigation features. If recent work addressed wind resistance, ensure documentation is readily retrievable-receipts, contractor notes, and any third-party verification. The aim is to present a well-supported claim package that matches the local underwriting expectations, minimizing delays and helping the roof-replacement decision align with what the insurer recognizes as compliant and durable.
Connect with contractors who help homeowners navigate the claims process from damage assessment to final approval.

Ellis Roofing & sheet metal
(386) 314-3142 ellisroofing386.com
1947 Guava Dr, Edgewater, Florida
5.0 from 67 reviews
In Edgewater, frequent spring and summer rain can interrupt tear-off and underlayment installation, which makes scheduling and same-day dry-in planning especially important. You should coordinate with your contractor to secure a dry-in plan that anticipates possible showers, with weather buffers built into daily targets. Have tarps and edge protection ready, and confirm that crews can pause work safely if rain intensifies, then resume quickly when skies clear.
High humidity and heat in summer can slow drying times for roofing components and increase installation sensitivity during active replacement work. Plan for extended drying periods between roof deck exposure and overlay, especially if underlayment or sheathing has absorbed moisture. Ensure temporary ventilation to reduce heat buildup in the attic space, and be prepared for minor delays if interior environments remain damp after rain events.
Even outside named storms, Atlantic-influenced wind events and winter cold fronts can still affect staging, material handling, and inspection timing. Strong gusts can complicate ladder setup, debris control, and the securing of loose materials on the roof. Have a clearly defined staging area, secure all loose items at day's end, and schedule essential inspections for mornings when wind is typically calmer.
Build in a contingency plan with your contractor for sudden weather changes, including rapid tarp deployment and re-sequencing when rain disrupts progress. Keep inspection notes accessible, so you can document conditions after a rain event and coordinate timely follow-up work to maintain a smooth dry-in and overall roof replacement timeline.
Edgewater carries a strongly re-roof-driven market, with many homes transitioning to full replacement rather than sticking with aging systems. Local contractors report that buyers and insurers often expect a complete roof when the structure has reached a certain age or after a severe weather event. This pattern drives a steady cycle of tear-off, deck preparation, and metal or shingle installation, rather than episodic minor fixes. When a roof is nearing the end of its life, anticipate a plan that prioritizes durable, wind-resistant choices and a coordinated schedule to minimize exposure.
Storms are a routine part of the local roofing cycle, so expect leak response and post-wind repairs to be among the most common jobs. In the immediate aftermath, focus on securing the roof with tarps and temporary patches to limit interior damage. After the winds subside, a thorough inspection should follow-inspect everything from flashing and underlayment to ridge caps and vent penetrations. Quick triage helps protect interior spaces and streamlines the repair or replacement process. Keep a documented photo log of damage and communication with the contractor for smooth progress after a storm event.
Cleanup is a strong market expectation in Edgewater, with debris control during tear-off and post-storm repair weighing heavily on homeowner confidence. A reputable crew should contain and dispose of debris to prevent wind-driven messes on neighboring properties and streets. Demand a site-clean approach: ground protection, organized removal, and a covered staging area for materials. Clear communication about daily cleanup and waste containment reduces neighborhood disruption and speeds up the project timeline.
In this coastal residential market, flat or low-slope roofs show up enough to warrant dedicated attention. Edgewater homes frequently rely on membranes that must shed heavy summer downpours efficiently. The critical zones are around parapets, transitions from roof deck to parapet caps, and where insulation sits beneath waterproofing. Attention to substrate flatness, proper drainage plan, and correct termination details helps prevent water pooling and slow seepage that can compromise insulation and ceiling finishes long after a storm passes.
Skylights appear repeatedly in local service calls, underscoring homeowner concern about leak tracing around flashed openings. Where skylight curb flashings meet the roof membrane, small imperfections can become focal points for moisture intrusion with sustained rain. You should routinely inspect flashing seams, fastener corrosion, and the continuity of the dry-in around skylights. When a leak appears, focus on the intersection of the skylight curb and the roof membrane, not just the visible water trail inside the attic or ceiling.
Edgewater's rain pattern tests flashing details through repeated wetting, not just isolated storms. That means small gaps and mineral buildup on counterflashing can degrade service over time. Pay special attention to the transition from roof deck to flashing, the step and counterflashing around walls, and any penetrations through the membrane. Regular maintenance-cleaning debris from flashings, resealing seams, and ensuring proper slope toward drains-goes a long way in reducing hidden leaks.
For homeowners, simple checks can prevent larger issues after a downpour. Look for softened deck areas near skylights or transitions, listen for audible drip sounds indoors after rain, and monitor attic or soffit moisture after storms. When in doubt, a targeted inspection focused on low-slope zones and flashed openings yields clearer next steps than broad, generic roof checks.
Find specialists in TPO, EPDM, and built-up flat roofing systems for residential and commercial properties.
Ellis Roofing & sheet metal
(386) 314-3142 ellisroofing386.com
1947 Guava Dr, Edgewater, Florida
5.0 from 67 reviews