Last updated: Apr 19, 2026
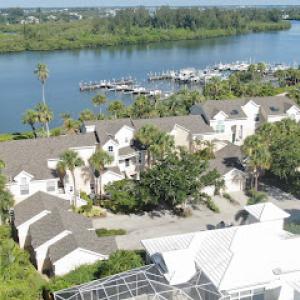
Vero Beach sits on Florida's Atlantic coast, so roofs contend with tropical-storm wind exposure and persistent coastal salt air that can shorten the life of fasteners, flashings, and some metal components. In this setting, corrosion resistance and wind performance matter more here than inland locations. When you inspect a roof, focus on the durability of fasteners, the integrity of sealants, and the resistance of metal trim to salt spray. Any compromise in these areas translates quickly to leaks, lifted edges, or accelerated wear after a hurricane brush-by.
This market rewards systems that resist uplift and resist salt-induced corrosion. Materials that hold their shape and fasteners that stay tight under salt-laden air give you meaningful protection during hurricanes. For asphalt shingles, look for high-wind components, but know that some shingle products can lift under gusts. Metal and aluminum systems often perform well if they're properly anchored and flashed, yet salt air can corrode hardware and reduce the life of non-stainless components. Clay and concrete tiles demand careful underlayment and accurate tile alignment to avoid wind-driven loosening. Copper and aluminum, while beautiful and durable, require corrosion-resistant fasteners and compatible hangers to maintain long-term performance in this climate.
The local reroof calendar often shifts away from peak hurricane months when possible because June through November brings higher wind and rain risk and can disrupt tear-off and dry-in scheduling. If planning ahead, coordinate with a contractor who can bin work into a window with fewer tropical storms and more predictable drying conditions. A tighter schedule reduces exposure of exposed edges, preventing moisture intrusion during rain bands. If a storm track threatens, have temporary coverings ready and a plan to protect exposed areas. Delays in dry-in are far more costly when salty air and humidity remain high; accelerated, weather-aware scheduling is not optional but essential.
In this market, material choice is tightly linked to coastal durability. Metal, aluminum, copper, clay tile, concrete tile, and asphalt shingles are all active roof types, but corrosion resistance and wind performance matter more here than inland. Choose hardware and fasteners rated for salt exposure, with sealants and flashing designed to endure coastal moisture. For tiles, ensure proper underlayment, backer rods, and edge restraint to resist wind uplift. For metal and aluminum roofs, verify lime- or salt-resistant coatings and compatible sealants and trims to avoid galvanic corrosion. If choosing clay or concrete tile, insist on quality installation that minimizes risk of crack propagation under wind load and salt exposure, and confirm that the fasteners and supports are compatible with the chosen tile type.
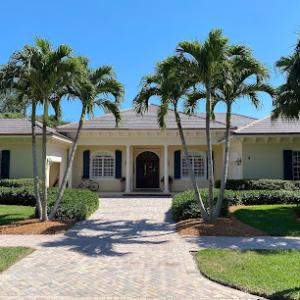
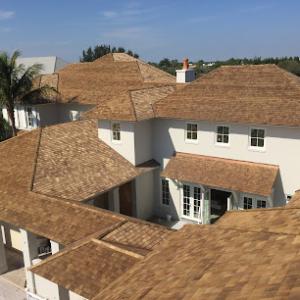
Asphalt shingles remain a common sight on inland and coastal-adjacent homes, offering a familiar look and straightforward installation. In this coastal setting, choose products rated for wind uplift and avoid thin-profile shingles that can struggle against blowing salt spray during storms. Look for options with sealed tabs and reinforced organic or fiberglass mats, and confirm that the color and granule protection hold up under sun exposure and salt air. When paired with a compatible underlayment and proper nailing pattern, asphalt can perform reliably, especially on homes with traditional rooflines and tighter roof-to-wall transitions. If you opt for asphalt, ensure the edge details and fasteners are corrosion-resistant and that the roof ventilation plan supports moisture control in a humid climate.
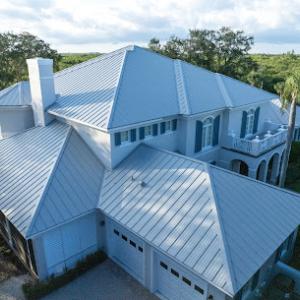
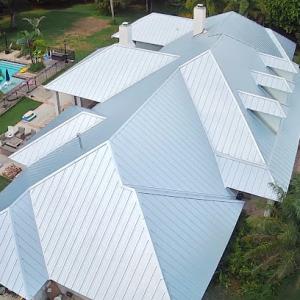
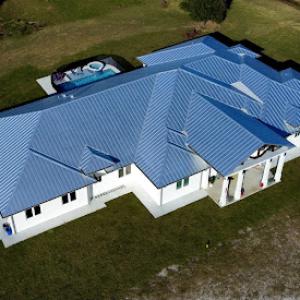
Metal roofs are a popular coastal choice for their longevity and low maintenance, but salt exposure makes corrosion-resistant assemblies essential. In this area, edge metal, clips, and exposed accessories must be selected for salt spray environments. Look for aluminum or galvalized steel options with coatings designed to resist salt-induced corrosion. Copper and aluminum alternatives offer excellent longevity and distinctive curb appeal, but require proper flashings and sealants to handle the constant humidity and sea air. For best results, specify fasteners with coatings that resist rust and ensure the entire rafter-to-sheet connection is weather-tight. A well-detailled metal roof can provide robust wind resistance when installed with continuous eave overhangs and properly integrated flashing at chimneys and vents.
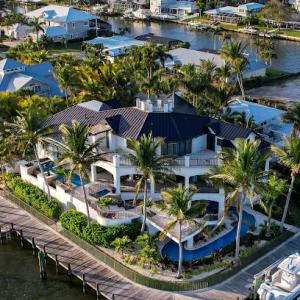
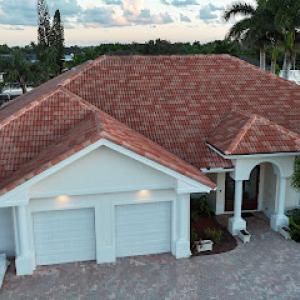
Clay tile and concrete tile are common on coastal and inland homes, valued for their shade and color stability. Heavy tile systems demand closer review of structural support and compatibility during reroof planning. Verify the deck can safely bear the weight of a full tile assembly, and confirm that fasteners and interlocks are designed for high wind events typical of this coastline. Salt air accelerates corrosion on metal underlayment and fasteners behind the tile, so choose corrosion-resistant components and ensure proper drainage under tile to prevent moisture buildup. For clay and concrete, consider lighter hybrid or reinforced options if the existing structure shows signs of weakness, and pay attention to the edge details where wind-driven rain can find its way under the tile. Proper sealing around penetrations-vents, skylights, and Chimneys-is critical to long-term performance.
Copper and aluminum roofing offer standout longevity and a distinctive look, fitting coastal custom homes as well as more budget-conscious inland designs. Copper, while premium, develops a natural patina that can add character over time, but requires attention to flashing, fasteners, and joints to prevent galvanic corrosion at every seam. Aluminum roofs are lighter and less prone to heavy maintenance, yet still demand corrosion-resistant hardware and compatible coatings, especially along eave edges and coastal facades where salt exposure is highest. Whichever metal you choose, insist on a complete corrosion-control plan for fasteners, seam sealants, and edge metal to ensure a seamless, weather-tight result through decades of salt air and hurricane cycles.
Thunderstorms and tropical storms roll through quickly, and wind-driven rain can cause hidden damage that worsens within hours. After a storm, your first priority is tarping and temporary leak control to protect interiors, followed by a careful evaluation of roof edges, penetrations, and flashings. In this market, rapid response matters because insurers expect you to mitigate further damage and document it promptly. A dry, accessible path to inspect the roof safely allows you to identify missing shingles, lifted tiles, and loose metal seams before secondary interior leaks take hold.
Florida's coastal underwriting has tightened, so meticulous records matter more than ever. Keep dated roof photos taken from multiple angles, especially after a storm and again after any temporary repairs. Save all permit records and inspection reports related to the roof, plus receipts for tarping or emergency repairs. If moisture enters the attic, photograph the interior damage and note any discoloration or musty smells. Have a log ready that tracks the sequence of events: storm date, observed damage, and the timing of temporary fixes. Present this clear chronology to the insurer to avoid unnecessary delays.
Coastal exposure in Indian River County means certain roof assemblies hold up better under hurricane winds and salt air than others. Metal roofing often resists wind uplift when properly installed, while tile roofs must have secure underlayment and compatible fasteners to withstand vibration and shifting during storms. If you own tile or metal, confirm that any recent repairs used materials and fasteners rated for coastal environments. Document the manufacturing spec for those materials and keep a note of batch numbers and installation dates. Insurers look for evidence that the repair or replacement would meet current coastal wind requirements.
Damage can appear cosmetic from the ground but be structurally significant up on the ridge line. Local crews familiar with Vero Beach conditions understand how salt spray, humidity, and heat cycles affect sealants and flashings. When arranging inspections, request a thorough roof-wide assessment, not just a quick leak check. For temporary repairs, insist on watertight tarps secured with weighted materials and corrosion-resistant fasteners. Clear communication about the scope, anticipated timelines, and the sequence of repairs helps keep the claim moving during peak demand after summer storms.
My Florida Roofing Contractor
(772) 453-7219 myflroofingcontractor.com
2230 US-1, Vero Beach, Florida
4.9 from 326 reviews
My Florida Roofing Contractor is a trusted, locally owned roofing company proudly serving Vero Beach, and surrounding areas. With over 25 years of experience, we specialize in residential and commercial roofing, offering expert services in roof installation, repair, replacement, and maintenance. Our team is committed to delivering high-quality workmanship, honest estimates, and dependable customer service. Whether you're dealing with storm damage, roof leaks, or need a complete roof replacement, we provide durable and long-lasting roofing solutions to protect your home or business. Contact us today for a free roofing estimate in Vero Beach.

Orchid Island Roofing
(772) 643-5950 www.oiroofs.com
856 US-1, Vero Beach, Florida
5.0 from 53 reviews
Orchid Island Roofing is the premier roofing and repairs contractor on the Treasure Coast. Synonymous with superior quality and durability, its partnership with Sharkskin underlayment provides a 50-year materials warranty and a double 10-yr workmanship and labor warranty on concrete and clay tile roofs. With deep expertise in cedar shake, turada (wallaba) shake, composite Brava tile, metal, asphalt shingle, and flat roofing systems, Orchid Island Roofing excels at high-end, complex roofing projects for discriminating residential and commercial owners seeking to protect their real estate investments.

Hannabri Roofing
(772) 794-0408 www.hannabriroofing.com
2175 20th St Suite A, Vero Beach, Florida
5.0 from 42 reviews
Hannabri Roofing is experienced in all facets of roofing including residential and commercial roofs, roof repairs, re-roof’s and new construction. All of our roofers are full-time employees. We do not hire sub-contractors so you can be assured your roofing project will be handled by professionals who care about quality, craftsmanship and customer service. We are centrally located in Vero Beach and provide high-quality roofing services to all of the surrounding areas such as Orchid Island, Indian River Shores, Sebastian and Port St. Lucie.
Proline Roofing
(772) 678-0002 prolineroofingfl.com
4014 43rd Ave, Vero Beach, Florida
5.0 from 41 reviews
Proline Roofing is a trusted roofing company serving Vero Beach, Sebastian, Palm Bay, Fort Pierce, Melbourne, Port Saint Lucie, and the surrounding areas with over 30 years of experience. We specialize in providing high-quality roofing services, including installations, repairs, and maintenance for both residential and commercial properties. Our team is committed to delivering durable solutions with exceptional customer service. We also offer flexible financing options to help make your roofing project more affordable. Contact us today to learn more and get a free estimate.
Ridgeline Roofing
(772) 643-0745 ridgelineroofingfl.com
2604 Piper Dr, Vero Beach, Florida
4.9 from 111 reviews
Ridgeline Roofing offers Residential, Commercial, and New-Construction roofing services. We are a Florida Licensed and insured Roofing Contractor in Indian River County. Ridgeline Roofing is an all inclusive premium roofing company. From roof replacement, roof repair, to maintenance we are a well versed premium roofing contractor based in Vero Beach Ridgeline Roofing's 40 years of experience in Indian River County is a testament to our knowledge in roofing. Let us help you protect your home or business from mother nature! Ridgeline Roofing specializes in roofing such as Tile, Metal, Shingle, Flat, Cedar, TPO, and Coatings. We are available 24/7 Contact us today to set up an appointment to receive a free estimate or inspection of your roof.
Panda Roof & Contractors
(772) 758-8336 pandacontractors.com
4560 US-1, Vero Beach, Florida
4.7 from 244 reviews
With over two decades of experience, Panda Roof & Contractors is a trusted, family-owned company proudly serving Vero Beach, Indian River County, the Treasure Coast, and Brevard County. Since 2008, Panda has specialized in high-quality roofing, including tile, metal, and shingle systems, along with roof repairs, roof replacements, gutters, and solar attic fan installations. Our licensed and insured team is focused on long-term protection, insurance compliance, and storm-ready construction, ensuring every home receives durable craftsmanship and reliable service homeowners can trust. Panda Roof and Contractors is your go-to partner for expert home renovations.
Edificium Construction
(772) 361-2475 edificiumroofing.com
3101 Aviation Blvd Suite H, Vero Beach, Florida
4.7 from 75 reviews
When you hire Edificium Construction for your roofing needs, you're getting great service at an unbeatable price. We make it a priority to charge fair, honest prices for our roofing services. Right now, we're offering financing through Greensky, and we're running a special that'll save you $200 on reroofing services. Get ahold of us now to learn more about our prices and special offers.
Freedom Roofers
(772) 500-7663 www.freedomroofers.com
5575 US-1 #2, Vero Beach, Florida
4.7 from 64 reviews
Freedom Roofers is a locally-owned business who is part of our community. When you work with us, you’ll be working with roofers who see you as their neighbors. Those values guide everything we do. We install shingle roofs, metal roofs and flat roofs in Vero Beach, Sebastian, Indian River County, St. Lucie County and Brevard County. We will remove and replace your existing roof (aka "re-roof") or install a new roof when you build a home. Call 772-500-ROOF today for a free estimate.
Coral Coast Roofing
(833) 313-7277 www.coralcoastroofing.com
Vero Beach, FL
5.0 from 16 reviews
Where Coastal Living Meets Roofing Excellence! The Coral Coast Roofing mission is to provide more than just roofs. We are dedicated to crafting structures that symbolize security, shelter, and protection! As a Florida native, we feel it is our duty to strengthen and preserve our vibrant communities. "Having a roof over our head" means more than a just place to live; it means having a place to grow, build a family, and defend! Here at Coral Coast Roofing we know that we are only as strong as our neighbor and that everyone needs a sanctuary in the storm. Choose us for your next roofing project! - Sustainable Roofing Practices - Community-Driven Partnerships - 10 Year Workmanship Warranty - Designated Repair and Maintenance Specialists
Indian River Roofing & Repairs
806 11th Dr SW, Vero Beach, Florida
4.7 from 34 reviews
Your local Certified Roofing Contractor in Vero Beach, FL -- Give us a call at (772) 713-7216 or email contact@indianriverroofing.com anytime.
Barrier Island Roofing
(772) 925-9223 barrierislandroofing.com
2616 Quay Dock Rd, Vero Beach, Florida
4.7 from 31 reviews
Barrier Island Roofing is a trusted roofing contractor serving Vero Beach, FL, and surrounding areas. Specializing in roof installation and roof repair, they provide high-quality solutions for both residential and commercial properties. Their team of experienced professionals ensures each project is completed with precision and care, delivering durable and long-lasting results. With a focus on customer satisfaction, Barrier Island Roofing has earned a reputation for reliability and expertise in the roofing industry.
De'Rion Group
4625 45th St, Vero Beach, Florida
5.0 from 12 reviews
Certified General Contractor who specializes in New Construction as well as Roof replacement and repairs.
You'll see a clear spread in replacement costs here because coastal exposure, salt air, and hurricane risk push certain materials toward higher-end fasteners, flashings, and accessory upgrades. Typical local material ranges are about $350 to $700 per square for asphalt shingles, $600 to $1200 for metal, $900 to $1700 for clay tile, $850 to $1500 for concrete tile, $1800 to $3500 for copper, and $800 to $1300 for aluminum. These figures reflect the realities of keeping roofing systems durable against wind, salt, and occasional surge exposure along the Treasure Coast.
Asphalt shingles remain a common entry option, especially for budget-conscious reroofs, but coastal conditions can nudge you toward upgrading nails, sealants, and underlayment to improve wind resistance and longevity. Expect a wider window in coastal settings because local crews may select higher-grade underlayment and compatible flashing to deter salt-induced corrosion. Metal roofs offer durability and wind performance, with ranges that help you compare lighter gauge versus more corrosion-resistant alloys. For clay or concrete tile, the weight and wind-resistance features come with higher installation complexity and fastener requirements, which push the per-square costs upward. Copper and aluminum provide excellent longevity and low maintenance in corrosive environments, but the upfront price reflects the premium alloys and specialty installation they require.
Costs in Vero Beach can rise when coastal corrosion resistance requires upgraded metals, fasteners, flashings, or specialty accessories compared with inland jobs. In practice, that means you might see quotes that include stainless steel or coated fasteners, high-grade sealants, and corrosion-resistant edge details. If your home has an older or mismatched roof deck, expect additional prep work that adds to the total. A reroof in this climate often includes better attic ventilation considerations and moisture-control features to counter salty humidity, and those add-ons influence final pricing as well.
Pricing can also climb after major storm periods when reroof demand surges across the Treasure Coast and scheduling becomes tighter during weather delays. If you're replacing soon after a hurricane or just after the peak season, you may encounter longer lead times and higher labor costs. Build a contingency into your plan for possible delays and price fluctuations as crews shift to prioritizing emergency or rapid-response work. In any case, you'll want a detailed scope that specifies underlayment, flashing, and fastener standards to ensure the chosen material performs well in this environment.
Get a clear picture of your project costs upfront - no commitment required.
My Florida Roofing Contractor
(772) 453-7219 myflroofingcontractor.com
2230 US-1, Vero Beach, Florida
4.9 from 326 reviews
Proline Roofing
(772) 678-0002 prolineroofingfl.com
4014 43rd Ave, Vero Beach, Florida
5.0 from 41 reviews

Ridgeline Roofing
(772) 643-0745 ridgelineroofingfl.com
2604 Piper Dr, Vero Beach, Florida
4.9 from 111 reviews
A full roof replacement in this area typically requires a building permit through the City of Vero Beach building department or Indian River County, depending on the property's jurisdiction. The distinction matters because the enforcement of wind-resistance standards, hurricane clips, underlayment, and tile or metal attachment methods can differ between the two authorities. Before any tear-off begins, verify the correct agency and file the application early to avoid stalled work. In coastal zones, a permit review can catch requirements for fasteners, roof-to-wall connections, and mitigations that aren't obvious from a quick contractor read. Skipping or rushing this step often leads to delays, rework, or compliance issues that bite harder once the inspector visits.
Local roof inspections commonly occur after tear-off of the old roof, after underlayment and new roof installation milestones, and again at final inspection. The tear-off phase is typically checked for debris removal and proper edge protection, with emphasis on ensuring the surface is ready for new underlayment and flashing plans. After underlayment and first-pass roof installation, expect an inspect-and-approve focus on fastener patterns, nailing schedules, and the integration of underlayment with hips, ridges, and valleys. Final inspection locks in weatherproofing, flashing details around chimneys or vents, and the secure attachment of heavier assemblies such as tile or premium metal systems. Delays at any milestone can cascade into project timing problems and potential rework if the installed system doesn't align with permit specifications.
Plan review or material compatibility checks can be more likely here for heavier or specialized roof assemblies such as tile or premium metal systems. Given the barrier-island setting and salt-air exposure, authorities scrutinize wind-rated, corrosion-resistant fasteners, flashing materials, and the compatibility of underlayment with chosen coverings. If you're installing concrete or clay tile, or a premium metal option, expect additional calculations around wind uplift resistance and ballast or attachment method. Prepare product data and installation manuals for review, and be ready to adjust screws, clips, or sealants to meet the approved plan. Non-compliance can trigger rework or permit holds, especially in zones with stricter coastal wind requirements.
Vero Beach's hot, humid summers and frequent afternoon thunderstorms can shorten daily work windows and interrupt tear-off, dry-in, and inspection timing. Expect afternoon showers to roll in with little warning and push crews off the roof for safety. Plan a schedule that concentrates the most fragile steps-tear-off, underlayment placement, and adhesive cures-early in the day and builds in flexible buffers for rain delays.
High humidity in this market can affect underlayment handling and adhesive performance, making installation sequencing more sensitive during the wet season. Work in the cool, dry parts of the day when possible, and allow extra cure time for sealants and self-adhered membranes. If a humid stretch coincides with critical seal points, consider preconditioning materials and using products proven for tropical climates to avoid tackiness or slow bonding.
Homeowners trying to reroof before or during hurricane season may face more weather-related delays than those scheduling in lower-risk months when feasible. Target windows with drier forecasts and calmer winds, and coordinate with the crew to front-load teardown and deck preparations if storms threaten. Have a contingency plan for temporary roofing protection and moisture management so interior spaces stay dry if a storm interrupts work.
Prioritize roof edge protection, ridge vent and flashing readiness, and attic ventilation checks before any tear-off begins. Verify that fasteners and metal accessories are compatible with the existing structure and coastal exposure. Maintain clear communication with the contractor about weather pauses, material acclimation, and follow-up inspections to ensure a tight, durable dry-in once the wet season subsides.
Vero Beach sits in a Florida coastal insurance environment where wind-related roof claims are closely scrutinized and documentation standards are often stricter after storms. The pattern seen here is not just about a single event, but about how adjusters compare prior conditions, installed materials, and the traceability of recent work. A roof that shows weathering from salt air or a long stretch of high-wind seasons can invite more detailed inspections, and records that reflect steady maintenance can matter when questions arise about cause and responsibility after a claim.
Because some insurers have reduced coverage options or tightened terms in coastal markets, local homeowners often weigh roof age, permit history, and code-compliant replacement materials more heavily when deciding whether to repair or reroof. In this area, a reroof with durable, salt-tolerant materials can simplify future claims by presenting a clear, compliant, up-to-date installation. On the other hand, an older roof with gaps in documentation or mismatched components may trigger additional review or reluctance from a carrier.
Keeping organized records of inspections, photos, invoices, and permit close-out can matter more in Vero Beach than in lower-risk inland markets when pursuing claims or maintaining coverage. A well-kept file helps establish a coherent timeline of aging, replacements, and weather events, which can streamline communications with adjusters and reduce the friction that sometimes accompanies post-storm evaluations. In practice, this means compiling a simple, orderly archive before every major storm season.
Connect with contractors who help homeowners navigate the claims process from damage assessment to final approval.
My Florida Roofing Contractor
(772) 453-7219 myflroofingcontractor.com
2230 US-1, Vero Beach, Florida
4.9 from 326 reviews
Orchid Island Roofing
(772) 643-5950 www.oiroofs.com
856 US-1, Vero Beach, Florida
5.0 from 53 reviews
Proline Roofing
(772) 678-0002 prolineroofingfl.com
4014 43rd Ave, Vero Beach, Florida
5.0 from 41 reviews
The local market shows strong demand for re-roofing and quick-response service, so homeowners often prioritize contractors who can handle storm-driven schedules and cleanup efficiently. In coastal neighborhoods, a contractor's ability to mobilize after a tropical storm, protect landscaping, and manage debris removal is as important as the roofing work itself. Tile, metal, and storm repair are active specialties, so a good fit isn't about a one-size-fits-all roofer. The right team understands how salt air accelerates corrosion and how wind-driven debris can affect edge fasteners and underlayment.
Look for a crew with documented experience in the material you're considering, and ask for recent projects nearby that faced similar exposure. A reliable contractor will present a clear plan for tarp-downs, secure staging, and post-storm cleanup as part of the job sequence. Ask about the cadence of communication during a project and how storm alerts or scheduling changes will be handled. If the firm emphasizes responsiveness and can provide a realistic timeline for weather-impact days, that is a strong signal. Local firms often highlight a track record of coastal reroofs, and that local emphasis matters when dishing out the project scope.
Because tile, metal, and storm repairs are active specialties in this city, contractor fit matters more here than choosing a one-size-fits-all roofer. Look for a locally owned or family-owned firm with a verifiable coastal reroof portfolio and a willingness to tailor workmanship to the house type-whether a small bungalow with tile accents or a two-story home with mixed materials. A meaningful share of area contractors market themselves on those local roots, and that credibility tends to align with steadier crews and better long-term results.
Get a clear picture of your project costs upfront - no commitment required.
My Florida Roofing Contractor
(772) 453-7219 myflroofingcontractor.com
2230 US-1, Vero Beach, Florida
4.9 from 326 reviews
Proline Roofing
(772) 678-0002 prolineroofingfl.com
4014 43rd Ave, Vero Beach, Florida
5.0 from 41 reviews
Ridgeline Roofing
(772) 643-0745 ridgelineroofingfl.com
2604 Piper Dr, Vero Beach, Florida
4.9 from 111 reviews