Last updated: Apr 19, 2026
Terre Haute homeowners face a recurring spring pattern of hailstorms and high winds that can create sudden surges in roof damage inspections and replacement demand. When storms sweep through the Wabash Valley, shingles get dented, granules lift, and flashing can fail under heavy gusts. The risk isn't just cosmetic: hail-driven water intrusion and wind-driven lift can compromise underlayment and attic ventilation in a single afternoon. In a market where a single event can trigger a wave of roof-replacement inquiries, the timing of repairs matters. A damaged roof that isn't addressed promptly may worsen, accelerating interior damage and complicating future insurance interactions. This region's mix of older homes with asphalt and metal roofs alongside clay and concrete tile stock means different failure modes-softened shingles, punctures, cracked tiles, or loose fasteners-all needing quick-onset attention to avoid cascading problems.
Indiana insurers in storm-prone areas commonly require detailed photo documentation and on-site adjuster review for hail and wind claims before payouts or endorsements are finalized. In practice, that means you should be ready with clear, dated photos of every affected area: roof surface, gutters, fascias, vents, skylights, and interior signs of moisture. Photos should capture close-ups of hail hits, wind-caused uplift, and any granule loss, along with wider shots that establish the roof's overall condition and surrounding trees or property that might contribute debris. An on-site adjuster visit is often the gatekeeper to payment, so be prepared with a concise history of the storm, dates, and any prior issues. Delays can come from backlogs after a regional event, but thorough documentation can shorten cycles and reduce misinterpretation of damage. If a previous repair exists, document it as well to avoid disputes about coverage scope or material compatibility. The aim is to present a coherent, verifiable narrative that aligns with the insurer's standards for hail and wind claims, so the settlement can reflect actual loss rather than best-case estimates.
Because claim activity rises after regional storm events, Terre Haute homeowners often deal with tighter contractor scheduling and longer insurer response times during peak spring demand. This is not the time for ad hoc planning or last-minute shuffles. The best approach is proactive coordination: secure a reputable local contractor before the storm window closes, schedule a pre-storm inspection if there's an existing roof weakness, and establish a clear communication channel with the insurer early in the process. When storms hit, expect competition for crews to rise, and avoid overlapping projects that could stretch resources thin. It's smart to have a prioritized plan: address immediate water entry points first, then tackle secondary damage identified during daylight inspections, and finally complete a full roof replacement or repair scope once adjuster findings are available. If your preferred contractor has a backlog, consider a contingency plan with a trusted local alternative to prevent weeks of idle time that can permit further weather exposure or interior damage.
Begin with a documented baseline: take comprehensive photos of all roof surfaces, flashing, gutters, and any prior repairs. After a storm, perform a careful walkthrough, identifying suspect areas, loose shingles, and signs of granule loss. Create a simple damage log with dates, storm names if known, and a summary of observed issues. Notify your insurer promptly, but avoid signing off on repair authorizations without an adjuster review unless the situation is an urgent leak. Work with a local, insured contractor who understands the neighborhood's housing material mix and typical failure modes. In the days after a storm, keep access clear for inspectors and ensure there is a reliable point of contact for coordination between the insurer, the adjuster, and the contractor. This targeted, organized approach helps prevent claim delays and accelerates the path to a durable, code-compliant repair.
Connect with contractors who help homeowners navigate the claims process from damage assessment to final approval.
All - N -1 Roofing & home repairs
3306 N 11th St, Terre Haute, Indiana
4.7 from 27 reviews
Rogers Home Improvement
(812) 238-0154 www.rogershomeimprovements.com
4200 N 13th St, Terre Haute, Indiana
4.4 from 92 reviews
Poplar Roofing & Construction
(812) 298-6242 www.terrehauteroofingcompany.com
Terre Haute, Indiana
4.4 from 16 reviews
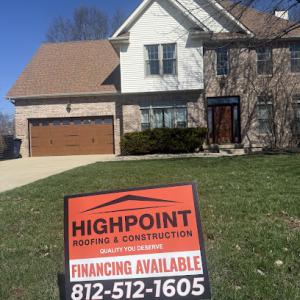
Highpoint Roofing & Construction
(812) 512-1605 choosehighpoint.com
191 Harding Ave Suite A, Terre Haute, Indiana
5.0 from 27 reviews
Highpoint Roofing & Construction provides reliable residential and commercial roofing and construction services. We specialize in roofing, exterior improvements, delivering quality craftsmanship, clear communication, and long-lasting results on every project.
Honest Abe Roofing Terre Haute
(812) 562-5994 www.honestaberoofing.com
1700 E Woodsmall Dr, Terre Haute, Indiana
4.4 from 889 reviews
Honest Abe Roofing has been installing, repairing, and maintaining residential roofs since 2007. It is our goal to bring a customer service focus to the roofing industry. We are aware that we are providing a very important and necessary service to many homes, so we work incredibly hard to provide the best possible roofing at the most competitive pricing. All of our customers are very important to us, and we want to give them a perfect roof to protect their home and keep them comfortable. Each of our professionals is fully certified and has passed extensive background checks and drug tests, so you can rest easy knowing you have a completely reliable team of experts working on your home.
Midwest Contracting
(812) 478-2999 www.midwestcontractinginc.com
1925 S 13th St, Terre Haute, Indiana
4.8 from 28 reviews
We specialize in roofing, concrete, and gutters, but can handle a wide range of projects depending on your needs. We believe our duty is to help our customers, not upsell them on services and products they don't need. That's why when you call us, you will get individualized service and work in partnership with our team.
All - N -1 Roofing & home repairs
3306 N 11th St, Terre Haute, Indiana
4.7 from 27 reviews
All -N-1 roofing is a women owned roofing and general contracting company that provides quality home services to Terre Haute and surrounding areas .We pride ourselves as a local operated company which keeps our money in our community. We offer military and emergency personal discounts .We don't spend money on big ads, we donate back to our local people and children. We do Roofing, siding, Masonry ,chimney take downs ,interior, exterior, fencing, custom decks, additions and more. We HONNOR our warranty's and stand behind our work, we are a 1 call 4 all, FREE ESTIMATES CALL US TODAY All-N-1 is a trusted Roofing and home repair provider for all your renovation needs. Smart Safe and effective BUILT on integrity and honesty in everything we do.

Rogers Home Improvement
(812) 238-0154 www.rogershomeimprovements.com
4200 N 13th St, Terre Haute, Indiana
4.4 from 92 reviews
Rogers Home Improvement has been a trusted Terre Haute roofing company for over 25 years. We proudly serve Terre Haute, the Wabash Valley, and nearby Eastern Illinois, providing high-quality, affordable roofing and home improvement services. Our expert team is accessible 24/7 to help you through an emergency restoration or urgent home repair, and our unparalleled service has helped us build an excellent reputation in this community over the last two and a half decades. We’re proud to be a locally owned and operated family-run business here in Terre Haute. Ready to get started? Call us at (812) 238-0154 for a FREE quote. Ask us about our financing options.
Wilson's Roofing & Construction
(812) 264-0848 www.roofingterrehaute.com
2430 Hulman St, Terre Haute, Indiana
4.6 from 27 reviews
Welcome to Wilson's Roofing Construction located in Terre Haute, IN, where you will get the most professional roofing services around! Our roofing contractors will do their best to give you the roof you've always wanted. We service both residential and commercial properties and can help you with many other services in addition to roofing.

JC Roofing & Construction
(812) 281-1834 jcroofingandconstruction.com
Terre Haute, Indiana
4.6 from 18 reviews
Protect your largest investment with our reliable roofing services. We are a locally owned and operated roofing company currently serving Terre Haute, IN and surrounding communities. If you want to make your roof last as long as possible, it is vital that you never put off a roof repair. Small issues with roofing become big issues in a hurry. No matter how major or minor the repair you need, we are here to help. We offer roofing contracting, roofing replacement, and metal roofing.
Paitson Roofing & Siding
(812) 232-2869 paitsonroofingandhomeimprovement.com
34 N 12th St, Terre Haute, Indiana
4.5 from 17 reviews
Paitson Roofing was established by Frank and Irene Paitson in 1950, located at 34 N. 12th St. in Terre Haute, IN. Their son Bill and wife Rita Paitson presently own and operate the business. Bill has been active in the company for 58 years. Paitson Roofing & Siding CO. INC. provides roofing, siding and home improvement services to the Terre Haute, IN area.
Poplar Roofing & Construction
(812) 298-6242 www.terrehauteroofingcompany.com
Terre Haute, Indiana
4.4 from 16 reviews
When you need a roofing and construction company that puts craftsmanship and customer satisfaction first, look no further than Poplar Roofing & Construction, LLC. We are the premiere roofing company located in Terre Haute, IN – providing quality work at affordable prices. We are locally owned, licensed, insured, and bonded. We offer thorough inspections, evaluations, and consultations… delivering the perfect solution for your unique situation. Our roofing repairs, installations, and maintenance are top quality. We always do work the right way, and within the scope of your schedule and budget. For better, faster, and friendlier service, contact Poplar Roofing & Construction, LLC.
Ideal Roofing
400 Wabash Ave #120, Terre Haute, Indiana
4.4 from 9 reviews
Ideal Roofing is a full service roofing company located in the Terre Haute, IN area. We are licensed, bonded and insured, serving Terre Haute, IN and surrounding areas. If you are in need of any type of roofing repair or installation, give us a call today.

Fydea
1674 E Davis Dr, Terre Haute, Indiana
5.0 from 3 reviews
Combining years of experience with a dedication to client satisfaction, Fydea, LLC has established itself as the local leader in Roofing Company, Metal Roofing, Roofer.
Art Roofing Construction
(812) 241-6477 www.facebook.com
Terre Haute, Indiana
4.2 from 5 reviews
A home’s roof is its first barrier against adverse weather. Keeping your roof in excellent shape protects your home from water intrusion and the damaging effects of the sun. We help your home stay safe and cosy by providing professional roofing service. Our experts use products of the best quality only, and guarantee the excellent results.
Replacement projects tend to run smoother when you choose milder windows in the year. In this area, planning for spring or fall helps dodge winter cold and summer humidity that can stall crews or complicate sealant curing. If a window project must push into late fall, expect extra attention to moisture control and flashing around openings to guard against late-season freeze-thaw cycles. The goal is to complete installation during a stretch of reliably moderate temperatures, so interior finishes and underlayment stay stable and dry.
Cold winters raise concerns about cold-soaking and drafts if openings aren't properly sealed, while summer heat and humidity can affect caulking, composites, and sun exposure on frames. Look for windows with high-performance glazing and well-rated low-emissivity coatings to minimize heat gain and condensation risk on humid days. In areas with substantial temperature swings, choose frames with stable materials and good thermal breaks to reduce interior temperature shifts and minimize stress on the sashes. Also pay attention to drainage around the sill and proper installation of exterior flashing to direct water away from the wall assembly.
Hail and wind events common to spring storms make impact resistance a practical consideration. If the home faces frequent hail, prototype or select impact-rated glass or laminated glass options in areas prone to direct hits. For wind-prone elevations, ensure the installer uses robust glazing beads and weather-tight seals that resist wind-driven infiltration. A well-insulated frame with tight, continuous seals helps prevent drafts, moisture intrusion, and air leakage that can worsen energy bills and occupant comfort after a hailstorm or strong gust.
A proper installation matters as much as the window itself. Ensure that the installer follows flashing best practices for the exterior opening, with a continuous drainage plane and properly integrated sill pan. In late-season projects, protect interior spaces from dust and moisture, and verify that drywall or plaster around the opening remains dry before applying finishing materials. For homes with older or uneven framing, expect a careful assessment of square openings and, if needed, targeted shimming to preserve straight operation of sashes and reliable seals in temperature extremes.
Moisture management is key in this market, where high humidity summers can creep into wall cavities if openings aren't perfectly sealed. Choose a window with a durable, moisture-resistant frame core and compatible sealants. After installation, run a thorough blower-door style test or a basic air-leak check to confirm tightness around the frame. Consider adding a small dehumidification plan for damp months to minimize condensation on interior glass, which can obscure views and damage sills over time.
Storm season can bring questions about post-install documentation or claims for incidental storm damage. Keep a clear record of the window model, installation method, and any warranty details. If a hail event occurs, note any impact marks on existing openings and discuss with the installer how to ensure the new openings are prepared to resist future impact while maintaining ventilation and energy performance. This practical record helps in managing future weather-driven concerns without delaying comfort upgrades.
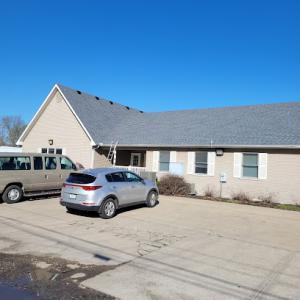
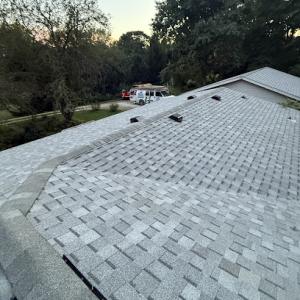
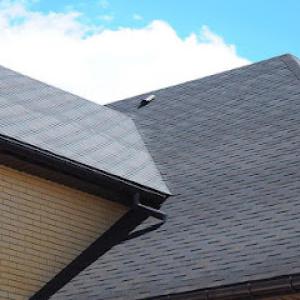
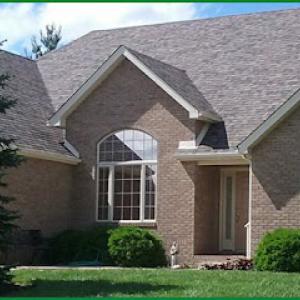
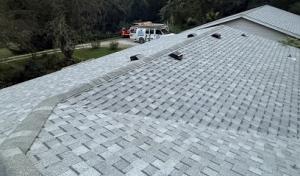
Asphalt shingles remain a dominant choice for re-roof projects in this market because they fit the local re-roofing market and align with typical home stock. They handle the freeze-thaw cycles, spring hail, and summer heat reasonably well when installed with proper underlayment and ventilation. Look for asphalt shingles with good impact resistance ratings and a stiff, high-wire wind uplift design to stand up to spring wind events. In this area, you'll often see shingles chosen with stronger adhesive seals and thicker singles to reduce blow-off risk after hail strikes. Pair a shingle system with a continuous ridge vent and well-sealed penetrations for better moisture management during rapid temperature swings. Remember that after a hail event, it's the wind-driven damage and hidden water intrusion that create the most headaches, so installation quality and a solid attic ventilation plan are worth prioritizing.
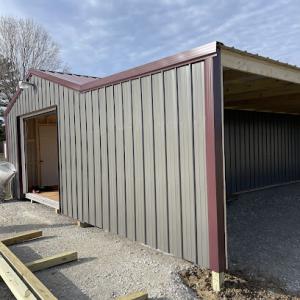
Metal roofing has a meaningful specialist presence here, reflecting homeowner interest in durability through freeze-thaw winters, heavy rain, and storm exposure. Steel or aluminum panels with concealed fasteners or engineered standing-seam profiles tend to perform well under hail and wind loads when properly installed. A metal roof often offers superior hail resistance, but the fastener pattern and panel edge detailing matter for long-term performance. If you're weighing metal, consider a system that includes a backer underlayment rated for metal roofs and a forgiving安装 detail at eaves and gables to prevent ice damming and condensation build-up in shoulder seasons. A skilled installer should address panel alignment, sealant choices, and flashing around chimneys, skylights, and roof-to-wall transitions to minimize edge leaks after storms. In a wind-driven climate, proper attic ventilation remains essential to avoid condensation and to help temperatures stay balanced, which can extend the life of any roof system.
Heavier systems such as clay tile, concrete tile, and slate are available in this market, but their use is more selective because weather and replacement economics often keep homeowners focused on practical re-roofing options. If a heavier option is considered, assess the structural capacity of the existing roof deck and the load impact on soffits and eaves. These materials can deliver long service life and a distinct aesthetic, yet they demand precise roof framing, professional tile or slate installation, and careful detailing where rainfall, hail, and wind meet roof edges. Ventilation needs remain crucial because dense tile or slate layers can trap heat and moisture if the attic is not properly vented. For storm-damaged homes, a conservative approach favors familiar, repair-friendly systems that still meet performance goals while avoiding future vulnerability to hail and wind-driven debris. In all cases, ensure that flashing around transitions, vents, and chimneys is upgraded to maintain a weather-tight envelope after heavy storms.
Explore specialists in steel, aluminum, and standing seam metal roofs built to last 50 years or more.
Honest Abe Roofing Terre Haute
(812) 562-5994 www.honestaberoofing.com
1700 E Woodsmall Dr, Terre Haute, Indiana
4.4 from 889 reviews
Wilson's Roofing & Construction
(812) 264-0848 www.roofingterrehaute.com
2430 Hulman St, Terre Haute, Indiana
4.6 from 27 reviews
JC Roofing & Construction
(812) 281-1834 jcroofingandconstruction.com
Terre Haute, Indiana
4.6 from 18 reviews
Spring hail and wind can tighten contractor calendars in this area, and that spike in demand shows up in pricing and scheduling. In practice, you'll see faster turnarounds on non-emergency repairs, but full replacements often push into the middle of the warmer months when crews are chasing datter storms and the roofing crews are booked out. When a major hail event hits, expect material suppliers and crews to run at higher capacity stress for a week or two as properties in the neighborhood all seek estimates at once. Planning ahead, lining up references, and securing a start window early in the season helps keep the project moving.
Costs in this market move with the material you choose. Asphalt shingles typically run from 350 to 700 USD per square, a spread driven by quality tier, warranty, and local disposal costs. Metal roofing sits higher, usually 600 to 1100 per square, with lighter panels sometimes pushing the price toward the top end if a retrofit involves significant detailing. Clay tile ranges from 900 to 1500 per square, while concrete tile sits around 800 to 1200 per square. Synthetic or composite shingles land in a middle ground, about 550 to 900 per square, and slate ranges from 1200 to 2300 per square. For a homeowner, the difference isn't just upfront cost-it affects wind resistance, hail performance, and long-term maintenance in our variable climate.
Terre Haute experiences a broad swing in weather, so your project plan should account for months with unpredictable precipitation and heat. A straightforward tear-off with a straightforward layer replacement tends to stay on one track, but a more complex roof with many penetrations, venting needs, or insulation work can push the schedule into storm-avoidance windows. If shingles or tiles arrive delayed by a weather lull or supply hiccup, expect staggered start times or partial-day tasks to keep crews moving. A clear, written scope that covers tear-off, underlayment, flashing, venting, and waste removal helps prevent sticker shock when crews begin the job.
Ask for a line-item estimate that separates disposal, underlayment, and flashing from the core roofing material. This makes it easier to compare bids when hail season prompts competitive pricing or after-event discounts appear. Consider long-term value: higher upfront costs on metal, tile, or slate can yield better wind resistance and longer life, which matters in a storm-driven market. Finally, remember that the local market's volatility means you'll occasionally see pricing shift between quotes as crews adjust to demand.
Get a clear picture of your project costs upfront - no commitment required.
All - N -1 Roofing & home repairs
3306 N 11th St, Terre Haute, Indiana
4.7 from 27 reviews
Rogers Home Improvement
(812) 238-0154 www.rogershomeimprovements.com
4200 N 13th St, Terre Haute, Indiana
4.4 from 92 reviews
Poplar Roofing & Construction
(812) 298-6242 www.terrehauteroofingcompany.com
Terre Haute, Indiana
4.4 from 16 reviews
In this region, a full roof replacement is not treated as a no-paperwork job. In Terre Haute, the typical process starts with a formal building permit rather than assuming you can proceed on authority of a few signatures or a contractor's word. That permit helps ensure the project aligns with local setbacks, zoning considerations, and subdivision rules, especially in neighborhoods with older homes or historic overlays. The permitting system also creates a documented record that can be useful if storm damage is later involved in an insurance claim or if questions arise about workmanship quality and code compliance.
Before any shingles come off or underlayment goes down, a permit application is usually submitted describing the project scope and the chosen roofing materials. Homeowners or contractors can initiate this paperwork, but the key is to provide a clear description: the number of squares being replaced, the type of roofing material, any venting or chimney work, attic insulation considerations, and a plan for debris containment. In practice, a simple, straight-ahead scope speeds up the review, while broader changes-such as transitioning to a metal roof or adding a ventilation retrofit-might prompt additional questions from the city building department.
Inspections are a steady rhythm in Terre Haute's permit process. Inspections commonly occur at key milestones to confirm safety and code compliance before proceeding to the next phase. A typical sequence includes an underlayment or installation review, where inspectors verify proper nailing patterns, underlayment installation, flashing details, and venting arrangements. The final inspection confirms that the project has been completed to code, and that all components meet local requirements for weather resistance and detailing. If plan-review time is involved, the permit issuance can experience a short lead time, so budgeting a bit of flexibility around the start date helps keep the project on track.
Because spring hail and wind can drive urgent repairs, it's helpful to align roof work with the permitting timeline rather than rushing to cover a damaged area. A permit provides formal documentation for the work performed, which can be important when an insurance review occurs after a storm, especially when the scope changes from a temporary tarping to a full replacement. Coordinating with the roofer to schedule inspections at the right milestones helps avoid delays that could extend exposure to weather or affect venting and drainage performance. If you are transitioning from one system to another (for example, upgrading from traditional asphalt to a metal roof), expect extra scrutiny on the installation details, flashings, and attic ventilation, all of which influence long-term durability in the local climate.
A practical tip: keep a running file of the permit number, inspection appointments, and any city requests for plan clarifications. Sharing this information promptly with your contractor can reduce back-and-forth time and help ensure that the project moves smoothly through the inspection stages.
Winter in this area brings ice damming that can back water up at eaves and stress shingles, underlayment, and edge details. When cold snaps meet melting daytime temperatures, meltwater refreezes at the eave and creates a dam that pushes water under the roofing system. Over time, this can deteriorate sealant, loosen shingles, and force leaks into attic spaces. The key is to keep snow melt moving freely off the roof and to ensure the edge details are sound so that ice hasn't created a stubborn barrier against drainage.
Snow load is a real seasonal concern in this region because repeated winter accumulation can expose weak decking, aging materials, and prior repair shortcuts. A load that seems manageable after a light storm can add up quickly during a heavy or repeated event, especially on shallower pitches or older roofs. If there are soft spots, creaking sheathing, or visible sagging, those signs point to compromised structure that should be inspected before the next freeze cycle. Proactive checks can prevent sudden failures once warming days return and melt cycles intensify.
The city's freeze-thaw cycle into late fall and winter makes flashing transitions and moisture entry points more likely to fail if the roof is already compromised. Repeated freezing expands and contracts joints, vent penetrations, and step flashing along walls and chimneys. When flashing is compromised, water can find its way into ceilings, walls, or attic cavities long after a storm has passed. Look for hairline cracks around flashing, loose fasteners, or missing sealant, and address them before the thaw begins to reduce the chance of cascading leaks.
During dry spells, inspect attic insulation and ventilation. Improper ventilation traps warm, moist air that accelerates ice dam formation and accelerates deterioration of decking and underlayment. In the attic, ensure soffit vents are clear and the baffles allow airflow to reach the ridge vents or exhaust vents. Outside, keep gutters clean, ensure downspouts direct water away from the foundation, and verify that drip edges are secure and properly aligned. If a leak occurs, document the damage with photos and note the exact location on the roof-this information helps when coordinating with a local contractor during the spring thaw, when many homeowners are seeking timely repairs. Terre Haute winters demand attention to these patterns, because a small leak today can become a substantial repair tomorrow if the cycle repeats without intervention.
When you can't wait, these contractors offer fast response times to stop leaks and prevent further damage.
All - N -1 Roofing & home repairs
3306 N 11th St, Terre Haute, Indiana
4.7 from 27 reviews
Rogers Home Improvement
(812) 238-0154 www.rogershomeimprovements.com
4200 N 13th St, Terre Haute, Indiana
4.4 from 92 reviews
In a market with frequent re-roofing and storm-related replacements, you should distinguish between material coverage from the manufacturer and the workmanship promises offered by the installer. Manufacturer warranties typically back the product itself-shingles, metal, or tile-against defects in materials or certain performance claims. Contractor warranties cover the quality of the installation, including how the roof was sealed, fastened, and integrated with valleys, penetrations, and attic ventilation. For homeowners, this split matters because weather events in this area can blur the line between a defective product and an installation issue when leaks show up after a storm. A reliable plan accounts for both layers and who stands behind them after the hail and high winds knock on your door.
Manufacturer warranties often specify that coverage travels with the roof material and can be affected by proper maintenance and installation. In a storm-driven market, hail and wind exposure increase the importance of understanding what qualifies as a warranted defect versus damage from weather or improper care. Look for transferability to future homeowners, as well as conditional terms that may require particular underlayment, nail patterns, or roof deck preparation. Exclusions are common for damage caused by insufficient attic ventilation, standing water, or impact from debris that wasn't anticipated by the product guidelines. You want the language that clearly ties the defect to the product itself, not to a lapse in maintenance or an installation misstep.
A noticeable share of local contractors market warranty-backed work, reflecting homeowner concern about post-storm callbacks and long-term leak responsibility. Workmanship warranties should specify duration, what is covered (seams, fasteners, flashing, underlayment), and what voids coverage (missed nail patterns, improper sealant, or neglected maintenance). Confirm whether the warranty transfers if you sell the home and how service is requested after a storm event. Favor promises that include on-site inspections after hail seasons or wind events, with a clear timeline for repairs if a leak reappears. A solid warranty plan reduces the burden when the weather darts back in with new surprises.
Keep a dated file of all communications, inspection notes, and repair receipts, plus weather reports from nearby stations and any storm damage photos. When a hail event happens, arrange a prompt inspection and request a written warranty summary that ties responsibilities to specific conditions. This local pattern-where storms drive both need and scrutiny-means you'll benefit from a clearly defined path for post-storm callbacks and a straightforward claim process.
In this market, claim handling for hail and wind often hinges on clear photo evidence and the adjuster's on-site inspection. Terre Haute homeowners should document roof conditions before and after storms because Indiana claim practices commonly rely on visuals to separate pre-existing wear from storm damage. Keeping a thorough record helps ensure repairs are aligned with actual damage and not mistaken as routine aging.
The local storm pattern means you may need to move quickly to capture shingle bruising, lifted tabs, flashing damage, and interior leak evidence before temporary repairs begin. After a hail event, take exterior photos from multiple angles-roof planes, valleys, edges, and vents. If access is limited, use binoculars from ground level to flag affected areas. Inside the attic, photograph any staining, condensation, or dark spots near penetrations, especially if a roof deck leak is suspected. Do not rely on memory; timestamp images and label them by date and location.
Keep a dated log that tracks weather conditions, timing of the storm, and observed damage. Include close-ups of bruising, granule loss, and any loose or displaced flashing. Photograph gutters and downspouts for denting or kicked-off fasteners. Capture a wide shot showing the entire roof silhouette for scale. When contractors begin temporary repairs, document the scope and any steps that impact the property, such as tarping or debris removal. Preserve all receipts and notes related to early mitigation.
If an adjuster is scheduled, share your photo log and attic findings in advance. After the visit, compare notes with the adjuster's report and your own records. Given the timing dynamics after a regional storm-adjuster scheduling, contractor demand, and permit lead times-accurate documentation helps protect your claim and keeps repair timelines realistic. In a storm-driven market, fast, organized evidence supports smoother decisions and minimizes back-and-forth.
Connect with contractors who help homeowners navigate the claims process from damage assessment to final approval.
All - N -1 Roofing & home repairs
3306 N 11th St, Terre Haute, Indiana
4.7 from 27 reviews
Rogers Home Improvement
(812) 238-0154 www.rogershomeimprovements.com
4200 N 13th St, Terre Haute, Indiana
4.4 from 92 reviews
Poplar Roofing & Construction
(812) 298-6242 www.terrehauteroofingcompany.com
Terre Haute, Indiana
4.4 from 16 reviews