Last updated: Apr 19, 2026
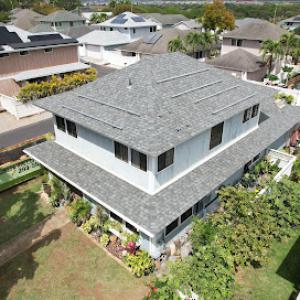
Kailua sits on Oahu's windward side, where trade-wind-driven rain and persistent humidity create more moisture stress than leeward Honolulu neighborhoods. The salt air that drifts off the offshore reefs bites into metal fasteners, flashing, and connectors if corrosion-resistant components aren't chosen and kept in good condition. The result is faster wear at vulnerable points, especially on roofs that face open, exposed edges and frequent spray from passing squalls. Edge protection, flashing attachment, and uplift resistance must be prioritized because tropical storms and robust tradewinds can surge moisture and wind pressure in a single gust.
Beginnings of trouble show up at seams, hips, ridgelines, and along roof-to-wall transitions. In Kailua's climate, moisture can travel under shingle or tile coverings and lift or loosen fasteners when edges are not securely sealed. Look for rust in metal fasteners, flashing corners, and connectors, even if they look intact from a distance. Pay particular attention to low-slope sections near the eaves and any penetrations such as vents or skylights, where wind-driven rain tends to pool and seep. If you notice any staining, soft spots, or a slight wobble in flashings after a strong gust, treat it as a red flag requiring immediate attention. A proactive approach means inspecting after winter storms and after any hurricane season events, then acting before hidden moisture penetrates substrate.
Coastal Kailua roofs that endure salt spray demand components with robust corrosion resistance, especially for edge metalwork and flashing. Metal fasteners, clips, and flashing should be rated for salt-laden air, with coatings designed to resist pitting and crevice corrosion. For shingle and tile systems, ensure the underlayment and drip edge are compatible with high humidity and can tolerate frequent wetting without swelling or breakdown. Sealing at penetrations must use moisture-compatible sealants that maintain elasticity through heat, humidity, and salt exposure. If choosing clay or concrete tiles, verify that the installation allows for ample drainage and that edge fasteners are intentionally secured to resist uplift in gusty winds. Synthetic or composite options can offer good moisture resistance, but must still employ high-quality flashing and a reliable underlayment system to withstand Kailua's year-round humidity.
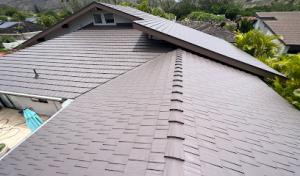
Edge securement is not a cosmetic afterthought; it is the first line of defense against uplift. Use continuous eave and rake fastener patterns with corrosion-resistant hardware, and upgrade to washers and sealants rated for coastal salt exposure. Flashings around valleys, skylights, chimney penetrations, and wall terminations should be integrated with tight joints and backing that resists water intrusion even when wind pushes water upward along the roof plane. Pay extra attention to roof-to-wall transitions where wind can funnel pressure; ensure step flashing is continuous and sealed, with no gaps that moisture can exploit. Vent and cap installations must be sealed and vented to prevent wind-driven rain from forcing water into the attic space. In gusty conditions, consider additional counterflashing and an uplift-resistant method that ties into the roof deck with a continuous, bonded seal.
Set a routine to inspect after every significant storm or strong trade-wind event. Look for loosened edge metalwork, disturbed flashing, and any signs of rust or corrosion on exterior components. Clean debris from eaves and gutters promptly, as clogged drains can trap moisture at the roof edge and accelerate deterioration. If you detect slow leaks or damp insulation during seasonal checks, address them immediately rather than waiting for a rainy season to compound the problem. In Kailua's climate, timely maintenance isn't optional-it's the difference between a sound roof and recurring interior water damage that corrodes metal, corrodes confidence, and shortens the roof's life.
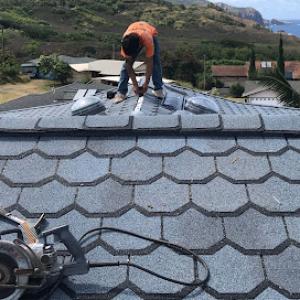
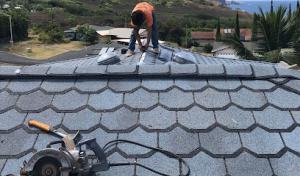
Asphalt shingles remain a practical choice for many homes because they're quick to install and widely available. In salt-air coastal conditions, you'll want to pair them with a high-quality underlayment and corrosion-resistant flashing. Choose shingles with a longer warranty and reinforced edges to resist wind uplift, and consider a sealed, vented attic space to help manage moisture. Pay attention to the valley details and edge trim, since wind-driven rain can exploit gaps there. Regular inspections after heavy trades-wind events help catch fastener loosening or flashing corrosion before leaks start. For homes with flat or low-slope sections, a reinforced membrane or a lid-over roof detail can reduce water wicking along the eave line.
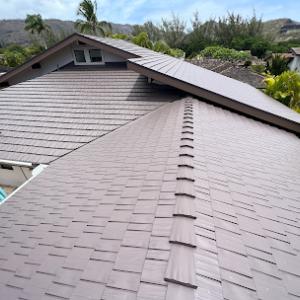
Metal roofs can perform exceptionally well in this climate when corrosion resistance is built into the system. In practice, performance hinges on the panel coatings, fasteners, and flashing rather than panel color or profile alone. Look for coatings rated for marine atmospheres and fasteners with corrosion-resistant finishes that extend beyond the panel surfaces. The edge detailing is critical where wind can lift edges; sealed panel joints and properly integrated drip edges help shed salt spray. Ensure the roof has a robust underlayment and a sound vapor barrier to limit condensation on humid nights. Metal is a good fit for sun exposure and wind, but maintenance focus should stay on corrosion-prone connections and any drilled penetrations around skylights, vents, or HVAC curbs.
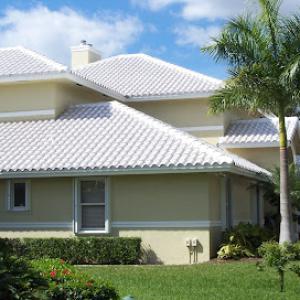
Tile roofs add weight and character, but weight means structure and installation details matter more here than with lighter systems. In Hawaii, tile roofs rely on solid underlayment to manage moisture transfer from the warm, salty air and frequent trade-wind moisture. Pay close attention to underlayment type, nailers, and wind-exposed edge details to prevent lift or water intrusion. Clay and concrete tiles perform best when fasteners and battens are designed for coastal wind loads, and when there's a continuous waterproof membrane beneath. Regular inspections should focus on cracked or chipped tiles, misaligned edges, and any signs of moisture intrusion at eave edges or near vents and chimneys. The weight of tile makes roof deck support and tie-downs worth confirming during upgrades or repairs.
Wood products bring a distinct look but face heightened moisture pressure in a wetter windward climate. Regular moisture management is essential: ensure proper ventilation, use rot-resistant fasteners, and maintain a durable sealant or finish that withstands UV exposure and salt spray. Edges and overhangs should have solid drip details to shed spray away from the deck. Wood shingles and shakes require more frequent maintenance than many other options, including timely replacement of sun-checked or water-stained pieces and re-sealing of any exposed fastener areas. If you opt for wood, consider factory-finished, rot-resistant stocks and a maintenance plan aligned with seasonal humidity cycles.
Synthetic or composite shingles offer a broad range of looks with potentially better moisture resistance and lower weight than traditional tiles. Look for products formulated to resist UV degradation and salt spray, with a trusted warranty that covers impact and color stability. Edge and flashing performance remain critical, especially along rake lines and hip ridges where wind exposure is highest. Composite options often pair well with coastal underlayment systems, providing a stable, low-maintenance alternative to natural materials while still delivering curb appeal. Regular inspections after storms help verify sealant integrity at transitions and ensure there's no moisture buildup behind the fascia or soffits.
Drier months are the practical default for a full replacement in this windward coastal neighborhood. The wetter season from November through March raises the risk of delays and exposed-deck moisture, and it can stretch a project well beyond the original timeline. Plan your tear-off, dry-in, and final sealing to stride through sustained dry periods of at least a few days in a row. If you're aiming to avoid weather-induced setbacks, align the main replacement window with the drier stretch and keep a contingency plan ready for unexpected showers.
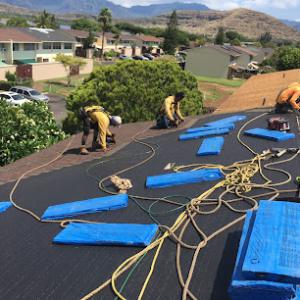
On Oahu's windward side, even routine showers can interrupt tear-off and dry-in sequencing. Staging becomes more than just logistics; it's a protective strategy. The deck and underlayment must stay dry long enough to let underlayment substrates acclimate and to prevent premature moisture intrusion. Work with your contractor to identify two or three potential weather blocks, rather than one fixed date, so crews can pivot quickly when a passing shower rolls through. Consider high-up, shaded staging areas and tarps that can be deployed with minimal disruption if a brief shower appears. The goal is to secure a dry-in window that survives typical Kailua showers without forcing a rollback of progress.
Year-round heat and UV in Kailua continue aging exposed roofing surfaces even outside storm periods, so delaying replacement after visible wear can compound leak risk. If signs of wear are accelerating, a cautious but timely replacement reduces the chance of moisture infiltration during a stretch of unpredictable weather. Balance the urgency of replacing compromised sections with the reality of wind-driven squalls and humidity that can affect adhesive cures, fastener seating, and flashing integrity. Make decisions with a clear plan for a dependable dry-in sequence: tarped work zones, protected openings, and a clean, dry substrate ready for underlayment and shingles when weather allows.
Reach out to a trusted local contractor who understands the typical Kailua weather pattern and can forecast micro-climates within your neighborhood. Ask for a phased schedule: a tear-off block, a dry-in block, and a final seal block, each with built-in weather contingency. Ensure the contract specifies sheltered staging and protected access from outdoor elements, so interior spaces stay dry during the process. Confirm that the plan includes a daily weather check and a rolling schedule update, so a rain event doesn't derail progress more than necessary. For homes that sit close to salt air exposure or with salt-laden mist infiltrating exterior surfaces, emphasize rapid tarp deployment and frequent inspection of exposed fasteners and flashing as soon as work resumes after a pause.
Attyx
Kapaa Quarry Pl Unit 5007, Kailua, Hawaii
3.5 from 25 reviews
Elevate your Hawaii home with ATTYX, your premier provider for roofing, HVAC, and solar solutions. Enjoy quality services without upfront costs, ensuring comfort and protection for your home. Our comprehensive offerings include expert roofing solutions, hassle-free solar panel services, and efficient HVAC installations tailored to Hawaii's climate. From the Big Island to Oahu, our local teams provide professional services, ensuring your home withstands the elements. Upgrade for $0 out of pocket with our financing options and increase your home's value effortlessly. Request your quote today and connect with savings!
Oahu Roofing Repairs Kaneohe
(808) 825-6420 oahu-roofing.com
Serving
5.0 from 28 reviews
We are Roofing & Repairs located in Kaneohe, HI. Our services include roof inspections, leak repairs, roof repairs, partial re-roofs, re-roofs, new roof installations. We are experienced and manufacturer certified installers for metal roofs, asphalt shingle, cedar shake, ceramic and concrete tile, composite, Japanese ceramic tiles, copper, slate, GACO, torch down, EPDM, and other fluid applied single membrane roof coatings. Roofing contractors on Oahu understand the importance of a reliable roof to protect our homes from rain and wind. Take no chances on your roof and always make repairs or replacements before more damage happens. Give us a call when you need a Honolulu roofing company & we'll provide you with our always free estimate.
Gold Pacific Roofing
(808) 744-1476 www.goldpacificroofing.com
Serving
5.0 from 35 reviews
Oahu's Best Roofers! Residential Roofing. Our Roofing Technicians Specialize in Roofing Restoration and Full Replacement. A Local Hawaiian Roofing Company that puts its Heart & Soul into each Roof Project. 100% Locally Owned and Ohana Operated all of Roofers are Insured. Our Roof Replacements come with a 7 year labor warranty. Call us today to Schedule your Free 10 minute Roofing Inspection.
All Around Roofing & Waterproofing
(808) 226-8864 aaroofinghawaii.com
Serving
4.9 from 110 reviews
For over 15 years, All Around Roofing & Waterproofing has made a name for reliable roof repair and replacement services to residents and businesses in Kailua. Our focus on hard work and perseverance has earned us a solid reputation as one of the best roofing contractors in Hawaii. We’re not just any typical Oahu roofing company; we provide our residential and commercial roofing services with the Aloha spirit!
Ohana Construction
(808) 999-0941 www.ohanaconstruction.com
Serving
4.8 from 157 reviews
Aloha & Welcome to the Ohana, Ohana Construction is a State of Hawaii General Contractor, Roofing, Contractor, and Painting Contractor operating locally for the last 16 years with 25 years combined business experience. We put Ohana first. We pride ourselves in exceptional customer service. Everyone is treated like family and family comes first. The Ohana Mission is to provide clients an all-in-one solution for their construction needs. Help clients bring their plans and visions to fruition. We improve the lives of our clients through high level business integrity, fair practice, pricing, and continually putting the needs of others first. We pride ourselves in sustainable development practices and giving back to our community.
Murakami Roofing
(808) 348-8270 murakamiroofing.com
Serving
4.3 from 12 reviews
Murakami Roofing builds strong, water tight roofs as a 3 generation family business since 2003. We are a roofing contractor who prides ourselves on the quality of our work and appreciate our customer's business. Whether you need a roof in Manoa or Ewa Beach, to Kaneohe to Kahaluu, Wahiawa to the North Shore, Hawaii Kai to Waimanalo, Murakami Roofing is the roofer to call for Oahu roofers.
Roof Maxx Hawaii
(808) 522-7663 getroofmaxx.com
Serving
4.9 from 30 reviews
Replacing your asphalt roof costs thousands of dollars and is a disruption to your daily life. For an affordable and less invasive alternative to a roofing replacement, reach out to the experts at Roof Maxx Hawaii in Mililani, HI. This locally owned and operated roofing company offers a specialized application to prolong the lifespan of roofing systems for clients across central Oahu. Asphalt roofing becomes weathered and susceptible to leaks after years of taking a beating from Mother Nature. This trusted team uses an environmentally friendly application to restore shingle pliability, permeability, and adhesion.
LeakMaster Roofing
(808) 591-1900 www.leakmaster.com
Serving
4.8 from 43 reviews
Roofing company serving Oahu since 1979. Complete services, from Roof repairs to brand new roofs for homes, residential or commercial buildings. Get Cool coatings that do exactly that - cool your house or building from the hot Hawaii sun. All Roof types served - Shingle, Metal, Flat or Monier Tile. We've done every kind, so we can do the job for yours, too. Call us today for a Free Estimate and Consultation.
R & C Roofing Contractors
(808) 888-2524 roofinspectionhawaii.com
Serving
4.8 from 33 reviews
As with most everything in life, every roofing project comes with its challenges. Whether it be estimating, insurance coverage, material cost and safety to weather, manpower and transportation. Each roof is special in many ways. We at R&C Roofing Contractors embrace these challenges and like to see the beauty that presents itself along the way. R&C Roofing Contractors & Installation professionals have over 50 years of combined roofing experience we are capable of installing most any product you choose. We will walk you through the different manufacturers & the various products they offer to find the roofing product that best meets the needs of your home or business. Call us, we service the islands of Oahu, Maui, Molokai, Kauai and Hawaii

MRC Roofing
(808) 842-4464 mrcroofinghawaii.com
Serving
4.8 from 65 reviews
MRC Roofing is a trusted, locally owned roofing company serving Hawaii’s residential, commercial, and industrial sectors with expert roofing solutions. Specializing in roof installation, repairs, maintenance, and inspections, MRC Roofing provides durable and reliable roofing systems tailored to the unique demands of Hawaii’s tropical climate. Whether it’s installing new roofs, repairing leaks, or providing regular maintenance, their team of skilled professionals ensures top-quality results using the best materials and industry practices. With years of experience, MRC Roofing is adept at handling various roofing types, including asphalt shingles, metal roofs, tile roofing, and flat roofs. They also offer solar-ready roofing systems and en...
Pamalu Roofing
Serving
4.9 from 27 reviews
Pamalu Roofing is a family-owned company with 45+ years of experience serving homeowners across Honolulu, Kailua, Ewa Beach, Kapolei, and Pearl City. Our licensed and insured team specializes in roof repair, roof replacement, re-roofing, skylight installation, and gutter services — all built to handle Hawaii’s salt air, heavy rains, and hurricane winds. Known for our expertise in finding and fixing leaks the first time, we’re also trusted to guide Oahu homeowners through the insurance claim process after storm or wind damage. Whether you need a small roof repair or a full replacement, you can count on Pamalu Roofing for quality, reliability, and local care.

FBC Roofing
(808) 236-0756 www.fbc-hawaii.com
Serving
4.7 from 150 reviews
FBC Roofing, based at 3050 Ualena Street Unit D in Honolulu, is your premier roofing contractor providing top-notch roofing services across the Hawaiian Islands since 2009. Specializing in roof repair, roof replacement, and new roof installation, we cater to both residential and new-build projects. Our expertise includes metal roofing, shingle roofing, and asphalt roofing, ensuring durable and leak-proof solutions. With GAF Master Elite certification, we guarantee premium materials and reliable workmanship. We also offer gutter installation and repair services. Schedule a free roof inspection now—call (808) 236-0756, and let us safeguard your home today!
In Kailua, typical pricing runs about $600 to $1100 per square for asphalt shingles, $900 to $1500 for metal, $1200 to $2400 for clay tile, $1200 to $2300 for concrete tile, $1000 to $1800 for wood shingles or shakes, and $700 to $1200 for synthetic or composite shingles. This spread reflects the windward coast's exposure, salt air, and year-round UV, which push up material costs and the need for higher-quality fasteners and flashing. Those ranges are a practical frame for budgeting a re-roof, with the material choice driving the largest delta in total project price. You'll notice metal can be more upfront but often offers longer life in salt air and high-wind zones, while concrete or clay tiles bring distinctive durability but heavier loads and slower install.
Material availability on Oahu shapes pricing, and specialty products or replacement components can be timing-sensitive more than mainland jobs. If you're choosing a roof profile or color that's common on the Windward Side, you'll face steadier stock and fewer delays; unique shapes or obscure profiles can push lead times and lift costs. The local climate conditions-salt spray, UV, and wet-season humidity-mean you'll want systems and accessories rated for coastal exposure. A well-sealed underlayment, corrosion-resistant fasteners, and durable flashing are not optional add-ons here; they're part of the base cost to avoid premature failures near edges and valleys.
Wet-season scheduling pressure and demand spikes after tropical wind events can tighten labor availability in Kailua, nudging day rates higher and compressing job timelines. Islands' logistics add travel and material handling components to the overall cost, even for common products. If you're weighing a reroof during a busy window, expect shorter lead times for standard materials but longer waits for specialty options, which can shift both price and completion date. In practice, plan for a tighter window on the calendar and be prepared for price adjustments if a preferred product must be sourced off-island or expedited locally.
A full roof replacement in Kailua requires a permit filed with the City and County of Honolulu Department of Planning and Permitting. The process accounts for shoreline winds, salt exposure, and the need to protect underlayment and flashing against salt spray and UV. Ensure the project plan highlights fastener types, roof edge detailing, and flashing transitions that are designed for wind-driven rain common to this windward coastline.
For Kailua re-roof projects, the contractor typically handles permit submission and coordinates required inspections with Honolulu's building department. This coordination is vital to keep the project moving, since inspections are scheduled to verify that the underlayment, flashing, and overall code compliance meet local expectations before the job is considered complete. Your contractor should frame the inspection milestones around weather windows and coastal exposure considerations to minimize delays caused by trades and inspection scheduling.
Inspections are scheduled during and after the work to verify underlayment, flashing, and overall code compliance before the job is considered complete. In coastal, wind-prone areas, inspectors will pay close attention to roof edge detailing, hip and valley flashings, and the connection between the roof deck and the structural framing, ensuring that fasteners resist salt-accelerated corrosion and wind uplift. Expect interim inspections to occur as layers of underlayment go down, followed by a final inspection once asphalt, metal, or tile installations are in place and any temporary protection measures are removed.
Because Kailua roofs contend with salt air, year-round UV, and wetter trade-wind conditions, the permit process often reflects enhanced requirements for flashing materials, corrosion-resistant fasteners, and proper drainage transitions at eaves and parapets. When planning the permit timeline, factor in lead times for plan reviews that may request greater detail on roof-to-wall flashings and coastal-approved sealants. The building department may request confirmation that the chosen materials and attachment methods align with wind exposure category designations and Hawaii-adapted building codes.
Coordinate with the contractor to prepare a concise package of product data sheets, detailing approved fasteners, corrosion-resistant coatings, and flashing configurations suitable for coastal exposure. Schedule inspections with practical buffers to accommodate Kailua's typical trade weather patterns. If a revision is requested, address it promptly and keep the project log accessible so the building department can verify changes quickly, avoiding extra hold times that can ripple through the neighborhood's busy re-roof window.
The coastal wind exposure in this area means storms and salt spray can accelerate wear on fasteners, flashing, and roof edges. Insurance providers tend to scrutinize storm documentation and the overall roof condition more closely than inland neighbors. You should expect closer attention to recent repairs, signs of wind uplift, and any vulnerability created by long-term coastal exposure.
For a claim, insurers may request detailed damage assessments and appraisals, especially when wind exposure or coastal conditions are part of the loss story. Keep a well-organized file with dated photographs showing before-and-after conditions, interior signs of moisture, and any seasonal maintenance you've completed. Insurers appreciate receipts or notes from qualified professionals who can verify the roof's condition and any wind-related issues.
Features like upgraded fasteners, enhanced flashing, and edge protection can influence underwriting or premium conversations. Collect records of upgrades, including photos, product specs, and inspection reports, along with dates. A clear history helps demonstrate resilience against Kailua's typical salt-air and UV challenges, and it gives you a stronger footing when discussing coverage scope.
Before dry-season storms, photograph roof edges, flashing seams, and underlayment access points from multiple angles. After a significant event, arrange a prompt assessment by a qualified roofer or loss estimator, and obtain a written report that ties observed damage to wind and exposure conditions. Keeping this practice consistent makes future claims smoother and reduces ambiguity for adjusters.
Connect with contractors who help homeowners navigate the claims process from damage assessment to final approval.
In Kailua's coastal environment, salt air can attack exposed fasteners, flashing edges, and metal accessories before the field roofing itself appears worn. The sea breeze carries salt that accelerates oxidation and corrodes metal over time, especially on south and eastern exposures where trade winds push salty spray higher. When you inspect, look for rust halos around nails, screws, and ridge caps, and note any staining that travels along edge metal. Small gaps at penetrations can become leaking highways the moment rain arrives with wind. If fasteners loosen or pop, fastener heads can frost with salt, creating micro-missings that invite moisture behind the sheet metal or shingles.
Edge details endure the most abuse. Caulking may fail first under salt and sun, then traps moisture against underlayment. Hooded drip edges can corrode where runoff hits the fascia, lifting flashing and creating bending points where water can seep behind the trim. In a windward home, metal flashings should sit tight and continuous, with sealant renewed periodically. Do not wait for visible rust to decide a repair; salt-stained flashing often signals sub-surface corrosion beneath, masking failure.
Leak paths here often begin at penetrations and edge details where wind-driven rain exploits small installation gaps during the wet season. Flashing around chimneys, vents, and skylights must be secured with corrosion-resistant fasteners and properly sealed with compatible sealant. Every year, recheck boot flashings and step flashing at valleys or gutter lines. If you notice staining, crumbling sealant, or lifted metal near any penetration, address it promptly before it migrates into the attic or ceiling.
Homes closer to the shoreline need closer monitoring of rust staining, lifted flashing, and fastener deterioration than inland Oahu properties. Keep a simple eye on the top edge of the roof as winds shift in the afternoon; record changes and schedule a check after storms or heavy trades. A proactive approach now reduces the chance of costly repairs later.
Seasonal checks should focus on metal edges, rust staining, and sealant bridges. After a heavy storm or powerful trades wind, inspect the roof edge carefully for lifted flashing or loose fasteners. Address any suspect repair promptly to keep moisture out of the attic and crawlspace.
Extend the life of your existing roof with reflective or waterproof coatings that protect against UV and moisture.
In this coastal windward micro-market, replacement experience trumps new-construction volume. Look for firms with a solid track record on occupied homes and complex detailing near salt spray and UV exposure. Ask specifically for portfolios or references tied to re-roofs on similar roof types and orientations-especially if you have clay or concrete tiles, metal, or synthetic options common to Kailua's stock. Longevity on the business card often signals a stable crew that understands how to sequence work to minimize disruption and to manage moisture during the project.
Projects routinely happen with people living under the same roof, and wet-weather protection is a top concern. Choose a contractor who outlines daily cleanup practices and staging areas that keep walkways clear and debris contained away from outdoor living spaces. Notice response times for emails or calls-when leaks or wind-driven leaks pop up, the fastest responders are the ones you want on speed dial. A crew that finishes each day with tarps secured and materials properly covered reduces morning flood risks and helps maintain interior comfort.
Coastal Honolulu County conditions demand robust protection behind underlayment and flashing. Verify who stands behind the work and for how long, including underlayment installation, flashing integration at hips and valleys, and workmanship warranties. Ask for written specifics: what is covered, what could void coverage, and how service calls are prioritized after installation. The best local signals are contractors who clearly document their warranty commitments and who name reliable suppliers for weatherproofing details, ensuring protection against salt air, wind uplift, and seasonal showers.