Last updated: Apr 19, 2026
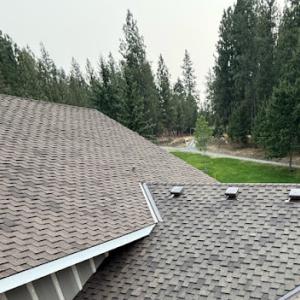
Cold, snowy winters leave roofs under heavy burden, and the spring thaw compounds that stress. When snow melts unevenly, recessed flashing and marginal underlayment weaknesses become visible as interior leaks after a few warm days. The cycle repeats: freeze, thaw, re-freeze, and every cycle widens hairline gaps where shingles meet valleys, dormers, and chimney flashings. You cannot rely on a single sunny day to fix it-each thaw invites new micro-cracks, and those cracks can turn into active leaks inside your attic or ceiling. Your plan should target proactive reinforcement before the next thaw, not after water starts showing up on ceilings.
Summer hail storms are more than a temporary nuisance; they are the kick-start of insurance activity and rapid roof deterioration. Even small pings can crack protective coatings, loosen shingles, or bend flashing edges, opening channels for water during the next rain event. After a hail storm, your first move is documentation: take clear photos of dented vents, damaged flashing, and lifted edges, and keep a running note of any new leaks or attic moisture. If a claim is filed, be ready for a quick, concrete timeline to verify diminished performance. In this market, storm-driven damage often progresses from cosmetic denting to structural exposure if left unaddressed, so early assessment is critical.
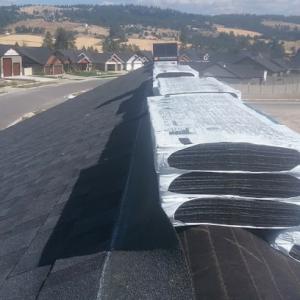
Autumn wind events lash roof edges with gusts that can peel shingles and fray edge metal. That edge exposure becomes a prelude to winter stress, because snow will accumulate on a compromised perimeter and then freeze-thaw stress compounds the problem. Pay special attention to fascia, drip edge, and valley protection as the first frost approaches. If you notice loose shingles at the eaves or lifted edge rows after a windy day, treat it as a high-priority fix, not a distant repair. This is the moment where preventive work pays off when the snowpack returns and snow loads push against weakened areas.
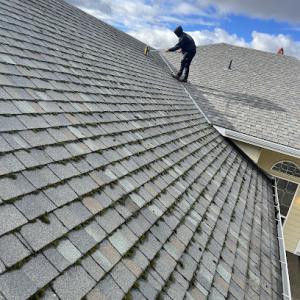
A practical approach in this climate is to schedule a post-winter inspection that targets flashing integrity and underlayment condition, with a second, targeted check after spring storms and again after autumn wind events. Look for granular loss on shingles, curling corners, exposed nails, and any staining that appears after a thaw or a hail event. If any issue is found, prioritize securing flashing and resealing underlayment around problem corners, chimneys, and vents before next freeze. Quick, targeted repairs reduce the risk of widespread interior damage when snow sits atop a compromised roof.
Keep a simple log of weather-triggered events and any subsequent leaks, matching each incident to a visible change on the roof. In this market, a well-timed inspection right after a notable weather event can capture the differences between minor wear and failing components. The goal is to prevent a small flaw from becoming a full-blown roof failure as temperatures swing and storms roll through. If you suspect hidden moisture, don't delay; a professional assessment can reveal compromised underlayment, hidden rot, or rusted edging that only shows up once spring rains return.
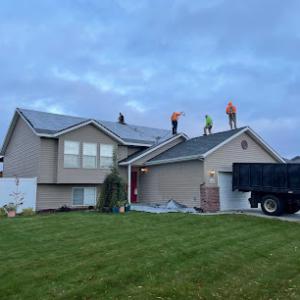
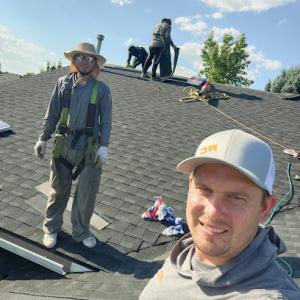
Late spring through early fall is the preferred installation window in Post Falls because drier conditions reduce weather delays and help crews avoid winter snow and ice complications. If you're planning a roof replacement, aim for that stretch when the calendar offers you the least disruption from moisture and freeze-thaw cycles. The addition of dry days makes tear-off, underlayment, and shingle installation proceed more smoothly, and it gives the crew a clean, uninterrupted work sequence. This window also aligns with the typical spring repair surge, so your project can stay on track without competing with a lull in demand.
Spring is when many Post Falls homeowners first discover leaks after thaw, which can compress contractor schedules as repair demand rises. If you notice active leaks or rising interior moisture in March or April, don't delay planning. Reach out to a roofer early, so they can inventory materials, line up crews, and schedule a start date during the stable dry-in days of late spring. Your goal is to lock in an installation slot before the peak repair period, ensuring weather won't push you into rushed decisions or suboptimal tear-off timing. A well-timed start also helps ensure underlayment and flashing are installed during consistently warm and dry conditions, reducing the risk of moisture-related setbacks in the first winter season after the replacement.
Trying to push replacement too late into fall in Post Falls increases the chance that wind and early cold weather will interrupt tear-off and dry-in timing. As temperatures drop and days shorten, crews face tighter windows for proper adhesive curing, shingle sealing, and weatherproofing. If the forecast calls for showers or a late cold snap, you may be forced into expedited workflows that compromise long-term performance. Plan with a buffer for potential back-to-back storms, and coordinate a start date well before mid-October if your conditions allow. A conservative schedule helps you avoid the stress of near-term weather swings and the risk of wind-driven delays that complicate installation.
1) Check the long-range forecast and identify a 4-6 week window of consistently dry, moderate temperatures.
2) Contact a trusted local roofer early in the year to determine availability and confirm preferred start dates within that window.
3) Schedule a pre-job inspection to assess decking, flashing, and underlayment needs, and prepare for potential repairs before the tear-off begins.
4) Confirm that materials and crew logistics are secured for your chosen start date, with a contingency plan for an early fall window if summer weather remains favorable.
5) Prepare your home for a removal-and-installation sequence: clear pathways, protect landscaping, and arrange interior safeguards for any attic or ceiling work.
6) Maintain flexibility: if a late-spring or early-summer storm requires adjustments, coordinate promptly to keep the project on track without sacrificing quality.
This practical approach helps you maximize dry-weather days, minimize weather-related delays, and complete the replacement during the window that best fits the local climate and storm-repair rhythms.
New Heights Roofing
(208) 427-8875 www.newheightsroofing.com
2785 W Seltice Way Suite A, Post Falls, Idaho
4.9 from 426 reviews
We are on a mission to make home ownership easier and less stressful. Hiring a contractor to work on your home is tough, and if you choose the wrong contractor it can cost you a lot upfront and be a problem for years. We’ve been refining our Roof Replacement System since 2005 to ensure every roof we install will never have a problem. We combine proven installation procedures with the best bang-for-your-buck materials on the market to deliver a new roof that will last for decades – so you won’t ever have to worry about it again. We are so confident that we back up every roof we install with a Lifetime Workmanship Guarantee. If there’s ever a problem with your roof, all you need to do is give us a call and we’ll fix it 100% free.
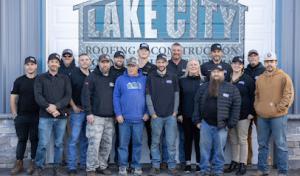
Lake City Roofing & Construction
3642 E Covington Ave, Post Falls, Idaho
4.9 from 184 reviews
Lake City Roofing is locally owned and family operated, and has been serving the Inland Northwest since 1987. Our team specializes in asphalt shingle roofing, metal roofing, flat roofing, gutters, window replacement, siding, and waterproof deck systems. We are proud to be both GAF Master Elite® Certified and IKO Craftsman Premier Certified, offering top-tier workmanship and industry-leading warranties. Whether you're replacing a roof or upgrading your exterior, trust our expert team for reliable, high-quality service.
Western Construction & Roofing
(208) 398-6178 westernroofingusa.com
955 Innovation Way Suite A Suite A, Post Falls, Idaho
5.0 from 46 reviews
Western Construction & Roofing provides residential and commercial roofing, siding, storm damage, and emergency roofing services to Post Falls, ID, and the surrounding areas.
Skyline Roofing
(208) 415-8800 skylineroofingweb.com
728 S Goldfinch Rd, Post Falls, Idaho
5.0 from 27 reviews
Looking for a Roofing pro? Skyline Roofing is a company that does a variety of different roofs, we at experienced in Shingles, many different Metal, Slate and Tile roofs. We strive to give you the best quality of work that you deserve. All our quotes are free, and we offer competitive pricing to all our customers. Call us today and we will be happy to help you with any of your questions. The sky is the limit.
Cd'A Roofing
2012 W Yaquina Dr, Post Falls, Idaho
5.0 from 17 reviews
Locally owned and operated roofing contractor with over 30 years of experience. We give free estimates.
ARK Roofing
(509) 443-9300 www.thearkroofing.com
Serving
5.0 from 22 reviews
ARK Roofing provides replacement roofing & new construction roofing services, and specializes in roofing insurance claims. We guarantee all of our work, offer convenient financing options and allow for the best quality solutions.

Northwest Roof Restoration
728 S Goldfinch Rd, Post Falls, Idaho
5.0 from 1 review
We are a full service roofing company. We offer our customers speedy service and quality work at a competitive price. Specializing in tear offs, repairs and new construction; both residential and commercial in many different roofing types, such as asphalt shingles, metal roofing, concrete tile, and cedar shakes. If you have a flat roof we specialize in TPO single ply roofing systems where we can offer up to a 30yr labor and material warranty. Our business is built on customer service and one happy customer at a time. We try very hard to live up to our slogan "Roofing With Integrity"
Rocky Mountain Home Services
(360) 301-3596 www.rockymountainhomeservices.net
Serving
5.0 from 80 reviews
Roof Cleaning, Roof Repair, Concrete and Asphalt Services, Home Services
Lakeview Roofing & Restoration
(208) 661-1781 lakeviewroofs.com
Serving
5.0 from 23 reviews
Lakeview Roofing & Restoration is a trusted roofing contractor serving Post Falls, Kootenai County, and more. We specialize in roof replacements, roof repairs, storm damage restoration, and quality residential roofing. Our team is committed to honest pricing, excellent workmanship, and fast service. Whether you need a small repair or a full roof replacement, we've got you covered. Call today for a free inspection.
Paradise Roofing
(208) 640-6008 208paradise.com
Serving
5.0 from 68 reviews
North Idaho's elite roofing team brings you the best materials and craftsmanship. Currently booking full roof replacements, new construction projects, roof repairs and roof certifications for August 2023 - November 2023. Call, text or email anytime! All company details and product information is available on our website.
RC Roofing Specialists
(509) 990-9653 rcroofingspokane.com
Serving
4.9 from 45 reviews
RC Roofing Specialists is a family-owned roofing company with nearly a decade of experience serving Spokane and North Idaho. Led by licensed, insured, and GAF-certified builder Josh Honnold, we handle roof repairs, full replacements, and emergency leak service for both homes and businesses. Our team keeps job sites clean, communicates fast, and takes pride in doing the work the right way. We serve Spokane, Spokane Valley, Liberty Lake, Coeur d’Alene, Post Falls, and nearby areas with reliable service and warranties you can trust.
Asphalt shingles are the dominant practical choice for most homes around here because they align with the local re-roofing market and the weather-driven replacement cycle that follows a long Inland Northwest winter. They're forgiving during freeze-thaw cycles, relatively quick to install, and widely stocked by local crews. For most standard ranches, split-levels, and mid-century homes common in the area, asphalt shingles offer reliable performance when paired with solid flashing, proper attic ventilation, and careful fastening. This pairing helps resist wind uplift and minimizes heat-related aging during the summer sun that follows a snowy winter.
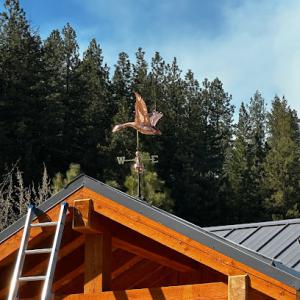
Tile, slate, wood shake, and copper do appear in the market, often on higher-end or historically styled homes, but they require closer review for non-standard installations through the local permit process. Tile and slate bring distinctive aesthetics and long service lives, yet their weight demands structural assessment and precise flashing details to handle freeze-thaw stress. Wood shakes provide a unique look with good insulation potential, but they're more vulnerable to moisture exposure and need meticulous maintenance to prevent ice-damming issues. Copper offers durability and a premium appearance but can complicate flashing transitions and expansion joints in mixed-material roofs. In areas where snow loads are a regular factor, a thorough evaluation of roof deck strength, underlayment, and edge details is essential before choosing these materials.
Freeze-thaw exposure makes flashing and fastening decisions more critical than material appearance alone. In this climate, ice dams and wind-driven moisture can exploit any gaps at valleys, chimneys, roof-to-wall transitions, and vent pipes. A high-quality underlayment that remains durable under cold cycles, paired with metal or membrane flashings that resist thermal movement, reduces leak risk as temperatures swing. Fastening patterns must account for both snow loads and wind exposures typical to the Inland Northwest. Additionally, ventilation plays a crucial role: attic space that breathes properly helps keep roof sheathing closer to uniform temperatures, reducing condensation and the risk of frost-related damage at roof edges.
The annual cycle of heavy snow followed by spring thaw shapes when homeowners consider material options beyond asphalt. Non-standard materials may be more sensitive to installation timing, especially in late winter or early spring when rain and lingering snow complicate work windows. For most homeowners, starting with asphalt shingles keeps timing flexible and repairs manageable, while keeping space in mind for more elaborate projects if the roof already shows signs of structural or flashing weaknesses after a harsh winter.
When evaluating options, prioritize proven compatibility with your existing deck structure and the anticipated weather pattern. If a home already has a robust ventilation plan and well-sealed, continuous underlayment, even premium materials can perform well under freeze-thaw stress. For homes with unique architectural features, consider how the chosen material interacts with trim, fascia, and eave detailing to maintain a seamless line against the winter-gray sky and the bright summer glare that follows. In all cases, align material choice with reliable flashing, solid fastening, and thoughtful ventilation to withstand the seasonal extremes that define Post Falls roofing.
In this market, costs span from asphalt shingles at 350 to 650 USD per square up to copper roofing at 1500 to 3500 USD per square. Those numbers reflect the mix of housing stock that leans toward mid-century staples and newer homes with upgrades. If your roof is standard asphalt over plywood, you'll likely land near the lower end of that range. Homes with concrete or clay tile, or specialty metals, sit toward the higher end. This is a practical starting point as you compare bids and plan replacements.
Costs in Post Falls can rise after hail or wind events when storm-driven demand increases competition for fast-response crews. If a storm hits and crews are trying to backfill multiple urgent jobs, you may see quicker scheduling but tighter availability and higher late-stage mobilization charges. Plan for a window where potential delays compress the timeline, and expect adjustments to freight, disposal, and premium underlayment needs when crews rush to protect homes during a peak season.
Non-standard materials in this market may add cost through plan review, specialized installation requirements, and a smaller pool of contractors actively marketing those systems. Clay tile and concrete tile, for example, require careful underlayment and precise framing checks, while slate or copper demand earned trades with experience and patience to handle delicate textures and longer install times. The result is a higher per-square cost, but it can pay off in longevity and performance during Inland Northwest freeze-thaw cycles.
A practical approach is to forecast the replacement year by evaluating seasonal patterns: freeze-thaw stress in winter, followed by spring leak discoveries, then summer hail claims. If you're between major storm seasons, you may secure steadier pricing and scheduling. When a hail event has recently occurred, expect a faster move to replacement but with potential price bumps tied to supply-demand dynamics. Your best bet is to gather three solid bids, verify material warranties, and confirm the contractor's experience with the region's snow loads and high-altitude moisture cycles.
If you're weighing asphalt shingles against higher-end options, consider the long-term value: a higher upfront cost may translate to fewer mid-life repairs after repeated freeze-thaw cycles. Copper or slate carries the prestige and durability but demands a premium that should align with the home's value and the expected lifespan of surrounding components. Use the ranges above to sanity-check bids, and factor in the likelihood of weather-driven demand spikes when setting your project timeline.
In Post Falls, a full roof replacement typically requires a building permit through the City of Post Falls Building Department. If you're navigating the process for the first time, expect forms that spell out the scope of work, material types, and the intended install timeline. The permit isn't just bureaucratic stairs to climb; it ties directly to how your roof will endure Inland Northwest winters and spring storm cycles. Missing or delayed permits can halt repairs mid-project and invite costly rework or fines, so plan ahead with your contractor to align timelines.
Local inspections in Post Falls focus on roofing details that spell the difference between a durable roof and a leak-prone one. Ventilation must be appropriate for your attic space to prevent ice damming and moisture buildup in the dry-warm cycles that follow winter crunches. Flashing around chimneys, skylights, and transitions to walls needs to be tightly sealed to resist spring hail and summer rain. Nailing patterns, including the right courses and fastener spacing for your chosen material, matter a lot when wind-driven storms sweep through and twist loose edges. Waste disposal compliance is also checked, ensuring stray shingles and debris don't clog gutters or create slip hazards after installation.
Plan review may be required when homeowners choose non-standard roofing materials or assemblies. If a more unique combination-such as specialty tiles or metal overlays-enters the plan, expect a closer look at how the system handles drainage, ventilation, and attachment to the roof deck. That review isn't meant to block projects; it's designed to verify that unusual choices won't compromise the roof's performance under post-winter freeze-thaw cycles and summer hail storms. Working with a contractor who knows the local permitting landscape can smooth the process and reduce the chances of delays.
Throughout the project, keep copies of permits, plan approvals, and inspection notices on site. If a city inspector spots a misaligned vent or an unsealed seam, the contractor may need to pause work until corrections are confirmed. A careful approach to permits and inspections helps ensure a roof replacement not only starts on solid footing but also finishes with the kind of protective detail that underpins lasting performance through the seasonal rhythms of this area.
In Post Falls, Idaho insurers generally cover hail and wind damage when it is properly documented, and claim activity tends to rise after storms. When a suspected loss occurs, your first step is to photo-document everything you can while the site is still accessible. Focus on visible impact points, roof lines, gutters, and interior signs like stains or leaks that align with storm timing. The goal is to create a clear narrative that connects the damage to a specific weather event, which helps insurers move from initial assessment to a repair or replacement decision.
After a summer hail event or autumn wind event, homeowners are often asked for photos and contractor estimates. If you notice staining, granule loss, or missing shingles after a storm, gather high-resolution images from multiple angles and collect any contractor estimates that quantify the scope. Insurers frequently use these visuals and bids to validate the claim and determine replacement feasibility. Keep a dated file and share updates promptly to avoid processing delays.
Older roofs in this market may draw closer insurer scrutiny, with carriers sometimes requesting a licensed contractor assessment before confirming scope. If your roof has reached or surpassed typical service life, anticipate questions about remaining attic insulation, deck condition, and ventilation. A licensed assessment can help map out necessary repairs versus full replacement, and it often strengthens the claim package when hail or wind damage is present.
Document the façade, eaves, and any interconnected systems like vents and skylights for post-storm evaluation. Note wind direction, suspected impact points, and any pre-existing conditions that could influence insurer decisions. When speaking with your insurer, present a concise timeline of events, backed by dated photos and a professional assessment, to keep the claim moving toward a clear resolution.
Connect with contractors who help homeowners navigate the claims process from damage assessment to final approval.

New Heights Roofing
(208) 427-8875 www.newheightsroofing.com
2785 W Seltice Way Suite A, Post Falls, Idaho
4.9 from 426 reviews
Western Construction & Roofing
(208) 398-6178 westernroofingusa.com
955 Innovation Way Suite A Suite A, Post Falls, Idaho
5.0 from 46 reviews
In Post Falls, leaks often become apparent during spring thaw when winter moisture finds pathways around flashing and underlayment defects. The melt-and-freeze cycle can push water into seams you didn't notice after last summer's hail rush. If you see damp spots spreading from corners of dormers or along the ridge line as days warm, your roof could be signaling compromised flashing or aged underlayment that didn't hold up to freeze-thaw stress. You'll want to inspect for dark streaks on ceilings after a warm day and address questionable seams before a larger leak forms.
Improper ventilation is a local inspection concern and can shorten roof life in a climate with cold winters and seasonal moisture swings. When attic air can't escape moisture efficiently, you get more condensation against sheathing and faster ice-damming risk on overhangs. Check soffit and ridge vents for obstruction, and ensure attic baffles aren't crumpled. If insulation looks soggy or boards feel damp to the touch, you're likely inviting early rot, warped deck edges, and increased shingle failure around vents and chimneys.
Edge details and exposed roof components in Post Falls are vulnerable because wind damage often precedes the city's harsher winter weather. Eaves, rake edges, and valley intersections bear the brunt of gusts, lifting shingles and loosening flashing before snow arrives. Look for lifted tabs, loose drip edge, or gaps where roof deck shows. Prompt repairs here prevent water entry that travels inward along soffits and into attic spaces during spring storms.
Find contractors experienced in skylight installation, flashing, and leak repairs to bring natural light into your home.
New Heights Roofing
(208) 427-8875 www.newheightsroofing.com
2785 W Seltice Way Suite A, Post Falls, Idaho
4.9 from 426 reviews

Skyline Roofing
(208) 415-8800 skylineroofingweb.com
728 S Goldfinch Rd, Post Falls, Idaho
5.0 from 27 reviews
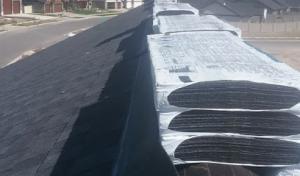
In this area, some houses feature flat or low-slope sections, and a few local contractors actively advertise that work. The spring wet season can reveal hidden flaws in drainage or membrane details that were stressed by winter freeze-thaw cycles. When a low-slope roof is part of the home, the edges and transitions from decking to flashing deserve extra attention, because any small defect tends to show up as leaks after the snowmelt and spring rain. The market here treats coatings as a niche option rather than a default path for replacement, so it's common to see traditional membrane and seam repairs paired with strategic upgrades rather than a coating-first approach.
If your roof includes a shallow pitch, look for drainage challenges that manifest as standing water near penetrations, transitions, or parapets after a storm. Inadequate slope or clogged scuppers can push water toward the interior, especially where overhangs or roof-to-wall transitions exist. Check for membrane fasteners and sealant joints that exhibit UV wear, hairline cracks, or bullseyes from ponding. Springtime moisture may intensify any of these issues, so timing your inspection to after the snowmelt is wise. If your roof deck shows visible sag or waviness around low sections, that's a sign to bring a professional in for a close-up assessment before the next thaw.
Maintenance on low-slope roofs is less forgiving of neglect. Regular inspections should focus on seam integrity, edge detailing, and penetration points around vents, skylights, and chimneys. Clean drainage paths, confirm that flashing sits flush, and verify that any previously repaired seams aren't showing new signs of distress after winter. If a coating is proposed, treat it as a targeted option rather than a blanket solution, and compare its expected lifespan against a full membrane or re-seaming plan. In this market, a thoughtful combination of repair, upgrade to higher-performing membranes, and careful drain detailing often yields the most predictable performance through the variable Inland Northwest spring.
Look for a local firm with documented experience in flat and low-slope systems, including edge flashings, parapet detailing, and deck preparation. Ask for recent project notes that show how they handled spring moisture challenges and what they did to improve drainage reliability. For coating options, request a clear explanation of surface preparation steps and the anticipated maintenance interval, alongside traditional membrane-based strategies. A trusted contractor will walk through the specific risks posed by winter-time moisture and map a plan that emphasizes durable seams and reliable drainage.
Find specialists in TPO, EPDM, and built-up flat roofing systems for residential and commercial properties.
Lake City Roofing & Construction
3642 E Covington Ave, Post Falls, Idaho
4.9 from 184 reviews
Northwest Roof Restoration
728 S Goldfinch Rd, Post Falls, Idaho
5.0 from 1 review