Last updated: Apr 19, 2026
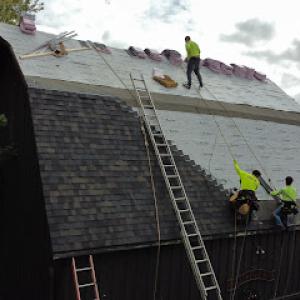
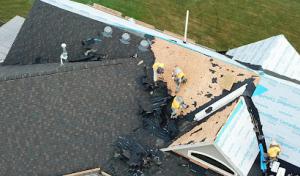
When a storm rolls through Eastern Iowa, North Liberty homeowners should act quickly to document damage before rain or further weathering compounds it. Start by surveying the roof, gutters, and skylights from a safe position and note any visible dents, granule loss, curling shingles, or dented metal panels. Take dated photos at multiple angles, especially of damaged areas that are visible from ground level. Insurers will expect dated imagery, and current photos carry more weight than memory sketches years later. If moisture intrusion is suspected, address interior leaks promptly to prevent secondary damage from complicating the claim.
In this market, insurers routinely request a clean package: dated roof photos, contractor bids, and a record of prior claims. Build that packet while the claim is fresh. Collect meteorological reports or hail history notes from local weather outlets for the storm date, and compile a short timeline of any prior Midwest storm cycles that may influence your roof's current condition. Keep a log of every contact with the insurer, including timelines, names, and promises made. If you've had a prior claim in recent years, have that claim history ready; adjusters often cross-check it against replacement eligibility and may weigh previous wear when evaluating current damage. Having a focused, organized binder speeds the review and reduces back-and-forth questions.
Many homes in North Liberty sit in newer subdivisions, where installation ages can overlap with recent regional storm events. Adjusters will compare current damage against the roof's age and the local weather history when determining replacement eligibility. Expect questions about whether prior installations could be failing prematurely due to a known pattern of hail impact on certain shingle types or metal surfaces. Be prepared to demonstrate that new damage is beyond ordinary wear and that a single event caused or accelerated deterioration. For skylights and metal panels, insurers may scrutinize whether previous warranties or installations could influence whether replacement is required or whether a repair can be justified. Clear, dated evidence that ties the damage to the most recent storm helps you stand the ground during the review.
Spring hail season is a major decision point locally because fresh impacts on asphalt shingles, metal panels, and skylights can overlap with older weathering from prior Midwest storm cycles. If you can, prompt action during the first two weeks after the storm improves the chance of a favorable assessment, because adjusters prioritize recent damage. Coordinate with a reputable local contractor who understands how the Eastern Iowa climate accelerates wear on common North Liberty roofing systems. If bids arrive quickly, compare scope and exclusions with the insurer's guidelines rather than accepting the first offer. A well-documented storm narrative-photos, bids, and a concise history-reduces ambiguity and supports a timely, appropriate replacement or repair decision.
Choose a local roofer who references real North Liberty storm histories and can provide dated references for prior local claims. They should be willing to accompany you in initial claim discussions to translate technical roofing terms into clear, actionable steps. During insurer conversations, present your organized documentation, emphasize event timing, and highlight any discrepancies between the claim date and the damage onset. If an adjuster denies coverage or offers a repair-only outcome, request a detailed written rationale and, if needed, escalate to your insurance company's claims supervisor. In many cases, a precise, neighborly approach paired with solid documentation accelerates a fair resolution and a roof that stands up to the next Eastern Iowa hail season.
Find local contractors experienced in assessing and restoring roofs after hail, wind, and severe weather events.

Diamond Ridge Construction
(319) 251-2667 www.diamondridgeiowa.com
2907 Stoner Ct, North Liberty, Iowa
5.0 from 160 reviews
Walter Roofing - Iowa City
(319) 214-0377 www.walterbuilds.com
7 Hawkeye Dr Ste 104, North Liberty, Iowa
5.0 from 18 reviews
Heartland Roofing, Siding, & Solar
(319) 600-2744 heartlandroofingandsiding.com
7 Hawkeye Dr #106, North Liberty, Iowa
4.8 from 36 reviews
RM Construction Services
(319) 961-0541 rmconstructioniowa.com
225 Beaver Kreek Center, North Liberty, Iowa
5.0 from 84 reviews
RM Construction Services is a roofing contractor serving North Liberty, Coralville, Iowa City, Tiffin, Cedar Rapids, and surrounding areas. We specialize in roofing, siding, gutters, and concrete work — done right the first time. Our team is known for honesty, showing up when we say we will, and delivering quality craftsmanship on every job. Whether it’s a roof replacement, gutter install, or concrete project, we help homeowners and property managers get jobs done fast, fairly, and professionally.
Diamond Ridge Construction
(319) 251-2667 www.diamondridgeiowa.com
2907 Stoner Ct, North Liberty, Iowa
5.0 from 160 reviews
Diamond Ridge Construction is a locally owned company specializing in roofing, siding, framing, and custom homebuilding in the Iowa City/Cedar Rapids area.
Walter Roofing - Iowa City
(319) 214-0377 www.walterbuilds.com
7 Hawkeye Dr Ste 104, North Liberty, Iowa
5.0 from 18 reviews
Walter Roofing is Eastern Iowa’s top-rated roofing contractor, serving Iowa City, Cedar Rapids, North Liberty, Coralville, Solon, Tiffin, Ely, Swisher, Hills, Kalona, Riverside, Williamsburg, Mount Vernon, Marion, and surrounding areas. Known for our 5-star service on Google and Facebook, we bring a higher standard to every roofing project—residential or commercial. From inspection to final cleanup, we focus on quality, communication, and long-term protection. Trusted by homeowners and businesses alike, Walter Roofing is proud to support the communities we live and work in every day.
Heartland Roofing, Siding, & Solar
(319) 600-2744 heartlandroofingandsiding.com
7 Hawkeye Dr #106, North Liberty, Iowa
4.8 from 36 reviews
Heartland Roofing, Siding, and Solar is North Liberty’s leading exterior contractor, specializing in roofing, siding, and window replacement. We proudly serve North Liberty, Coralville, Iowa City, and all of Eastern Iowa with high-quality workmanship, fast response, and honest service. Whether you need a full roof replacement, storm damage repair, new siding, or energy-efficient windows, our team delivers lasting results backed by top industry warranties. As an Owens Corning Platinum Preferred Contractor, we’re trusted for both residential and commercial projects. Call today for a free inspection and see the Heartland difference.
Bunting Construction
(319) 895-3274 bbuntingconstruction.com
North Liberty, Iowa
4.5 from 41 reviews
Bunting Construction is a trusted roofing contractor serving North Liberty, IA, and nearby areas like Iowa City, Cedar Rapids, and Coralville. With 20+ years of experience, we handle residential and commercial roofing, from new installations to shingle replacement. We offer asphalt shingles, cedar shakes, rubber and flat roofs—all with manufacturer warranties and a 10-year workmanship guarantee. We also provide 24/7 emergency storm repair and snow removal services. Call today for a free estimate and expert service you can count on!
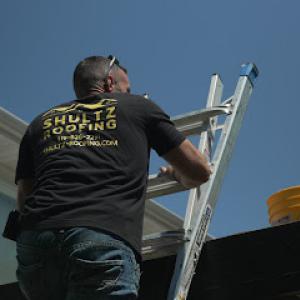
Shultz Roofing
(319) 834-9108 www.shultz-roofing.com
2698 Reservoir Dr, North Liberty, Iowa
5.0 from 6 reviews
With years of hands-on experience in the roofing industry, Shultz Roofing has built a reputation for excellence, reliability, and craftsmanship. Our team has successfully completed countless residential and commercial roofing projects, from small home repairs to full-scale roof replacements. We stay ahead of industry advancements, using the latest materials and techniques to ensure every roof we install is built for appealing and long-term protection. Our commitment to quality and integrity means we treat every home and business as if it were our own—because when it comes to protecting what matters most, experience makes all the difference.
TMJ Construction Services
(319) 569-7782 www.tmjconstructionservices.com
Serving
5.0 from 15 reviews
TMJ Construction Services is a licensed and insured exterior contractor serving the Des Moines metro and Central Iowa. We specialize in residential roofing, siding, windows, gutters, decks, and storm damage restoration. With over 25 years of experience, TMJ is known for quality craftsmanship, transparent estimates, and long-term customer relationships.
Five Star Home Improvement
(319) 250-4807 fivestarhic.com
Serving
4.7 from 398 reviews
Five Star Home Improvement specializes in roofing servicing. Five Star is a family-owned and operated business, proudly providing Coralville and the surrounding areas with professional roofing solutions. Our services include residential and commercial roof repairs, roof replacements, window and siding installation, and more. When your home or business needs professional solutions, count on Five Star Home Improvement for superior results. Five Stars owner is a third generation roofer. His family has been serving the Iowa and Illinois area for over 60 years. Consistently superior service has made Five Star Home Improvement the most trusted name in roofing.

Martinez Roofing & Construction
(319) 382-8168 martinezroofingia.com
Serving
4.9 from 146 reviews
Martinez Roofing & Construction provides roofing, siding, and gutter services and emergency services to the Cedar Rapids, IA area.
Tomlinson-Cannon Roofing
(319) 519-0315 www.tomlinsoncannonroofing.com
Serving
5.0 from 123 reviews
Since 1948, Tomlinson Cannon has been Eastern Iowa’s trusted expert in keeping homes dry. We believe the integrity of your roof depends on the integrity and workmanship of the people installing it. When you choose Tomlinson Cannon for your roofing and siding needs you will receive personalized service, an experienced team, top-quality materials and industry-leading guarantees. We offer a range of roofing services from roof replacement, roof repair, soffit & fascia, snow guards, gutters, gutter guards and more.
Century Roofing Company
(319) 351-5055 www.centuryroofing-iowa.com
Serving
4.8 from 87 reviews
Family owned and operated, asphalt shingle roofing. Been in business since 1991.

Andino Construction
(319) 471-7527 www.andinoconstructionia.com
Serving
5.0 from 44 reviews
Local construction company serving the Greater Iowa City Area, specializing in exterior needs including roofing, gutters, and siding. Fully insured and registered with the State of Iowa.
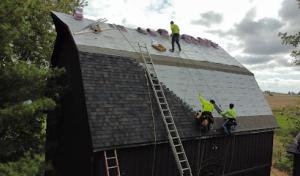
In North Liberty, full replacement is usually best scheduled from spring through fall because Iowa winter cold can complicate shingle sealing and safe installation conditions. That means planning work for a stretch when daytime temperatures are consistently above freezing and nights aren't dipping below workable thresholds. If a storm hits late fall, the window can tighten quickly as temperatures start to drop and rain becomes more uncertain. The goal is to hit a stretch with enough dry days to protect underlayment and deck from moisture while crews can work without frost delays. For new roof projects, aiming for a window once soils have dried and before heavy snowfall is a smart guideline.
Freeze-thaw cycles during Johnson County winters can stress shingles, flashing, and roof decking, especially after minor storm damage goes unrepaired. When spring storms roll through, shingles and flashing can be more vulnerable to additional wear if repairs are delayed. If hail or wind damage is suspected, an immediate assessment is valuable, but a full replacement should typically wait for a stretch of stable weather and solid curing conditions. In practice, a quick temporary protection plan can buy time after a storm, but expect the main reroof to occur in the milder months. If a repair is possible without compromising the roof deck, that can be a prudent interim step, followed by a scheduled replacement when weather and temperatures allow.
Summer humidity and thunderstorms in this part of Iowa make attic ventilation and moisture control a bigger concern than homeowners often expect during reroof planning. High humidity can slow drying of underlayment and decking after installation, so ventilation strategy matters. A reroof in midsummer benefits from ensuring ridge vents, soffit intake, and any powered ventilation are properly coordinated with the new roofing system. If attic conditions are poor, plans should include a moisture management approach to prevent condensation issues in the attic space, which can affect long-term performance and comfort. Note that afternoon thunderstorms can bring sudden rain, so crews may need to adjust schedule to keep interior components dry during installation steps that involve exposed decking.
Winter conditions in this area bring more than cold air; freezing cycles can complicate sealant behavior and the performance of fasteners and asphalt or synthetic shingles. If a replacement is unavoidable in winter due to damage, expect longer timelines, specialized cold-weather installation techniques, and careful sequencing to avoid trapped moisture. For most homeowners, planning ahead to avoid winter installs reduces risk of shingle adherence problems or ice dam-related interior damage. Communicate with the roofing crew about preferred sequencing, especially if prior storm damage created exposed decking or compromised flashing that needs careful attention before temperatures drop.
Begin with a dry-season assessment after any hail or high-wind event, documenting damage with photos and notes to support any insurance discussion. Schedule an inspection for a period of stable, moderate weather, with a contingency plan if a late-spring or early-fall window tightens due to unusual weather. Ensure the contractor lays out a clear sequence: remove old roofing, inspect decking and flashing, install underlayment and ventilation strategy, then apply the chosen roofing material with appropriate sequencing to prevent moisture infiltration. Maintain a focus on attic moisture control during the project, especially if a roof is opened during a humid summer stretch. This approach aligns with the local climate pattern and helps keep the project predictable and durable through Iowa's seasonal swings.
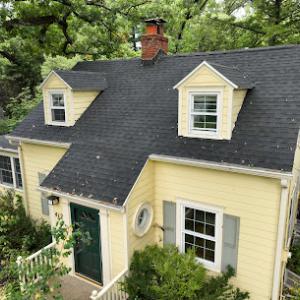
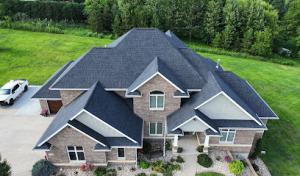
Asphalt shingles are the default choice for the region's plentiful single-family homes, matching the common roof lines and attic spaces found in newer subdivisions around the Iowa City corridor. They install quickly, respond well to local hail events with proper overhangs and fasteners, and preserve a clean, familiar exterior that homeowners already recognize. In practice, you'll see a broad spectrum of styles within this category-from traditional 3-tab looks to dimensional laminates that mimic the texture of wood without the upkeep. A North Liberty roof built with asphalt shingles tends to weave smoothly with existing gutters, venting, and insulation assemblies, while keeping replacement and repair tasks straightforward after a storm. When hail has stirred up, the quick, thorough inspection of shingle edges, granule loss, and damaged flashing is essential, because early identification helps keep moisture out of the attic and framing.
Metal roofs stand out as a meaningful upgrade in neighborhoods that emphasize resilience and low-maintenance long-term performance. They shed snow more reliably and resist impact from hail better than many other options, which matters in spring storms and rapid freeze-thaw cycles. In practice, metal can be a smart choice for homes that already have strong roof lines or plan to attach future additions like garages or sunrooms in newer developments. When you choose metal, pay attention to penetrations-vent pipes, chimneys, and especially the interfaces where the main roof meets any attached structures. The fastener schedule and sealant details around these zones determine long-term performance in damp springs. In newer neighborhoods with multiple structures, ensure that transitions between roof surfaces are clean and that the underlayment and flashing are matched to metal's expansion and contraction behavior. A careful installation plan will help prevent leaks at ridge caps, sidelights, and the often busy perimeter where decks or covered porches intersect the roof.
Premium options such as clay tile and slate exist in the local market, offering distinct curb appeal and longevity. However, the heavier weights of these materials require attention to the home's structural framing and the condition of load paths. Homes that were not originally framed for heavy coverings may need structural evaluation, possible reinforcement, or even changes to the roof deck and framing before installation. If a premium upgrade is appealing, weigh the functional benefits-historic appearance, fire resistance, and potential lifespan-against the added load and the implications for gutters, chimney clearance, and eave detailing. In some of the newer neighborhoods where partial conversions or extensions happen, careful integration with existing flashing, soffits, and attic ventilation becomes crucial. For many homeowners, premium choices are most impactful when matched with a clear plan for storm recovery and a durable underlayment system that handles rapid thaw cycles and moisture intrusion without sacrificing performance.
Local reroof pricing in this market is heavily influenced by storm-driven demand spikes after hail and wind events, which can tighten contractor availability across the Iowa City-Coralville-North Liberty area. After a severe hail season, the same crew that did your neighbors' roofs may be booked weeks out, and last-minute scheduling can push labor costs higher. In practice, you'll notice price shifts that reflect not only material costs but the bottleneck of qualified installers during peak spring and early summer repair windows. Planning ahead and securing a binding start date after a hail event can help stabilize your out-of-pocket.
Costs can rise on steeper suburban rooflines, multiple valleys, attached garages, and ventilation upgrades required at final inspection. North Liberty homes often blend two-story mass with complex interfaces-think multiple peaks, dormers, and valley intersections that catch wind-driven hail. Each of these features adds unload time, extra flashing, and sometimes temporary shingle footing to protect underlayment. If your attic has limited ventilation options, expect a modest bump to cover upgraded soffit or ridge ventilation to meet the common-sense airflow standards installers reference during final checks.
Material choices common here range from asphalt shingles at 350 to 550 USD per square, metal roofing at 600 to 1100, clay tile at 900 to 1800, synthetic/composite shingles at 350 to 700, slate at 1200 to 2800, and fiber cement shingles at 400 to 650. In practical terms, a straightforward asphalt reroof with basic attic venting will stay near the lower end, while a metal or specialty tile system on a two-story casa with several valleys climbs into the upper-mid range. The local climate-spring hail and freeze-thaw cycles-tends to favor durable, wind-resistant choices, even if upfront costs rise.
As you compare bids, prioritize crews who can document hail impact and provide credible storm-response timelines, including timeline for shingle removal, tarping, and debris cleanup. Look for clear explanations of whether high wind zones, ridge lines, or valley edges require extra flashing or upgraded underlayment. When estimating, include travel and staging costs that may appear on near-peak demand days; these can subtly elevate what starts as a modest project into a mid-range total.
Get a clear picture of your project costs upfront - no commitment required.
Bunting Construction
(319) 895-3274 bbuntingconstruction.com
North Liberty, Iowa
4.5 from 41 reviews


My Cedar Rapids Roofing
(319) 409-6432 www.mycedarrapidsroofingco.business
Serving
5.0 from 11 reviews
For a full roof replacement, a permit through the City of North Liberty Building Division is typically required. Before any shingles are torn off, you should confirm the permit path with the Building Division and secure approvals in writing. The permit process helps ensure the project aligns with current storm and wind standards and that neighborhood safety and property values are protected. If the project stalls at the framing stage or if temporary supports are involved, the city may pause work until plans and scope documents are updated and approved.
The local process generally involves submitting plans and a scope of work that reflect the roof's intended structure and finish. If only cosmetic replacement with the same framing is planned, the review is usually straightforward. When structural elements are being modified-such as reconfiguring overhangs, changing deck layouts, or altering ventilation pathways-the review becomes more thorough. Expect questions about attic ventilation, drip edge, flashing details, and how the new materials interact with existing home specifics such as dormers, valleys, and chimney penetrations. Providing clear diagrams and manufacturer data for any venting or deck work can shorten the review.
Inspection typically occurs after installation, with careful attention to code compliance and ventilation. The inspector will verify proper nailing patterns, underlayment, ice and water shield placement, vented attic configurations, and drainage alignment. Ventilation is not a place to cut corners; inadequate airflow can shorten the life of a roof and invite condensation issues in freeze-thaw cycles. Schedule the final inspection promptly after completion to avoid delays in occupancy or occupancy-related requirements.
If structural changes are part of the project, an engineer's seal may be required. This adds a layer of documentation, so expect additional lead time for plan revisions and coordination with the engineer. The better prepared you are with stamped drawings and practical notes on how the work integrates with existing framing, the less friction arises during permit review and the final inspection. If any questions arise during the process, contact the Building Division early to prevent missteps and costly rework.
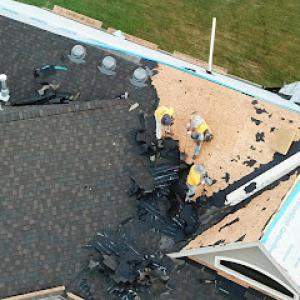
After spring hail or summer thunderstorm damage, fast temporary drying and tarping matter because repeated rain events can turn a small breach into decking and attic moisture problems. In this market, a prompt response signals reliability and helps prevent long-term damage that can drive up interior repairs. If you spot a wet ceiling, drips, or attic condensation, prioritize stopping the water first with a secure tarpaulin and plywood to cover the breach, then call for a same-day evaluation. Delays invite mold, warped decking, and interior staining that complicate later fixes.
Emergency response is especially relevant locally because quick-response service is a strong contractor market signal in this storm-driven reroof environment. Hail can create micro-cracks and punctures that aren't obvious from ground level, so a fast on-site check helps separate cosmetic issues from structural concerns. A rapid tarp and temporary sealing plan buys you time without risking more water intrusion during a string of wet days. Stay proactive: document progress and keep crews moving toward a permanent fix while weather holds.
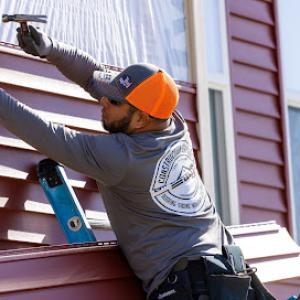
Skylights and roof penetrations are common weak points after hail and wind in this market and often need separate photo documentation before temporary repairs are installed. Take clear photos from multiple angles, including close-ups of any dents, loose flashing, or compromised sealant around penetrations. When a contractor arrives, point out these areas and share the photo record to ensure the temporary fix targets the right spots. If a skylight shows leakage, insist on a temporary seal around the frame and flashing until a proper patch can be applied.
When you can't wait, these contractors offer fast response times to stop leaks and prevent further damage.
Bunting Construction
(319) 895-3274 bbuntingconstruction.com
North Liberty, Iowa
4.5 from 41 reviews

In this part of Iowa, hail and wind claims come up with enough frequency that the quality of your documentation can materially affect the claim outcome. The weather history and local claim patterns shape how adjusters approach every roof event, so solid records aren't extra-they're essential.
Keep a date-stamped overview of the damage and close-up photos that clearly show both the big picture and the fine details. Take wide shots from ground level and then zoom in on damaged shingles, flashing, and gutters. If a contractor inspects, request a written note that covers rough locations of damage, suspected causes, and any recommendations. Preserve records of prior repairs or patches, along with dates, locations, and materials used. Insurers will review whether new damage is truly post-storm or related to pre-existing wear, so those prior records matter.
When a contractor comes to inspect, ask for a detailed, written report that includes photos, measurements, and notes about any interior signs of water intrusion. Make sure the report notes the roof's current condition, the suspected progression of damage, and whether fasteners, underlayment, or deck are stressed. If possible, have the report timestamped and signed, and keep a copy for your files. The more precise the report, the clearer it is for the adjuster to distinguish new damage from older issues.
Store all documents in a single, organized location-digital copies with back-ups and physical copies filed chronologically. Weather history can influence decisions here, so maintain a running log of significant storms and any repairs performed between events. If any records disappear or become unreadable, you'll want clear backups to prevent gaps in the narrative a claims adjuster will build. This approach keeps the claim trail transparent and defensible.
Connect with contractors who help homeowners navigate the claims process from damage assessment to final approval.
Diamond Ridge Construction
(319) 251-2667 www.diamondridgeiowa.com
2907 Stoner Ct, North Liberty, Iowa
5.0 from 160 reviews
Walter Roofing - Iowa City
(319) 214-0377 www.walterbuilds.com
7 Hawkeye Dr Ste 104, North Liberty, Iowa
5.0 from 18 reviews
Heartland Roofing, Siding, & Solar
(319) 600-2744 heartlandroofingandsiding.com
7 Hawkeye Dr #106, North Liberty, Iowa
4.8 from 36 reviews
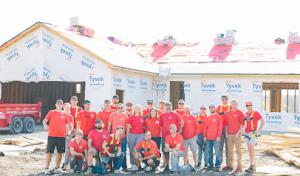
The North Liberty contractor market skews toward re-roofing rather than niche new-construction work, which suits homeowners facing quick project turns after spring hail and winter freeze-thaw cycles. A locally active crew tends to align with the city's storm-responsive timelines and can navigate the typical replacement demand without long delays. Look for teams that regularly service nearby Iowa City corridor neighborhoods and understand the pattern of insurance-driven work here.
Prioritize long-established, locally owned outfits with visible manufacturer-certified credentials. Certification matters for warranty support and post-job service, especially if you expect the crew to stand behind their work after severe spring storms. When you call, ask for references from recent re-roofs in your neighborhood and, if possible, visits to completed jobs to assess cleanup and workmanship. Confirm the crew carries current liability and workers' compensation coverage to avoid gaps if an accident occurs on site.
Nearby crews should offer predictable response windows for storm-related damage, not weeks of delay. Ask how they prioritize cleanup, debris containment, and protection of landscaping and gutters during a project. In a suburban-yet active replacement-market, quick yet careful cleanup matters for minimizing further damage during freeze-thaw cycles. If access is tight, verify that the crew has a plan to protect driveways and to manage material storage without blocking traffic.
Seek crews that provide both a workmanship warranty and manufacturer-backed material warranties. Clarify who handles warranty claims, how long service calls take, and what constitutes a covered defect. A reliable crew will provide a clear post-installation service protocol and a single point of contact for any issues that arise after hail season or a heavy storm.
Prepare to receive detailed project notes, material specifications, and dated "as-built" records. The strongest local teams will supply a concise, storm-damage-focused summary that you can share with your insurer and adjuster. This documentation helps keep timelines realistic and supports a smoother claim process during the high-claim season.