Last updated: Apr 19, 2026
Manhattan sits in north-central Kansas where hail and straight-line wind are common enough to make roof claims a routine homeowner issue. Spring hail season brings a spike in activity from insurance adjusters and roofers alike, turning every neighborhood into a potential claim corridor. The clock during this window is unforgiving: the moment hail hits, you need to act quickly to document damage and secure the most accurate assessment. Winds that follow hail events can lift tabs, bend flashing, and loosen ridge lines, often layering new problems on top of old ones. Waiting can push minor signs into major complications, especially when storm cycles repeat within a few weeks.
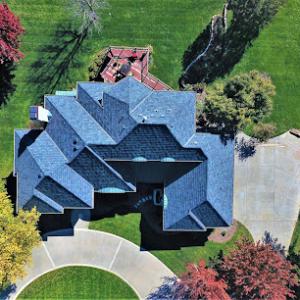
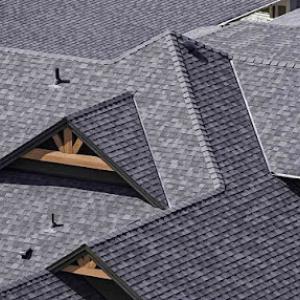
Damage in this climate is not always obvious from the ground. Inspect for bruise black and white dots on shingles, lifted or broken tabs, and stained or bent flashing at valleys and chimneys. Hail bruising can appear as small, irregular marks that weaken the surface even if the roof looks intact from a distance. In a residential stock built to withstand heavy weather, repeated cycles create cumulative wear: granule loss, micro-cracks, and flashing joints that lose their seal. If you see dark splotches, curling, or any exposed substrate near fasteners, treat it as a red flag. The key is to identify patterns rather than single indicators, because many roofs survive one storm with only cosmetic marks but suffer functional damage after multiple events.
Post-storm documentation is not a luxury; it is part of protecting your claim and your home. Take high-resolution photos from multiple angles, including close-ups of suspect areas and wider roof panoramas to show the broader condition. Note the date of the storm, the approximate time, and any accompanying wind or hail reports from local weather services. Preserve records of prior repairs or patch jobs; repeated cycles can complicate the replacement decision, so a clear history helps the adjuster distinguish between age-related wear and storm-induced damage. If a contractor flags flashing or vent pipe damage, photograph those specifics with emphasis on flash line integrity and any gaps around penetrations.
Local replacement timing is often driven less by age alone and more by whether a roof has accumulated hail bruising, lifted tabs, and flashing damage from repeated storm cycles. In practical terms, that means a roof that still appears visually intact may not be safe to delay if there are hidden structural or underlayment concerns uncovered by a professional assessment. Storm-damaged roofs can deteriorate quickly under Kansas weather, especially when spring winds unleash additional hits. The decision to replace should weigh the likelihood of further hail events before the next season against the current level of damage and the roof's ability to protect the interior.
The typical Manhattan housing stock includes asphalt shingles, synthetic/composite options, and some clay or concrete tile installations in select neighborhoods. Shingle systems, especially those with lifted tabs or compromised flashing, tend to cascade into further issues under Kansas wind cycles. Flashing at chimneys, skylights, and transitions to vents is a frequent weak point after hail impact. A practical approach is to treat any patch or repair as a temporary measure unless you can verify the supporting structure and sealants are sound. If multiple storms occur, the cumulative effect will push a roof toward replacement readiness sooner than anticipated.
After spring and fall storms bring hail and gusty winds, the decision to replace a roof often hinges on what an insurer's adjuster sees and documents. In this market, the pattern is that damage can be scattered across shingles, vents, and metal flashings rather than concentrated in a single patch. Expect adjuster involvement as a routine step rather than an exception, and plan for a process that may extend from initial contact to a full replacement decision. The goal isn't to rush, but to ensure that the claim reflects the actual condition of the roof, including ventilation and flashing quality, which drive long-term performance.
In the Manhattan market, insurers commonly ask for roof age records, date-of-loss details, and clear photo documentation because hail and wind claims are frequent. Start gathering these before the next hail season begins. Retain roofing invoices, warranty letters, and any contractor notes that indicate when components were replaced or serviced. Clear photos should capture the entire roof, close-ups of shingle edges and granule loss, and images of vents, flashing, and any attic signs of moisture. A well-organized file with a simple timeline helps the adjuster verify the roof's condition and any prior work that could affect coverage decisions. This documentation becomes especially valuable if the wind event exposes vulnerabilities in ventilation or flashing later in the year.
Adjusters in this market operate with a practical lens: they want on-site assessments, not guesswork. When the claim is opened, obtain the claim number and coordinate a joint inspection window with the insurer and a contractor who understands how to address storm-driven needs. The contractor should be prepared to discuss not only the cosmetic impact but also the roof deck, underlayment integrity, attic ventilation, and flashing details around chimneys, skylights, and penetrations. Clear photos and a concise list of observed deficiencies help the process move forward. If the initial assessment leaves questions about ventilation or flashing, request a re-inspection or a supervisor review to ensure those elements are documented and addressed in the scope.
Because carriers may react to local storm patterns, Manhattan homeowners benefit from documenting maintenance history and prior repairs before the next hail season. Keep a running record of roof-age milestones, weather-related repairs, and known vulnerabilities such as damaged flashing or vent seals. This history helps paint a fuller picture for the adjuster, especially when the claim involves gradual aging versus sudden impact. A well-documented maintenance track can support decisions about replacement timing and ensure that the replacement plan aligns with both the insurer's expectations and the home's long-term performance.
Begin with a careful, on-record inspection of the exterior and attic space if accessible. Photograph any irregularities-lifted shingles, cracked edge tabs, rusted or loose metalwork, and signs of moisture intrusion. When meeting the adjuster, present a concise summary of observed damage, supported by the documentation file. If the claim results in a replacement decision, insist on a scope that covers not just shingles but critical accessories-ventilation upgrades or replacements, and flashing improvements around penetrations-as these often determine the roof's resilience in future storms. Finally, maintain a calm, cooperative stance through the process; a disciplined approach reduces back-and-forth and supports a timely, comprehensive resolution.
Weddle & Sons Roofing
(785) 532-8347 www.weddleandsons.com
919 S Manhattan Ave, Manhattan, Kansas
4.9 from 463 reviews
At Weddle & Sons, we believe that our clients deserve the best the industry has to offer. That’s why we offer a full range of roofing and exterior services that make us a one-stop-shop for all your needs. Weddle & Sons, Inc. is a Certified Solar Roof Installer and is accepting orders for new installations in Kansas, Colorado, and Nebraska. Learn more about this amazing product being offered directly to you by Weddle & Sons! Our Manhattan branch services the following areas: Manhattan, Kansas; Wamego, Kansas; Junction City, Kansas; Ogden, Kansas; Milford, Kansas, Randolph, Kansas; Westmoreland, Kansas; and other cities in this region.
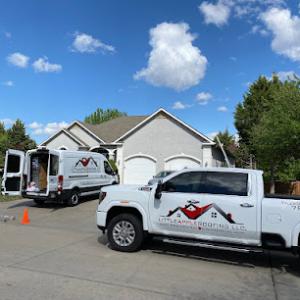
Little Apple Roofing
(785) 706-8140 littleappleroofing.com
323 Fort Riley Blvd, Manhattan, Kansas
4.8 from 85 reviews
Little Apple Roofing offers a variety of roof replacement and repair options. We can install metal, tile, flat and rubber roofs. Consult our roofing contractors to find out which material is best for your home or business. If you need roof repairs, turn to us for emergency services.
Ozone Roofing, Inc. - Manhattan Branch
(785) 789-9234 www.ozonerfg.com
8859 Green Valley Dr #2, Manhattan, Kansas
5.0 from 21 reviews
We are a professional roofing company that specializes in helping with roof storm damage. Ozone Roofing always puts you, the homeowner first. Customer satisfaction is our top priority. We will help you through the entire process, and install a new quality roof on your home. We are a company that cares and we want to see your damaged home made whole again.
Danker Roofing
(785) 776-9128 www.dankerroofing.com
8521 US-24, Manhattan, Kansas
4.7 from 41 reviews
Since 1969, we have been providing trustworthy roofing contractor services in much of Northeast Kansas. The roof on your house or business needs to be in tiptop shape all the time. What do you do if a leak starts or shingles go flying? Rely on our expert team at Danker Roofing, Inc. to repair or replace your roof. Danker Roofing, Inc. offers a wide variety of services designed to suit all your needs. With decades of experience, we have both the skill and the resources necessary to complete any roofing project.
Superior Roofing
(785) 537-8777 superiorroofing.biz
1115 Westport Dr suite D, Manhattan, Kansas
4.5 from 54 reviews
Roofing, siding and window Experts Superior Roofing is dedicated to providing the highest quality roofing, siding and windows. We offer the best product and price for your home's needs, whether that be cleaning, inspection, repair, or replacement. Our mission at Superior Roofing is to work with honesty, dedication and integrity while serving our local communities with the most qualified, uncompromising workmanship and service. We utilize the latest technologies and newest products to provide you the homeowner with the longest lasting value in roofing for the least amount of money. Whether you need a roof replacement or roof repair you will always receive our best work, and that's a promise.
Smart Choice Roofing
(785) 317-3835 smartchoiceroofingllc.com
2500 Farm Bureau Rd, Manhattan, Kansas
4.1 from 9 reviews
We manage your roof’s installation, repair, replacement, and insurance claims with honesty and full transparency. Reach out and get a free estimation today.
Gevock Roofing
3224 Highland Cir, Manhattan, Kansas
5.0 from 1 review
Residential roofing services including inspections, estimates, repairs, roof replacements, new construction, and additions
EDI Remodeling & Roofing
(785) 340-0792 ediremodelingandroofing.com
Serving
5.0 from 6 reviews
Edi Roofing and Remodeling is your trusted partner for exceptional roofing services tailored to meet all your needs. We offer expert installation and repair for a diverse range of roofing options, including metal propane roofs, classic shingles, and robust metal roofing systems. Our team is also skilled in addressing storm damage, ensuring that your property remains secure and resilient against severe weather. At Edi Roofing and Remodeling, we are committed to providing high-quality workmanship and reliable service, making sure every project is completed to the highest standards of durability and performance.
Grandview Roofing
Serving
5.0 from 13 reviews
At Grandview Roofing, located in Junction City, KS, we take pride in delivering top-quality roofing and general contracting services to our local community and the surrounding areas. Whether you need roofing repairs, home improvement, or snow removal, our skilled team is here to handle all your needs with precision and care. We specialize in everything from storm damage repair and emergency roofing services to new construction and siding replacement. With our commitment to excellence and customer satisfaction, we ensure your home or business is protected and looking its best. Contact Grandview Roofing today to schedule your consultation and let us exceed your expectations!
Lucky's Roofing MHK
(785) 844-0145 www.luckysroofs.com
Serving
5.0 from 26 reviews
Lucky's Roofing and Construction provides residential and commercial roofing including asphalt shingles, metal, tile, flat roofs, TPO, mod-bit roofing, storm damage emergency roofing, roof repairs, and gutter installations in the Manhattan, KS and surrounding area.
Skyview Roofing
Serving
4.2 from 20 reviews
CLOSED. Whether you’re looking for a roof replacement or repair, our team has you covered. We are experienced in residential & commercial roofing, gutter protection and solar installation. Family owned & operated. We offer financing to fit any budget without checking your credit. Get started today!
Lozano Construction & Roofing
Serving
3.0 from 2 reviews
Lozano Construction & Roofing is a Construction Company located in Seneca, KS and has been servicing all of Seneca and the surrounding areas for many years. We specialize in Commercial Roofing, Residential Roofing, Roof Repairs, Metal Roofing, and Shingle Roofing. Here at Lozano Construction & Roofing, our mission is to always provide quality service at an affordable price. The success of our company is due to the dedication we provide to our customers. No matter the job, customer satisfaction is always our number one priority! Don't hesitate to give us a call! (785) 336 1583
Manhattan's location in the Flint Hills brings broad exposure to sun, wind, and fast-moving weather changes that can age roofs unevenly across different elevations and exposures. On sun-battered south and west slopes, asphalt shingles can show granule loss and color fade earlier than shaded portions. Wind-driven debris gnaws at edges and flashings, while hail plays a more aggressive role on the higher ridges and exposed exposures. This pattern means the roof is not a uniform aging surface; some sections may need attention years ahead of others. A proactive homeowner keeps an eye on edge details, penetrations, and the transition from rock to roofline, because those contact points often reveal the first signs of wear even when the overall surface looks acceptable.
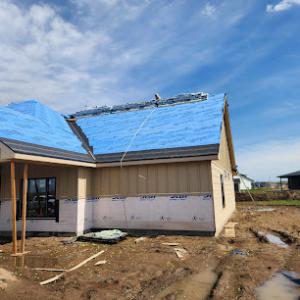
Hot summers in Manhattan accelerate asphalt aging on sun-beaten slopes, while winter freeze cycles can stress flashings, sealants, and vulnerable roof penetrations. The annual temperature swing matters: sealants shrink and expand, and nail heads can work loose under repeated freeze-thaw cycles. Late spring through early fall is commonly favored for reroofing in Manhattan because winter freezes and snow complicate tear-off, dry-in, and inspection scheduling. If a storm season arrives late in the season, moisture at tear-off can push projects past ideal dry-in windows, so planning with local weather patterns in mind helps ensure a clean, watertight install. In practice, that means coordinating with your roofing team to secure dry-in conditions before the first cold snap, and aligning shingle selection with the longest possible exposure to sun and wind so the roof ages more uniformly under harsh conditions.
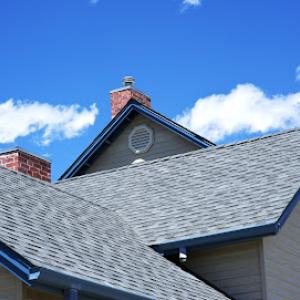
Exposure over the Flint Hills makes ventilation and flashing a central decision point for longevity. Poor attic ventilation compounds heat buildup that degrades underlayment and accelerates shingle wear, while improper or aging flashing around chimneys, vents, and stacks invites slow leaks that surface after a season of heat and wind. When choosing a roof system, consider how well the ventilation plan supports consistent temperatures in the attic and how the flashings are integrated with the chosen materials. For example, asphalt or fiber cement shingles benefit from solid drip edges and well-sealed step-flashing at joints; clay or concrete tile demand robust underlayment compatibility and properly spaced fasteners to resist wind uplift in exposed settings. Local crews with a track record repairing spring hail impact also know how minor edge faults can become major leak paths after a few freeze cycles.
Because conditions vary across elevations, a roof in good shape is one that has consistent maintenance checks rather than a single annual look. Inspect after major storms for hail bruising, wind uplift, or lifted edges, and pay special attention to ridges and valleys where weather energy concentrates. Keep gutters and downspouts clear so water movement remains unobstructed and no pooling occurs at eaves or around penetrations. If a sectioned roof age discrepancy shows up during inspection, prioritize those high-exposure areas for prompt repairs to prevent small issues from expanding under the next sharp weather shift. This approach aligns with Manhattan's climate pattern and helps preserve roof integrity across the life span of the materials chosen for your home.
Asphalt shingles remain a practical fit for Manhattan because they are widely used locally and are often the baseline option when hail or wind damage leads to insurance-funded replacement. They install faster, handle the spring hail season with predictable performance, and are compatible with most existing roof decks. When you're eyeing a weathered section of roof after a claim, you'll find asphalt shingles respond well to standard flashing practice and routine ventilation upgrades. If you're rebuilding on a typical home with standard attic space, this option usually provides a solid balance of protection and long-term service, especially when the surrounding structure and underlayment are solid.
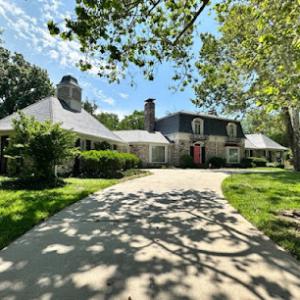
Clay tile, concrete tile, slate, synthetic/composite, and fiber cement appear on higher-end or distinctive homes in Manhattan, but their performance depends heavily on proper fastening and flashing under local wind and hail exposure. Clay and concrete tiles can deliver striking curb appeal and durable performance, but they demand a reinforced roof frame and continuous, meticulous fastening to resist gusts. Slate offers exceptional longevity and a refined look, yet the weight is substantial and requires a capable structure plus precise flashing to manage wind-driven water intrusion. Synthetic or composite shingles imitate the appearance of natural materials while offering lighter weight and easier handling, but installation quality remains critical to avoid wind uplift in storm-prone seasons. Fiber cement sits between asphalt and high-end composites in terms of heft and durability, lending resilience against hail if installed with correct underlayment and fasteners. In your neighborhood, a careful appraisal of the roof deck's capacity and the flashing plane around chimneys, vents, and skylights is essential when considering these materials.
Material choice in Manhattan should account for repeated storm impact, summer heat load, and whether the existing structure can support heavier systems such as tile or slate. If the roof has a shallow slope or limited attic cooling, heavier options may trap heat or complicate drainage, which can amplify hail impact or wind-driven water intrusion. Consider how local wind patterns affect eave and ridge exposure, and verify that the chosen system includes robust edge detailing and continuous flashing. For homes with distinctive shapes or historical accents, weight, weight distribution, and compatibility with the surrounding façade matter as much as appearance. When in doubt, balance the ease of maintenance and repair access with the expected storm load, aiming for a system that keeps ventilation unblocked and flashing continuous across transitions.
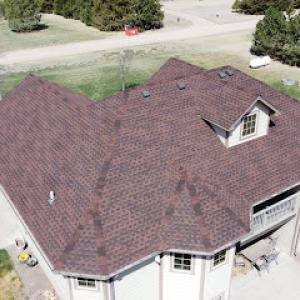
After those spring hail events, asphalt shingles in this market often show noticeable granule loss, bruising, and occasional tab damage. The exposed slopes tend to age faster under the summer heat, especially if the roof has seen repeated hail impact over the years. You may notice dark streaks or bare patches from the granules washing away during rain, which not only dulls appearance but also accelerates UV exposure to the underlying asphalt. What this means for you is a higher likelihood of premature aging and potential shingle cracking, which can create soft spots that worsen with seasonal temperature swings. If you suspect hail has struck, a careful month-by-month assessment is essential: check for missing granules after storms, inspect for curled edges along ridge lines, and remember that even a visually "okay" roof can be compromised where the underlayment or flashing has hidden damage.
Tile and slate systems here face a double threat. First, impact breakage from hail or wind can fracture individual tiles or slates, leaving small, unseen gaps that allow water to reach the roofing substrate. Second, even if the field looks intact from ground level, secondary leaks often arise when underlayment or flashing is compromised. In this market, a single compromised tile can create a cascade of moisture ingress, and the once-stable roof plane may begin to show staining or damp insulation once inspected up close. The core warning is simple: a surface that appears solid from the curb can harbor hidden failures that only reveal themselves during wet months. Pay attention to any cracked or displaced tiles, and keep an eye on attic ventilation for signs of moisture buildup that wasn't there previously.
Autumn winds in this climate have a way of loosening ridge components, edge details, and flashing transitions, especially along valleys and hips. When those features loosen, you create new leak paths that often go undetected until winter moisture returns. The consequences may arrive with a steady drip near a ceiling corner or a cold draft that intensifies through a seam during freezing rain. The practical implication is proactive inspection: check ridge caps, vent pipes, and seam tape in the shoulder seasons, and don't wait for a visible drip to prompt action. If you notice easing along flashing transitions or granular wear near roof-to-wall interfaces, those are early signs that a careful reseal or flashing upgrade may be overdue.
In Manhattan, typical pricing sits in clear ranges by material. Asphalt shingles run about $350 to $650 per square. For clay tile, expect roughly $900 to $1600 per square, and concrete tile typically lands around $800 to $1500 per square. Synthetic or composite shingles stay closer to $350 to $700 per square, while slate can push $1500 to $3000 per square. Fiber cement shingles are usually $500 to $800 per square. These are neighborhood-friendly benchmarks you'll see quoted by local crews who know the Flint Hills exposure and the way spring hail can shape a job. When a tear-off reveals heavier decking or flashing issues, the price climbs as labor and materials adjust to the extra work, usually on a square-by-square basis.
Spring hail events in this market surge contractor demand across north-central Kansas, and scheduling tightens quickly. That pressure tends to squeeze both availability and price, especially for full reroofs that must be coordinated around weather windows. If a claim drives replacement timing, expect crews to prioritize storm-damaged roofs first, which can shift pricing and lead times in the short term. If you're weighing options after hail, you'll often see a premium tied to expedited timelines or limited crews, particularly for heavier or specialty materials that require more precise installation.
Project pricing in this area is affected not just by the material, but by the labor needed to repair storm-damaged decking or flashing found during tear-off. Heavier specialty materials require more skilled installation and can push both material and labor costs higher. If you're considering synthetic or composite shingles, you'll see cost leverage from their easier installation relative to clay or slate, but price still climbs if decking or vented soffit work shows up in the scope. In practice, a clear, material-specific quote with an on-site assessment will help you avoid surprises as the storm season unfolds.
A full reroof in this area generally requires a building permit through the city building department. Before any ladder work or material orders, you'll want to confirm the permit is active and that all required forms are in hand. The city's process centers on safety, proper installation, and long-term performance, so start with a clear plan showing underlayment, ventilation, and flashing details. If the roof has an unusual configuration, expect to coordinate additional plan-review steps before permit issuance.
Specialty roofs and complex designs can trigger extra coordination. Some hip-and-valley layouts, dormers, or unusual ridge lines may need drawn details or contractor notes to satisfy city reviewers. A timely submission often hinges on including accurate roof dimensions, vent locations, flashing details at penetrations, and a practical ventilation strategy. If a plan-review is required, expect a brief pause while the plans are checked, with the aim of confirming that workmanship will withstand Kansas weather and provide reliable drainage.
Inspections focus on underlayment installation, attic ventilation, flashing at edges and penetrations, and overall workmanship, rather than treating reroofing as a no-review job. Typical inspection milestones include a rough-in or pre-roof inspection to verify layout and venting, a mid-roof or flashing check, and a final inspection to confirm adherence to code and contract terms. Be prepared to correct any deficiency notices promptly; many issues arise from improper venting or flashing details, especially around valleys, skylights, and chimneys.
Storm season can accelerate the need for replacement, but permit timing still drives the project schedule. Coordinate with the contractor to align delivery and staging with inspection windows, and keep the city informed if a temporary closure or access issue arises.
Spring is also Manhattan's highest-risk period for new hail damage, so some homeowners delay replacement until after the storm stretch unless active leaks force immediate work. If your roof shows new pitting, granule loss, or daylight in the attic, start coordinating with your contractor for a post-storm assessment. Insurance timelines often drive the pace, but a measured plan still reduces the chance of re-damage.
Weather windows matter for access. Summer humidity, heat, and storms can slow crews, while late spring hail events may trigger rapid debris cleanup and access restrictions. Choose a window with clear inspection slots, scaffolding setup, and a neighbor-friendly schedule, since most projects rely on driveways and street access for equipment.
Winter work in Manhattan is harder because freezes, snow, and ice-dam conditions can limit safe access and complicate sealing details. If a leak forces attention in winter, expect temporary protections and a staged approach that minimizes freeze-thaw damage while waiting for a more stable stretch.
Coordinate weather-based inspection windows with the contractor and city inspectors. In late spring and early summer, plan for at least two dry, calm days so attic and vent pipes can be checked without rushing. If a storm hits, document damage with photos and notes, then schedule a follow-up inspection after the area dries. A stable stretch minimizes callbacks and helps keep the project on track.