Last updated: Apr 19, 2026
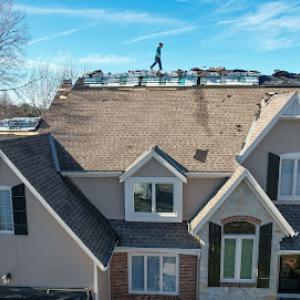
In the Kansas City metro, Lenexa sits in a storm corridor where hail damage inspections spike after each significant hail burst. When the thunderstorm season hits, the risk to asphalt shingles and metal roofs goes from theoretical to urgent in a matter of hours. If you hear hail persist, plan for a rapid exterior check the following day. Look for dented gutters, bruised shingles, and granule loss in gutters and downspouts. Document what you see with clear photos from multiple angles, and note the date and time of the storm. A prompt, detailed record sets you up for smoother communication with your insurer and contractor.
After major spring hail events in Johnson County, adjuster scheduling can slow down and insurers often ask for detailed photo sets, roof plans, and a thorough scope of work. You may find yourself waiting longer than you expect, especially if your property is part of a neighborhood that endured a batch of claims. In practice, the insurer will request a professional estimate, a roof plan if visible, and a scope of work that matches the damage. Gather your own notes immediately: dates of the hail event, wind direction, and any prior leaks or water marks inside the attic. The more precise the documentation, the clearer the path to a timely settlement.
In Lenexa, the rhythm of inspections tends to follow a storm-driven surge. Start organizing a prioritized inspection list the day after you assess the roof from ground level or with a safe step ladder. If there is any visible damage to skylights, vents, or fascia, flag it early in the claim. Insurance companies often request staged documentation before authorizing replacement, so align your records to support a staged approach. A staged pathway helps prevent a bottleneck if the initial inspection partially confirms damage while the rest of the roof features more extensive wear.
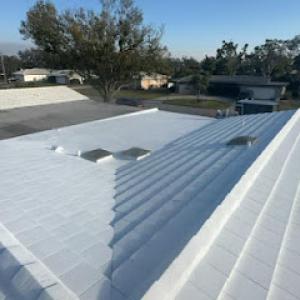
Spring hail and heavy rain can delay production, so Lenexa homeowners often need to sequence temporary protection, claim documentation, and replacement scheduling carefully. Place temporary roof tarps over exposed areas as soon as it's safe to do so, especially if a storm is forecast within days of a hail event. Secure the tarps firmly to withstand gusts, and document the installation with time-stamped photos. This step reduces the risk of secondary interior damage and strengthens the claim narrative when the adjuster reviews the loss. Remember that weather changes can shift timelines quickly, so plan for contingencies.
Once the claim progresses past the initial adjustment, the question becomes: when to replace? In practice, Lenexa neighborhoods often experience a window of opportunity after the hail event when contractor crews can begin work between rain delays and forecasted warmth. A well-timed replacement minimizes exposure to subsequent storms and reduces the chance of interim leaks compromising interior finishes.Keep communication open with the contractor and insurer about expected start dates, material lead times, and anticipated durations. A coordinated timeline helps ensure the roof is restored before the next round of severe weather rolls in, reducing risk to your home and your peace of mind.

True Grit Roofing Company
12209 W 88th St, Lenexa, Kansas
5.0 from 456 reviews
Tired of roofing companies that overpromise and underdeliver? At True Grit Roofing, we’re built for homeowners who do their homework and expect craftsmanship over gimmicks. Based in Lenexa and serving the Kansas City metro, we specialize in premium roof replacements, storm restoration, seamless gutter systems, and insurance claim support. Licensed and insured in KS and MO, we use top-tier materials and back our work with a solid workmanship warranty. No pressure. No shortcuts. Just honest work from people who take pride in doing things right.
HT Roofing & Construction
11437 Strang Line Rd, Lenexa, Kansas
5.0 from 141 reviews
HT Roofing & Construction takes pride in offering comprehensive roofing and construction services. Reach out to us for: Residential roofing installations and repairs Gutter installations and repairs Siding Replacement and repairs Call 913-828-7663 now to speak with a reliable roofing contractor about your new roof. We offer free estimates and discount is offered to all military personnel.
The Roof Warrior
(877) 917-8885 theroofwarrior.com
22115 W 83rd St, Lenexa, Kansas
4.9 from 171 reviews
Roof Warrior offers an exclusive clear waterproofing sealer and rejuvenating roof finish, as well as a clear restoration shingle sealer. This specialized mixture is formulated to preserve, safeguard, waterproof, restore, and circumvent the expensive cost of re-roofing. Furthermore, Roof Warrior now extends its services to include window, siding, door, and gutter replacement, providing a comprehensive solution for enhancing your home's exterior!

Swing Coast Roofs & Gutters - Lenexa, KS
(833) 492-7663 www.swingcoastroofing.com
8367 Nieman Rd, Lenexa, Kansas
5.0 from 47 reviews
Swingcoast Roofing is a locally owned company specializing in residential and commercial roofing, gutters, and painting. With over 20 years of experience, we treat every customer like family and every property like our own. From storm damage to home updates, we provide reliable, high-quality service with a stress-free experience. Whether you need a roof repair, new gutters, or a fresh coat of paint, our team works efficiently to get the job done right. Serving Lenexa and beyond, we’re here to protect and refresh your home or business.
Mighty Dog Roofing of Kansas City
(913) 349-6385 www.mightydogroofing.com
15012 W 106th St, Lenexa, Kansas
4.8 from 199 reviews
Mighty Dog Roofing specializes in roofing, storm damage repair, siding, and windows. As a locally owned and operated company, we are your trusted choice for servicing the Kansas City area across Kansas and Missouri. From Lenexa to Lee’s Summit, we help homeowners and businesses protect what matters most with reliable, high-quality roofing solutions. We offer state-of-the-art 25-point inspections using our GoLive and Drone Superscan technology. This technology, combined with the highest quality products and superior workmanship, provides peace of mind for your most important investment—your home.
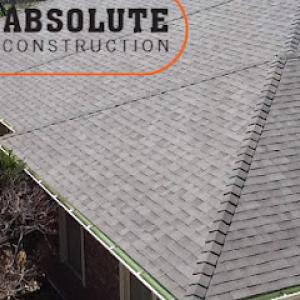
Absolute Construction
(913) 428-9242 www.absoluteroofingcompany.net
11751 W 86th Terrace, Lenexa, Kansas
4.9 from 61 reviews
With our office in Lenexa, Kansas, Absolute Construction is your trusted partner for Residential and Commercial Roofing services. Proudly serving the Kansas City Metro area in both Kansas and Missouri, we specialize in addressing the unique needs of homeowners and businesses alike. Our residential services include Roof Replacements and Repairs, with a focus on storm restoration work, encompassing exterior renovations like reroofs, gutters, and siding. For residential properties, we provide emergency solutions, ensuring temporary leak stoppage, tarping, and protection from the elements. In the realm of Commercial roofing, we offer emergency repairs, preventative maintenance programs, and comprehensive roof replacements.
Revival Roofing
(913) 210-1028 www.revivalroofingkc.com
Lenexa, Kansas
5.0 from 32 reviews
Revival Roofing and Construction is your trusted roofing expert in the Kansas City metro area! Specializing in roof repairs, replacements, and inspections, we deliver modern, high-quality solutions tailored to your needs.
LoveOurRoof, an Xcel Company Lic#DR 2020-9778
10608 Widmer Rd, Lenexa, Kansas
5.0 from 30 reviews
Local and BBB A+ Accredited Loving exteriors since 1990! Serving the Kanasas City, KS and Kansas City, MO Metro areas, we are involved in your community through Habitat for Humanity and other great charitable organizations. We help realtors, insurance agents and homeowners with their roofing and siding needs. We would love a chance to be a part of your exterior contracting project.
Emerson Enterprises Unlimited
(913) 513-1182 emersonpros.com
16309 108th Cir, Lenexa, Kansas
4.6 from 367 reviews
Emerson Enterprises Unlimited is a reliable roofing replacement contractor Lenexa homeowners can count on. We provide high-quality roof replacement and repair services, using durable materials to protect and enhance the look of your home. Whether you need a full roof replacement or minor repairs, we deliver dependable results tailored to your needs. Our skilled team offers competitive pricing and timely service, ensuring your roofing project is completed efficiently. Serving Lenexa and surrounding areas, Emerson Enterprises Unlimited is committed to keeping your home safe and secure with lasting roofing solutions. Contact us today to discuss your project!
Your Neighborhood Roofer
(913) 214-2123 www.yourneighborhoodroofer.com
14004 W 107th St, Lenexa, Kansas
4.6 from 65 reviews
Your Neighborhood Roofer delivers expert roof installations, repairs, and a complete range of specialized roofing services throughout the Kansas City Metro area.
RoofTek Kansas City
(913) 513-0160 kansas-city.rooftek.com
Lenexa, Kansas
5.0 from 12 reviews
RoofTek is the leading residential and commercial roofing and solar company in Kansas City, MO. Our mission is to provide clients with peace of mind, knowing their valuable assets are protected from any storm. With extensive experience, our team has completed thousands of rooftop installations, from affordable re-roofs to complex solar setups on steep-pitched, custom homes. In Kansas City, MO, we install over 60 roofs monthly during the roofing season. Our unwavering commitment to quality is paramount; our installers, project managers, and team receive continuous training to ensure RoofTek consistently delivers the highest value in the industry. Contact RoofTek today for all your roofing and solar needs!
RufPlus - Roof Replacement, Roof Repair & Maintenance.
10000 Marshall Dr, Lenexa, Kansas
5.0 from 12 reviews
RūfPlus is a trusted roofing contractor in the Kansas City Area that goes above and beyond to ensure that your roof is protected and well maintained. We provide comprehensive services from preventative care to cost effective repairs and replacements, offering more than just a traditional roofing service. With our commitment to quality craftsmanship and dedication to customer satisfaction, RūfPlus is your ideal choice for any roofing needs.
Lenexa's climate pushes homeowners toward the mild-weather stretches for full roof replacements. The combination of hot summers, cold winters, and freeze-thaw cycles means a true replacement is most reliable when temperatures sit in a comfortable range and the ground isn't frozen. In practice, the ideal window avoids the peak heat of July and August and the depth of January's cold spells. The goal is a steady pace from tear-off through sealing, with materials able to cure and set without rapid temperature swings breaking the seal.
Spring brings insurance-adjusted storm activity that can accelerate a replacement timeline, but the migrating rain can also create delays if a roof is torn off early in the season. For a homeowner, the practical plan is to target a stretch after the last major freeze but before the late-spring heat ramps up. Scheduling should anticipate occasional showers, which can slow underlayment and flashing work. When a storm hits, the quick decision to tarp and temporary patch exposed vulnerabilities helps avoid water intrusion while a crew awaits a drier spell. In Lenexa, the soil thaws quickly and the roof deck dries faster than in northern climates, which helps keep crews moving as long as rains stay moderate.
Summer heat in the Kansas City area can affect installation conditions and material handling, especially on dark asphalt roofs during afternoon work. If a replacement must occur in July or August, plan for early-morning sessions and mid-afternoon pauses to protect crews from heat exposure and to reduce the risk of shingles curling or adhesive issues on materials that are more temperature-sensitive. A practical approach is to schedule the largest roof sections before the hottest part of the day and finish the day while temperatures are still manageable. Expect more shade management on steep slopes, and ensure ample hydration and dry-on-slope protection. Communication with the crew about heat-related safety can prevent delays and protect the warranty on underlayment and fasteners.
Fall offers another reliable window as temperatures cool from late September through early November. The risk of summer heat is gone, and the threat of early winter storms has not yet arrived. This period allows for thorough tear-off, careful underlayment installation, and proper sealing. Homeowners should coordinate with the contractor to ensure that weather breaks are leveraged for timely inspections and staged installations that align with the final inspection plan. In Lenexa, fall replacement can often catch homeowners before the holiday rush, reducing the likelihood of weather-induced holdovers that complicate sealing and warranty timelines.
Winter freeze-thaw conditions in Lenexa can complicate tear-off, underlayment work, and sealing performance, making emergency repairs more common than elective replacements. If a storm incurs damage in late fall or early winter, a temporary fix may be necessary to protect the home until temperatures rise enough for a full replacement. When planning a winter approach, anticipate shorter daylight hours, more frost delays, and a tendency for crews to pack smaller windows into each day. The practical takeaway is to treat winter more as a disruption period than a replacement season, and to reserve a firm replacement window for the first mild spell after the holidays.
Asphalt shingles dominate Lenexa, yet metal, clay tile, concrete tile, wood shakes, and synthetic/composite roofs are all active material categories in this market. Each option brings its own behaviors when paired with the local climate and housing stock. If your home features a traditional suburban roofline, you'll notice laminated shingles remain the go-to for ease of repair and availability, while neighbors increasingly consider impact-conscious upgrades and longer-life alternatives as part of reroof projects that occur in the storm season.
Hail exposure and freeze-thaw cycling shape failure patterns differently for each material. Asphalt shingles can show granule loss and surface bruising from hail, with the underlying layers occasionally showing wear after repeated cycles. Metal roofs might resist impact better in some cases but can suffer from cosmetic denting and potential panel edge stress if hit hard or if fasteners loosen over time. Clay and concrete tiles bring durability and a longer life, but their brittle nature means a severe hail strike can crack or break individual tiles and expose underlayment. Wood shakes offer strong impact resistance in some installations but can be vulnerable to moisture and rot if not properly vented and maintained. Synthetic or composite shingles tend to balance impact resistance with weight and flexibility, helping them handle cycle wear while preserving a modern look. In any case, flashing and joints-especially around chimneys, vents, and dormers-receive particular attention during inspections after hail events, as these areas often bear the brunt of stress from rapid temperature swings.
The mix of suburban residential reroofing and some low-slope commercial work means you'll regularly compare standard laminated shingles against options that are more impact-conscious or designed for longer service life. If hail or frequent storms are in the forecast, a system with robust underlayment, reinforced flashing, and a denser granule pattern on shingles can improve resilience. For those leaning toward metal or tile, pay close attention to roof geometry and support details; some configurations perform better in wind and impact than others, and proper installation matters just as much as material selection. If you own a home with an attic or cathedral ceiling, consider how the internal insulation and ventilation interact with the chosen roof; better air flow helps prevent ice damming and preserves the integrity of the sheathing during freeze-thaw cycles. In all cases, alignment with your existing look, roof slope, and long-term maintenance plan will guide whether you lean toward a familiar asphalt system or one of the longer-life, higher-impact options.
Local reroof pricing in this area moves with storm-driven demand spikes, especially after hail events. When a big hail storm hits, crews and materials can tighten up, which may push scheduling and labor availability out a bit and can drive up short-term quotes. In Lenexa, you'll notice that getting on the calendar soon after hail can be a challenge, and some crews price accordingly to reflect the tighter market. This isn't just about the rough cost per square; it's about the pace at which crews can mobilize, remove old decking, and install new underlayment and finishes. Expect estimates to reflect both the material you choose and the likelihood of extended lead times for skilled labor.
In this market, the cost per square foot varies widely by material. Asphalt shingles range from 350 to 650 USD per square, which remains the most common option for many Lenexa homes due to balance of price and performance. Metal roofing sits higher, typically 700 to 1100 USD per square, offering durability and lighter weight but a bigger upfront investment. Clay tile runs 900 to 1700 USD per square, while concrete tile sits about 900 to 1500 USD per square, appealing for long life and distinct curb appeal but heavier installation considerations. Wood shingles or shakes come in around 800 to 1300 USD per square, valued for a traditional look, but they require more maintenance in our climate. Synthetic or composite shingles generally run 450 to 900 USD per square, providing a middle ground with good wind and hail resistance. Your choice should weigh not only initial cost but long-term performance in freeze-thaw cycles and hail exposure typical of the metro area.
When hail pushes fast-tracked replacements, the tear-off phase can reveal hidden damage that expands scope. Decking repair or replacement is a common add-on when the old boards show rot or soft spots once the roof is torn back. If hidden damage is found, expect a revised plan that lengthens the project and adjusts the budget. This is a practical reminder: the cheapest roof upfront may not be the cheapest over the life of the roof if decking or underlayment needs frequent attention. Planning for contingencies helps keep the project moving when the storm-driven surge hits, and it reduces the risk of delays at critical stages of the tear-off and installation.
Get a clear picture of your project costs upfront - no commitment required.
HT Roofing & Construction
11437 Strang Line Rd, Lenexa, Kansas
5.0 from 141 reviews
In this market, a roof replacement typically starts with a building permit from the City of Lenexa, and the roofing contractor usually handles pulling that permit. The process is not a formality to skip; it's a formal step that helps ensure your home meets local wind, fire, and construction standards. If the permit isn't pulled or lapses, you risk fines, delays, or the city denying final approval when you're ready to close the project. Expect the permit to be active through the major milestones of installation to keep the project aligned with city rules and your insurer's documentation needs.
Inspections in Lenexa are commonly scheduled to align with the roof's progress. There is an installation inspection during the work and a completion inspection once the roof is in place. The final inspection is the key step to close the permit and move on from the project with a clean record for your property file. It's wise to coordinate inspection windows with your crew so weather doesn't push the timeline or create a backlog, especially in the spring thaw when hail season can cluster with heavy rain.
If decking work is involved-such as replacing damaged plywood or adding structural support-the City of Lenexa may require additional review beyond the straightforward reroof permit path. This can mean extra plan checks, longer review times, and potential adjustments to the scope of work before the permit moves forward. Being proactive with your contractor about any decking concerns helps prevent surprises that could stall both permits and insurance documentation. If there is any doubt, ask for a pre-submittal review so you know which steps to expect and can plan around city review cycles.
In a high-claim hail market within the Kansas City metro, insurers often scrutinize prior damage and repair history closely. That means a prior roof repair or patch can influence how a new hail claim is evaluated and paid. If a roofer has documented previous damage, repairs, or a partial replacement, expect underwriters to review those records more carefully, comparing what happened before to what is being claimed now. The result can be more questions, longer processing times, and the potential for adjustments to scope or payout. Homeowners should be prepared for a thorough review that considers the entire roof's history, not just the most recent event.
Detailed documentation matters locally: carriers may request before-and-after photos, roof diagrams, and line-item scopes when evaluating storm losses in this area. Gather photo timelines that show the roof's condition before the hail, the damage observed after, and any interim repairs. Keep a clear, itemized record of materials, patches, and contractor notes. If a claim grows complicated, a professionally prepared roof diagram or annotated photos can help the adjuster see where damage overlaps with previous work. Having this documentation organized and ready can prevent delays and reduce misunderstandings about scope and eligibility.
After widespread hail events affecting Lenexa and nearby suburbs, claim handling can become more involved and premiums may rise even though broad coverage remains available. Insurers may take a more conservative approach during evaluation, even when the roof is ultimately replaced. It helps to anticipate a longer timeline for decisions and to maintain open, clear communication with the insurer. Stay proactive: document every interaction, confirm what has been approved in writing, and request written summaries of any changes to the claim scope. This approach supports a smoother process and reduces the chance of surprises as the settlement unfolds.
Connect with contractors who help homeowners navigate the claims process from damage assessment to final approval.

True Grit Roofing Company
12209 W 88th St, Lenexa, Kansas
5.0 from 456 reviews
HT Roofing & Construction
11437 Strang Line Rd, Lenexa, Kansas
5.0 from 141 reviews
Swing Coast Roofs & Gutters - Lenexa, KS
(833) 492-7663 www.swingcoastroofing.com
8367 Nieman Rd, Lenexa, Kansas
5.0 from 47 reviews
In Lenexa, repeated hail and wind exposure commonly show up first at ridge caps, along vent bases, and on softer metal components rather than only in obvious leak spots. Ridge caps can crack or lift under hail impacts, allowing water to migrate beneath shingles. Attic vents and turbine vents may develop damaged housings or loose flashing that invites moisture intrusion after a storm. Soft metal trim along the eaves and around roof edges is particularly vulnerable to denting, deformation, and seam separation. Inspect these areas after hail events or strong winds, looking for wrinkles, gaps, or displaced flashing. If you notice discoloration, lifted edges, or metal corrosion, address promptly to prevent accelerated deterioration.
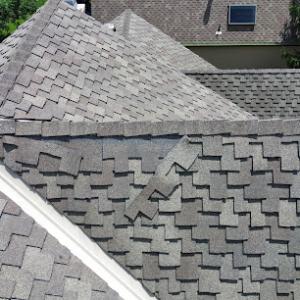
Shingle edges near transitions-chimneys, skylights, and dormers-tend to wear first in this climate. Freeze-thaw cycling in northeast Kansas can worsen small flashing gaps and exposed fastener issues over winter, turning minor defects into active leaks by spring. Pay special attention to granule loss along the rake and eave edges, as granules shield the asphalt and help defined wind- and hail-resistance. Damaged or missing shingles at edges create pathways for water that can travel along the shingle layer and find its way under flashing. Regular inspections after storms should include a careful check for lifted tabs, curling corners, and worn tabs along roof-to-wall transitions.
Debris and wind events in fall can disrupt roof access and expose vulnerable components around penetrations. Around chimneys and skylights, sealant deterioration, improper flashing, and fastener backout are common failure points. Look for hairline cracks in sealant, rusted or loose flashing angles, and mortar deterioration at chimney bases. Skylight flashing often loses its watertight rhythm after hail or heavy winds, leaving visible gaps that worsen with freeze-thaw cycles. If flashing looks darkened, cracked, or seeps moisture around these penetrations after storms, a timely resealing or flashing retrofit can prevent larger leaks.
Find contractors experienced in skylight installation, flashing, and leak repairs to bring natural light into your home.
Emerson Enterprises Unlimited
(913) 513-1182 emersonpros.com
16309 108th Cir, Lenexa, Kansas
4.6 from 367 reviews
Because Lenexa sees heavy storm-response activity, homeowners commonly prioritize fast response, reroofing experience, and cleanup commitments when comparing contractors. In practice, that means you should expect timely arrival, clear timelines, and a crew that finishes the job with thorough site cleanup. When you call, ask for an estimated start date, a realistic finish window, and a plan for debris containment and disposal. If a crew promises an overnight or rushed timetable, press for specifics on daily progress and safety checks.
Residential homes in this area sit on a mix of existing roofs and newer adds, so the right roofer should demonstrate real experience handling hail impact, vent and flashing replacements, and slope-specific challenges. Some contractors also handle commercial work, so be explicit about scope: confirm that the estimator will propose residential-grade materials and warranties, not a mixed bag of commercial products. Review the estimator's photos from recent storm work and ask about how they protected landscaping and driveways during the tear-off.
A solid Lenexa contractor brings documentation that aligns with an insurance claim process. Expect a detailed roof condition report, a line-item material list, and a documented sequence of inspections and rechecks. The estimator should outline how they'll manage the staged inspections commonly used here, including any required interim checks and the final sign-off. If the claim is involved, ask the contractor to provide templated notes that you can share with your adjuster, ensuring the record is consistent from the first estimate through the final installation.
With many firms serving both residential and commercial clients, the strongest bidders keep the residential scope narrowly defined. Confirm material types for your roof and any accessories, confirm warranty coverage, and insist on a single-point contact for updates. Ask for a written project plan that describes staging, weather contingencies, and the cleanup protocol. A responsive contractor will provide regular progress updates and a post-install walkthrough to verify everything meets your expectations before signing off.
Get a clear picture of your project costs upfront - no commitment required.
HT Roofing & Construction
11437 Strang Line Rd, Lenexa, Kansas
5.0 from 141 reviews