Last updated: Apr 19, 2026
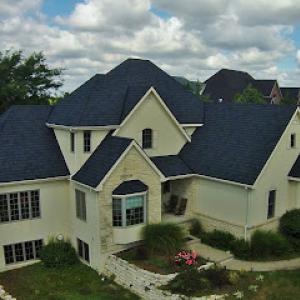
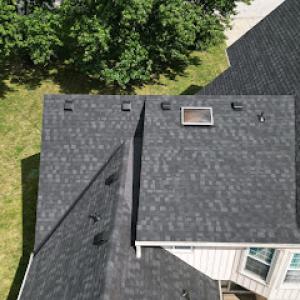
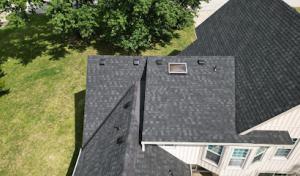
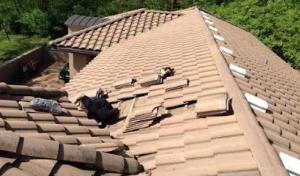
Gardner homeowners are in a Kansas hail-and-wind claim environment where spring storms can create sudden neighborhood-wide roof demand spikes. When the skies slam shut with hail, the risk to shingles, flashing, and ventilation increases in minutes. The impact isn't just cosmetic: hail damage can compromise water shed and roof integrity faster than most residents realize. In a few days, a quiet street can turn into a reactionary market where multiple crews chase the same repairs. The window for prompt action is narrow, and delays can cascade into longer enforcement cycles and a pile of contractor calls. Watch for signs like new granule loss, dented metal, or curled shingles after a heavy squall, and treat those signs as a red flag for next steps rather than a typical wear pattern.
Local contractor signals show storm damage, insurance claims, and emergency repair are among the most prevalent specialties in this market. In practical terms, that means you will be negotiating with crews who are tuned to the insurance process and the pressure to secure rapid assignments. The best path is to document damage immediately with clear photos, include timestamps after each hail event, and compile a concise, damage-first narrative for the insurer. If a contractor offers an accelerated patch to placate you, verify that the temporary fix won't delay a proper replacement and that the contractor can coordinate a full roof schedule once the claim settles. In Gardner, the rhythm of spring storms makes it common for neighbors to experience overlapping claims within the same quarter, so mutual planning with nearby homeowners can help protect driveways, property landscaping, and accessibility to staging areas for materials.
Because dry spring and fall windows are the best replacement periods in Gardner, major hail events can quickly compress scheduling during the same seasons most favorable for installation. The practical effect is a tight timeline between confirmation of coverage and the actual scoping, ordering, and installation phases. If a claim is opened, push for an early, clear scope of work that prioritizes roof replacement rather than cosmetic fixes when damage is confirmed. Coordinate with the insurer for preferred contractors who maintain consistent crew availability and solid teardown-to-installation throughput. Maintain a single point of contact for the project to minimize back-and-forth during a compressed window, and prepare in advance by clearing obstructions from eaves, gutters, and drive paths so crews can work efficiently on the roof deck. In neighborhoods where hail strikes land in rapid succession, timing the project to a dry, wind-stable day can cut exposure to rain intrusion and wind-driven debris during re-roofing.
If a hail event hits your block, initiate damage assessment within 24 to 48 hours. Gather and organize documents: photos of dented shingles, granule loss, and any interior signs of leaks, plus a brief summary of the event timeline. Reach out to reputable local contractors who specialize in storm-related claims and have a proven record of coordinating with insurers. Confirm the contractor can manage a full roof replacement within the anticipated window and has contingency plans for weather delays. Keep a close eye on scheduling shifts as multiple homeowners in the same area pursue replacements; staying proactive minimizes the risk of being sidelined by a crowded calendar.
Find local contractors experienced in assessing and restoring roofs after hail, wind, and severe weather events.
Cordray Roofing
(913) 856-7663 www.kcroofing.com
105 S Sycamore St, Gardner, Kansas
5.0 from 65 reviews
Platinum Roofing
(877) 200-7683 platinumroofllc.com
865 E Warren St, Gardner, Kansas
5.0 from 2 reviews
Cordray Roofing
(913) 856-7663 www.kcroofing.com
105 S Sycamore St, Gardner, Kansas
5.0 from 65 reviews
Cordray Roofing is pretty much the best roofing company in Johnson County. Try us, I dare you.

Platinum Roofing
(877) 200-7683 platinumroofllc.com
865 E Warren St, Gardner, Kansas
5.0 from 2 reviews
At Platinum Roofing, we are dedicated to providing top-notch roofing services to the Kansas community and beyond. Our team of experienced professionals specializes in a wide range of roofing solutions, including roof replacement, repair, and maintenance services for both residential and commercial properties. We understand the importance of a strong and reliable roof, which is why we offer free roof inspections and quotes to ensure your property is well-protected. Whether you're dealing with storm damage, leaks, or simply need a routine check-up, Platinum Roofing is here to help. Our commitment to quality workmanship, timely service, and customer satisfaction sets us apart from the competition.
Gardner Roofing Repair Pros
Gardner, Kansas
5.0 from 1 review
Gardner Roofing Repair Pros is the roofing contractor Gardner residents should call for Roofing Construction, Roof Repair, Storm Damage and Hail Damage repair on their homes. Our team of roofing contractors, siding contractors, and window installers each have years upon years of professional service hours and on the job training. Our crews will come out, evaluate, provide a free estimate quote, complete the work upon request, clean up the site, and do it all while being courteous and respectful to you, your family, and your property. Give us a call today at (913) 270-1137.
AKC Pros Roofing, Gutters, Siding & Insulation
(913) 592-9194 www.akcpros.com
Serving
4.8 from 188 reviews
We have been providing satisfactory service in the roof repair and Construction industry for many years. We have the expertise to take on any size and type of roofing job. We have a high reputation in the industry and want you to know that we can provide you the best service in Kansas City. Our team of skilled, experienced roofing professionals who back that up every day of the week with a commitment to true roofing craftsmanship and top notch customer service. AKC Pros is a fully licensed, bonded and insured Kansas & Missouri General Contractor serving the entire Kansas City Metro. We are your local & full-service contracting pros.
Iconic Home Renovations
(913) 787-2654 www.iconichrkc.com
Serving
4.8 from 47 reviews
Iconic Home Renovation, based in Olathe, KS, is a premier general contractor serving Kansas and Missouri, specializing in top-quality roofing, siding, and decking services. As a GAF Master Elite contractor, we provide industry-leading roofing solutions backed by a 25-year workmanship warranty, ensuring durability and peace of mind. Our expert team also excels in siding repair and installation, including James Hardie products, as well as deck design, installation, and replacement. At Iconic Home Renovation, we’re dedicated to transforming your home and creating a lasting legacy of quality and craftsmanship.
VernCo Roofing
(913) 300-1878 verncoroofing.com
Serving
5.0 from 18 reviews
"VernCo Roofing is your trusted partner for residential and commercial roofing solutions in KC Metro and surrounding areas. Specializing in roof repair, replacement, and storm damage restoration, we are committed to delivering exceptional craftsmanship, superior materials, and outstanding customer service. Whether it’s a new roof, gutters, or siding, we’re here to protect your home and ensure your peace of mind. Contact VernCo Roofing today for a free inspection!"
Weddle & Sons Roofing of Olathe
(913) 732-8010 www.weddleandsons.com
Serving
4.9 from 117 reviews
We are a regional family owned roofing company serving the Kansas City Metro area. As a company, we've been in business for over 20 years and are dedicated to building better lives in our communities, among our employees, and for our clients through quality workmanship and trusted relationships.
Vision Construction
(816) 743-4156 www.buildwithvisionllc.com
Serving
4.8 from 110 reviews
At Vision Construction we believe we are called to add value. Roofing, Siding, Gutters, Storm Restoration - Our process starts with a Free 21-Point Inspection of your project. We serve homeowners throughout states like Kansas, Missouri, Oklahoma, and Texas and take great pride when homeowners express to us that they actually enjoyed the experience.
M & M Roofing
(913) 782-7300 www.mmroofingkc.com
Serving
5.0 from 150 reviews
M & M Roofing, Inc. has been offering the best quality and service available to the Kansas City metro area since 1992. Our core values have always been and remain Quality, Knowledge, Integrity and Service after the installation or repair. We hope this web site is another tool available to help you select the best contractor and system for your project.
Roofing Force
(913) 270-5440 roofingforce.com
Serving
4.8 from 363 reviews
Have a roofing problem? We have a solution. From low cost, composition asphalt and composite roofing, to premium lifetime metal and polymer roofing solutions, we install it all. We also cover all storm damage restoration.
Maverick Exteriors
(913) 268-6052 www.maverickexteriorskc.com
Serving
5.0 from 101 reviews
Maverick Exteriors, located in Olathe, KS, provides reliable roofing solutions with a focus on customer satisfaction and convenience. They offer free estimates, same-day service, and flexible financing options to make roofing projects stress-free and affordable. Fully insured and committed to safety, they back their work with a 100% satisfaction guarantee. Their team is experienced, professional, and ready to serve both English- and Spanish-speaking customers. Whether it’s a small repair or a full roof replacement, they bring prompt, high-quality service to every job. Maverick Exteriors is the trusted local choice for roofing done right, with the speed, care, and support homeowners deserve.
Midwest Roofing
Serving
4.6 from 19 reviews
Midwest Roofing offers residential and commercial roofing services in Kansas, Missouri, Nebraska, and Iowa. We specialize in complete roofing installation, repair, restoration, and replacement solutions. If you need roofing assistance, call us today!
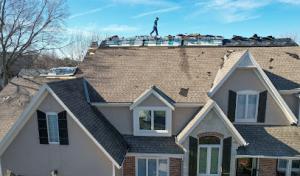
In this climate, the smoothest tear-off and installation days tend to come during the drier stretches of spring and fall. Those windows usually mean fewer weather-induced pauses, less risk of water intrusion through open decks, and a more predictable pace for crews to complete a full replacement without back-to-back delays. If a roof project needs to be timed with high wind events or hail risk, prioritizing a week or two of settled weather in those dry seasons can keep the project moving steadily. Plan around a sequence that allows for a clean tear-off, proper underlayment installation, and a targeted, efficient finish before the next heat spike or winter onset.
Summer in this area brings hot days, which can be a strain on shingles during installation and on underlayment in direct sun. More critically, the daily rhythm of a Gardner roof job often gets interrupted by sudden summer thunderstorms. Those weather breaks aren't just inconvenient; they expose underlayment and open roof decks to moisture, which can complicate fastening schedules and temporary protection plans. If choosing a summer start, build buffers into the schedule so a brief storm doesn't cascade into multiple days of work stoppage. Ensure crews have shaded staging areas and allow for midday work pauses to protect materials. Clear communication about potential weather pauses helps avoid rushed workmanship when the skies finally clear.
Winter brings ice, snow, and consistently lower temperatures, which slow and sometimes stall roof work. Freezing conditions affect fastener performance and shingle handling, and the angle of daylight shortens workable hours. If a replacement is necessary in colder months, expect more conservative timelines and a cautious approach to material handling and adhesive performance. Consider staging the project to align with mid-mortality periods of winter-after a cold snap but before the heaviest snowfalls-so crews can keep material wraps intact and protect the interior during any temporary exposure gaps. A winter plan should include contingency clips for delays caused by weather, plus clear guidance on what temperature thresholds will trigger a shutdown or a safe protective pause.
A practical approach is to target a main season block for the bulk of the work, supplemented by a precise start date that avoids peak heat in late summer and the hardest cold in mid-winter. For homes with limited access or roof obstructions, the season you choose can determine how effectively crews can stage equipment, haul debris, and manage waste. When hail or wind damage has already occurred, the window that minimizes rework and accelerates the inspection-to-dinstallation cycle often sits in the spring or fall. Use those periods to coordinate with insurance-driven timelines, ensuring the crew has uninterrupted access from tear-off to final inspection, with a buffer before the first winter freeze or the next spring storm flood.
Coordinate deck and attic protection, especially on sunny days when temperatures spike. Confirm that drip edge and underlayment are installed promptly during dry-season work so there's a solid barrier against moisture during any unexpected spring rain. For homes on the steeper pitches common to local neighborhoods, confirm that fall and spring crews have ample daylight hours to complete safety-belted work before evening chill or rain. In all cases, maintain a clear line of communication with the crew about weather contingencies, daily goals, and anticipated wrap-up dates to keep the project moving steadily through Gardner's seasonal realities.
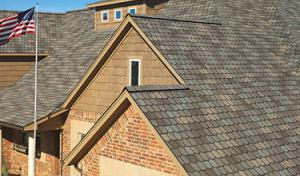
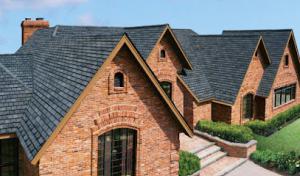
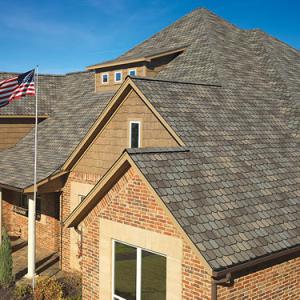
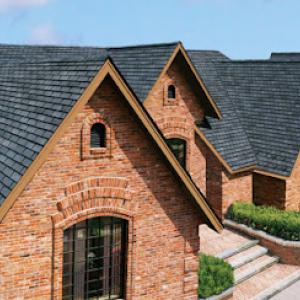
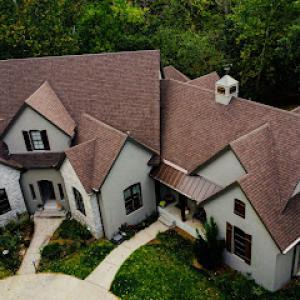
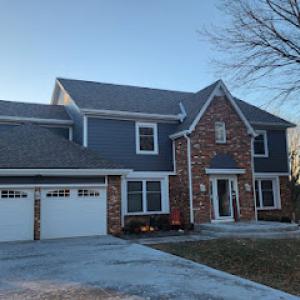
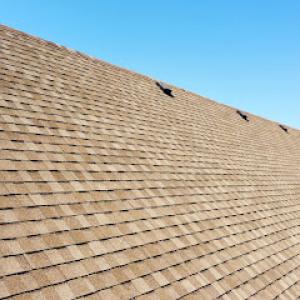
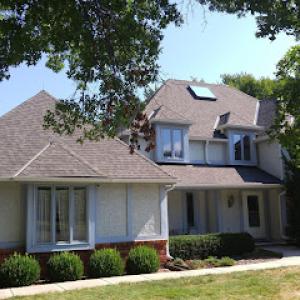
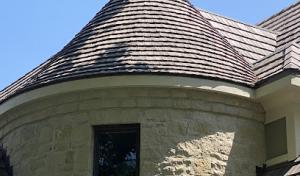
Asphalt shingles dominate the Gardner market, matching the suburb's mix of modest to mid-size homes with practical, straightforward replacement options. In the hail-prone setting, asphalt maintains its appeal because most repairs can blend in with existing shingles and the material tolerates typical wind and hail events reasonably well when installed correctly. The key decision point is roof age and shingle granule loss: after a storm, you might see granules in gutters and on the ground, which signals damage that could accelerate wear if not addressed. If a storm has rattled your roof, a close look at the edges, flashing, and any exposed underlayment helps determine whether a repair will suffice or a full re-cover is warranted. In Gardner, homeowners often choose asphalt for its balance of performance, availability, and ease of matching color and texture to neighboring homes.
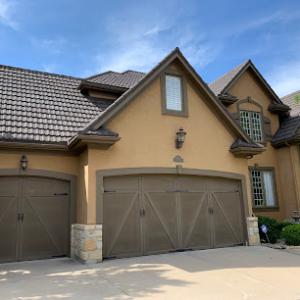
Metal roofing has a dedicated following among local contractors, even as the broader market leans toward re-roofing practicality. In Gardner's storms, metal can be a strong performer because its impact resistance and fast installation can limit ongoing leakage risks after hail. A well-sealed metal roof also tends to shed wind-blown debris more cleanly, reducing damage to interior structures. The main considerations are panel type, fastener security, and proper flashing around chimneys, valleys, and vents. If your home features a metal upgrade, you'll likely notice a longer interval before cosmetic repairs become necessary, and tighter attic ventilation can help manage condensation under high-humidity stretches following summer storms. For many homeowners, metal represents a strategic choice when storm history, property value, and local contractor expertise line up.
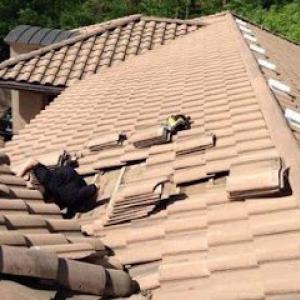
Clay and concrete tiles are actively supported by Gardner's market signals, especially for homes with existing tile frameworks or elevated curb appeal. Tiles can perform well in hail if properly chosen (impact-resistant options exist) and installed with a robust underlayment. The trade-off is weight and the potential for individual tiles to crack during intense hail events, which may translate into more focused repair needs rather than a full roof replacement. When considering tile, a careful assessment of roof framing, attic load, and the surrounding landscape is essential. In storm cycles, the advantage is a durable, long-lasting surface with a distinctive look, but the decision should align with the structural capacity and the local contractor's experience in tile installation and restoration.
Wood shakes offer a traditional appearance that appeals to certain neighborhoods, yet they demand vigilant maintenance in Gardner's climate, where sun exposure and moisture fluctuations can accelerate aging. After hail, shakes may suffer dents or cracks that compromise protection, and repairs can be more visible and labor-intensive. Slate, while offering exceptional longevity and a refined aesthetic, remains a niche option driven by specialized labor and the home's structural suitability. In areas with frequent wind-driven storms, slate's weight and brittle edges require careful handling during installation and potential replacement, making it important to work with a contractor who has proven experience with slate systems. For homeowners weighing these materials, the local signal from contractors emphasizes the value of pairing material choice with existing roof geometry and retrofit readiness.
When you're budgeting after a hailstorm, base estimates in this area reflect the practical realities of local homes and labor. Asphalt shingles fall in the neighborhood of $350 to $650 per square, depending on shingle quality and installation details. Metal roofing tends to run higher, roughly $700 to $1300 per square, with weather resistance and panel choices driving the spread. If clay tile is on the house, expect a broad range from $900 to $2600 per square, while concrete tile sits around $800 to $1800 per square. Wood shingles or shakes usually land between $450 and $900 per square, and slate can range from $1100 to $2800 per square. These figures reflect Gardner's mix of older homes and newer builds, plus the regional tendency toward storm-driven ups and labor competition after hail events.
Storm-driven surges in re-roof demand push scheduling pressure higher after major hail events. In Gardner, that means you may see crews booking into tighter windows, especially when a large area is hit in quick succession. The result is shorter lead times for material supply and tighter coordination with weather windows. If your roof is on the edge of damage, a quick-but thorough-inspection helps sort weather-ready days from rush jobs. Expect some price movement as crews balance demand against material backlogs. In practice, that can translate to a few more days of lead time or a modest bump in labor quotes during peak storm weeks.
Costs can shift based on whether the project is a straightforward replacement or a storm-damage job that requires temporary dry-in, emergency response, or insurer documentation. A simple replacement with no emergency work generally follows standard material and labor variables for the chosen system. Storm-damage scenarios add layers: temporary tarping or dry-in, expedited scheduling, and the need to document damage for insurer claims. Those elements can raise upfront quotes slightly and complicate the path to a final invoice. In any case, aligning expectations with your contractor on scope, photos, and communication helps keep costs and timelines transparent after a hail event.
Get a clear picture of your project costs upfront - no commitment required.
Platinum Roofing
(877) 200-7683 platinumroofllc.com
865 E Warren St, Gardner, Kansas
5.0 from 2 reviews
A full re-roof in Gardner typically requires a permit reviewed and issued through the City of Gardner or Johnson County building department process. This is not a formality to skip when a storm tears off shingles or when hail leaves dents on the deck and eaves. The local system expects paperwork, approved plans if needed, and a licensed contractor to sign off on the work. If a contractor suggests you can bypass it to save time, understand that skipping the permit can stall any insurance claim, trigger penalties, and complicate future resale. The permit anchors the project to a code-supported baseline, which matters when the next storm comes through and a hail-adjusted replacement is on the horizon.
Roof replacements are inspected during the project and receive a final inspection upon completion in this jurisdiction. That means every major step-deck protection, underlayment, flashing, venting, and the actual installation-will be reviewed as work progresses. A mid-project check helps catch issues before they hide under new shingles, reducing the chance of waking up to leaks or warranty headaches after the crew has already left. Plan for potential re-work if the inspector requires it; neglecting corrections at the right stage often leads to longer timelines and added stress when the final inspection date nears.
The permit is expected to remain visible on site until final inspection, and contractors are responsible for code-compliant work throughout the project. This visibility acts as a constant reminder that the project is under official review and that all trades must meet local adoption and amendment provisions. If the permit becomes obscured or lost, or if a contractor stops showing progress, contact the building department promptly to avoid a stop-work order or a delayed final seal. In a fast-moving storm cycle, timely inspections help keep insurance calendars aligned and prevent a rework backlog that complicates claim timelines.
When storms push homeowners toward rapid replacements, the permit process acts as a safeguard against rushed, non-compliant installs. If an adjuster approves a claim for a complete roof replacement, knowing the project will be pursued under proper permit channels helps ensure the replacement holds up under local code requirements and future premium considerations. Being proactive about permits, inspections, and visible documentation protects both the structure and the homeowner's long-term interests.
Kansas insurers commonly request detailed roof damage documentation because hail and wind claims are frequent across markets like Gardner. Homeowners who can show a clear trail of impact marks, shingle failure, and hail bruising on photos tend to move claims through faster and with fewer back-and-forth holds. In a neighborhood where roofing styles span asphalt, metal, and tile, having a consistent, carefully dated record helps prevent mismatches between what is seen on the roof and what the adjuster notes on paper.
Gardner experiences pronounced cycles after big hail events, and many nearby properties may file at once. Expect adjuster arrival times to vary widely in the weeks following a severe season. Some homeowners encounter a quicker review if the damage is plainly evident from the ground or with a quick drone shot; others face longer waits when multiple roofs require inspection, and scheduling becomes a bottleneck. Being prepared with organized documentation helps you stay ready when the first appointment slots open.
Coverage is generally available, but underwriting and claim scrutiny can tighten after active hail years in Kansas. Insurers may request deeper proof of loss, timelines for prior repairs, or evidence that the damage occurred during the covered storm period. If a claim feels unusually delayed or denied on a technical point, review the history of previous weather events in your area and gather any related correspondence from the insurer as context to support your case.
Begin with high-resolution photos showing the entire roof and close-ups of hail hits, damaged flashing, and edge fractures. Create a simple dated log of events, noting when hail storms occurred and any temporary leaks or interior signs. Keep a copy of contractor estimates and any correspondence from the insurance company. If an adjuster is delayed, maintain your records and be ready to share them promptly to keep the process moving.
Storms in Gardner can pivot from a bright afternoon to a roof problem before you finish the dish. Hail and wind-driven events repeatedly push roof damage into interior leaks, turning a simple shingle curl into soaked attic insulation and soaked ceiling drywall in hours. This is not a slow drip-it can escalate quickly during a severe thunderstorm or a hail event, especially when storm fronts push through at night.
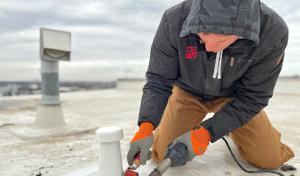
If you notice water intrusion, your first move is to protect the interior. Place a sturdy bucket under the leak, move valuables away, and avoid electrical hazards by turning off the affected circuit if you can do so safely. Speak with a local roofer who handles emergency repairs; you want someone who can arrive within hours, not days, to stop further intrusion and minimize secondary damage.
Autumn wind events and summer thunderstorms can leave roofs partially damaged while full replacement crews are scarce. Lay down heavy-duty tarps, secure edges with nails and sandbags, and ensure gutters and downspouts are free of debris. In places with frequent backlogs, these temporary measures are not optional-they're your bridge to a proper fix when the weather cooperates and crews can be dispatched.
Storm-related scheduling backlogs can delay permanent repairs even during the best roofing seasons. If a reliable crew is tied up, you'll rely more on quick, sturdy temporary protection and rapid communication with your contractor about estimated arrival windows. Establish a clear contact line and confirm who is on call for after-hours emergencies.
If multiple leaks appear or there is active dripping from a ceiling joist, contact a local emergency roof specialist immediately. A prompt, decisive response reduces interior damage and keeps the threat from expanding into insulation, walls, and electrical systems. In Gardner, timely action is the difference between a quick fix and a major reconstruction.
When you can't wait, these contractors offer fast response times to stop leaks and prevent further damage.
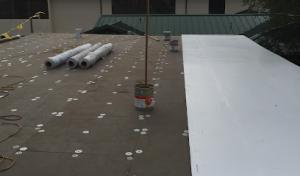
Flat-roof and skylight work is a recurring demand in Gardner's contractor market, with homeowners often chasing fixes after hail and wind events. Expect a steady stream of skylight reseals, membrane patches, and edge flashing replacements in this zone. When evaluating a flat-section repair, focus on the perimeter details where flashing meets parapets, and outline a predictable plan for seasonal inspections that catches early signs of moisture intrusion around skylight frames.
Thunderstorm-driven rain in Gardner can expose drainage and flashing weaknesses faster on low-slope sections than on simple steep-slope roofs. Look for standing water near scuppers, interior ceiling staining below flat sacks, and rusting or loose counterflashing at transitions. A practical approach is to pre-emptively dry-fit and seal the drip edge, test the internal gutter slope after heavy storms, and verify that any outward slope remains consistent across field joints.
Mixed rooflines on additions, porches, and transitions can become problem areas after hail and wind events common in this part of Kansas. Pay attention to where two roof planes meet, especially at valley intersections, step joints, and corner flashings. In Gardner, these zones tend to trap debris and thawing ice, which accelerates wear. Implement targeted inspections after storms, and document any creep in alignment or flashing gaps that could invite water intrusion during the next downpour.
Find specialists in TPO, EPDM, and built-up flat roofing systems for residential and commercial properties.
In Gardner, warranty-offered contractors are present, but they are less common than storm-response firms that rush into a roof swap after a hail event. That dynamic makes workmanship quality and the strength of manufacturer backing a critical differentiator. A solid warranty isn't just a promise on paper; it's a safety net that travels with the roof through years of weather, temperature swings, and the occasional Kansas hailcore bounce.
In a market driven by rapid post-storm scheduling, the best choice is not the fastest crew but the crew that can stand behind their work. Short lead times can tempt homeowners to overlook detail, and that can surface as leaks or shingle blow-off after a few seasons. Look for a contractor whose timeline aligns with a thorough, methodical installation, and who can document every step-from underlayment choices to nail patterns and attic ventilation checks. A rushed install can compromise wind uplift performance and overall durability, especially on homes with complex rooflines common to the area.
Post-storm replacements should be evaluated not just on upfront price but on whether the contractor can support documentation, inspections, and warranty follow-through. Confirm access to original manufacturer warranties, and verify who to contact if a claim is needed years down the line. Ask about an annual or biannual inspection option, and whether the contractor offers a clear process for addressing workmanship issues that arise within the warranty period. Local crews who emphasize long-term service, photo-dorecords of the installation, and transparent communication tend to deliver coverage you can rely on when a late-season hail event challenges the roof again.