Last updated: Apr 19, 2026
June through November brings the peak of hurricane season for this area, and wind-driven roof damage is a recurring local challenge. Heavy summer storms hammer roofs with micro-blasts of debris, hail, and sudden downpours, testing weak flashing, shingles, and vent penetrations. When a storm snaps a limb or tears along a ridge, every hour without a dry-in plan compounds interior water intrusion and interior damage. The risk is not just from one event; it's from the sequence of rapid weather swings that follow each storm, making quick, targeted responses essential.
Hot, humid summers mean roofing crews often face stubborn heat and rain delays, pushing emergency leak control and temporary dry-in work to the front lines after a weather event. Prolonged heat also accelerates asphalt shingle aging and can loosen sealant joints on withstanding edges. The window you must protect is the immediate aftermath of a wind event: tarping, temporary cover, and rapid drainage redirection to prevent attic mold growth and interior staining. In practice, that means having a plan that kicks in within hours of a gusty storm, not days after. When storms roll through, predictability drops-storm timing becomes the deciding factor for whether a roof can be stabilized quickly or if more extensive repairs become necessary.
Adjuster timelines tend to stretch after major North Carolina storm events, and Hope Mills replacement decisions often hinge on how quickly storm damage can be documented and inspected. If you wait for everything to calm before starting, you risk a creeping moisture problem and a tighter window for weatherproofing. The key is to create a concise damage dossier right away: take dated photos of impacted areas, note any attic condensation, and record the path of water intrusion. If you can, secure written assessments from a trusted roofer or storm restoration contractor who can present a professional summary to the insurer quickly. Timely documentation accelerates decisions and helps prevent overextension of a temporary fix into a longer, costlier problem.
When a storm hits, every minute matters for preventing interior damage. Immediate priorities include stopping additional water intrusion via tarping or tar-based sealants, sealing exposed penetrations, and redirecting runoff away from eaves and walls. In homes with multiple layers or older roofing, temporary wind-resistant overlays can hold until a full repair window opens, but the plan must specify the corrective path and its duration. Keep a ready-to-deploy kit with heavy-duty tarps, roofing cement, tar strips, fasteners, a ladder, and a utility knife. Practice safety: if the wind is strong enough to lift a ladder or expose you to falling debris, delay exterior work and secure the area until conditions settle.
Develop a city-aware plan that respects the town's storm rhythm and the realities of hot, humid summers. Establish a rapid response team-someone who can stand by for emergency sealant and tarping, a verified contractor for immediate dry-in, and a point person who communicates with insurers. On the insurance front, keep a clear record of storm date, wind speeds, and the sequence of events that led to damage, then forward the documentation promptly. As you map your recovery path, prioritize securing the most vulnerable roof sections first-valleys, flashing around chimneys, and transitions between roof planes-so you minimize water infiltration while larger repairs are scheduled. In this climate, the fastest, safest route to resilience is a proactive, storm-aware mindset that moves quickly from damage recognition to controllable dry-in and documented repair plans.
Spring and fall are typically the best replacement windows in Hope Mills because they avoid peak summer heat and the core of hurricane season. The milder temperatures help shingles, underlayment, and sealants set properly without the stress of 90-degree days. This timing also provides a more predictable work pace, reducing heat-related safety risks and allowing crew members to stay focused on accurate fastening and weather documentation.
Storm-driven planning matters in this area. During hurricane season, you should align your project with reliable weather windows and have contingency time built into the schedule. Even in favorable months, spring rains and thunderstorms in the Hope Mills area can still delay tear-off and dry-in scheduling. If a front moves through with heavy rain, crews pause, tarping becomes essential, and inspections may wait until the sky clears and surfaces are dry. Plan for potential delays and communicate with the contractor about flexible milestones so a storm doesn't derail the whole project.
Winter in Hope Mills is milder than farther north but occasional cold snaps and rain can still slow installations and inspection timing. Cold weather slows asphalt shingles and can complicate adhesive performance for underlayment and ice barriers. If a cold snap hits mid-project, expect shorter workdays and more time spent on detailing flashing and drainage transitions. Winter readiness also means ensuring temporary protection for exposed roof edges during ferocious wind events, so a robust plan for wind-driven rain is useful even in the milder season.
Set your project window around weather forecasts and seasonal patterns, aiming for a stretch in spring or fall with at least a few dry days ahead of the tear-off. Talk through contingency days with the contractor, so a lingering storm doesn't push the crew off the roof for an entire week. During any session, confirm that proper tarping, edge protection, and temporary water control are in place for fast-moving spring showers. If a hurricane threat looms, establish a clear decision point with the crew for delaying start or pausing work to protect materials and ensure safety. Finally, document all weather-related pauses and keep a simple log so future repairs or warranty work have precise historical context. Hope Mills homeowners benefit from a methodical approach that respects local climate quirks while preserving the integrity of the roof installation.
Get a clear picture of your project costs upfront - no commitment required.
Karcher Roofing & Construction
(910) 568-2861 www.karcherroofingandconstruction.com
3940 Yarborough Rd, Hope Mills, North Carolina
4.9 from 155 reviews


Karcher Roofing & Construction
(910) 568-2861 www.karcherroofingandconstruction.com
3940 Yarborough Rd, Hope Mills, North Carolina
4.9 from 155 reviews
Hope Mills' #1 roofing and construction company — Karcher Roofing & Construction is a licensed, insured contractor serving Hope Mills, Fayetteville, and all of Cumberland County, NC. We specialize in storm damage repair, roof replacement, roof repair, and wind & hail restoration. Our full-service construction team also handles remodeling, bathroom renovations, deck installation, fence building, gutter repairs, painting, and home improvements. Owens Corning Preferred Contractor. Free estimates. Insurance claims welcome.
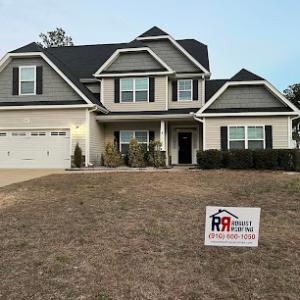
Robust Roofing
(910) 600-1050 www.robustroofingcarolinas.com
3620 Legion Rd Ste 109, Hope Mills, North Carolina
5.0 from 67 reviews
Robust Roofing is your premier residential roofing contractor in the Carolinas. We are passionate about providing quality work in a timely manner. It is our mission to provide clear communication, an accurate estimate and excellent project management throughout your roof replacement.
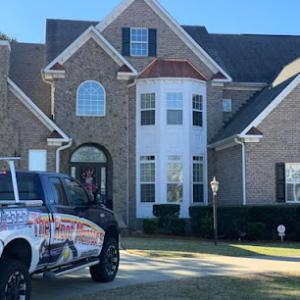
The Roof Mentors
(910) 987-2727 theroofmentors.com
133 Missy Byrd Dr suite 3, Hope Mills, North Carolina
4.9 from 205 reviews
Protect your home with trusted roofing experts at The Roof Mentors. We are a locally owned and operated roofing company proudly serving Hope Mills, NC, and the surrounding communities. Our team specializes in roof repairs, full roof replacements, and professional roof inspections for residential properties. From minor leaks and storm damage to complete roof systems, we deliver high-quality workmanship, honest guidance, and reliable service every step of the way. At The Roof Mentors, we believe proactive maintenance prevents costly repairs. That’s why we focus on identifying issues early and providing clear solutions designed to extend the life of your roof. When you need dependable roofing done right, our experienced team is ready to help
Ray Bullock Roofing
4814 US-301, Hope Mills, North Carolina
4.4 from 13 reviews
Your roof is your home's first line of defense. If it's leaky, you could end up with costly water damage and mold growth. Thankfully, Ray Bullock Roofing can help you keep your roof in good working order. Our local roofer provides a variety of services to home and business owners in the Hope Mills, NC area, from minor roofing repairs to full replacements.
Blue Ribbon Roofing
(910) 483-7663 blueribbonroofingnc.com
Serving
5.0 from 94 reviews
Blue Ribbon Roofing serves homeowners and businesses throughout Fayetteville, NC and nearby communities with reliable, professional roofing services. From leak repairs and storm damage to full roof replacements, our team brings years of hands-on experience and a commitment to quality workmanship on every job. We work with both residential and commercial properties, handling everything from routine maintenance to complex roofing projects. Customers choose us for clear communication, honest recommendations, and roofs built to stand up to North Carolina weather. When you need dependable roofing service in the Fayetteville area, our team is ready to help—reach out today to schedule an inspection or get a quote.
M&D Construction
(910) 978-8125 www.mndbuild.com
Serving
4.1 from 194 reviews
Looking for a reliable general contractor in Fayetteville, NC? M&D Construction is your trusted local expert for high-quality home improvement services. We specialize in roofing, vinyl siding, Hardie siding, replacement windows, painting, and flooring—delivering expert craftsmanship and long-lasting results. Whether you’re renovating your exterior or upgrading your interior, our team provides energy-efficient solutions, professional installation, and unbeatable value. We proudly serve Fayetteville and surrounding communities with honest service, clear communication, and attention to detail from start to finish.
SH Barnes East Coast Roofing
(910) 429-0509 www.barnesecr.com
Serving
4.7 from 61 reviews
SH Barnes East Coast Roofing is a roofing contractor in Fayetteville NC, providing roof replacements, roof repairs, roof inspections, siding repair, fascia and soffit repairs, attic insulation, deck installation and repair, privacy fence installation, and emergency storm damage services to the Fayetteville, NC, area and Always "Free Estimates" and "Fully Insured"
Premier Builders Roofing Specialists
(910) 485-3479 www.pbroofingspecialist.com
Serving
5.0 from 58 reviews
Premier Builders & Roofing Specialists has been proudly serving Central and Eastern North Carolina since 1983. Since then, we have been providing professional, thorough and reliable roofing services to both homeowners and businesses in the local community. Our company is family owned & operated and we are committed to providing 100% customer satisfaction. We are dedicated to providing our customers the very best roofing services by using only high-quality materials and superior craftsmanship that will last for years to come. If you're looking for a roofer you can count on to get the job done the right way, the first time, give us a call today.

At Ease Roofing
(910) 670-5988 chooseatease.com
Serving
4.7 from 13 reviews
Combining years of experience with a dedication to client satisfaction, At Ease Roofing has established itself as the local leader in Roofing Company, Roofing Contractor, Roofer.
Quality Roofing & Home Improvement
Serving
4.5 from 16 reviews
We are a full-service contracting company that is capable of installing and repairing a variety of roofs, including commercial, industrial, residential, and motor homes. We also offer a variety of home improvement options. Call us for a free Quote👍 910-988-8062 910-583-3829 Veteran Owned Business 🇺🇸 Fully Insured & Bonded🛠

Calvary Roofing
(910) 494-4022 www.calvaryroofingusa.com
Serving
5.0 from 193 reviews
Calvary Roofing, based in Fayetteville, NC, offers expert residential roof repairs, replacements, & inspections with a focus on quality, integrity, and customer satisfaction. Free estimates available.
Big Timber Roofing NC
(910) 964-2299 bigtimberroofingnc.com
Serving
5.0 from 24 reviews
Big Timber Roofing is a high quality roofing company providing our community with an efficient roofing process accompanied with fair and honest pricing. We put our clients first each and every time and we look forward to working with you!
In this area, pricing can spike after regional storm activity when demand for re-roofing, emergency repairs, and insurance-scope work rises across the Hope Mills and greater Cumberland County market. When a cluster of homeowners needs work at once, contractors may charge higher mobilization fees and rush charges, and material lead times can stretch. You'll often see steeper quotes for repairs that require rapid scheduling or for work that needs to fit the insurance-adjuster window. The practical takeaway is to start conversations early after a storm, gather multiple bids, and document condition and timing so you're not negotiating from a weaker position when urgency hits.
Material choice matters sharply here because asphalt shingles are common and lower-cost, while metal, tile, synthetic, and slate options move into much higher per-square ranges. If you're balancing budget against wind resistance, asphalt remains the most cost-effective path, but note that high-wind or hurricane-season needs may tilt you toward better-fastening systems and underlayment upgrades that protect longer term. Metal can deliver durability in a storm-prone year but carries a substantially higher initial price. Tile and slate offer excellent longevity and impact resistance in some homes, but their weight and installation complexity can complicate repairs after a major event. Synthetic shingles provide a middle ground, often with decent storm performance at a mid-tier price. Evaluate not just the sticker price, but the long-term value, including labor efficiency and insurance documentation when storms are nearby.
Scheduling outside the hottest and stormiest parts of the year can affect labor efficiency in this climate, where summer heat and humidity slow crews and material handling. Spring and fall tend to offer cooler days, steadier supply chains, and more predictable crew performance, which can translate to fewer delays and lower overall costs. If a storm is forecast, plan a window that avoids peak hurricane activity, but be prepared to adjust as conditions change. A well-timed replacement limits weather-related callbacks and helps ensure the chosen materials are installed with proper fastenings and underlayment without rushing.
Start with a realistic cost range for the material you're considering per square, then add a buffer for weather-related scheduling and potential emergency adjustments. Asphalt shingles typically present the widest affordability lane, often complemented by a protective underlayment and upgraded edge detailing for wind resistance. For metals and tiles, size up both the material and installation labor, as heavier options may require structural considerations and specialized fasteners. If you're weighing synthetic or slate, factor in transport, handling, and potential customization around eaves and penetrations, which can otherwise drive small cost variances into larger sums.
Don't let upfront costs delay a critical repair - these contractors offer payment plans to fit your budget.
The Roof Mentors
(910) 987-2727 theroofmentors.com
133 Missy Byrd Dr suite 3, Hope Mills, North Carolina
4.9 from 205 reviews
Residential full roof replacements in Hope Mills require a building permit from the Town of Hope Mills. Getting the permit in hand before any tear-off begins not only keeps you on the right side of local rules, it also helps you avoid delays that can push storms or weather windows into worse schedules. The town treats a full roof replacement as a major addition to your home's envelope, so the permit is your first line of accountability and documentation.
The local process centers on submitting a scope of work that clearly describes the planned replacement, materials, and installation approach. Expect to provide details such as material type, underlayment, flashing plans, and fastening methods. This isn't a box-ticking exercise; it's a record you'll compare against during inspections to ensure the work meets Hope Mills' standards under humid Sandhills conditions. After submission, you'll move to scheduling inspections at key stages, starting with a pre-install review and ending with a final inspection.
During the pre-install inspection, the focus is on the plan aligning with code and town requirements. The inspector will want to see the proposed underlayment and flashing details, as well as the anticipated method of attachment. In Hope Mills, wind-related mitigations are considered case by case, so expect questions about fastener patterns, nailing schedules, and any local wind load considerations specific to your street and house orientation. Having product specifications on hand and a clear sequence for tear-off and installation helps keep this phase moving smoothly.
The final inspection is your opportunity to prove that the work was executed per the approved scope and building code. Be prepared to demonstrate proper installation of underlayment, flashing at eaves, rakes, valleys, and around penetrations, plus your chosen fastener method. If anything doesn't meet the plan, you'll be asked to adjust or document corrective steps. The town's emphasis on compliance means a clean final stamp not only validates the project, it smooths any future permit or insurance considerations.
If a storm or wind event triggers hail or shingle damage, the permit history and inspection trail can help support repairs or restoration. Keep a record of the permit number, inspection dates, and the scope of work as a permanent part of the home's files. Deviations from the approved plan are possible, but they require updated documentation and coordination with Hope Mills inspectors to avoid complicating future work or inspections.
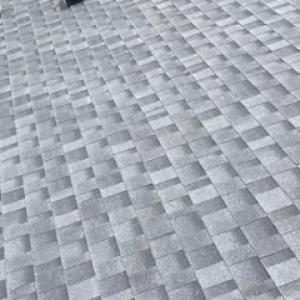
Asphalt shingles are a dominant choice in this area, and that reality shapes how you plan for hurricane season. Your roof's wind uplift performance, shingle retention, and repairability under duress are central concerns. When you're evaluating a replacement or upgrade, look for architectural or higher-warranty shingles that feature reinforced nailing zones and wind-resistance ratings suited to local wind loads. In storms, you'll appreciate a strong sealant, solid substrate adhesion, and a roof deck that's solid beneath the shingles to minimize loss after a heavy rain or brief gusts. Routine inspections after storms-checking for pulled-up tabs, lifted edges, or missing granules-help you catch small issues before they become big leaks. Since asphalt Shingles are common here, working with local roofers who know the typical wind patterns and the best fastener strategies for these roofs makes a meaningful difference in storm-readiness.
Metal roofing has carved out a meaningful specialty presence in this market, reflecting homeowner interest in stronger storm performance and long-term durability in a humid climate. If you're weighing metal, pay attention to panel profiles, fastening methods, and sealant choices that perform in heavy rain and high humidity. Ring-fastened or concealed-fastener systems with proper closure trim tend to resist wind uplift well, especially on higher-slope sections common in this area. The humidity profile also means you'll want treated underlayment and corrosion-resistant materials, along with thoughtful roof-edge detailing to prevent water intrusion around eaves and valleys during tropical downpours. Availability of skilled metal installers is a practical factor here, so confirm their experience with the exact product line you choose and their process for sealing joints against wind-driven rain. If you already have a metal roof, routine checks after major storms-looking for dents, seam separations, and fastener loosening-keep it performing through many seasons.
Tile and slate offer durability and a distinctive look, but they are less common in this market. Homeowners should weigh higher material and installation costs against the local installer pool and the likelihood of timely repairs after a severe storm. Tile and slate perform well in wind-driven rain when properly installed with matching underlayment and appropriate edge detailing; however, a misstep in alignment or fastener choice can become a vulnerability in a hurricane event. If you're drawn to these materials, seek out installers who regularly work with the exact tile or slate type you want, and confirm they can deliver a full wind-resistance approach that accounts for the humid climate and seasonal storms. Access to replacement tiles or slates, compatible flashing, and a backup plan for storm-day repair windows should factor into your decision. Tile and slate can elevate curb appeal and resale value, but the practicalities of workmanship and asset longevity in this market mean careful planning and tested local craftsmanship are essential.
In North Carolina, roof claims are strongly influenced by wind and hail exposure, which makes weather-event documentation especially important for homeowners. Hope Mills sits in a climate where summer storms can roll in quickly and hurricane-season winds can push shingles loose or gutters off balance. When a roof is damaged, the first hours after a storm are critical for preserving evidence of your roof's pre- and post-storm condition. A clear record helps you tell the story if an adjuster questions the damage or the timeline.
Insurers commonly require photos and supporting documentation for weather-related roof damage, so you should document conditions immediately after storms. Take wide shots of the roof and close-ups of broken granules, lifted or curling shingles, dented vent pipes, and any interior staining that traces to roof leaks. Keep a storm diary with dates, wind speeds if available, and notes on any nearby damage to trees or fencing. If you can, have a trusted neighbor corroborate the storm impact on your home. Save all correspondence with your insurer and your contractor, and organize it so you can present a coherent damage narrative when needed.
Wind mitigation credits may be available in this market but are not guaranteed, so homeowners should not assume premium savings will offset upgrade costs. If your home has features like reinforced roof-to-wall connections, undersized openings, or modern underlayment, these may influence an adjustment in risk assessment. A thoughtful assessment now can help you decide whether pursuing qualifying upgrades makes sense in the longer run, but avoid counting on an immediate, large discount as a given.
After a storm, your priority is tarping and temporary protection to prevent further water intrusion, then arranging a professional assessment. If you suspect damage, contact your insurer promptly to understand their required proof and timing. Schedule a licensed roofer who can document the condition with dated photos and explain any observed wind or hail signs. Maintaining a calm, orderly record through the process will support your claim and help prevent gaps in coverage once adjustments are considered.
Connect with contractors who help homeowners navigate the claims process from damage assessment to final approval.
Karcher Roofing & Construction
(910) 568-2861 www.karcherroofingandconstruction.com
3940 Yarborough Rd, Hope Mills, North Carolina
4.9 from 155 reviews
Robust Roofing
(910) 600-1050 www.robustroofingcarolinas.com
3620 Legion Rd Ste 109, Hope Mills, North Carolina
5.0 from 67 reviews
The Roof Mentors
(910) 987-2727 theroofmentors.com
133 Missy Byrd Dr suite 3, Hope Mills, North Carolina
4.9 from 205 reviews
In this climate, repeated exposure to humid summers and frequent storms makes flashing integrity and leak tracing especially important around penetrations and roof transitions. Vent pipes, chimneys, skylights, and step-flashing at dormers are common failure points after wind-driven rain. After a storm, look for dark stains along joints, feel for moisture at the base of vents, and check for loose or lifted metal. If flashing shows gaps or corrosion, replace with corrosion-resistant metal and reseal with compatible sealant. Ensure step-flashing is properly stitched into the shingle line and tucked under shingles on the up-slope side of the penetration.
The town's emphasis on underlayment, flashing, and nailing reflects local failure patterns most likely to matter after wind and rain events. Scratched or torn underlayment invites water entry at fastener points. Nails must be driven straight and to the right depth; overdriven or underdriven nails can loosen shingles and expose underlayment. Inspect for nail pops or raised fasteners after severe storms, and reseat or replace damaged shingles and fasteners promptly to prevent leaks along eaves and ridges.
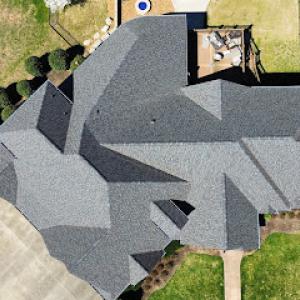
Valley flashing and roof-to-wall transitions see extra stress in heavy rain and wind. Worn metal at the valley, compromised sealant at transitions, and loose edge metal are common trouble spots. Check for lifted shingles along the valley and inspect the seam where two roof planes meet. Secure loose metal, reseal joints with a compatible sealant, and replace damaged shingles to keep water from tracking into the eaves.
Summer heat and humidity in Hope Mills can affect material handling and installation pace, increasing the importance of proper staging and weather-window planning. Hot shingles can become brittle when aged, and high humidity can slow adhesive-driven tasks. Plan work for cooler mornings, protect bundles from direct sun, and verify that materials are kept dry and properly supported to avoid warping during placement.