Last updated: Apr 19, 2026
This area sits inland enough to dodge direct salt spray, yet still faces tropical storm remnants and hurricane rain bands rolling into eastern North Carolina. That pattern pushes wind-driven rain through vulnerable spots repeatedly, eroding fasteners, flashing, and roof-to-wall transitions faster than a milder climate would. In humid summers, shingle heat aging accelerates, softening surface and increasing brittleness at edges where wind gusts pry up edges or lift tabs. The next front can arrive with little warning, driving rain onto a roof that's already stressed from days of heat and humidity. The result is a rhythm of wet cycles that ages a roof in jagged steps: one storm, a handful of flashing questions, and a temporary lull that invites another cycle before the previous repair can fully seal. For a homeowner, recognizing this pattern helps avoid waiting until leaks force a crowded schedule and rushed choices.
Spring and fall emerge as the most reliable windows for replacement work. The logic is simple: summer thunderstorm activity tends to interrupt tear-off days, while winter cold snaps complicate sealing and setting, especially on days that swing between damp and chilly. Scheduling in late spring or early fall aligns with milder temperatures, lower humidity, and more predictable drying times after a storm for the roof deck and underlayment. If a storm passes in late spring, you still have a workable stretch before heat and humidity rise again; if a late-season storm clatters through, you're positioned to catch a window before the first hard frost. The goal is to finish tear-off, install underlayment, and complete sealing while the dry-season risk is lowest and temperatures stay within a forgiving range for adhesive and mastics. In practical terms, you'll want to average out around two to three weeks of work, factoring in days lost to residual heat, wind, or rain bands. The outcome should be a roof that can shed summer downpours without leaking through a brittle seal or misaligned flashing.
Look for edges curling or lifted tabs on asphalt, and for any shingle granule loss that clutter gutters after a storm. Metal roofs should be checked for loose fasteners and flashing gaps where heavy rain and wind have driven water toward joints. Valleys matter here; repeated exposure to driving rain can loosen seams and widen gaps where water can back up and seep under the underlayment. Look at roof-to-wall transition areas-chimneys, vents, and parapets are common failure points; building movement and wind uplift can pry flashing free if it hasn't been properly bedded and sealed. After a heavy storm, inspect for damp patches on ceilings near the attic or upper rooms-these are red flags indicating moisture has breached the barrier. On older roofs, soft spots that indent under foot during a careful walkover often signal compromised decking beneath the surface, a risk that compounds with each additional storm.
Plan ahead for a spring or fall replacement, aiming to lock in dates before the peak window closes. Do not delay if you notice curling edges, loose fasteners, or accelerated granule loss-these are early warnings that the weather pattern will test the roof again soon. Maintain gutters and downspouts clear of debris to prevent water from backing up at the eaves during a storm surge. Have a trusted local contractor perform a mid-season inspection after any major storm to catch issues before they cascade into leaks or structural concerns. Finally, align your schedule so that a full tear-off and reseal can occur in a single planned sequence rather than fragmented visits across multiple weather events. The coastal-inland balance is unforgiving: proactive planning saves you from a scramble when the next storm rolls in and pressure rises on a compromised roof.
When a heavy rain sweeps in off the Tar River basin, the damage pattern can be tricky to interpret. The wind and hail that often accompany those downpours can leave discreet, localized points of roof failure that look minor at first glance-a few lifted shingles, a bruised edge, or granule loss at a corner. Yet the surrounding flood forces from the same storm can intensify interior damage, attic moisture, and hidden rot. In practice, separating roof wind or hail damage from broader storm losses tied to heavy rain and flooding becomes essential for a fair claim. You should inspect the orientation of any visible damage-ridge caps, vent flashings, and eaves are typically the most exposed to wind-driven rain-while also noting areas that show signs of water intrusion inside the attic, such as staining, musty odors, or warped decking. This distinction matters because insurers often treat roof-specific issues differently from systemic flood-related losses, and misclassifying can delay or complicate the settlement.
After one of the season's bigger events, claims commonly hinge on documentation. Dated roof photos that show the condition before the storm, evidence of prior condition, and a contractor scope for replacement are all pieces of a typical file. In a storm-wired climate along the Tar River corridor, it pays to have clear, independent notes about the roof's age, material, and known weaknesses before the event. If you have existing issues-curling shingles, loose flashing, or inconsistent granule loss-document those with timestamps and expert input. When the claim is opened, you should be prepared to present the contractor's assessment early in the process. Insurers will weigh this against the observed storm impacts, so a precise, professionally supported scope helps avoid protracted back-and-forth and supports a more timely resolution. The goal is to align expectations with what actually needs to be repaired or replaced, rather than what might be aesthetically imperfect but still functional.
Policy terms can shift regionally in North Carolina after active storm seasons, and homeowners in this area need to review whether age, cosmetic damage, or actual cash value language affects roof decisions. The balance between refurbishing versus replacing a roof can hinge on how age affects performance, even if cosmetic wear appears minor. If the roof has endured multiple seasons of heat, humidity, and occasional wind-driven rain, the cumulative aging can push toward a replacement threshold sooner than a homeowner might expect. Another practical step is to gather a convenient, up-to-date narrative of performance: how the attic has managed moisture, whether there have been rapid temperature swings, and how the roof has held up to seasonal storms. This context helps the insurer and the contractor evaluate whether a renewal, a repair plan, or a full replacement best preserves long-term protection against the river-adjacent weather pattern.

Carolina Trophy Roofs
(252) 302-2003 www.carolinatrophyroofs.com
104 S Business Ct, Rocky Mount, North Carolina
4.8 from 202 reviews
Listed in the National Roofing Directory as the #1-rated roofing company in Rocky Mount, Wilson, & Greenville, NC: CAROLINA TROPHY ROOFS specializes in residential and commercial roofing, gutters, siding, and steeples. GAF, Owens Corning, CertainTeed, Atlas, and IKO certified, ensuring top-tier quality and manufacturer-backed warranties. As the only manufacturer-trained Ames Roof Coating expert in the region, we provide cutting-edge commercial roofing solutions. Hundreds of 5-star reviews, A+ BBB rating, features in BreakingNewsCorp and Chamber of Commerce, were trusted for storm damage repairs, roof replacements, and free inspections. Call us today for fast, professional service! #BestRooferNearMe #NorthCarolina #MasterCertification

B&M Roofing Contractors
(252) 442-5300 bmroofingcontractors.com
2841 N Church St, Rocky Mount, North Carolina
4.7 from 22 reviews
BM Roofing Contractors is a commercial roofing contractor. We combine proven, time tested techniques, superior quality roofing products and materials, and cutting edge technologies to deliver high quality, professional commercial roofing services. Family owned and operated, BM Roofing provides commercial and Industrial clients a commitment to quality and customer satisfaction that is unmatched.
Phillips Home Repair & Roofing
Rocky Mount, North Carolina
4.4 from 7 reviews
We are an experienced roofing contractor specializing in home construction working out of Rocky Mount, NC and surrounding communities. We are a top rated construction service provider, and from the first nail to the final creative touches our contractor and crew will turn your home into a modern, unique, and comfortable place to live. We proudly offer deck building, fencing installation, and home additions.
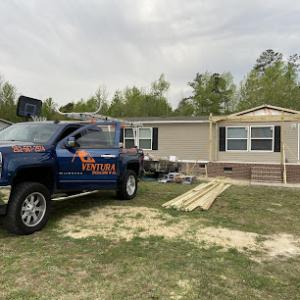
Ventura’s Construction
5116 Doe Run Ct, Rocky Mount, North Carolina
5.0 from 1 review
Roofing and construction
Brian Creech Roofing
(919) 269-8599 briancreechroofing.com
Serving
4.6 from 67 reviews
For over 30 years, Brian Creech Roofing has been providing quality roofing services to the greater Triangle area. As a locally owned and operated company, we are proud to be a fully insured roofing company serving residential and commercial clients. Our commitment to customer satisfaction has made us the top roofing company in the area. With certified Certainteed master installers, we are dedicated to providing our customers the very best roofing services by using only high-quality materials and superior craftsmanship. We specialize in all roofing types and offer a 100% satisfaction guarantee on all the work we do. If you're looking for a roofer you can count on to get the job done the right way, the first time, give us a call today.
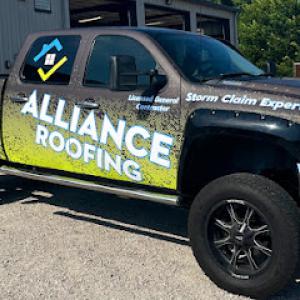
Alliance Roofing
(252) 289-0672 www.allianceroofing.org
Serving
5.0 from 41 reviews
Alliance Roofing is a family-owned licensed roofing company that provides a full range of roofing services in Wilson, NC, and the surrounding counties. It offers both residential and commercial roofing installation, repair, maintenance, and replacement services. Alliance offers free, no-obligation roof inspections, which can be scheduled same-day or the next day. Clients deal with the owners directly, ensuring a close working relationship and prompt service. With over 20 years of providing roofing services, Alliance Roofing is equipped to handle all your roofing issues. They are roof experts with HAAG certification, A+BBB accreditation, and 5-star Google reviews.

MidSouth Roofing & Construction
Serving
4.9 from 63 reviews
MidSouth Roofing and Construction is a top-tier full-service turnkey construction, roofing, siding and exterior materials and finishing contractor with several specialist crews operating in the areas surrounding Wilson, RDU, Southern Pines, and Wilmington. We serve both residential and commercial roofing and siding customers. Our team and project efficiency allows us to deliver satisfaction guaranteed quality work at rates that will surprise you.
Garliss Roofing
Serving
4.7 from 90 reviews
Garliss Roofing is dedicated to serving the residential, multi-family, and commercial roofing needs of Wilson, North Carolina, and the surrounding areas. Our goal is to make one's experience the best in the industry by offering outstanding customer service and excellent workmanship. We provide the following services: Roof Replacement; Gutters; Siding. Quality Materials + Superior Workmanship = Satisfied Customers!

StaDry Roofing
(252) 991-5152 stadryroofingnc.com
Serving
4.5 from 84 reviews
We are a full service Roofing, Window and Siding Installation and Repair Company. Your roof endures a lot of abuse. Even the sturdiest roofing system can be affected by extreme rain, hail, and winds from severe storms. When the worst does happen, you will need a dependable partner to aid you in swiftly repairing your roof so it can continue to shield you. Sta-Dry Roofing proudly assists residential and commercial property owners with insurance and storm damage repairs. We can help you with any roof repair project you have, whether it’s a roof replacement or a roof inspection.
BK Roofing & Seamless Gutters
(919) 268-2462 www.bkroofingandgutters.com
Serving
4.7 from 111 reviews
We over custom made on site 5 or 6 inch seamless gutters, made with a seamless Gutters machine, with hidden hangers every 2 feet with screws to add strength and stability to your gutters, if you have any wood issues from fascia to windows and siding we have you covered with in house trained professionals, we offer shingles as well as metal roofing with all trained employees and only top quality products. Fully insured and ready to serve you.

Construction Unlimited
Serving
3.6 from 5 reviews
We are a Licensed General Contractor Company that specializes in Roofing (All types), foundation repairs, bathroom remodeling, painting (Interior and exterior), seamless gutters, siding, decks, and rooms additions.
F & V Contracting
Serving
5.0 from 1 review
F & V Contracting is your professional roofing contractor in Wilson, NC. We are committed to staying on schedule and within budget, and we use the best tools and materials to get the job done correctly. All of our equipment and resources are up-to-date, ensuring the job is done efficiently and created with high-quality materials. When it comes to all of your roofing needs, no one does it better than our team.
Asphalt shingles dominate in Rocky Mount because they fit the area's common residential stock and cost expectations, but humidity and storm exposure make ventilation and underlayment choices especially important. When you plan an asphalt roof, focus on a higher-quality underlayment that resists moisture intrusion and a well-sealed attic space with adequate intake and exhaust ventilation. In practice, that means ensuring an airtight attic with baffles above the soffit to keep ventilation unrestricted, and choosing a 15- or 30-year shingle line that tolerates hot, humid summers without premature curling. Look for shingles with good algae resistance given the Tar River corridor's climate, and ask your roofer to double-check for proper nail fastening through the shingle course to prevent wind uplift during tropical-influenced downpours.
Metal roofing is locally attractive for wind resistance and rain shedding during tropical systems, but detailing around fasteners and penetrations matters in a region with repeated heavy downpours. If you choose metal, insist on solid attic ventilation and a taped or membrane-backed underlayment beneath the panels to block any incidental moisture that sneaks through gaps around fasteners. Pay attention to how the panels terminate at eaves, rake edges, and valleys; a well-sealed valley and a careful edge trim minimize moisture tracks after a strong shower. For Rocky Mount's humid pattern, a concealed-fastener or standing-seam system often performs best, provided the installer uses corrosion-resistant coatings and ensures a continuous, well-sealed seam system. If you have complex roof geometry or multiple penetrations (vents, skylights), budget extra attention for flashing continuity and sealant compatibility to handle repeated downpour cycles.
Clay tile, concrete tile, wood shakes, and synthetic products appear more selectively and can be limited by structural load, neighborhood housing style, and contractor familiarity in this inland eastern North Carolina market. Tile brings excellent longevity and a unique look, but the weight requires a careful structural assessment and potentially added rafter or truss support. For humid climates, drainage and underlayment play a bigger role than you might expect: ensure proper underlayment with a breathable system or one designed to shed humidity beneath the tile, plus a moisture-tolerant membrane in the valleys. If your home's roof pitch and framing can support it, clay or concrete tile can be a durable choice, but verify that the installer has recent experience with local wind-driven rain patterns so the fasteners, battens, and edge details stay secure during storms.
Wood shakes provide distinctive curb appeal but require more maintenance in a humid, storm-prone environment. If you opt for wood, treat and seal the wood and plan for regular maintenance and inspection for mold or moisture intrusion around penetrations. Synthetic shingles offer a lower-maintenance alternative that can mimic wood or slate while improving moisture resistance and installation consistency. In either case, the key is compatibility with your home's ventilation strategy and a installer who accounts for Rocky Mount's storm exposure in detailing around valleys, ridges, and penetrations. Ensure that the chosen product and system are compatible with the home's existing decking and that the installation includes proper moisture barriers and fastener selection to stand up to repeated downpours.
Prices you'll see in Rocky Mount reflect the same basics you'd expect across eastern North Carolina, but with local timing pressures. Asphalt shingles commonly run about $350 to $650 per square, metal roofing roughly $750 to $1600 per square, clay tile $1000 to $2500 per square, concrete tile $900 to $1800 per square, wood shingles or shakes $800 to $1400 per square, and synthetic or composite shingles $450 to $900 per square. Those ranges are a practical starting point when you're budgeting after a storm or when a contractor is juggling multiple eastern markets. Pricing can spike during storm season, especially after tropical storms and severe spring weather when demand climbs and crews are in tighter supply.
Tear-off complexity matters here more than you might expect. If your roof needs a full tear-off, add roughly one price tier for each roof plane and for the amount of disposal. Decking repairs caused by long-term humidity exposure will push costs higher, since insulation layers and plywood often need replacement or reinforcement after repeated moisture events. The pitch of an older home matters too: steeper roofs require more labor time and special safety measures, pushing square pricing up. If specialty materials must be sourced beyond the immediate Rocky Mount market, expect a premium for expedited delivery and limited stock.
Costs can rise when tropical storms press through the Tar River corridor and you're booking during a peak window. Local crews can tighten schedules quickly, which translates to higher labor quotes or shortened installation calendars. If you're weighing materials, consider that asphalt remains the most cost-stable option for short lead times, while metal or tile choices may see longer waits if supply lines tighten. In practice, the best approach is to set a target budget using the local ranges above, then build in a 10-15% contingency for weather-driven delays or material scarcities. This protects you from sticker shock when crews finally sign your schedule after a storm.
A building permit is normally required in Rocky Mount for a full roof replacement, and the process is handled through the City of Rocky Mount Building Department. The rule of thumb is to start with the permit early in planning to avoid delays that can disrupt a storm-season schedule. The Building Department will want basic project details, including the scope of work, contractor information, and a rough timeline. Having documentation ready-like the roofing material type, tear-off method, and any temporary weather protection plans-helps smooth the review.
Homeowners or contractors submit project details and scheduling with the Building Department, and a permit review is typically followed by staged inspections. In practical terms, an inspector will usually come by after tear-off to verify that the decking is sound and that there are no hidden issues that require attention before installation proceeds. Then, after the new roof is installed, another inspection confirms that the work was completed to code and that flashing, penetrations, ventilation, and sheathing meet local standards. Keeping your contractor aligned with the permit timeline helps ensure the inspections happen in the expected sequence without rushed corrections.
Expect a process that requires timely communication between you, your contractor, and city staff. Inspections are not merely a formality; they verify that wind resistance, moisture management, and ventilation comply with local requirements, which is especially important given Rocky Mount's exposure to storm-driven rain and humid summers. Plan for inspection windows in the schedule and have access ready for the inspector to review decking, underlayment, and the final installation. If a problem is found during an inspection, address it promptly to avoid a hold on the project that could impact storm-season timing.
Because Rocky Mount spans Nash and Edgecombe counties, confirm the property's exact jurisdictional handling and inspection logistics before work begins. The jurisdiction can affect permit numbering, inspection sequencing, and any county-specific requirements for storm-related repairs. Your contractor can help verify the correct jurisdiction and ensure that all paperwork aligns with the right authority. If the project touches county lines, request written confirmation of which office will issue final approvals and what documentation is expected at each inspection stage. This extra step helps prevent misunderstandings and keeps the project moving through the storm season with fewer hiccups.
In Rocky Mount, repeated heavy rain events make flashing failures and leak paths around chimneys, valleys, and roof penetrations more consequential than purely cosmetic wear. A small gap or loose seal can channel water right into the attic, especially when winds shove rain sideways off the Tar River corridor. If shingles look intact but you notice damp spots or musty odors upstairs after a storm, don't chalk it up to age alone-inspect the flashings and underlayment first, and consider how the roof meets the chimney and vent connections.
Humidity-driven aging can hide beneath otherwise serviceable-looking shingles, leading to soft decking or underlayment issues discovered only at tear-off. In this climate, moisture can saturate the roof deck quietly, inviting rot and mold that aren't visible from ground level. If a roof looks flat or curled only in the shade or under lingering humidity, the problem may be lurking beneath the surface, not just in the visible wear. A careful examination of attic ventilation and decking condition becomes essential before any decision to replace or repair is made.
Spring hail and summer wind events in this region often create mixed damage patterns, with granule loss, lifted tabs, and localized impact marks appearing together. What seems minor after a single storm can compound across the season, weakening sections of the roof without obvious, uniform damage. Look for scattered granules in gutters, loose tabs near ridge lines, and any new creases that form after strong gusts. This kind of damage tends to be patchy and can accelerate aging if left unaddressed.
Watch for sudden attic heat buildup or inconsistent indoor moisture after storms, as these are early signals of hidden decking or underlayment issues. If you notice new stains around chimney flashing, or if valleys drip even after a light rain, treat these as urgent. A cautious approach-addressing both surface symptoms and hidden moisture pathways-helps prevent more extensive, costly failures down the line.