Last updated: Apr 19, 2026
In this valley corner, the long, scorching summers bake roof surfaces and push asphalt shingle fibers to their limit. The sun's heat accelerates granule loss, which leaves shingles looking chalky and less protective over time. The Mediterranean pattern-very dry summers followed by a wet, winter season-exposes flashing, underlayment, and drainage paths to a two-stage stress: heat-driven aging during the dry spell, then rain-driven vulnerability when the rains arrive. That cycle is the main driver of roof age in the local housing stock, where roofs shoulder both sun exposure and wind-driven drama. Understanding that sequence helps you prioritize maintenance before winter begins and plan replacements that resist heat-softened joints and moisture intrusion.
When summer ends and the dry season finally moderates, inspect the roof edging, drip edge, and the top of flashing at chimneys and skylights. Heat expands metal components; over a long summer, repeating expansion and contraction can loosen fasteners and sealants. By late fall, walk the roof (or have a trusted pro do it) to look for granule loss, curling edges, and any micro-cracks near ridge lines. Come winter, the rain pressure tests everything that's been tightened in the dry months. Look specifically for damp underlayment, dark stains on sheathing, and any shingles that feel loose to the touch. Cold snaps followed by rapid warm-up days can also cause small gaps to widen, inviting water infiltration at joints. The practical outcome: address minor issues in the fall, so they don't become water pathways in December and January.
The local climate rewards materials that resist heat aging and tolerate wet-season cycles. Asphalt shingles age fastest under long heat exposure, but modern laminate or architectural shingles still perform well with proper ventilation and a solid underlayment. Metal roofing handles heat well and sheds rain efficiently, yet edge detailing and fastener corrosion warrant attention in areas with strong summer sun and winter moisture. Clay and concrete tiles offer cool roof benefits and long lifespans, but they add weight and require a sturdy structural assessment, especially in homes with older framing. Concrete and clay tiles handle wet seasons differently from asphalt, and the Mediterranean pattern means drainage details-valleys, rakes, and eaves-should be reliable to minimize winter leakage. Wood shingles bring a classic look but demand extra attention to moisture resistance and ventilation, particularly in channels where wind-driven spray can hasten rot. Slate delivers durability but sits heavy and may demand structural checks and wind-rated installation.
Spring wind events in north Merced County produce a distinctive damage signature: lifted shingles, displaced ridge components, and occasionally hail bruising that isn't always obvious after a dry stretch. The absence of immediate rain in spring can mask these issues until the next rain event, when displaced materials reveal themselves as leaks or damp spots in the attic. A practical approach is to conduct a targeted spring inspection: lift points along ridges, fastener security at hips, and the seams where the roof intersects walls or dormers. If a windstorm or hail has occurred, err on the side of proactive resealing or re-fastening, because the damage may not be fully visible on the surface until moisture takes hold. In the valley heat, metal components can experience fastener fatigue in exposed eaves and joints; check these areas after storm events when the air is still warm but the roof is cooling.
A simple cadence works well: a visual inspection after the harshest heat of summer, a more thorough fall check, and a post-winter inspection after the wettest weeks. During each pass, verify flashing integrity around penetrations, confirm the condition of underlayment where visible, and test drainage outlets for blockages. Clean debris from valleys and gutters before the first big winter rain, because a small clog in the wrong spot can magnify roof leaks. If a mismatch between material choice and the home's roof pitch or structure exists, consider consulting a local roofer who understands both the heat-aging reality and the winter rain pattern that shapes Atwater's roofs. A well-planned replacement or retrofit that acknowledges the seasonality of stress-heat, wind, and wet season-tends to hold up better across many Atwater cycles.
In this Central Valley climate, the sun hits roofs hard from late spring through early fall, and that heat pushing at every tile edge accelerates wear. Asphalt shingles are common here, but they are particularly vulnerable to accelerated granule loss, curling, and shortened service life under the Central California heat. If a roof already shows blisters, soft spots, or early curling after a few seasons, the heat cycle is likely a major culprit. When considering a replacement, you'll want to weigh how fast you're likely to see granule loss and color fade, and how those factors will affect attic temps and cooling loads in summer. For homeowners who plan to stay put for a while, a roof that handles heat with steady granule retention and stable dimensional changes will save headaches down the line.
Clay and concrete tile fit the regional sun exposure well, which means they perform well in the long, hot days and in the occasional winter rain. The trick is that their weight is heavier than asphalt or metal, and in re-roofs on an older home, the existing framing and structure may not be prepared for a heavy covering. If the house wasn't originally framed for a heavy roof, upgrading to clay or concrete tile can require reinforcing the underlying structure or even adjusting ceiling heights or interior framing to accommodate the extra load. When planning a tile installation, you want an engineer's assessment of the attic space, roof deck, and supporting walls. If the framing is solid and properly retrofitted, tile roofs can offer excellent durability and a classic look that ages gracefully under heat and sun. For aging homes, the decision often comes down to whether the current roof structure can accept the extra weight without sacrificing ceiling support or insulation continuity.
Metal roofing is increasingly relevant in the inland valley because it handles sun exposure well, resisting heat-related degradation and standing up to wind without the same granule loss concerns as asphalt. However, detailing around penetrations-such as skylights, vent stacks, and chimneys-needs careful planning in metal systems to prevent leaks. Expansion and contraction under high heat can create gaps or fastener loosening over time, so a metal roof must be installed with generous allowances for movement and precise sealants at flashing joints. If you're drawn to metal for its cool roof potential and longevity, choose a profile and coatings tested for high-UV environments and confirm that the installation method leaves room for heat movement. Proper gasketed seals at penetrations and a well-planned valley or seam layout will keep heat from compromising performance during peak sun.
For most Atwater homes with lighter framing, asphalt shingles remain a budget-friendly, common choice, provided you pair them with an reflective, cool-color shingle and an underlayment designed for heat and occasional rain. When a longer lifespan and lower maintenance are priorities, clay or concrete tile offers sun resilience, as long as the structure can handle the weight. If the goal is longevity and reduced maintenance under intense sun, metal is worth evaluating, with extra attention paid to penetration details and expansion joints. A balanced approach combines a realistic assessment of roof load with your climate expectations, ensuring the final choice performs reliably through Atwater's long, hot summers and brief winter rains.
Straight Edge Roofing
(209) 262-8768 straightedgeroofing.com
5248 Sultana Dr, Atwater, California
4.9 from 261 reviews
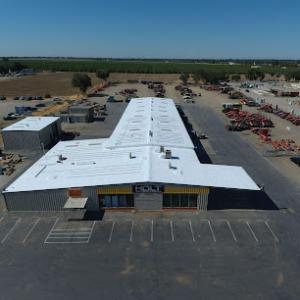
Straight Edge Roofing is a team of experienced and dedicated roofing installation and roofing repair contractors committed to providing our clients with high-quality commercial and residential roof repair services. The roof is the most essential part of your property, and if you find yourself searching the internet for the "best roof repair services near me," our team of roofing repair contractors is here for you. We ensure that every home or business establishment's roof is well-maintained and functional for everyone's safety and comfort.
Benchmark Roofing
(209) 756-3019 benchmarkroofingca.com
5490 Sultana Dr, Atwater, California
4.9 from 196 reviews
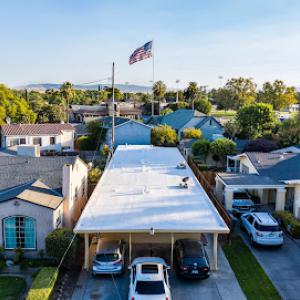
We are a full service roofing company serving the San Joaquin valley and surrounding areas in California. With over 35 years in the industry, we have the experience, knowledge, and resources to get the job done right. Whether you have a residential home or a commercial building; we have a time proven system to meet your roofing needs and budget. We install new shingle and metal roof coatings. We also offer roofing repairs for residential and commercial roofs. We offer: New Roofs Roofing Installation Roof Coatings Commercial Roofing White Roofing Roof Repair Roof Replacement Storm Damage Repair Metal Roof Coatings
Celestial Roofing
(209) 355-4401 celestialroofinginc.com
Serving
5.0 from 17 reviews
Celestial Roofing is a licensed, insured roofing contractor providing expert residential and commercial roofing services throughout Merced, Atwater, Livingston, Winton, Los Banos, Turlock, and surrounding Central Valley communities. We specialize in roof replacement, roof repairs, leak detection, shingle roofing, flat roofing, attic ventilation, gutters, siding, waterproofing, and custom sheet‑metal work. Our team uses premium materials and proven installation methods to deliver durable, energy‑efficient roofing systems built to withstand California’s heat, storms, and seasonal weather. Whether you need a small repair or a full reroof, we bring precision, craftsmanship, and service that’s truly out of this world. Protect your home or b

Merced Roofing
(209) 618-2373 www.mercedroofingcompany.com
Serving
4.9 from 9 reviews
Need a reliable and trustworthy roofing company in Merced, CA? Look no further than Merced Roofing! With years of experience, we've become the go-to choice for top-notch roofing services. Get top-quality roofing services for your home and commercial properties. From repairs to replacements, our expert team can handle any project with ease. Whether you need asphalt, metal, tile, or wood shake, we work with all types of materials. Trust us to deliver high-quality workmanship using only the finest materials. Contact us today for a reliable and great roofing experience. We offer roof repair, roof replacement, residential and commercial roofing services. Our team specializes in various roofing materials - shingles, tile, metal, and flat roofs.
A & a Roofing
Serving
4.9 from 36 reviews
A & A Roofing: Protecting your home with expertise and care in Los Banos. As seasoned roofing contractors, we bring quality craftsmanship and reliable solutions to every project. From repairs to complete roof replacements, trust us to safeguard your investment. Discover the peace of mind that comes with a secure and well-maintained roof.
DeHart Roofing
(209) 667-7737 www.dehartroofinginc.com
Serving
4.3 from 53 reviews
With over five decades of expertise, DeHart Roofing is a trusted name in roofing solutions for the Turlock community. Since 1975, this established contractor has been dedicated to protecting homes and businesses with a comprehensive range of services. From full-scale residential and commercial roofing projects to meticulous repairs and gutter services, DeHart Roofing delivers exceptional craftsmanship. Their team uses high-quality materials to ensure durable, long-lasting results, all while prioritizing customer satisfaction and clear communication. For reliable waterproofing and expert roofing solutions tailored to your needs, DeHart Roofing provides professional service you can count on.

Hensley's MFG Direct Metalroofing
(209) 632-2118 hensleysmfgdirectmetalroofinginc.com
Serving
4.6 from 10 reviews
Manufacture Metal Roofing
Turlock Premier Roofing
(209) 585-8792 premierroofers.net
Serving
4.5 from 8 reviews
Premier Roofing is a distinguished company that guarantees impeccable results. We provide high caliber roofing and waterproofing services. Our professional team is what allows us to stand behind and maintain our high standards in quality, giving you peace of mind.

Ralph's Restorations
Serving
4.3 from 6 reviews
Being in business for 30+ years has given us an unparalleled advantage over our competition and allowed us to provide the finest and most efficient customer service possible. We strive to ensure you’re confident and satisfied with our work. We look forward to providing excellent customer service to you!
Platinum Roofing Group
Serving
Providing the valley with the highest quality work and customer service for any and all of there roofing needs.
Serrano Roofing
(209) 853-0854 sites.google.com
Serving
Free Estimates when you call. Being in the Roofing industry for over 20 years, accumulating a great amount of knowledge and expertise, "Serrano Roofing" is skilled in a wide range of roofing systems, working with both removal and installation of Solars, shingles, metal, title, and flat roofing systems on residential homes. Giving a deep understanding of customer needs, maintaining high-quality work, and having expert advice & solution's, "Serrano Roofing”

The Roof Geek
Serving
All type of Roof replacements, repairs, inspections, certifications.
Heavy tile raises the dead load on the home's framing, and in this valley climate that extra weight can translate into noticeable changes for existing structures. If the roof is being swapped from a lighter product to clay tile, concrete tile, or slate, the added mass may overwhelm original framing or intermediate supports that were never intended to carry such heft. This is not about fear, but about making sure the roof you end up with sits securely without stressing connections, rafters, or ceiling joists. The framing behind the walls and under the attic space matters just as much as what sits on top, so a careful assessment of how the house was built is essential before selecting tile options.
In Atwater, switching from a lighter roof to clay tile, concrete tile, or slate can trigger structural review rather than a simple like-for-like replacement path. That truth shapes the decisions you make early in the process. A trusted contractor or structural engineer will look at rafter sizing, span, hangers, and any existing retrofit work that may have been added over the years. If the home uses lightweight decking or has older joist configurations, the project may require reinforcement or selective framing modifications to ensure safe load transfer from the tiles down to the foundation.
This issue is especially important for homeowners replacing older asphalt roofs on valley tract homes where the original framing may not have been designed for heavy tile. Those homes often sit on modest or traditional framing layouts, and the transition to heavier systems can reveal weak points that were never exposed before. The risk isn't just during installation; it can influence long-term performance, including how the roof responds to wind uplift, seismic events, and seasonal temperature variations. Plan for a structural review as part of your decision process, rather than assuming the existing structure will accommodate tile without modification.
Begin with a candid conversation with a licensed contractor who understands local construction practices and loads. Request a structural assessment or footing of the attic framing to confirm whether the current members can carry the added weight. If reinforcement is advised, ask for a clear plan that explains what changes will be made, how they impact interrelated elements like attic ventilation and insulation, and how long the work is expected to take. When you compare tile options, factor in not only the aesthetic and heat characteristics but also the practical implications of weight on the underlying structure. A thoughtful approach now helps you avoid surprises when it's time to re-roof, ensuring the home remains safe and durable under Central Valley heat and winter rains.
In the Central Valley climate that shapes this neighborhood, heat ages roofs quickly and pushes you to weigh upfront costs against long-term performance. The local cost ranges for common materials are asphalt shingles 350 to 650 USD per square, metal 700 to 1100, clay tile 1200 to 1900, concrete tile 1100 to 1700, wood shingles or shakes 900 to 1400, and slate 1500 to 2600. Those figures reflect typical Atwater pricing patterns, not abstract numbers from another city.
Heat-driven aging shows up in choices that resist sun and shrinking, cracking, or hail-driven wear. Asphalt remains the lowest entry price, which is appealing if you plan to replace more often, but it can show its age faster in the valley sun. Metal roofing costs sit higher up front yet often deliver better heat reflectivity and longer life. Clay and concrete tiles perform well under strong sun and can resist long summers, but they bring heavier weight and higher installation complexity.
Clay tile and concrete tile bring notable advantages in heat durability, which matters here where summer days spike and shade is a premium. Atwater homes commonly require careful structural consideration when opting for these heavier systems, especially on mid-sized or older frames. The heavier materials can push total project cost beyond material price alone, as the structure may need reinforcement and the crew may require more time. Concrete tile generally lands in the 1100 to 1700 USD per square range, while clay tile runs 1200 to 1900 USD per square.
Metal roofing is a versatile alternative that holds up well to heat and can shed radiant energy. For homeowners balancing a steeper initial outlay against longer service life, metal offers a predictable performance envelope in this climate. Expect the per-square figure to land toward the higher end of the range (700 to 1100 USD), but with potential savings over time through reduced cooling loads and fewer re-roofs.
Wood shingles or shakes bring a distinct aesthetic and good insulative qualities, yet they require vigilant maintenance in a dry, windy valley environment. Expect a mid-to-high price range here (900 to 1400 USD per square) given the labor intensity of installation and the need for careful moisture management. Slate, while durable and striking, remains the premium choice, with costs from 1500 to 2600 USD per square, reflecting material heft and the meticulous craftsmanship it demands.
In practical terms, your material choice in Atwater weighs upfront price against heat durability and long-term performance. If heat resistance and a longer between-roof cycle are priorities, tile and metal systems commonly justify the higher entry cost through reduced cooling needs and extended life, even if the immediate job price is steeper.
A full re-roof in Atwater typically requires a permit through the City of Atwater Building Division. The process begins with submitting project plans and a scope of work that clearly outlines the roofing materials, metal or tile weights, and any potential structural implications. The permit acts as the formal authorization to proceed and ensures the work complies with local codes, wind resistance requirements, and fire safety standards that are tailored to this Central Valley climate. Once the permit is issued, inspections are scheduled at critical milestones to verify that the installation aligns with approved plans and code expectations.
Plan review happens before any shingle, tile, or metal is removed, and it may prompt small clarifications or minor plan adjustments. During installation, inspections occur at key stages such as underlayment placement, nail patterns for the chosen material, and flashings around skylights and vents. In Atwater, the inspection schedule is typically structured to catch material compatibility with existing roof decks and to confirm that roof-to-wall connections meet local resistance standards against the district's wind profiles. A final inspection is conducted after completion to verify that all permit conditions are satisfied and that the new roof meets the city's performance expectations for longevity and safety, especially under the region's summer heat and winter rains.
Projects involving heavier roof systems such as tile or slate may face added review steps. The Building Division might request structural documentation to demonstrate that the existing deck can support the added weight without compromising framing integrity. This can include a structural engineer's letter, joist sizing confirmations, and cross-sectional details of the rafter system. If such documentation is requested, coordinate with the licensed contractor to assemble complete, clear calculations and ensure they accompany the permit applications. Expect potential additional review time, but those steps help ensure long-term performance against Atwater's heat-driven aging and wind exposure, especially for homes with lower-pitched roofs or older framing.
Begin with a thorough pre-project check of the existing deck's condition and any known trouble spots around penetrations. Communicate early with the building official about material choices, especially if heavier tiles or slate are planned, so any structural concerns are addressed upfront. Keep all inspection notices and correspondence organized, and schedule inspections promptly to avoid delays that can push a project into peak heat periods. A clear, well-documented submittal that aligns with local requirements reduces back-and-forth and helps ensure the permit stays on track through completion.
Winter rainfall in Atwater can delay tear-offs, expose decking moisture problems, and extend project timelines once the wet season begins. If crews are forced to pause, you may see adhesive-backed underlayment lifting or soft spots showing up on decking after a storm. Before re-roofing starts, have a quick inspection window set aside for after the heaviest rains pass, and expect some extra drying time if the soil is saturated. On milder winter days, weather windows can still shift due to cold fronts, so build a flexible schedule with a few contingency days to avoid losing progress between storms.
Summer heat affects asphalt shingle handling and adhesive behavior, making installation timing more important than in cooler California markets. Extreme afternoon heat can cause shingles to bend or buckle if left out in direct sun, slowing progress and increasing waste. Plan lift and staging areas to shade materials, and aim for early-morning or late-afternoon installation when temperatures are lower. If a roof must be worked during peak heat, allow extra cooling and re-check sealant tack before final nailing to maintain proper adhesion and wind uplift resistance.
Late fall rain events can create a local scheduling crunch as homeowners try to finish projects before persistent moisture complicates inspections and dry-in. Start the dry-in phase early enough to capture a stretch of dry days, but anticipate a few wet spells that push completion into winter. Maintain a robust communication plan with the crew and the homeowner about expected rainfall probabilities, and mark critical milestones that must stay on schedule to avoid moisture-related delays during the final inspection and dry-in phase.
Insurance dynamics in this valley can catch unprepared homeowners off guard. Broad California trends-insurer pullbacks and tighter underwriting-mean roof age and condition carry more weight when renewal time rolls around. In this climate, a roof that once seemed "good enough" can become a trigger for higher scrutiny or even non-renewal if its age, material, or visible wear suggests elevated risk. The risk isn't only about a storm event; it's about the ongoing exposure from long, hot summers and periodic heavy rains that test shingles, underlayment, and fasteners.
Keep documentation that proves a roof's condition and the quality of its components. Date-stamped photos, detailed invoices for repairs or replacements, permit records, and any adjuster reports should be stored in a central file. When a claim is opened or a renewal is evaluated, this evidence often shifts the narrative from perception to condition. Clear records help establish a credible baseline for what exists now and what has been done to maintain or upgrade the system.
For homes with tile or slate, replacement questions carry extra weight because these heavier systems can prompt code-related upgrades or structural assessments during claim settlements. If a roof section is near or beyond its expected service life, carriers may request structural verification or reinforcement details. In such cases, the insurer's evaluation can hinge on whether the existing support structure aligns with current loading standards and the chosen replacement material.
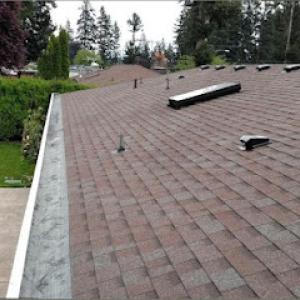
In this inland Central Valley climate, asphalt roofs age fastest during long, scorching summers. The constant heat accelerates granule loss, softens the asphalt, and can cause surface cracking. When the surface breaks down, water can start to seep into the deck more easily, especially after a few storm cycles. Homeowners may notice hairline cracks or a sandpaper feel on the surface, and those indicators often precede leaks that show up with the first winter rain. Regular inspection after peak heat, looking for missing granules and cupping or curling edges, helps catch problems before water intrusion becomes visible inside the attic or ceilings.
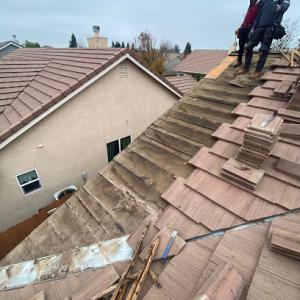
Tile roofs offer durability in this climate, but wind events can crack or loosen pieces. When tiles crack or slip, underlayment and the roof deck become exposed to the elements. That exposure is particularly troublesome once sustained winter rain arrives, as the vulnerable areas can rapidly deteriorate and let moisture into vulnerable seams and fasteners. If tiles are displaced after a wind episode, have a qualified roofer re-seat or replace tiles promptly and check the underlayment for signs of wear or grit exposure along valleys and ridges.
Homes that skip maintenance through the dry months often discover flashing failures and compromised valleys once the wet season starts. Valleys and flashing are essential drainage paths and weather barriers; when they fail, water tends to concentrate where it can do the most harm-intersections, chimneys, and around vent pipes. In inland Central California, this timing issue means problems can feel sudden after a few weeks of rain, even if the roof looked fine during summer. Regularly verify flashing sealant and look for lifted metal, rust, or loose fasteners ahead of the rains to avoid cascading leaks.
Keep an eye on heat-weathered shingles for blistering or curling, and schedule prompt replacement of damaged tiles after storms. Maintain gutters and downspouts to prevent water backup near edges, and inspect flashing after wind events or heavy rains. If signs of moisture appear in ceilings or attic spaces, assume the worst at the penetrations and have a professional assess all potential failure points, especially around valleys and chimneys. By staying proactive each dry season and after major weather events, leaks and water damage can be kept to a minimum.