Last updated: Apr 19, 2026
The Mediterranean pattern here means a long dry season with intense summer sun that ages shingles, sealants, and exposed flashings faster than you'd expect in milder climates. UV exposure isn't just a yearly concern-it compounds over time, so a roof that holds up well in year one may show wear in year eight if the underlayment and flashing aren't up to the task. When you're choosing a roof system, think about materials that resist UV degradation, have proven color stability, and maintain their integrity with extended exposure to heat.
Winter brings its own tests. Most annual moisture stress arrives in storm season, when roof decks get wet and the dry-in window can be tight. A rushed tear-off or delayed underlayment work can lead to moisture entrapment, mold risk, and attic condensation that strains ventilation. If you're planning a re-roof during wetter months, coordinate closely with your contractor to secure a dry-in plan, protect the deck during removal, and minimize time with the roof open to the weather.
California's wildfire narrative also shapes decision-making here. Insurance considerations increasingly tie defensible-risk perceptions to material choice and installation quality, even in denser urban pockets of the county. That means selecting fire-rated assemblies, proper clearance from ignition sources, and meticulous installation details that bolster the roof's defensible space profile. It's not just about meeting a code label; it's about how the system performs under a wind-driven ember scenario and how well it integrates with ember-resistant barriers.
Your first step is to map the shingles' expected UV life against your local sun exposure. Options with reinforced granules, matte or reflective finishes that resist heat buildup, and colors that balance heat absorption with shingle longevity tend to age more gracefully in the San Jose sun. If you live in a tile-heavy neighborhood, clay or concrete tiles offer excellent UV resistance and a long service life, though they bring weight and roof structure considerations. In nearby sun-drenched blocks, metal roofing has gained traction for its reflective qualities and rapid rain shedding, but the tone and coating must be tailored to resist thermal expansion and color fading in the summer heat.
In winter, focus on underlayment and deck protection. A high-quality, weather-rated underlayment paired with proper deck drainage and a well-sealed, continuous vapor barrier helps prevent moisture intrusion during late-season storms. If a tear-off is in the plan, ensure proper sequencing: deck inspection, repairs as needed, then a clean, dry-in environment before any new roof is installed. The moisture delay you experience in slower rain periods can cascade into longer project timelines if the team isn't prepared with temporary protections.
Discuss a design that anticipates both intense sun and winter rains. Ask for a reflective or cool-roof coating option that won't prematurely degrade unique tile or metal profiles. For tile systems, verify the fastener layout and sealant compatibility with your chosen tile type, plus ensure flashings at penetrations and transitions are continuous and corrosion-resistant. If wildfire exposure is a factor, request fire-rated decking and ignition-resistant underlayment, with ember-resistant vents and updated edge terminations.
Think about maintenance windows. Schedule inspections after the first heavy winter storm and again after the summer heat peaks to catch early signs of UV-driven deterioration or seam failures. Document everything so future homeowners have a clear record of the roof's performance in this climate. When timing, material choices, and installation quality align with these realities, the roof stands the best chance of enduring the Santa Clara Valley's distinctive mix of sun, rain, and fire risk.
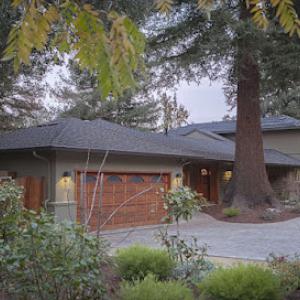
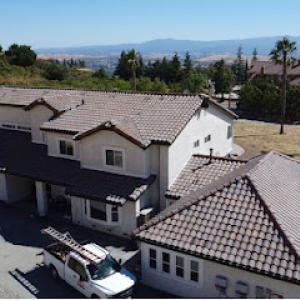
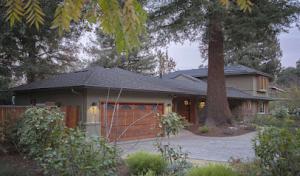
Clay and concrete tile stand out in neighborhoods with Mediterranean and Spanish influences that populated late-20th-century suburban layouts. These rooflines were designed around tile aesthetics, and that pairing of form and function often yields long-term durability when the right underlayment and fasteners are used. In hot summer months, tile can help keep attic temperatures relatively stable if ventilation is properly addressed, and it carries a classic look that remains visually compatible with many streetscapes. If your home is a tile-vintaged remodel or a brand-new tile installation, you'll want to consider texture, color, and profile that complements surrounding homes while maintaining performance through those Santa Clara Valley heat spikes. The choice here isn't just about appearance; it's about how the system handles UV exposure, thermal expansion, and wind uplift on exposed ridges.
Clay and concrete tile are especially relevant in this market because many neighborhoods built in late-20th-century suburban growth phases use Spanish-influenced designs. Clay tends to resist fading and offers strong longevity, but it can be heavier and more brittle if laterally stressed by seismic movement or hail impact. Concrete tiles can provide greater impact resistance and a broader range of shapes and textures, which helps when a home wants a more modern or diverse silhouette while preserving the tile aesthetic. Both materials benefit from a well-sealed underlayment, continuous edge protection, and a ventilation strategy that minimizes heat buildup under the tile layer. For reclaimed or re-roof scenarios, inspect existing battens (or appropriate modern substitutes) and verify that the roof deck can support the tile weight with adequate seismic bracing.
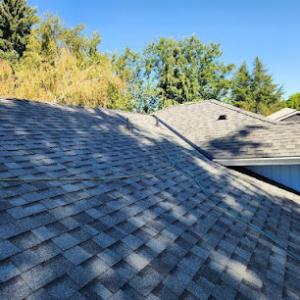
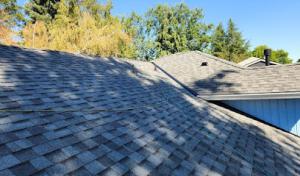
Asphalt shingles remain common for cost-sensitive reroofs, but in this climate they need to be evaluated for sun exposure on south- and west-facing slopes that take prolonged summer heat. The heat amplifies wear on the top surface, accelerates granule loss, and raises the risk of curling on lower slope sections where sun exposure is relentless. If asphalt is chosen, consider architectural or designer shingle profiles with enhanced UV resistance and a reflective granule blend to mitigate heat absorption. Tight, well-sealed edges and careful alignment near roof penetrations help prevent wind-driven water intrusion during Santa Clara Valley winter storms. For homes with long, exposed eaves, you'll want to install a high-quality flashing and consider additional overhangs or soffit venting to maintain attic moisture balance without compromising fascia integrity.
Metal roofing and synthetic products appeal to homeowners balancing lower maintenance, solar compatibility, and insurance-conscious upgrades in a market where reroof decisions increasingly consider long-term resilience. Metal panels paired with a cooling-finish coating reflectivity can improve energy performance on the hottest days, and many metal systems are designed to resist wind uplift effectively on San Jose's varied wind patterns. Synthetic or composite shingles offer a lighter weight option with improved impact resistance relative to traditional asphalt, and they often come with longer warranties against fading and weathering. When paired with solar arrays, metal or synthetic systems can simplify integration, reducing the risk of penetrations or heat-related roof deck stress that might complicate electrical work.
Maintenance and inspection routines matter across all choices. After the first year, conduct annual checks for loose tiles, degraded sealants, or fastener corrosion, especially on roofs facing the summer sun or winter rain bursts. Clear gutters and downspouts to prevent overstressed joints during heavy rainfall, and keep an eye on roof penetrations around vents and chimneys where temperature swings can stress sealants. If wildfire risk remains a consideration for insurance conversations, prioritize systems with proven fire resistance ratings and compatible underlayments that reduce ember intrusion and surface heat transfer.
Ultimately, the best roof type for your home hinges on matching the architectural style, anticipated wind loads, and long-term resilience you want to achieve. The right choice balances aesthetic compatibility with performance under San Jose's distinctive sun, rain, and seasonal pressures.
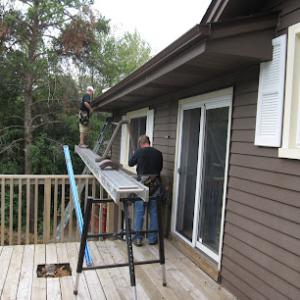
The Santa Clara Valley bakes in strong summer UV, and many homes double as solar showcases. That means every roof penetration is a potential headache once the rains return. A reroof or reflash must coordinate with the solar array layout, roof-mounted equipment, and the existing penetrations, because missing a single connector or misaligning a pathway can invite leaks months down the line. In this climate, roofing details that once seemed minor-offset flashings around vents, the alignment of hooks and rails, even the way attic access doors sit against a sun-warmed underside-suddenly matter more. The result is not just a drip, but a cascade of small failures that under pressure become noticeable as the rainy season arrives.
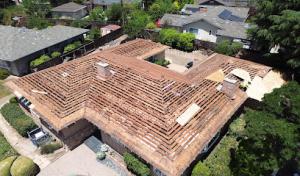
Older tile roofs carry a specific kind of risk that local crews see frequently. When access is needed for replacing underlayment or inspecting sheathing, the visible tile condition often says little about the true scope. The real work can be on the underlayment and plywood layers beneath, which can deteriorate quietly after years of sun exposure. Breakage during removal and reinstallation is common, and those fractures add up to extra labor and more spots to reseal. For homes with clay or concrete tile, plan for gentle handling and a careful layout of temporary platforms. This reduces the chance of crack-induced leaks and avoids a cycle of tile replacements after every minor misstep during access. Remember that tile weight and brittleness raise the stakes: a single miscalculated lift can trigger a broader, more expensive repair than the surface damage would imply.
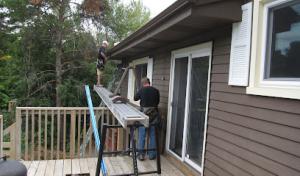
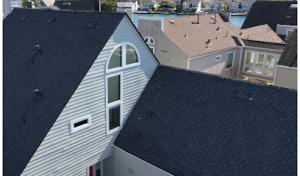
Skylights and roof-mounted equipment populate many San Jose roofs, and winter rains magnify any aging flashing. The sun-welded sealants and baked underlayment around these features can fail quietly, leaving a soggy bed of insulation and timber. Years of heat can bake flashing alloys into stiff, unyielding corners that don't flex with seasonal movement. The result is a small, persistent leak that travels along the underside of the roof deck and reveals itself only after a heavy storm. If a roof section carries multiple penetrations, the probability of a drip path becomes higher, so each flash, boot, and sealant joint deserves a close, measured inspection rather than a quick fix.
When planning a reroof, prioritize consolidation of penetrations and simplification of flashing where possible. Coordinate any solar hardware setbacks with a roofing plan that allows for continuous, overlapping flashing channels designed to shed water away from the array rather than toward it. If replacing underlayment on an aged tile roof, check the decking for moisture damage and replace compromised sections before laying new material. Use flashing that matches the original design intent but accepts modern sealants and coatings to resist bake-and-break cycles. For skylights and vents, consider upgrading to higher-performance flashing assemblies and longer-lasting sealants rated for heat exposure and UV. Finally, insist on a careful, staged removal and replacement process that protects tile integrity, avoids overloading temporary supports, and verifies water tightness at each step before the work progresses.
Find contractors who integrate solar panels or solar shingles into your roof for long-term energy savings.

Roofs By Reveille
(800) 395-7855 www.roofsbyreveille.net
545 Meridian Ave Suite D, San Jose, California
5.0 from 71 reviews
Conrad Roofing Service
(408) 294-7615 conradroofingservice.com
663 Walnut St, San Jose, California
5.0 from 65 reviews
Los Gatos Roofing
(408) 677-2818 www.losgatosroofing.com
888 Faulstich Ct, San Jose, California
4.8 from 288 reviews
Eastman Roofing & Waterproofing
(408) 389-1385 www.eastmanroofing.com
1418 Douglas St, San Jose, California
4.9 from 175 reviews
Our team of expert craftsmen have delivered the finest quality roofs for our customers in the Silicon Valley for more than 40 years. We are committed to listening to our customers and ensuring that their unique roofing system needs are met to their full satisfaction. We take pride in our precision craftsmanship, well-trained and professional employees, and superior customer service. We offer roof repairs, restoration, replacements & inspections!
Roofs By Reveille
(800) 395-7855 www.roofsbyreveille.net
545 Meridian Ave Suite D, San Jose, California
5.0 from 71 reviews
Roofs by Reveille, Inc was established in 2016 by Pablo Alviar. Pablo has been in the roofing industry for 32 years and is not slowing down. Pablo is a licensed and certified contractor and a preferred contractor to Sun First Solar, Maverick Renewables, and California’s Great America. Roofs by Reveille is certified with all major roofing suppliers and a GAF Master Elite contractor, which is only given to 2% of contractors.

Conrad Roofing Service
(408) 294-7615 conradroofingservice.com
663 Walnut St, San Jose, California
5.0 from 65 reviews
For over 85 years, Conrad Roofing Service has installed high-quality roofs. Always focused on the small details, our professional staff specialize in installing top of the line composition shingles and gutters. As we strive to become the largest go-to residential roofing company in the bay area, we will offer our customers the best solutions to take care of their home. From our dedicated staff out in the field, to our project managers creating the most efficient strategy for your project, we will make sure your house ends up looking clean and waterproof. Guaranteed!
Los Gatos Roofing
(408) 677-2818 www.losgatosroofing.com
888 Faulstich Ct, San Jose, California
4.8 from 288 reviews
Los Gatos Roofing is more than just a roofing company. In addition to offering roof repairs and replacements, we offer high quality, professional gutters and installation. Los Gatos Roofing is one of the few companies that can offer custom made seamless gutters onsite anywhere in the Bay Area. Los Gatos Roofing has five different profiles of gutter to match the style of your home. Most styles are available in both aluminum and steel and are offered in over 20 different colors. For a free estimate on new gutters for your home reach out to one of our professional estimators today.

Newhaus Roofing & Construction
(669) 287-8895 newhausroofing.com
670 Coleman Ave, San Jose, California
4.9 from 143 reviews
At Newhaus Roofing & Construction, we take pride in serving San Jose, CA, with over 25 years of expertise in residential and commercial roofing. As a family-owned, licensed, bonded, and insured company, we handle every job in-house—never subcontracting—to ensure top-quality workmanship. We are Owens Corning Preferred Contractors, certified by Owens Corning University and CSLB licensed. Our services include roofing, gutters, insulation, solar, roof venting, cool roof systems and AC, along with roof insurance claims, appraisals, warranties, and drone inspections. We offer free inspections, estimates, and flexible financing to make roofing affordable. Contact us today!

Apollo Roofing Company
(669) 201-3290 www.apolloroofingcompany.com
2175 The Alameda Ste 203, San Jose, California
4.9 from 85 reviews
Apollo Roofing Company takes pleasure in providing top-notch roofing services in San Jose. Our number one priority is the customer's happiness while offering a wide selection of services that include roof installation, roof replacement, and roof repair. No matter the project size, we will not stop working until our customers roof matches the caliber of their homes. As the leading contractor in San Jose and the surrounding areas, you can trust your roof will be built to last. Call us today! "By Appointment Only"

Top Roofing
(408) 900-6551 toproofingca.com
San Jose, California
5.0 from 42 reviews
Top Roofing is your trusted Cupertino CA based local roofing company specializing in roof replacements, roof repairs, and roof maintenance for both residential and commercial properties. We use only high-quality materials and expert craftsmanship to ensure long-lasting, reliable roofing solutions. Our fully licensed and insured team is committed to honest communication, fast response times, and exceptional customer service. Whether you need a new roof, leak repair, or routine maintenance, we provide free estimates and guarantee satisfaction on every job. For all roofing work in the Bay Area the team at Top Roofing are ready to help you with professional courteous service.
Any Roof Repair & Installation
(669) 304-3716 www.anyroofrepairsanjose.com
1 Curtner Ave, San Jose, California
5.0 from 42 reviews
100% Satisfaction Guarantee on Service. Local family-owned and operated company servicing San Jose since 2012. Licensed and insured to service any roof in San Jose. Experienced roof installers to install any roof in Santa Clara County CA. Great customer’s reviews about our roofing services. Service roofs all over Santa Clara County California. There's no roofing job too big, or too small for Any Roof Repair & Installation San Jose. Advanced solutions for roofs in San Jose. Free estimate by a licensed roofing expert in San Jose. Residential and commercial roofing services in San Jose. Emergency roofing services in San Jose.
All About Roofing Repair & Installation
2548 Seaboard Ave, San Jose, California
5.0 from 38 reviews
All About Roofing is a San Jose roofing company that combines true craftsmanship with an unmatched level of professionalism and affordability, that has garnered us a reputation as one of the best San Jose roofing companies in the area. Roofing emergencies happen. Luckily, All About Roofing is here to tend to emergencies both big and small – quickly. At All About Roofing we have years of experience tending to emergency roof repairs safely and efficiently. You can count on our team of experts to evaluate the damage, and make any necessary repairs before your home is further compromised. Call us or visit our website to get a free quote started today!
NC Roofing solution
(408) 688-5653 ncroofingsolution.com
2876 Flint Ave, San Jose, California
4.9 from 74 reviews
At NC Roofing Solutions, we know that finding a quality roofing company that fits your budget can be challenging. That's why we offer exceptional roofing services that won't break the bank. With our expert team, you can have peace of mind knowing your roof is in good hands. Don't let roof issues escalate. Choose NC Roofing Solutions for the best roofing services. Contact us today for a consultation and let us take care of your roofing needs!

Indaspec Smart Roofing & Energy Solutions
(408) 372-6801 www.indaspec.com
976 S 1st St, San Jose, California
5.0 from 32 reviews
Indaspec is your full service roofing, solar and energy provider. Indaspec can service, maintain and upgrade existing solar and battery systems. Indaspec can install new photovoltaic systems with storage solutions. As a C-10 electrical contractor, Indaspec can offer a full suite of electrical services including, main panel upgrades, generator installations and EV charger installations. Indaspec Smart Roofing is our full service roofing solution. Indaspec can repair, upgrade and install new roofing systems for homes and businesses. We can remove and reinstall all existing solar systems as part of a new roof installation as well. Indaspec Smart Roofing has experience in Comp Shingle, Natural Slate, Metal, Low Slope, Tile and Shake roofing.

A M Roofing Contractors San Jose CA
1772 Midfield Ave, San Jose, California
5.0 from 31 reviews
At A M Roofing Contractors San Jose CA, we proudly serve the San Diego area with top-quality roofing services, available 7 days a week. Our expert team specializes in roof repair, new roof installation, re-roofing, roof inspections, shingle roofing, tile roofing, flat roofing, and emergency leak repair. Whether it’s residential or commercial, we deliver dependable, long-lasting roofing solutions tailored to your needs. We use premium materials and ensure every project meets high industry standards. Trust our licensed and insured roofers for reliable, affordable service. Call today for a free estimate and experience why San Diego homeowners and businesses count on A M Roofing Contractors for all their roofing needs.
Spring and fall are the most favorable reroof windows in this area because crews can avoid both winter rain interruptions and peak summer heat on exposed roof surfaces. In spring, the air is cooler and the deck has had a chance to dry after winter storms, which helps dry-in times and interior protection. In fall, the days cool down before the wet season starts, giving crews a solid stretch to finish with daylight to spare. If you're eyeing a reroof, target these seasons and coordinate with a contractor to lock in a window before the Thanksgiving lull and the winter surge in demand.
Winter scheduling can be disrupted by Pacific storm systems that saturate decking and force temporary dry-in measures during tear-off. If a storm hits, expect brief pauses that push the project into a longer dry-in phase and potentially extend the time you're without a weatherproof roof. When you see the forecast showing consecutive wet days, it's wise to shift to a window a few weeks out rather than letting rain linger over the work. This keeps shingles or tiles from sitting damp and reduces risk of decking damage or interior moisture intrusion.
Extended summer sun can speed visible aging and make homeowners notice granule loss, brittle seal strips, and flashing fatigue even when leak activity is low. If your roof is already showing these signs in late spring, you may want to plan earlier rather than later to prevent accelerated deterioration. On tile or metal systems, inspect for color fading, accelerated granule loss on asphalt, and any warping from heat exposure. If you're not ready to reroof, schedule a targeted inspection in late spring to map out a practical replacement plan, especially for homes with extensive solar installations or tile that's aged unevenly.
Keep a clear target window in mind for the spring or fall, and block it with your contractor early. For homes with tile or heavy solar arrays, factor in additional staging time for panel or tile removal and reattachment, plus potential ventilation needs. In any case, align the timing so you maximize dry-in days, minimize exposure to peak heat, and avoid the risk of a mid-winter rush that compresses quality checks.
When you can't wait, these contractors offer fast response times to stop leaks and prevent further damage.
Eastman Roofing & Waterproofing
(408) 389-1385 www.eastmanroofing.com
1418 Douglas St, San Jose, California
4.9 from 175 reviews
Roofs By Reveille
(800) 395-7855 www.roofsbyreveille.net
545 Meridian Ave Suite D, San Jose, California
5.0 from 71 reviews
Any Roof Repair & Installation
(669) 304-3716 www.anyroofrepairsanjose.com
1 Curtner Ave, San Jose, California
5.0 from 42 reviews
Prices in this market reflect not only the base material but also Silicon Valley wage pressure and higher operating costs. The local labor market tends to push labor-heavy installations higher than many inland California markets, so expect quotes to sit toward the upper end of published ranges. The typical per-square ranges you'll see are: Asphalt Shingles from 420 to 800 USD per square, Metal Roofing from 700 to 1200 USD per square, Clay Tile from 900 to 1800 USD per square, Concrete Tile from 900 to 1700 USD per square, Synthetic or Composite Shingles from 480 to 900 USD per square, and Slate from 1000 to 2000 USD per square.
Tile roofs are common on suburban, older homes with heavy roof systems, but structural or underlayment work can suddenly push costs up. If structural repair is needed to support heavy tile, or if underlayment needs replacement to meet current performance standards, you'll see a sharp jump beyond the base per-square material range. Matching existing tile shapes, colors, and textures on older homes adds time and often a premium, especially when crews need to source specialty tiles or custom cut patterns. In practice, a tile reroof can stretch well beyond the lower end if any of these components are compromised or mismatched.
Homes with solar arrays, multiple penetrations (vent stacks, plumbing, electrical), attached garages, and intricate valley patterns common in tract developments compound labor time. In San Jose, those complexities translate into higher install times and increased waste handling, fasteners, and flashing details. Expect per-square quotes to drift upward when penetrations aren't neatly packaged or when roof lines create nonstandard valley configurations. A straightforward install is still possible, but count on additional labor in projects with solar mounting hardware or high roof complexity.
When budgeting, pair material cost with a local factor for labor and contingencies. If your home has an older tile system to match or requires underlayment replacement, ask for a separate line item for structural checks and reinforcement. For homes with solar, request a detailed plan showing how penetrations will be managed and how the array will be integrated with the new underlayment and flashing. Compare bids that break out disposal, waste hauling, and possible tile matching surcharges, so you're not surprised by a hidden add-on as the project progresses.
Get a clear picture of your project costs upfront - no commitment required.
Los Gatos Roofing
(408) 677-2818 www.losgatosroofing.com
888 Faulstich Ct, San Jose, California
4.8 from 288 reviews

Newhaus Roofing & Construction
(669) 287-8895 newhausroofing.com
670 Coleman Ave, San Jose, California
4.9 from 143 reviews
Apollo Roofing Company
(669) 201-3290 www.apolloroofingcompany.com
2175 The Alameda Ste 203, San Jose, California
4.9 from 85 reviews
In San Jose, a full reroof typically requires a building permit rather than being treated as informal maintenance. A reroof triggers the city's building code framework, so the project moves through a formal process rather than a simple DIY notice. Expect that the permit covers scope, materials, and workmanship standards, and that plan reviewers evaluate the proposed roof system for wind, seismic, and drainage considerations. Your contractor should pull the permit before any shingles come off, and you should keep a careful record of the approved plan and any amendments. This helps avoid late-stage snags that can hold up the job.
The city uses plan review and milestone inspections, commonly including an in-progress stage such as underlayment or framing-related review and a final inspection after completion. During the plan review, ensure the roof framing, ventilation, and underlayment details align with the chosen system and the Santa Clara Valley's dry-summer, wet-winter climate. Milestone inspections give you concrete checkpoints where inspectors verify critical steps-like deck integrity, underlayment installation, and flashings-before coverage goes on top. Your contractor should coordinate these inspections and communicate any required rework promptly to minimize delays.
Homeowners should expect permit-number tracking and online portal communication as part of the City of San Jose building process. Create an account early and link it to the project so you receive notifications about plan-review status, inspector appointments, and any addenda. Keep digital copies of all approvals, inspection reports, and correspondence. If a change to the scope occurs mid-project, update the portal and resequence any required inspections to avoid "missing a milestone" penalties.
Work with a contractor who is familiar with local permit expectations and can explain the milestones upfront. Schedule inspections to align with your crew's progress and the weather window, especially after winter storms. Have a clear record of the approved plan, material selections, and any deviations documented with notes and photos, so inspectors can verify compliance quickly and avoid back-and-forth delays.
In San Jose, when a wind or rain event tests a roof, how you document the damage can determine the outcome of a claim. Photos before and after the event, timestamped maintenance records, and clear evidence of leaks or blown shingles make the adjuster's review smoother. Property owners should capture water intrusion paths, attic conditions, and any visible wear to avoid disputes later, especially during wildfire-season underwriting shifts.
California's strained homeowners insurance market affects reroofing decisions, and some carriers have tightened underwriting in years with wildfire risk. You may find that choosing a roof system with enhanced fire resistance can influence insurability, even if the immediate need is weather-related. In practice, that means weighing materials that meet higher fire-performance expectations, while balancing durability against San Jose's intense summer UV and occasional winter downpours.
Homeowners replacing older roofs often weigh whether a more durable material could help with insurability over time. In a market where carriers scrutinize risk, selecting a roof that's rated for better fire resistance and proven performance under sun and rain can shift how insurers view the home. The decision becomes not just about today's leak, but about reducing future adjustment uncertainty and easing long-term coverage concerns.
If a loss happens, keep a running log of weather events, repairs, and inspections, and schedule professional assessments that focus on how a roof responds to both rain and heat. When you meet the adjuster, present organized documentation and a clear narrative of preexisting conditions. A well-supported claim, combined with a durable, fire-conscious replacement choice, can influence insurability during the next renewal cycle.
Connect with contractors who help homeowners navigate the claims process from damage assessment to final approval.
Roofs By Reveille
(800) 395-7855 www.roofsbyreveille.net
545 Meridian Ave Suite D, San Jose, California
5.0 from 71 reviews
Newhaus Roofing & Construction
(669) 287-8895 newhausroofing.com
670 Coleman Ave, San Jose, California
4.9 from 143 reviews

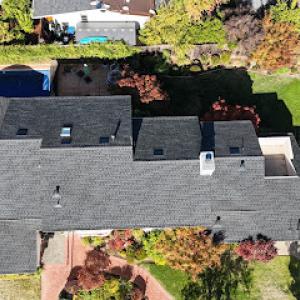
While much of San Jose's housing is pitched-roof suburban stock, low-slope sections are common on additions, patio covers, multifamily buildings, and some mid-century homes. These areas can look simple, but they carry unique failures if not cared for with local conditions in mind. A low-slope roof faces the dry summer heat and the concentrated winter rain, and that combination tests drainage, seams, and edge details more than a steeper roof does.
These roofs tend to shed water the slowest, so ponding and backed-up drainage are real risks during heavy rains. After a storm, visually inspect for standing water zones near drains, penetrations, and transitions to steeper roofing. If you notice any pooling that persists more than a few hours, plan a targeted fix. Confirm that scuppers, gutters, and downspouts are clear, and that interior ceiling signs or damp patches aren't indicating hidden leaks. In multifamily or addition roofs, check shared flashings and non-movable joints first, as those areas see the most stress from runoff changes.
Concentrated winter rain tests seam integrity and flashing performance. Look for ripple, blistering, or seam separation along field seams and around penetrations such as vents and skylights. If you detect moisture wicking or unusual staining, schedule a closer assessment with a contractor who specializes in low-slope systems. Local crews will often suggest resealing or re-flashing with materials designed to handle San Jose's mixed climate, especially where roof-to-wall transitions are involved.
Heat buildup on low-slope surfaces in sunny summers can accelerate membrane aging. If a restoration or retrofit is on the table, consider reflective coatings or a membrane upgrade that enhances heat resistance and long-term durability. Ventilation and insulation around the perimeter can also help reduce heat transfer to the membrane, extending its life and reducing interior temperature swings.
Start with a preventive walk-around after the next heavy rain to spot early signs of ponding, edge pooling, or flashing gaps. Keep drains and gutters clear, and verify that any recent additions maintain proper slope toward drainage paths. For aging membranes, ask about a targeted restoration that preserves factory warranties and aligns with local climate realities.
Find specialists in TPO, EPDM, and built-up flat roofing systems for residential and commercial properties.
Roofs By Reveille
(800) 395-7855 www.roofsbyreveille.net
545 Meridian Ave Suite D, San Jose, California
5.0 from 71 reviews
Conrad Roofing Service
(408) 294-7615 conradroofingservice.com
663 Walnut St, San Jose, California
5.0 from 65 reviews
Apollo Roofing Company
(669) 201-3290 www.apolloroofingcompany.com
2175 The Alameda Ste 203, San Jose, California
4.9 from 85 reviews