Last updated: Apr 19, 2026
Sits directly on Monterey Bay, so roofs are exposed to marine salt air that can shorten the life of fasteners, flashing, vents, and other metal accessories even when the field roofing material still looks serviceable. In practice, that means you should pay extra attention to the corrosion resistance of every metal detail you install or replace. Stainless or coated steel fasteners, corrosion-resistant flashing, and sealed penetrations become less optional and more essential in this climate. Expect fastener heads and metal trim to show wear sooner than inland counterparts, especially in coastal pockets where salt spray swirls along ridgelines and eave lines. Plan for proactive inspection of penetrations every few years and around any wind-driven storms.
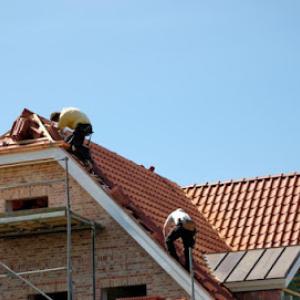
The city's coastal winds make edge details, ridge attachment, and uplift resistance especially important on re-roof projects near open exposures and dune-influenced areas. When evaluating roof edge components, look for a wind-rated underlayment system and fastener patterns that align with your chosen roof material. Reinforcement at the rake and eave edges reduces wind-driven water intrusion and lift. Ridge lines deserve extra attention: secure ridge cap fasteners, ensure proper sealants are compatible with salt air, and verify the venting behind the ridge to avoid heat buildup that can accelerate material fatigue. In open exposures or dune-adjacent zones, consider more robust edge detailing and higher nail counts or fastening methods that meet the wind profile of the property.
Seaside's mild but damp winter pattern and dry summer cycle means homeowners often replace roofs for corrosion, underlayment fatigue, and leak-prone penetrations rather than for extreme freeze-thaw damage. That pattern translates into prioritizing the integrity of the secondary barriers and attachment systems over the cosmetic life of the visible field. When planning a re-roof, assess not only the roof surface but also the underlayment's condition, flashing continuity, and the health of any vented penetrations. If any metal components show corrosion or loosening, or if the underlayment has signs of moisture saturation, treat those issues as signals to refresh the surrounding assembly rather than waiting for a leak to occur.
Coastal winds and salt exposure influence how you select roofing materials. Metals with strong corrosion resistance are advantageous where fasteners and flashing are likely to face spray or splash. Among common options, metal roofing and synthetic/composite shingles offer compatibility with reinforced edge details and improved uplift resistance when paired with proper underlayment and venting. Clay or concrete tiles provide durability but require careful attention to attachment systems and sealants at hips, ridges, and penetrations to prevent salt-laden seepage from compromising fasteners and grout. Asphalt shingles remain a practical choice, but require corrosion-resistant accessories and upgraded edge fasteners in exposed locations. The long-term performance depends as much on the detail work around edges and penetrations as on the field material.
On maintenance trips, inspect edge metalwork, ridge caps, and penetration flashings for signs of corrosion, looseness, or cracking sealant. Clean off salt buildup around fasteners and vents to slow corrosion processes. For re-roofs, engage a contractor who emphasizes edge-to-edge assessment: confirm proper wind-rated attachment, verify underlayment health, and ensure vent spacing and attic ventilation align with the chosen roofing system. Keep an eye on any area where dune winds channel along the fascia or around adjoining structures such as garages or guest houses, as these are common spots for uplift-related wear. A proactive, detail-focused plan minimizes the chance of a coastal leak becoming a larger, harder-to-repair issue later.
Dority Roofing & Solar
(831) 375-8158 dorityroofing.com
Serving
5.0 from 6 reviews
Dority Roofing & Solar has been providing high-quality roofing services on the Monterey Peninsula since 1996. Because we have this level of experience, we are prepared for all kinds of roofing needs. With our friendly, prompt, and professional service, we tailor to each customer’s specific wishes. As a result, our customers are more than satisfied with the work we perform for them. Because we source a wide variety of roofing products, you’ll find a roof that has the style, color, and material that you want. If you have a custom roof in mind, please contact us to discuss your ideas. Our portfolio includes extraordinary roofing projects in the area, and our staff will assist you in creating your vision.
Scudder Roofing Company
(831) 373-7212 www.scudderroofing.com
Serving
4.9 from 37 reviews
Scudder Roofing specializes in all types of roofing and roof repairs as well as waterproofing, seamless gutters, skylights, and roof maintenance. A full-service residential and commercial roofing contractor, we serve clients all over Monterey, Santa Cruz, and San Benito counties. From tile, slate, custom and specialty metal to shingles, shake roofs, solar and so much more, the Scudder name has been synonymous with excellence since 1982. Give us a call today at 831-373-7212 for a free roofing estimate or visit our website for more information about our roofing company and the skilled construction services we can offer you.
Ross Roofing & Construction
(831) 394-8581 www.rossroofing1950.com
Serving
4.6 from 14 reviews
Ross Roofing & Construction is a trusted team of roofers in Monterey, CA, providing reliable and affordable roofing solutions backed by decades of experience. Our licensed, bonded, fully insured, and BBB-accredited professionals specialize in new roof construction, re-roofing, and roof repair for homes and businesses. We also offer expert services in gutters, sheet metal fabrication, foundation waterproofing, walkout decks, and real estate inspections. From minor leaks to complete replacements, we handle every project with precision and care. Contact Ross Roofing & Construction today for dependable roofing and exterior services throughout Monterey County.
Coastal Roofing & Solar
(831) 324-4908 www.coastalrs.com
Serving
5.0 from 19 reviews
Coastal Roofing and Solar is a locally owned family oriented company with extensive background in the local construction industry. With over 35 years of combined ownership experience, over 56 years of combined front office customer care experience and over 90 years of combined local installation experience our mission is simple: Treat every person and each property with the highest respect and provide the right job scope to ensure the best investment return for each individual project whether residential or commercial, large or small. Each job is customized for the customer. Roofing, solar and waterproofing, both retrofit and new construction.

Premo Roofing Company
(831) 443-3605 www.premoroofing.com
Serving
4.6 from 69 reviews
Premo Roofing is a full-service company serving residential and commercial clients in Monterey, Santa Cruz and San Benito Counties.
Slaton & Son Roofing
(831) 449-0599 slatonandsonsroofing.com
Serving
4.9 from 28 reviews
Family Owned & Operated Roofing Company with 44 Years in Business.
Monterey Bay Roofing
(831) 901-4810 www.montereybay1.com
Serving
3.3 from 7 reviews
At Monterey Bay Roofing, Inc., we take great pride in being the top provider of residential and commercial roofing services for our neighbors and their families in Monterey, CA. With over 40 years of experience in the field, our team of skilled and highly qualified roofers is ready to provide you with the finest quality roofs, using only the best materials at competitive prices.
Earl Deal Roofing
(831) 217-4425 earldealroofing.com
Serving
4.7 from 11 reviews
Earl Deal Roofing is a reputable & quality roofing contractor in Salinas, CA! We have over 9 years of experience! Our company is licensed and insured! Call us for professional roofing services. "We have 5% off discount on labor cost for senior and military" Contact now!!
Kennedy Roofing
(831) 254-4900 kennedyroofing.net
Serving
5.0 from 13 reviews
Kennedy Roofing has been established over more than 20 years in the business completing work of exceptional quality throughout Watsonville and the surrounding cities. Our team of skilled roofers has the tools and the experience to confidently offer a comprehensive range of services for your roof. We service in general inspections, repairs of all scopes, the installation of brand new roofs and maintenance such as pressure washing. Beyond roofs themselves we also install seamless gutters and solar panels adding great value to your home. We work with you to make the process as convenient as possible and will work with you to get your project completed to your full satisfaction before receiving payment.
Dynamite Roofing
(831) 240-8281 dynamiteroofing.com
Serving
5.0 from 1 review
Lic# 697091 - PL & PD Insured Serving Monterey & Santa Cruz Ca Family owned and operated, Dynamite Roofing is dedicated to installing quality roofs at a reasonable price. Our services include: • New construction • Re-roofing • Repairs • Carpentry – dry rot restoration Specialize in installing: • Composition shingles • Clay & concrete tile • Wood shakes & wood singles • Torch down flat roofs • Waterproofing balcony decks • Sheet metal & gutters • Skylights and sun tunnels Call for free estimates (831) 240-8281 Rob@dynamiteroofing.com

Legacy Roofing
(831) 753-7663 www.legacyroofing.net
Serving
5.0 from 2 reviews
Our company has provided professional roofing services in new construction, roof replacement, roof maintenance, and roof leak repairs for over 20 years. We service both private and public-sector customers as well as general contractors. Our knowledgeable staff works with manufacturers to provide custom solutions designed to provide our clients with the best possible finished product for their roofing and waterproofing needs.
Ed's Tile & Shingle Roof Cleaning
(831) 277-7713 edsroofcleaning.com
Serving
5.0 from 6 reviews
Exterior power washing at it's best! For all of your exterior cleaning needs, call Ed's Tile & Shingle Roof Cleaning. Does your home look a little dull? Do you think you need to paint? Maybe all you need is a good exterior cleaning. Our qualified and insured technicians will clean and restore your exterior surfaces and bring out the beauty of your home which is more cost effective than painting! We also can clean and reseal your fences, decks, patios and porches, along with cleaning your gutters and downspouts so that they work more efficiently. Call Ed's Tile & Single Roof Cleaning today to schedule your next home improvement project.
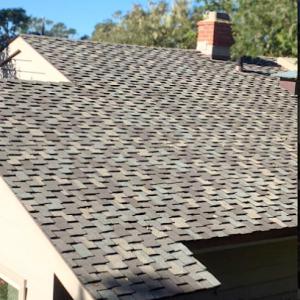
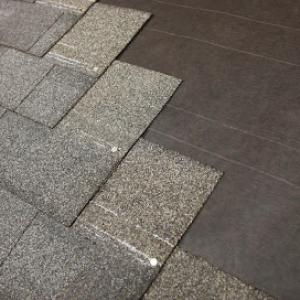
Asphalt shingles are a familiar sight on many Seaside homes, often chosen for their balance of cost and straightforward maintenance. Coastal sun and salt exposure can accelerate granule loss and aging compared with cooler inland assumptions about lifespan, so you'll want to choose a high-quality, impact-resistant shingle and plan for more frequent inspections as the system ages. Look for shingles with enhanced UV resistance and a robust granule embedding, and make sure the installation uses wind-appropriate fasteners and sealing to resist the persistent coastal wind. Regular ventilation remains crucial, so ensure the attic space under asphalt is well vented to prevent heat buildup that could compound aging of the top layer. In practice, budget for an orderly maintenance cadence: clean debris near eaves, watch for curling edges, and replace any granule-rich granules that accumulate in gutters after a windy period.
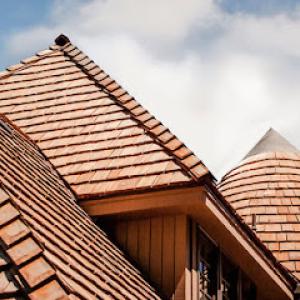
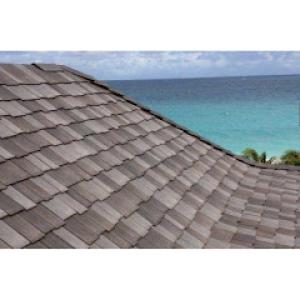
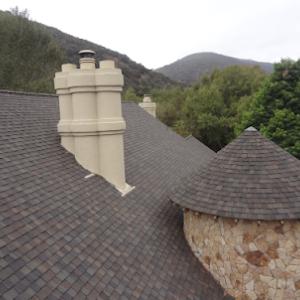
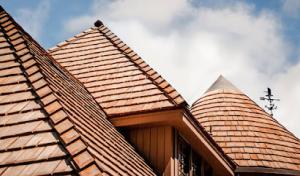
Clay and concrete tile are prominent local choices and fit the region's architecture, offering durability and a classic look that holds up under Seaside's marine aesthetic. The tile surface can still appear durable even as underlayment ages, so you must not overlook the life of the underlayment beneath the tiles. Coastal wind can lift and stress the roof more than inland areas, making underlayment condition and fastener security critical. broken tiles from foot traffic are a common issue; even if a tile surface looks intact, the underlayment or mounting system may be compromised after wind-driven debris or careless maintenance access. When you replace or repair, verify that the underlayment is appropriate for tile roofs and that trim and edge detailing are corrosion-resistant to resist salt exposure. Foot traffic should be minimized on the tile surface, and if access is necessary, use soft-soled shoes and set down mats to limit cracking or chipping.
Metal roofing can perform well in Seaside's wind environment, offering excellent shedding and resilience when fastened properly. The marine environment, however, makes coating quality and corrosion-resistant trim, fasteners, and penetrations more critical than in non-coastal markets. Choose metal panels with a durable coating system designed for salt spray exposure, and ensure all penetrations (vent stacks, skylights, gutters) receive corrosion-resistant flashing and sealants. Regular inspection of seams and fasteners is essential, because salt air can accelerate corrosion on exposed components. If you opt for metal, coordinate with a contractor who uses specific coastal-grade fasteners and checks for stone-damaged coatings after storms. Ventilation considerations remain important to prevent condensation-related issues in mixed-dry coastal cycles, so ensure attic ventilation is balanced and that the roof's overall airflow remains unobstructed by metallic components or thick insulation.
The wettest roofing period hits hardest in winter when Pacific storms roll in off Monterey Bay. Small flashing or underlayment failures can become active interior leaks in a heartbeat, forcing an urgent tarping response before a full replacement can be scheduled. The coastal climate with salt spray and persistent winds means any weakness in the roof system is tested repeatedly during the winter storms, and delays in tearing off old layers can leave decks exposed to driving rain and wind-driven spray.
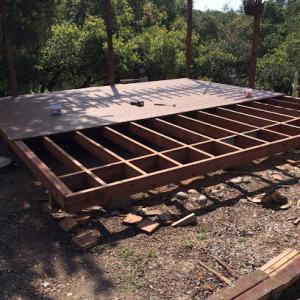
Installations can be delayed by rain, so local projects often require tarping after tear-off or staged dry-in planning to avoid exposing roof decks during storm windows. If a tear-off lines up with a forecasted rain event, plan for a rapid tarping plan immediately after removal to keep interior spaces dry. A carefully staged dry-in can buy critical days, but it must be timed to the wet-season weather pulse so a storm window doesn't expose newly exposed decking.
Wind-driven rain along the coast tends to reveal weaknesses around skylights, valleys, and roof-to-wall transitions that may not show up during dry summer months. Those areas deserve closer inspection as soon as the first heavy winter fronts arrive. If flashing around a skylight shows loosening, or if a valley shows a damp or bubbled underlayment, treat it as a priority repair to prevent interior leaks during the season's peak rain episodes.
Keep a weather eye on roof penetrations and transitions during winter storms. If a leak is active, place a tarp or temporary cover over the affected area, focusing on controlling seepage around penetrations and along any exposed deck. After a storm passes, contact a roofer for a targeted assessment of flashing, underlayment, and ventilation components. Rapid triage and timely staging for dry-in can significantly reduce interior damage and make the eventual full replacement more predictable.
Coastal winds amplify the impact of moisture intrusion, so pay attention to ridge vents, soffit intake, and any ducts routing through the attic. Proper sealing and wind-resistant fastening around edges and transitions become critical in winter, when gusts can push rain under marginal seals. If repeated wind-driven leaks occur near a particular wall plane or window, that area warrants an expedited inspection and reinforcement before the next storm cycle.
When you can't wait, these contractors offer fast response times to stop leaks and prevent further damage.
When planning a full roof replacement, expect the permit process to be part of the job rather than treating it as simple maintenance. In this area, the Building Department reviews high-salt air exposure, wind considerations, and roof ventilation as part of the permit scope. Before any material is ordered or work begins, verify that a city permit is in place and that all required plans reflect your chosen roofing system and any ventilation changes.
The permit path includes two key city reviews: plan-check and field inspections. After the old roof is removed, a city inspector typically checks the decking, underlayment, fasteners, and any mechanicals tied to the roof-line. This first inspection confirms structural readiness and correct ventilation details. Upon completion, another inspection verifies that the final installation matches the approved plan, including flashing, wind-vented components, and flashing around penetrations such as skylights or vents. Having a clear, signed inspection record helps prevent hold-ups when you're ready to close out the permit.
Delays tied to plan-check and review can pop up, and those delays are not unusual in this coastal climate. Expect plan-check feedback tied to ventilation changes, skylight work, or the scope of materials being replaced. If your project includes new skylights or modifications to attic ventilation, the city may require additional calculations or drawings. Prepare for potential back-and-forth with the plan-check reviewer and factor in extra time into your project schedule.
Ventilation is a frequent focal point for Seaside reviews, driven by Monterey Bay's salt air and persistent coastal winds. Ensure the new system maintains or improves attic and roof ventilation, and have documentation ready for the inspector showing how soffit, ridge, or turbine vents are configured relative to the new roof. If the replacement involves changing the roof line or adding vents, coordinate those changes with the plan-check packet so the city can assess wind-driven performance and corrosion resistance.
On the day of inspection, have the site prepared with clear access, proper pedestrian safety, and all required documentation on hand. If the inspector notes an issue, respond promptly with revised details or corrected work. After final sign-off, keep the permit and inspection record with your home documents, since future property transactions or insurance reviews may look for that compliance trail.
In this market, asphalt shingles are the budget entry point for most homeowner projects, with prices typically in the low to mid range. However, Seaside's coastal character quickly shifts the math as you move up to metal, clay or concrete tiles, or even slate. Tile and slate systems carry significantly higher labor and accessory costs, driven by wind fastenings, moisture protection, and more intricate underlayment details. When budgeting, start with asphalt as a baseline and add the premium for coastal-specific details such as corrosion-resistant flashings, fasteners, and vent components that are essential in this environment. The typical square costs reflect that mix: asphalt shingles sit toward the lower end of the spectrum, while clay, concrete, and slate push well above, with metal occupying a mid-to-high range depending on the gauge and surface preparation required.
Salt air and persistent coastal winds intensify wear on fasteners, flashings, and vent components. In this market, fastener corrosion resistance isn't optional-it's part of the system long-term. Expect thicker, corrosion-resistant aluminum or galvanized steel flashings, stainless-steel nails or screws, and ventilated ridges designed to resist wind uplift. Roofs with tile or slate require careful installation of wind clips and sealants to prevent salt-laden spray from compromising joints. These details add both material and labor costs, so the price-per-square jumps more than other inland regions when upgrading from basic components to coastal-grade assemblies.
Seaside crews often need careful staging to manage salt-laden air and wind while working. Tile and slate installations are labor-intensive, involving precise underlayment, batten systems, and meticulous sealing around each piece. Access challenges near bluff lines, coastal neighborhoods, or older homes can also elevate labor time. Expect longer lead times for specialty materials and more on-site coordination for wind-resistant details. All of this translates to higher overall install costs compared to inland projects that use the same materials.
Winter weather and the rainy season can introduce indirect costs due to temporary dry-in or tarping needs. Scheduling around marine-season winds can also affect timing and crew availability. In Seaside, these factors can push both the timeline and the administrative sequence of the project, influencing total project cost even before materials are selected. Plan for potential delays and the cost of keeping a dry-in through peak wet periods when budgeting.
For a typical Seaside replacement, start with asphalt shingles for the budget baseline and layer in coastal-grade flashings, fasteners, and vents if the project scope calls for increased corrosion resistance. Anticipate higher labor costs for tile or slate, and prepare for longer installation times if wind-prone scheduling or access constraints apply. Weather-related delays can add indirect costs that are often the tipping point between a tight and a comfortable budget. Consider a phased approach if timing and weather windows are tight, weighing long-term durability against upfront cash outlay.
Get a clear picture of your project costs upfront - no commitment required.
In this coastal town, insurance decisions hinge on documentation about roof age, material type, and prior repairs before binding or renewing coverage. California's tighter underwriting means your file should clearly show when the roof was installed, what materials were used, and any previous mitigation steps taken after wear or damage. Prepared homeowners keep notes, receipts, and dated photos ready so the carrier can see a straightforward history rather than gaps or ambiguities.
Although the area isn't a classic hail market, winter storms and coastal winds still produce leaks and wind-related damage worth detailing. Use fresh, well-lit photos from multiple angles after every storm: corroded fasteners, lifted shingles, and flashing gaps are common problem spots near salt-influenced lines. When a leak is suspected, record the progression with dated images and keep a written timeline of when water entered living spaces, how quickly mitigation was performed, and what temporary measures were installed to limit further damage.
In wildfire-sensitive insurance years across California, even coastal homeowners may see stricter roof-condition scrutiny, deductible changes, or reduced carrier appetite. Expect carriers to request more complete age, material, and condition data, particularly after a suspected ember exposure or nearby brush event. Mitigate risk by maintaining clear drainage, securing proper ventilation, and documenting any recent maintenance that supports a durable, wind-resistant roof system.
Prompt mitigation matters for claims impact and recovery speed. If you notice wind-lifted edges or suspicious moisture intrusion, take immediate steps to minimize interior damage and contact the insurer with clear, dated evidence. Consistency in documenting condition changes over time helps protect the claim's credibility and supports a smoother resolution.
Seaside's sunny dry season makes solar attractive, but roof penetrations need careful flashing because winter rains and coastal moisture can exploit poor attachment details. When you plan a solar array, verify that rafter-to-plate connections around mount brackets and rails have corrosion-resistant fasteners and sealed shims. Use flashings that terminate under the ridge line and extend down both sides of racks to shed salt-laden spray. Leave extra clearance for anticipated wind loads along the Monterey Bay breeze, and choose sealants and coatings rated for marine exposure. If your roof already has ballast or integrated panels, inspect all edge details for lift or corrosion after the first wet season, then schedule a follow-up inspection after heavy coastal storms.
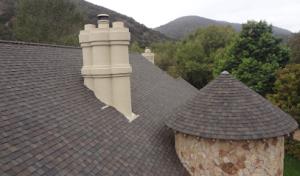
Skylight work in Seaside can trigger added review attention during permitting when replacement scope changes ventilation or opening details. When replacing a skylight or altering its opening, ensure the new curb height or flashing conforms to existing roof pitch and surrounding venting needs. Metal transitions around skylights are common weak points on coastal roofs; verify that metal-to-metal seams are continuous and backed with corrosion-resistant gaskets. Always plan for robust drip edges and kick-out flashing to direct water away from the curb. If a skylight shares a vent with the attic or is near a solar mounting, coordinate the penetrations to avoid multiple moisture paths.
On coastal roofs, the weak points are often not the field material but the penetrations and metal transitions around skylights, solar mounts, and vents. Do not overlook edge fasteners or sealant compatibility with salt air. Use continuous, curved flashing membranes where possible and seal all terminal points with marine-grade primers and sealants. After installation, conduct a tactile inspection of all joints, focusing on windward edges and near chimney or vent terminations. Plan a mid-winter inspection to catch any creaks, lifts, or corrosion before the next rain cycle.
Find contractors who integrate solar panels or solar shingles into your roof for long-term energy savings.