Last updated: Apr 19, 2026
In this climate, the Bay Area pattern of wet winters and dry summers drives how a re-roof should be scheduled. Full tear-offs are commonly safer to schedule in the dry season to minimize rain intrusion during open-roof phases. This means prioritizing a stretch when the forecast shows several weeks of sun and low rain risk, typically late spring through early fall. When planning, think of the project as a sequence that stays watertight at every stage, not just the final roof laydown.
Winter storms and rain in the East Bay can interrupt tear-off, underlayment drying, and final installation sequencing, which matters more here because permits and inspections must align with active job stages. Start planning well before the first dry spell of the year narrows your window. If the forecast signals an approaching rainy period, shifting to a smaller scope or delaying certain stages can prevent moisture intrusion. The goal is to keep the interior dry during the tear-off and to ensure the underlayment has adequate time to cure without exposure to frequent downpours. In practical terms, coordinate a block of consecutive dry days, plus a buffer for unexpected showers, and align expectations with the crew about staging materials to minimize open-wall exposure.
Summer heat and afternoon winds are a real installation factor in this market, affecting shingle handling, membrane placement, and crew pace even when the season is preferred for replacement. High temperatures can accelerate adhesive activation for underlayment and common roofing membranes, but can also damage rolled underlayment if left exposed too long. Afternoon winds can complicate material staging, especially for large sheets or bundles. Plan morning-only lifting and fastening when possible, with a clear protocol for securing materials at midday. Shingle bundles should arrive in the morning to reduce on-site exposure during peak heat, and temporary weather protection should be ready for sudden gusts. A reliable crew cadence helps maintain underlayment adhesion and ensures flashing details receive proper time for sealing before temperatures drop.
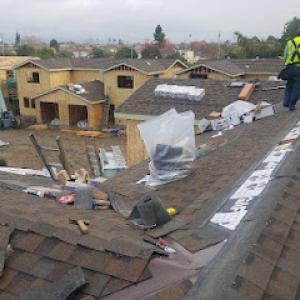
Winter weather interrupts are not just about rain. Even intermittent winter showers can stall drying times for underlayment and sealants, pushing a multi-day tear-off into an extended schedule. In this context, align the sequence with expected dry spells, but build in contingency for a longer-than-forecast dry period. The sequence typically begins with a controlled tear-off, followed by debris removal, deck inspection, and a careful dry-in of underlayment. Then comes flashing installation, followed by drip edge and starter strip placement, and finally the new roof covering. Each stage benefits from consistent daytime temperatures and reduced wind to prevent material damage. Inspections, when they occur, should be scheduled to verify that the sheathing is sound, underlayment is properly installed, and ventilation details are in place before the final roof covering is applied.
Begin by selecting a target window with consecutive dry days, ideally mid-spring to early fall, and lock a conservative buffer in case of an early-season or mid-season rain event. Request a clearly phased plan from the contractor that lists tear-off, underlayment, flashing, and final covering dates with expected durations for each step. Confirm the crew availability during the hottest months, and discuss the plan for managing heat and wind, including shading, hydration, and pace. Ensure materials procurement aligns with the schedule so there is minimal on-site storage exposure, reducing the chance of weather-related delays. Finally, coordinate with the contractor for timely inspections at key milestones to maintain momentum through the dry-season arc and minimize the risk of moisture intrusion between stages.
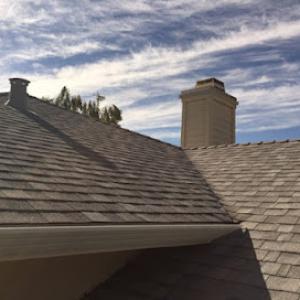
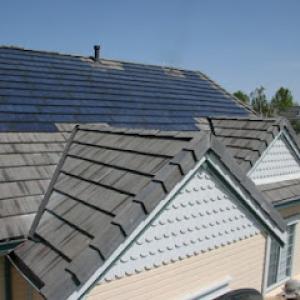
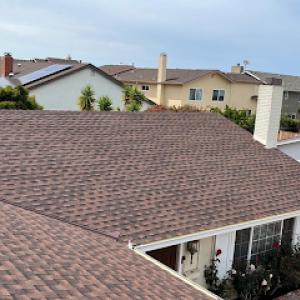
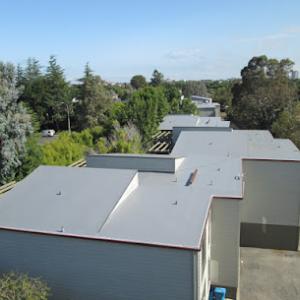
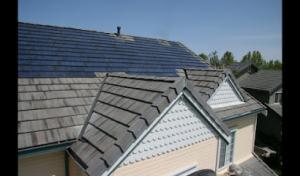
The East Bay has a distinct blend of styles and exposures that shape how you should approach a re-roof. In this area, the slope geometry of Mediterranean- and ranch-style homes means clay tile and concrete tile are common, and those heavy systems interact with underlayment life and retrofit matching in ways that matter for performance and longevity. You'll also find a solid share of asphalt shingles, metal roofing, wood shingles or shakes, and synthetic or composite shingles in the mix. Any choice should consider wind exposure, the wet-season schedule, and how insurers assess wildfire risk and overall roof condition.
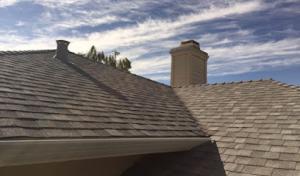
Clay and concrete tiles are especially relevant to many East Bay homes, including those with clay-on-concrete or colorfully finished barrel styles. Weight is not just a number on the tag; it translates to how your deck or rafters were built, how the underlayment performs, and whether structural reinforcement is needed during replacement. Tile systems demand meticulous installation of battens, proper nailing patterns, and careful matching of color and texture to maintain curb appeal. For aging tile roofs, pay attention to underlayment life and the condition of flashing-even small leaks can escalate quickly in hillside or wind-exposed settings.
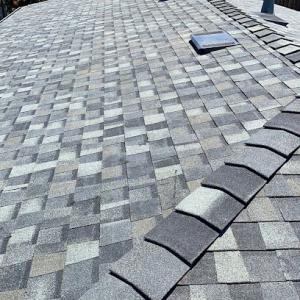
Asphalt shingles offer straightforward replacement paths with familiar maintenance cycles, and they pair well with a range of underlayment options suitable for shifting Bay Area moisture. Metal roofing provides durability against wind-driven rain and offers excellent longevity, which is helpful if you're trying to minimize future roof maintenance in high-wind zones along exposed slopes. For homes with a flatter or simpler roofline, steel or aluminum panels can be a dependable, low-profile option that still accommodates a wide array of architectural styles common in this corner of the Bay.
Wood shingles and shakes deliver a warm, traditional look that many homeowners prize, but wood requires closer attention to fire performance and moisture resistance in fire-prone conditions. Given tightening underwriting in wildfire and wind-sensitive regions, you may weigh non-wood alternatives more heavily when replacing an aging wood roof. Synthetic or composite shingles offer a middle ground-they mimic the aesthetic of organic materials while delivering improved fire resistance, lower maintenance, and stronger resistance to warping in variable Bay climate weeks.
Your decision should balance architectural alignment with practical performance. Tile systems suit Mediterranean- and ranch-style lines but demand frame compatibility and careful weight assessment. Asphalt and metal deliver flexible replacement timelines with strong performance in wet winters and dry summers. Wood and synthetic options give you stylistic choices with different maintenance and fire-resilience profiles. Regardless of material, ensure the installation accounts for local wind exposure, slope drainage, and the ability to reseal or reflash penetrations as the roof ages.
When planning a re-roof in this area, you should anchor your expectations to the Hayward-area cost ranges per square. Asphalt shingles run roughly 360 to 760 USD per square, metal between 600 and 1100 USD, clay tile from 1000 to 1800 USD, concrete tile 900 to 1500 USD, wood shingles or shakes 900 to 1700 USD, and synthetic or composite shingles 450 to 900 USD. These numbers aren't guesswork; they reflect the mix of local supply, labor intensity, and the way our crews handle the Bay Area's particular roof profiles and slopes. If you own a hillside home with steeper pitches or a tile roof that's aging, expect the higher end of these ranges, not the lowball estimates that show up in generic guides.
Tile and concrete tile stand out in Hayward because tile work involves more labor on a per-square basis. Tile handling, breakage management, and underlayment work add cost beyond a simple shingle tear-off. If you're replacing a tile system, plan for extra contingency in your budget for potential tile fractures during removal and the extra care required to avoid future breakage. In practice, the difference between a straight shingle tear-off and a full tile replacement can be a meaningful jump in total cost, especially if the existing roof deck needs additional attention or reinforcement.
Scheduling pressure around the Bay Area dry season can affect pricing and lead times, since many homeowners try to avoid winter rain exposure and compete for the same installation window. In Hayward, the dry-window rush often drives crews to book tighter schedules and push for earlier starts, which can edge prices up if demand outpaces supply. If your project can tolerate a slightly later start-after the wet season winds down but before the peak dry-season rush-you may see steadier pricing and fewer delays.
Weather risk also plays a role in the dry season. A late-season storm can stall work and force rescheduling, which sometimes triggers premium rates for expedited re-seaming, tarping, or temporary protection while waiting for a weather break. If you're aiming for a precise completion date to minimize exposure to rain, build in a small weather buffer and prepare for potential schedule shifts that could affect both cost and material availability.
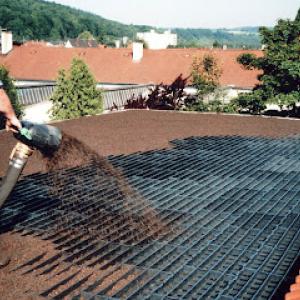
Beyond the primary roofing material, costs rise with underlayment upgrades, fastener choices, and any necessary deck repair or reinforcement. In Hayward, these components are not merely afterthoughts; they influence life span and insurance considerations, especially with aging structures. If your roof has vents, chimneys, or skylights, plan for additional flashing, sealants, and potential re-flashing, which add to labor time and material costs. Remember that tile systems demand careful underlayment and waterproofing strategies, which are priced as part of the overall package rather than as a separate line item.
Start with a material-driven budget using the per-square ranges above, then add a tile-load multiplier if you're replacing tile or a tile-inspired system. Build in a contingency for underlayment and deck work if the existing structure shows signs of wear. Finally, factor in scheduling realism: the dry-season window can compress timelines and marginally push pricing due to demand. With these realities in mind, you'll approach the re-roof project with a grounded, Hayward-specific plan that aligns expectations with local conditions.

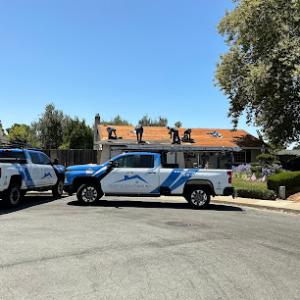
Dragon Roofing Contractors Hayward
22826 Vermont St #210, Hayward, California
5.0 from 40 reviews
Dragon Roofing Contractors Hayward is your trusted local roofing expert, proudly serving Hayward, CA and surrounding areas with top-tier roofing services 7 days a week. We specialize in roof installation, roof repair, roof replacement, leak detection, shingle roofing, tile roofing, flat roofing, and emergency roofing services. Whether you need residential or commercial roofing, our experienced team ensures quality craftsmanship and long-lasting results. Customer satisfaction and safety are our top priorities. Looking for reliable roofing contractors in Hayward, CA? Call Dragon Roofing Contractors Hayward today and let us protect your home or business with dependable, affordable roofing solutions.
Vincent Roofing
(510) 538-0222 vincentroofingcoinc.com
2181 Dunn Rd, Hayward, California
5.0 from 26 reviews
Roofing is a tradition in the Vincent family. Clyde Vincent Sr. started roofing in 1942. The company was then passed to Ed Vincent; he earned a reputation for personalized, high-caliber roofing with an emphasis on excellent customer service. His children, Don Vincent Sr., Larry Vincent, and Lynn Allan, comprised the third generation of Vincents involved in the company.
Century Roof & Solar
(510) 780-9489 www.centuryroofandsolar.com
23135 Saklan Rd, Hayward, California
4.8 from 83 reviews
Our company strives to deliver a high quality roof assembly and solar solutions to every customer. We believe one roof or solar installation job should create another through the networking of past satisfied customers. Our company takes a systems approach to re-roofing. Where every every component that goes into our roofs is designed to work together as a system. Our customers really drive our business, and because of that we take care of even the littlest requests that our customers have.
Rivera Roofing Systems
(510) 750-3220 www.riveraroofingsystems.com
2632 Sleepy Hollow Ave, Hayward, California
5.0 from 16 reviews
We provided Roofing & Gutter Services. From tear-off to Installing Shingles, Tiles, TPO, Torch, on New Roofs or Existing. We work with residential or businesses. We also do Roof Maintenance & clean gutters. Call us for your FREE ROOFING ESTIMATE TODAY.
Halco Roofing
(925) 373-7367 halcoroofinginc.net
Hayward, California
5.0 from 12 reviews
Halco Roofing is a full service licensed roofing company for over 35 years specializing in residential re-roofing and repairs. We primarily serve Livermore in California and we have an excellent reputation with our clients. We offer a wide range of professional roofing services including re-roofs, repairs, and maintenance. We believe that gaining the trust and loyalty of our clients is the key to our success. For this reason, we try our best to be fair, honest, professional, and always readily available to our clients. We stand behind our work and pride ourselves on great customer service and satisfaction. So, if you are in need of service please contact us.
Roofing Solutions
(510) 836-5227 roofing-solutions.net
25041 Oneil Ave, Hayward, California
4.8 from 18 reviews
From small repairs to large-scale commercial projects, we cover the entire spectrum of roofing needs in communities across the East Bay. Whether you’re seeking shingles, tiles, single-ply options like TPO and PVC, torchdown roofing, or innovative ultra-reflective liquid silicone and acrylic systems, Roofing Solutions has the expertise you can rely on. Experienced Professionals Quality Materials Customer Service Roofing Services From a Company You Can Trust A Properly Repaired Roof Makes a Big Difference
The Roofing Friend
(510) 999-7663 www.roofingfriend.com
244 Jackson St, Hayward, California
4.8 from 16 reviews
We are a family-owned company. We have been working in the industry for over 30 years, starting as a laborer in the 1990s and have worked hard and gained the knowledge and experience to make sure whatever projects we take on are done right. We do all types of roofing, commercial and residential, including: TPO, Metal Tiles, Concrete/Clay Tiles, Torch Down, Shingles from all Brands and more! Call us for a free estimate, we are always happy to take your call!
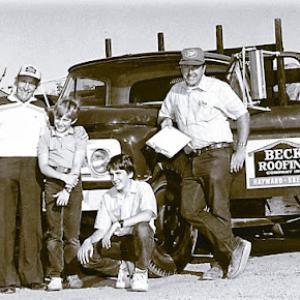
Beck Roofing Company
(510) 581-6750 www.beckroofingonline.com
21123 Meekland Ave, Hayward, California
4.7 from 13 reviews
Beck Roofing Company, Inc. is known throughout the roofing industry and among Bay Area customers as reliable and reputable, with quality work and customer satisfaction as our priorities. Serving Hayward and the surrounding areas since 1957!
Bigham Taylor Roofing
22721 Alice St, Hayward, California
4.3 from 22 reviews
Bigham Taylor Roofing is the leading name in Commercial Roofing and Industrial Roofing in Northern California and Northern Nevada. With over 40 years of experience, we offer expert Roof Repair and Roof Installation services. Our expertise extends to Multi-Unit Roofing for residential buildings, hotels, and churches. We pride ourselves on our comprehensive Roof Maintenance programs that ensure the longevity and durability of your roofing systems. Our team also provides in-depth Roof Analysis and Budgeting services to help you make informed decisions. For those in need of Seismic Retrofit and Structural Repair, we offer specialized solutions tailored to your building's needs. Don't settle for less; choose Bigham Taylor Roofing.
Rain Defense
(510) 769-0102 www.raindefense.com
2188 National Ave, Hayward, California
4.4 from 17 reviews
Rain Defense is a leading San Francisco Bay Area leak repair, roofing, waterproofing, and EEE compliance contractor. Our skilled teams serve commercial and multi-family properties throughout the region. We specialize in full replacement, maintenance, repair an emergency leak service of roofing, facade, waterproofing, decks, siding, windows, walls, doors, skylights, and any other components of the building envelope. If your building has leaks or needs an exterior service, Rain Defense can help!
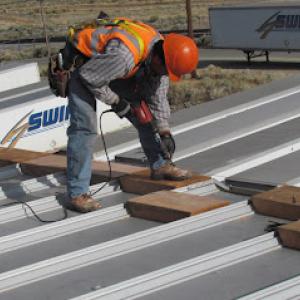
Tarasco Roofing Inc,
(510) 274-3890 tarascoroofing.com
27115 St Francis Ave, Hayward, California
4.5 from 8 reviews
We offer high quality metal roofs, standing seam and stone coated steel, quality installation, we will meet all your needs and expectations.
HRC Roofing & Solar
(855) 827-8957 hrcroofingandsolar.com
27365 Industrial Blvd Unit D, Hayward, California
5.0 from 3 reviews
Our roofing company, HRC Roofing & Solar, is the best in the business. We specialize in residential roofing and are family owned and operated. We are Licensed General and Roofing Contractors. We only use the best materials and are dedicated to completing each project in a timely manner. We have the perfect roofing solution for your home. We’re committed to helping you figure out what best fits your needs and budget.
For a full re-roof, a permit is normally required, and the city's Building Division reviews the request before work proceeds. That review isn't a mere formality-the division checks that the proposed roof system, flashing details, venting, and seismic considerations align with current code requirements and local amendments. Because Hayward's climate and hillside housing stock demand careful detailing around wind exposure and moisture management, the permit review tends to be thorough. Expect questions about your chosen materials, underlayment, and fastener schedules, especially if the project involves slope-adjacent homes or structures with irregular eaves.
Inspections in this area typically include a tear-off or underlayment stage and a final installation inspection. It is essential to hire a contractor who can coordinate city sign-offs at the right points in the job. If a tear-off is required, the inspector will want to see proper debris containment, ventilation, and a continuous underlayment. During the final installation inspection, the city verifies that the roof assembly meets code-mandated fastener patterns, hip and ridge treatments, and proper waterproofing around penetrations. Because wind-prone sites and coastal influences are common, expect the inspector to focus on flashings at walls, roof-to-wall connections, and any penetrations from mechanical equipment.
Compliance is checked against the California Building Code together with local amendments, which makes permit-closeout and inspection sequencing a practical part of project planning rather than a formality. Your project timeline should account for potential scheduling delays tied to permit review cycles, weather windows, and the coordination of sign-offs as each major milestone is completed. In hillside neighborhoods, inspectors may also pay close attention to roof edge protection during work and temporary containment to prevent runoff onto neighboring properties. Communicate early with the contractor about anticipated inspection dates, required documentation (submittals, product data, and installation details), and any municipal restrictions on work hours that could affect progress.
Start by confirming your contractor's license validity and their plan for satisfying city requirements, including any reroofing-specific notices or disclosures. Have a clear drawing set or manufacturer installation guide ready for the Building Division, with details on underlayment, ice barriers where applicable, venting strategy, and flashing transitions. After the final inspection, ensure the permit is closed out in the city system and that any required warranty paperwork or code-compliance certificates are provided to you. This orderly process helps protect both your investment and the long-term performance of the roof against moisture, wind uplift, and seismic considerations that are native to the area.
Hayward homeowners are operating in California's tightened insurance market, where wildfire- and wind-related underwriting pressure can affect whether an aging roof is fully covered, surcharged, or subject to limitations. That means your roof is not just a weather shield; it's a factor that can tilt coverage decisions, especially after a harsh winter or a windy spring. The way your roof sits on hillside zones and exposed edges amplifies these concerns, so the condition you present to an insurer can make or break the pace of any claim.
Insurers in this region often want roof age, recent inspection findings, photos, and contractor estimates, so Hayward owners should document condition before leaks become active claim disputes. A careful, dated record can be the difference between a straightforward repair and a drawn-out negotiation that drags into the wet season. In practical terms, you want a clear snapshot of the roof's health before trouble starts-cracked seals, missing granules, sags, and any evidence of moisture intrusion. When the time comes to file, those files become your narrative.
Because adjusters may coordinate on-site evaluations and some policies carry higher deductibles or narrower terms in exposed California markets, replacement decisions in Hayward are often tied to insurability as much as leak prevention. In other words, even if a leak is your trigger, the insurer's appetite for coverage can drive the decision toward replacement or substantial repairs to maintain insurability. This reality makes a well-timed, documented plan essential rather than a reactive patch job.
Prepare for on-site adjuster visits by keeping a simple, organized set of materials: recent roof reports, contractor estimates, dated photos from multiple angles, and a concise summary of observed issues (with locations) and any prior leaks. If a contractor points to weak seams, wind-stripped edges, or compromised flashing, photograph those exact spots. Keep notes on recent weather events that may have contributed to damage. Clear, contemporaneous records help prevent a dispute over what existed before the claim and what happened after.
Because California's climate can turn on a dime-wet winters, dry summers, and hillside exposure-the timing of documentation matters. You want a current picture before the next storm season, so your records closely reflect reality when an insurer requests evidence. In short, proactive, precise documentation protects your home and your coverage prospects in a market that prizes predictability as much as prevention.
Connect with contractors who help homeowners navigate the claims process from damage assessment to final approval.
Vincent Roofing
(510) 538-0222 vincentroofingcoinc.com
2181 Dunn Rd, Hayward, California
5.0 from 26 reviews


Richard's Hayward Roof Repair
(341) 232-3450 spinespecialistscenternj.site
777 Southland Dr #251, Hayward, California
4.7 from 3 reviews
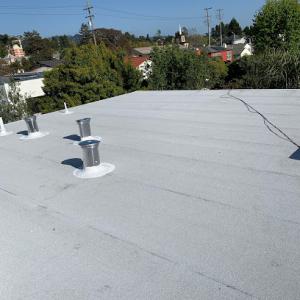
The Bay Area winter rain makes flashing transitions around skylights and low-slope sections especially sensitive, because even small installation defects can show up quickly during seasonal storms. In homes with mixed roof designs, the main field material may look fine, but attached low-slope areas, patio covers, and skylight penetrations often drive the first leak call. This means the focus should be on the connections where water can track between different planes, not just the shingles or tiles on the main field.
Start with a careful around-flash check: look for old, cracked, or missing sealant, rusted metal flashings, and any gaps where the curb meets the roof deck. Pay attention to the skylight skirts and curb flashing, which frequently deteriorate after years of sun and freezing cycles. If you can access the interior ceiling around the skylight, check for staining, which is a telltale sign of slow leaks that worsen with each storm. For attached or off-angle skylights, verify that flashing turns extend properly onto the higher plane and that there's a clean drainage path away from the curb.
Low-slope sections and patio covers deserve the same scrutiny as skylights. Look for peeling sealants, loose membrane edges, and any signs of ponding near transitions to steeper sections. Ensure drainage is unobstructed and that the edge details where the low-slope meets vertical facades are properly terminated. In winter, small gaps can become major leaks, so address suspect flashings before the first sustained rains.
Plan major repairs or re-flashing projects to complete before the winter rains arrive, then schedule a post-storm check after the wet season begins. For roofs with mixed materials, prioritize the skylight and low-slope components, since those spots are most likely to reveal weaknesses first under Bay Area conditions. If a leak persists after a targeted fix, re-evaluate the flashing transitions and consider upgrading to more robust, weather-appropriate membranes in the trouble zones.
Find contractors experienced in skylight installation, flashing, and leak repairs to bring natural light into your home.
Vincent Roofing
(510) 538-0222 vincentroofingcoinc.com
2181 Dunn Rd, Hayward, California
5.0 from 26 reviews
Century Roof & Solar
(510) 780-9489 www.centuryroofandsolar.com
23135 Saklan Rd, Hayward, California
4.8 from 83 reviews
Even though the city isn't a hail hotspot, winter storms bring pounding rain, saturated decking, and sudden leaks that spike calls to local roofers. A dripping ceiling, damp attic insulation, or stained soffits can escalate quickly as storms roll through. Treat any sign of active water intrusion as urgent, because exposed decking and compromised underlayment can deteriorate fast in these conditions.
Spring's spiky blend of intermittent rain and humidity can make temporary repairs tricky. If a leak is active, cover with a watertight tarp anchored to solid framing, not fascia boards, and avoid tarps that block drainage. Keep interior access clear to prevent further water intrusion, and schedule prompt inspection as soon as the weather allows. Wet decking needs careful dry-out planning before a full fix.
The local contractor market signals rapid response when storms hit, so lean into that demand to stabilize leaks now. Expect crews to prioritize tarping, leak stabilization, and deck-drying measures in the next 24 to 48 hours when feasible. A timely temporary fix buys you time until a dry-season replacement can proceed without weather interruptions.
After stabilization, assess vulnerable areas exposed to East Bay winds and hillside spray-edges, penetrations, and skylights. Prepare a staged plan that aligns with a dry-season replacement window, prioritizing flashing integrity and material compatibility to withstand the next wet season. Stay communicative with your contractor about evolving weather patterns and emergency contingencies.
When you can't wait, these contractors offer fast response times to stop leaks and prevent further damage.

Dragon Roofing Contractors Hayward
22826 Vermont St #210, Hayward, California
5.0 from 40 reviews
Roofing Solutions
(510) 836-5227 roofing-solutions.net
25041 Oneil Ave, Hayward, California
4.8 from 18 reviews
Rain Defense
(510) 769-0102 www.raindefense.com
2188 National Ave, Hayward, California
4.4 from 17 reviews