Last updated: Apr 19, 2026
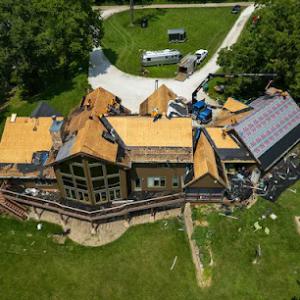
Spring hail and severe wind events are a defining pattern for this city's roofing health. When a storm blows through, the damage can be invisible at first glance-especially on flatter roofs or in the eaves where hail empreints or wind-lift can crack shingles and loosen granules. In this market, replacement timing is driven as much by storm history as by age. Repeated hail seasons can shorten a roof's service life, so a roof that looks fine at a glance may already be structurally stressed and ready for replacement after a major hail year. The urgency isn't just about damage; it's about avoiding accelerated wear from repeated hits that compromise underlayment, flashing, and decking. If a recent storm left you with shingle granules in gutters, dented metal edges, or unusually dark or soft spots, treat that as a red flag, not a cosmetic issue.
Winter snow and ice in this area can conceal impact damage until the thaw. Ice dams, freeze-thaw cycles, and hidden cracks can mask leaks until spring rains arrive. That delay means inspections can become a bottleneck, and leaks may worsen as meltwater seeks through compromised seams. When spring arrives, the combination of higher moisture and clearer access for contractors creates a narrow window to address compromised roofing before more weather cycles threaten interior spaces. The timing pressure here is real: if you suspect any storm impact, plan for a proactive assessment as soon as temperatures permit, even if the roof looks okay from ground level.
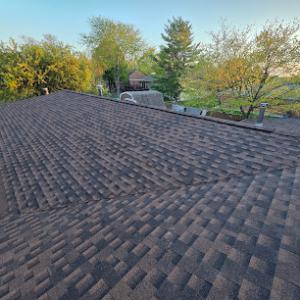
After a hail or high-wind event, scan for missing granules in gutters and on the ground, dented vent caps, and lifted shingle tabs. Look for granule washes in your downspouts after the first heavy rains. Inside the attic, examine for light leaks around vent pipes, chimneys, or along the ridge line, especially after the first spring storms. If you notice any moisture staining, damp insulation, or a musty odor near the attic or ceiling, treat it as a potential breach that warrants a professional inspection. Be aware that paint peeling on exterior walls near roof lines can also signal underlying deck or fascia damage that accelerates the need for replacement.
When a storm hits, sooner is better. Contact a reputable local roofer with storm-response experience and a track record of clear, transparent assessments. Request a roof inspection that includes attic checks, decking integrity, and flashing condition, not just surface shingles. If an initial assessment finds compromised decking or extensive flashing damage, you may need faster scheduling than a routine re-roof. In this climate, you want a contractor who can provide a phased plan: immediate temporary measures to mitigate leaks, followed by a full replacement when weather and site conditions allow. Have a clear plan for debris containment and a safe worksite, since spring crews will be busy and access can tighten up after severe events.
Every storm adds a data point to your roof's remaining life. If you've faced multiple hail seasons in a short span, the prudent move is to treat the roof as a finite asset rather than a perpetual cover. Coordinate with a trusted local contractor to interpret the storm history for your home and map a replacement pathway that minimizes interior disruption while maximizing long-term performance. In a market where timing hinges on weather cycles as much as age, a rapid, informed decision can prevent escalating damage and protect your home through the next storm season.
Central Illinois experiences intense hail and wind seasons, and this region consistently ranks as a high roof-claim environment. In Normal, insurers tighten their scrutiny after severe events, and carriers may adjust deductibles or tighten roof coverage once the storm buzz fades. The practical upshot is that pre-loss documentation isn't a luxury-it's a baseline of protection when a claim lands on the desk. When a hail event rattles your neighborhood, you'll want to demonstrate what the roof looked like before any damage, because the insurer will compare observations against your documented condition. Roving inspectors and adjusters expect a transparent trail of evidence showing the roof's true state prior to any weather-driven intervention.
Given the likelihood of a rapid demand surge after storms, collecting solid evidence quickly is essential. Start with wide-angle exterior photos that cover all elevations and the surrounding surroundings to reveal wear patterns that could affect claim decisions. Focus on soft metal damage, such as dented flashing, bent vents, and compression marks on gutters where hail often lands first. Inside the attic, document evidence of leaks, staining, and any condensation that points to hidden damage. These interior indicators are not just cosmetic; they help establish a timeline of when water intrusion began, which matters if the storm system created multiple layers of damage over several hours.
You should photograph each elevation from several distances and angles, capturing both the overall roof and close-ups of damaged areas. Prioritize ridge and hip lines, along with the most vulnerable eave edges where wind-driven hail tends to shear shingles and metal components. If loose granules are present in gutters or downspouts, photograph them as well, since this debris is a telltale sign of shingle wear or hail abrasion. Create a simple timeline: note the date and time of the hail event, the first days after, and any temporary tarp or repair activity. This helps establish a clear sequence for the claim and minimizes questions about the integrity of the roof between events.
Storm activity can create interior leaks even if the exterior looks only borderline damaged. Before any temporary repairs are made, record where water enters at ceilings, walls, and attic spaces, including the location of drips and staining that align with roof bays. Pay attention to soft metals around the vent collars, step flashing, and chimney caps, since hail can deform these components without obvious shingle damage. Interior documentation should include timestamps, room names, and descriptions of moisture patterns. This level of detail supports a transparent claim file and helps prevent disputes about the roof's condition prior to the storm.
After severe weather, contractor requests for access and measurements can surge, which makes organized documentation even more valuable. Maintain a living record: keep updated photos, revised measurements, and a written log of any temporary repairs and the dates they were performed. If a claim involves multiple elements-shingles, underlayment, flashing, and possibly interior damage-clearly map those components to the corresponding elevations and interior indicators. A careful, methodical approach reduces back-and-forth with insurers and increases the likelihood that the documented condition accurately reflects the roof's state before and after the hail event.
Connect with contractors who help homeowners navigate the claims process from damage assessment to final approval.


Carlson Exteriors
(309) 661-9001 www.carlsonexteriors.com
109 Northtown Rd, Normal, Illinois
4.7 from 147 reviews
We're the contractors who actually call you back. The results are in! Our clients have voted and said their favorite thing about us is that we actually call them back. It’s a small thing; but when communication is missing you, the customer, are left wondering if you were forgotten. We service repairs and full jobs for both new construction and residential remodel.
Casey & Sons Roofing
(309) 846-6967 www.caseyandsonsroofings.com
1805 Industrial Park Dr, Normal, Illinois
4.2 from 19 reviews
We have roofers with over 40 years of experience that have serviced Bloomington/Normal and the surrounding areas. Roofing has been in our family for over 80 years, We take much pride in our work, we're not finished until your satisfied. We are dedicated to delivering outstanding quality at competitive prices. Our goal is to create long-term value by building trusting relationships with our customers. Our roofing specialists are certified to attend to any roofing, gutter, or siding repair you need. Our team is the best choice for any project you have. Our relationship does not end when your project is completed, it begins! Give us a call today for your free estimate (309)846-6967
All Seasons Roofing
(309) 585-1439 allseasonsroofing-il.com
Serving
4.5 from 172 reviews
All Season’s Roofing is a business built on beautiful exterior design. Our services include roofing, siding, gutter repair and window replacement. Our main office is located in Bloomington, IL and we encourage our clients to come view our showroom of products. In the last couple of years, we have expanded to Western Iowa and Southern Wisconsin. We take pride in educating our customers about the process of repairs and roof replacement – we want to ensure that you know our procedure every step of the way so that we advise only what is necessary for your project. Since 2006 we have served the Midwest area homeowners and commercial clients. We love what we do and will only lead clients in a direction that is worth pursuing.
Messing Roofing & Construction - Bloomington Normal
Serving
5.0 from 93 reviews
As a second-generation, family-owned business serving Bloomington-Normal for over 40 years, we're the area's most trusted roofing contractor! We specialize in residential and commercial roofing, including asphalt shingles, metal roofing, flat roofs, roof repairs, and roof replacements. We also offer siding, seamless gutters, and architectural sheet metal services.
JW Cleary Construction
(309) 826-8536 jwclearyconstructionroofing.com
Serving
5.0 from 17 reviews
Based out of Bloomington and Chenoa, IL JW Cleary Construction and Roofing specializes in residential and commercial roofing. With 30 years of experience quality is our number one priority. Financing is also available so you can keep your money in the bank for a rainy day! Call for a free estimate today!
Yorkpublicadjuster.com
Serving
4.9 from 180 reviews
Full service Public adjusting firm. Helping you recover from insurance related claims. Our goal is to help you recover what the insurance cover owe based on your policy agreement.

Central Roofing of Bloomington
(309) 434-5770 www.centralroofingllc.net
Serving
5.0 from 21 reviews
Central Roofing is a veteran operated roofing company in Mattoon, Springfield and Bloomington, IL. We provide premium residential and commercial roofing systems, including shingle, metal, PVC, TPO, and EPDM. Our licensed and insured roofing contractors can easily address any of your roofing needs and provide the best customized roofing solutions. We always put our customers first and go above and beyond expectations on every job. Request your free estimate today!
Casey Roofing
Serving
5.0 from 14 reviews
We're a family owned residential / commercial roofing company where no job is too big or too small. Give us a call for a free estimate.

Aloha Construction
(309) 573-5806 www.alohaconstructioninc.net
Serving
4.0 from 165 reviews
Aloha Construction, Inc. is a family-owned and operated general contractor specializing in residential and commercial roofing & exterior services. With a dedicated location in Bloomington, IL, we proudly serve homeowners and businesses throughout Northern and Central Illinois, as well as Southern Wisconsin. Our expert team provides top-quality roofing, siding, gutter, and window solutions—backed by free inspections, 10-year craftsmanship warranties, and 24/7 emergency services. Licensed, bonded, and insured, Aloha Construction has earned the BBB Torch Award for Ethics for our commitment to honesty and excellence. Trust the Bloomington team at Aloha Construction for dependable, high-quality exterior work.
CentiMark Corporation
(331) 465-3000 www.centimark.com
Serving
5.0 from 1 review
CentiMark is North America's largest commercial roofing contractor and is known for delivering focused and value-driven roofing solutions. We are a dedicated team of commercial roofing contractors offering a wide array of roofing systems and services to meet the diverse needs of our customers. Our location in Bloomington serves businesses in the cities of Champaign, Decatur, Peoria, Springfield and beyond! We understand the unique challenges presented by the Illinois climate. Therefore, we offer specialized services tailored to these challenges, such as rooftop snow removal. CentiMark is more than just a roofing company, it is a commitment to quality, customer satisfaction and assurance.
Prime Roofing & Exteriors
(309) 718-2308 www.primeroofingexteriorsllc.com
Serving
5.0 from 9 reviews
Prime Roofing & Exteriors is a roofing and home exterior contractor. Exterior home specialist that provide a wide range of services and products. We can offer many different products and services for roofing, siding, windows, exterior doors, gutters, fascia and soffit installation along with expert repair for all. We are committed to providing the highest level of quality and professionalism. Honest and dependable service that you can trust. Prime Roofing & Exteriors can help you transform your home and protect it from the elements for years to come.
Eagle Eye Roofing & Construction
Serving
5.0 from 4 reviews
Roofing contractors - We Are Here When You Need Us Reliable Roofing Professionals As specialists in residential and commercial roofing services, we are dedicated to providing customer service that is second to none. Whether you have a new construction project or it is time for repairs, we offer the roofing services you need.
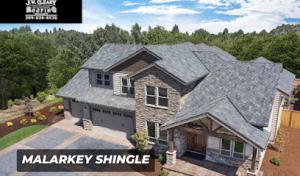
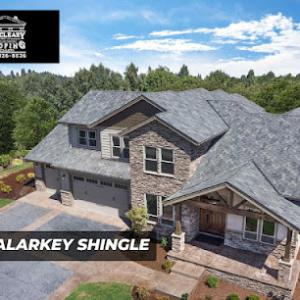
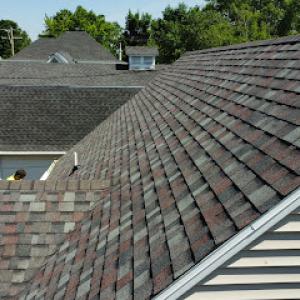
Asphalt shingles dominate many homes with a stock that fits the local housing mix, and they're typically the most straightforward to repair after a hail or wind event. In this climate, focus on impact-resistant layers and a shingle profile that preserves seal integrity as temperatures swing. Look for high wind-rated fastenings and shingles designed to resist uplift through storm cycles. When hail falls hard, the ability of the shingle surface to shed impact and reseal after minor contact is a key performance point. Installation quality matters: a precise nailing pattern and proper attic ventilation help maintain long-term seal and minimize seepage risk after freeze-thaw cycles. If a storm shifts debris or shingle granules, you want a system that can be retuffed and re-sealed without replacing large areas. For most homes, this material provides a reliable, efficient path back to weather-tightness without dramatic maintenance demands, provided the roof deck is sound and the installation is solid.
Metal has a clear niche in this market because it sheds snow efficiently and stands up well to long-term exposure across changing seasons. In practice, the benefit is a roof that can resist wind-driven debris and hail damage with less immediate surface deterioration than some other options. The key considerations in a storm-forward climate are noise expectations and the detailing around penetrations and edges. Metal panels can amplify rainfall and hail impact noise inside attic spaces if insulation and underlayments aren't matched well to the space. Pay attention to the sealant around vent stacks, chimneys, and skylights, because a tight seal around penetrations matters as freeze-thaw cycles start and cold air pressures shift. A well-installed metal roof often pays off in reduced maintenance over time and quieter performance when paired with proper underlayment and insulation. In terms of upkeep, you'll see fewer broken shingles, but you still need routine inspection after severe storms to catch any panel looseness or sealant wear before leaks form.
Clay tile, concrete tile, wood shakes, and synthetic products appear less frequently here, yet they can be appealing in specific situations. Freeze-thaw cycles demand attention to joint integrity and frost resistance; snow load must be assessed for each system's weight rating. Debris from storms poses a particular risk for breakage with tiles and shakes, and the maintenance burden can vary widely by product. Tile systems tend to demand careful detailing around penetrations and edges to prevent wind-driven uplift and water intrusion after hail events. Wood shakes bring a natural look but can be more susceptible to moisture-related issues without meticulous sealing and maintenance. Synthetic options can offer resilience but still require evaluation of how they handle local temperature swings and storm debris. For any of these, a frank assessment of the roof's existing structure, splines, and the ability to secure fasteners against freeze-thaw movement will inform whether the material performs reliably year after year. In practice, choose a material that matches not only the aesthetic you want but also the likelihood of quick, storm-responsive repairs if hail or wind damage occurs.
In Normal, costs are best understood per roof square (100 square feet). Asphalt shingles sit at the lower end of the local market, typically 350 to 650 USD per square. Metal roofing runs higher, roughly 800 to 1,500 USD per square. For premium options, concrete and clay tiles rise to the top: clay tile commonly lands around 1,600 to 3,200 USD per square, concrete tile 1,000 to 2,400 USD per square, and wood or synthetic alternatives falling between 600 and 1,200 USD per square. Synthetic or composite shingles offer a middle ground, often 700 to 1,200 USD per square. When planning, use these ranges as a framework: asphalt is usually your most economical choice, while tile systems deliver the longest service life and the steepest price tag.
Storm surges can push Normal pricing upward when hail events create sudden regional demand for labor, tear-off crews, dumpsters, and material delivery across McLean County. In years with severe hail or wind, material suppliers and crews may run short-handed, and that scarcity translates into faster project start times and higher total costs. If a hailstorm arrives during peak demand, expect bids to trend toward the upper end of the local ranges, especially for full tear-offs and roof refinishing that require extensive debris management and disposal.
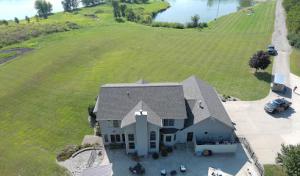
Work with a conservative budget that accounts for roof size, complexity, and material choice. Larger homes or premium materials push the project beyond base material pricing, even before any upgrades or additional safety features are considered. Take time to measure or confirm the roof's square footage and note any hips, valleys, or roof penetrations that may require extra flashing or specialized installation. In practice, a straightforward asphalt replacement for a standard ranch or two-story in decent condition often lands near the lower to mid end of the asphalt range, while a tile system on a similar home can approach the upper end of the local spectrum. Planning with these anchors helps align expectations when hail season arrives.
Get a clear picture of your project costs upfront - no commitment required.
Casey & Sons Roofing
(309) 846-6967 www.caseyandsonsroofings.com
1805 Industrial Park Dr, Normal, Illinois
4.2 from 19 reviews

A full roof replacement in Normal typically requires a building permit through the City of Normal or the applicable local authority in McLean County. The permit process is designed to coordinate storm-driven replacements quickly, especially after hail or high-wind events, but it also enforces code compliance and safety standards for the local housing stock. Because weather can compress timelines, planning the permit submission as soon as the project scope is clear helps avoid delays and ensures the work progresses under the right approvals. Be prepared to provide basic project details, including roof size, materials, and roof venting plans, so the review can proceed without back-and-forth.
Reroof projects in this area are generally inspected at key milestones, including underlayment or installation stages and a final inspection before closeout. Inspections at the underlayment stage help confirm proper nailing patterns, ventilation, and moisture barriers, which are critical in the freeze-thaw cycle and storm-prone springs. A second check during or after shingles installation verifies that materials meet code requirements and that flashing around chimneys, vents, and transitions is sound. The final inspection confirms the job adheres to permit scope, and wiring or venting changes tied to the roof are properly completed. Scheduling inspections promptly after milestones helps keep a storm-response timeline intact and reduces the risk of rework.
The local department may request material documentation and contractor licensing information, and permit fees are based on project value rather than a flat roofing fee. Expect to present manufacturer product data for the chosen shingles or panels, wind-design ratings if applicable, and proof of contractor licensing and insurance. Retain copies of material warranties and installation specifications, as inspectors may want to verify compatibility with local climate conditions and storm exposure. If multiple trades are involved (e.g., roof vent work, skylights, or attic insulation adjustments), ensure that all relevant licenses are current and that the contractor coordinates with any other required permits. Being proactive about compiling these documents helps streamline the review and reduces the likelihood of hold-ups during a busy storm season.
Normal's cold winters can delay tear-offs, underlayment work, and shingle installation because snow, ice, and low temperatures affect crew safety and product handling. In practice, that means you may see shorter workdays, more halting weather windows, and a lot of winter-specific planning in the schedule. If a storm hits mid-project, crews may need to pause everything until conditions improve, leaving your roof exposed longer than during milder seasons. Plan for practical contingencies: equipment can be slower to operate, and certain materials cure or set more slowly in prolonged cold. That doesn't mean your project is stalled forever, but it does underscore the need for flexible timelines and clear expectations with the contractor.
Ice and snow in central Illinois can complicate leak tracing in Normal because active moisture may appear far from the actual entry point until thaw cycles begin. A wet ceiling may trace back to a hidden ridge vent, flashing, or a seam that thawed water traveled from, not necessarily where the drip shows. In winter, you might find temporary patches that appear to stop the problem while the real source lies upstream or upstairs. Communication with the roofer should include a plan for monitoring during thaw and a strategy for confirming the leak once temperatures rise and moisture shifts.
Homeowners in Normal often need temporary dry-in strategies during winter weather windows rather than immediate full replacement scheduling. A winter dry-in focuses on enabling interior dryness and protecting insulation and ceilings while weather dictates long-term work. Expect decisions about temporary measures-tarps, temporary flashing, or partial underlayment-to hinge on current conditions and the likelihood of a window that can safely accommodate more extensive work. When spring arrives, you'll revisit the full replacement plan with a clearer path to complete installation.
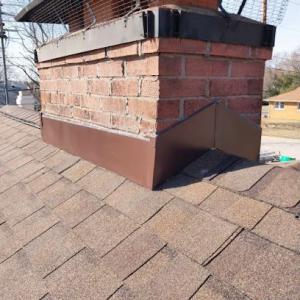
In Normal, the freeze-thaw cycle pushes and pulls at sealants and metal transitions around these penetrations. Repeated expansion and contraction during cold snaps, plus ice buildup along the pans and base flashing, stress the weakest joints. The result is slow leaks that may not be obvious from ground level, especially after a storm. Pay attention to any damp spots near skylights or chimney wells after a rain or hail event, even if the shingles look intact.
Storm-driven rain and hail can expose older flashing details on reroofed homes even when the main field shingles still appear serviceable from ground level. Look for loose or corroded metal, missing fasteners, or dark streaks at the base of the chimney, around the skylight curb, and along the valley transitions near these penetrations. In gusty events, wind-driven water can infiltrate where the flashing meets the chimney chimney-mortar joints or sealant beads. A flashlight inspection from the attic can reveal hairline gaps or daylight through the flashing crust when the roof is dry.
Because many local contractors emphasize cleanup and reroofing, homeowners should confirm whether flashing replacement is included in the scope. If the quote only covers shingles and the visible field, the package may not extend to re-flashing around skylights or the chimney chase. Ask specifically for a plan that includes removal of old flashing, new base flashing, step and counter-flashing where required, and resealing around any skylight curb. Ensure that ice and water shield is carried into the base of the penetration as well, not just along the main roof plane.
After a storm, inspect the attic for staining or mold that traces back to skylight or chimney lines. Outside, run your hand along metal transitions after a thaw-cold surfaces can hide hairline gaps. If a leak is suspected, avoid delaying a professional assessment; early flashing replacement can prevent more extensive damage as freeze-thaw cycles continue. Keep a simple record of prior sealant patches and any roof penetrations that show wear, so the contractor can plan targeted flashing work without surprises.
Find contractors experienced in skylight installation, flashing, and leak repairs to bring natural light into your home.

Carlson Exteriors
(309) 661-9001 www.carlsonexteriors.com
109 Northtown Rd, Normal, Illinois
4.7 from 147 reviews
Messing Roofing & Construction - Bloomington Normal
Serving
5.0 from 93 reviews
Steep residential roofing is common, but additions, porches, and attached garages in Normal often use low-slope designs. These sections need different materials and drainage detailing than the main roof to handle meltwater, spring rain, and wind-driven runoff. The goal is to prevent edge leaks and ponding that can sneak up on a house during thaw cycles and wet springs.
For low-slope areas, plan for stronger edge drainage andRated decking that resists standing water. Ensure fascia and drip edge are sized for the potential ponding zone at eaves and transitions to the main roof. Slope targets for these sections should be verified with the contractor, since even a small misalignment can shift water toward windows, doors, or interior ceilings after a heavy storm.
Separate low-slope scope items from the main reroof proposal because these areas often fail differently and may not be priced the same way. Discuss gasketed or enhanced flashing at wall penetrations, vent terminations, and skylights specific to additions and garages. Require a dedicated moisture and drainage plan for these sections, including a separate testing and warranty path if applicable.
In storm season, expect quicker decisions on low-slope work, but don't rush critical details. Confirm waterproofing, deck replacement, and flashing are handled before any new roofing layer is installed. Confirm tie-ins to the main roof are carefully planned to avoid mismatches in drainage or color, and document any deviations with written notes for future maintenance.
Find specialists in TPO, EPDM, and built-up flat roofing systems for residential and commercial properties.
Messing Roofing & Construction - Bloomington Normal
Serving
5.0 from 93 reviews
Storm season in central Illinois brings hail and high winds that can expose weak spots fast. In Normal, homeowners often need responsiveness just as much as a solid repair plan. A roofer who understands the seasonal surge and can schedule quickly after a hail event helps minimize interior damage and insurance headaches. Your choice should balance urgency with quality, so you're not duplicating work after a second round of weather.
Because both residential and commercial roofers operate in this market, confirmation that the contractor's recent work matches your roof type is essential. If you have asphalt, metal, clay, or another material, ask to see recent projects of comparable scope and material. A storm-focused crew should be able to adapt their repair approach to the same weather-driven wear you're dealing with, not pushcookie-cutter solutions that fit only generic roofs.
Long-established and family-owned firms are common locally, but storm seasons reward rapid response and efficient communication. Weigh local tenure against how quickly a contractor can mobilize after a storm, especially when a quick turnarounds matters. Look for crews who can outline a staged plan-from assessment to temporary protection to permanent repair-and who document actions clearly for insurance needs.
In a tight window after a storm, clear scheduling matters. Confirm who will supervise the project, how daily progress will be tracked, and how write-ups and change orders will be handled. Documentation should cover damage scope, materials used, and weather-safe closing steps. A reliable roofer provides simple, thorough updates so you're never guessing about the next day's work or safety considerations.